Building a Modular Synthesiser Part 1: Introduction and Planning
Follow article
 Dave from DesignSpark
How do you feel about this article? Help us to provide better content for you.
Dave from DesignSpark
Thank you! Your feedback has been received.
Dave from DesignSpark
There was a problem submitting your feedback, please try again later.
Dave from DesignSpark
What do you think of this article?
Researching self-build options and selecting a portable case for a Eurorack modular synthesiser.
I have decided that my next big audio project is to build a modular synthesiser. Modular synths were developed in the 1960s and 70s and as such, relied on analogue technology. Like a lot of audio technology from that era, they have seen a return to popularity in recent years. Bands as diverse as LCD Sound System, Coldplay and Nine Inch Nails employ modular synths and artists such as Kaitlin Aurelia Smith and Suzanne Cianni, bridge the worlds of pop and modern classical music with their work.
What is a modular synth?
A modular synth is a musical synthesiser comprised of separate units — or modules — that are typically connected by patch cables. They were the original musical synthesiser, developed notably, by Moog and Buchla in the early to mid-1960s.
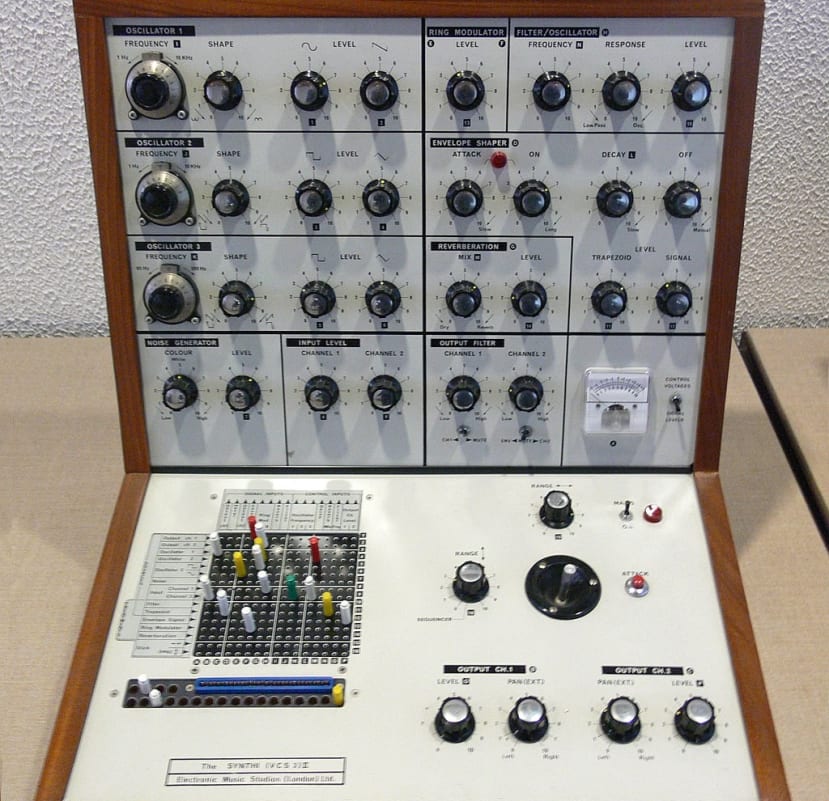
Electronic Music Studios Synthi VCS3 II (1973) Musikinstrumentenmuseum Berlin. Public Domain
I first came across a version of the modular synth in the 1970s, when I discovered an Electronic Music Systems (EMS) VSC3 in a cupboard at the Art School I was attending — and spent most of the rest of that term in the cupboard with it, figuring out how it worked.
A basic modular synthesiser will have modules to produce sound — oscillators and noise generators — along with filters and envelopes to change the tone of the sounds, plus some form of modulator. Modulation produces effects such as tremelo and vibrato, or for example, a ring modulator is used to produce the classic Dalek voice.
The modules can be connected in different ways through the patch cables, or a matrix as in the VCS3 pictured above, to produce varying sounds.
The joy (or possibly danger!) of the synthesiser’s modular nature means you can start with the basic modules and keep adding as you go along, which gives a great deal of flexibility and can result in your instrument being quite different from anyone else’s.
Eurorack
The most common mounting system for modern modular synths is the Eurorack. The standard was originally specified for this use in 1996 by Doepfer Musikelektronik, and allows modules from different manufacturers to fit in the same cases and communicate among themselves. It is based on the industrial “Eurocard” frame which is a European standard format for printed circuit board (PCB) cards that can be plugged together into a standard chassis, which in turn, can be mounted in a 19-inch rack. The physical specification of Eurorack is based on the Eurocard standard of:
- 3U (133.4mm), where height "U" is measured in rack units, rounded for a lip
- 1HP (5.08mm), where width "HP" is measured in horizontal pitch units, rounded down. A card width is integer multiples of 1HP.
This means that it is relatively compact in size, which is handy for the portable system I am intending to build.
As well as dimensions, the modular synth standard defines a common power supply and power connector: a 10- or 16-pin ribbon cable with IDC connectors, supplying a dual-rail 12v DC power supply. Audio and control signals employ 3.5mm mono jack patch cables.
I had admired this nice case that housed some old radio testing equipment as it sat on one of the shelves in the workshop and thought something similar would make a great way to house my synth. I found a Schroff portable rack case (721-2806) that looked very similar and came with an optional carrying handle (721-3014) .
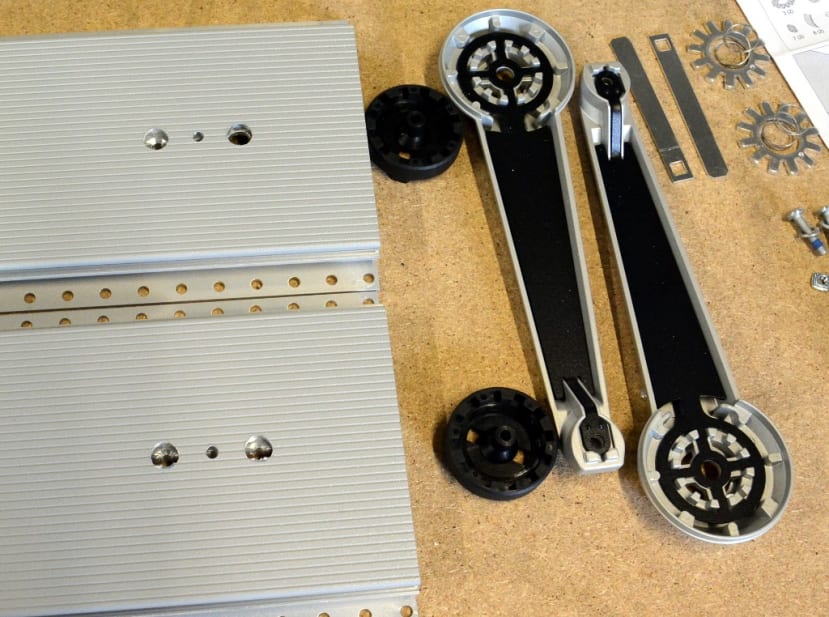
The first job on the case was to fit the handle. This entailed carefully measuring and drilling 3 holes in each side panel and then assembling the handle as per the instructions.
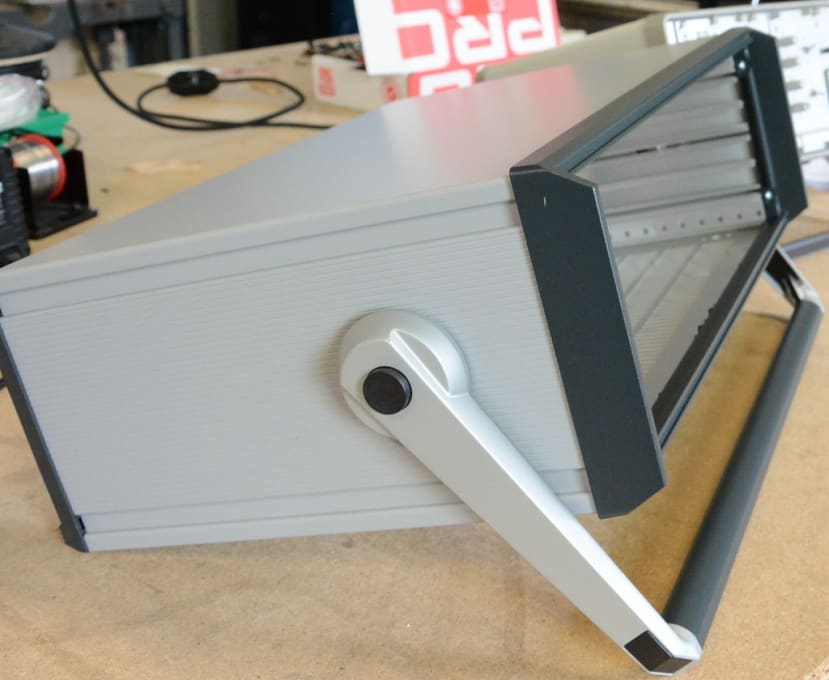
It certainly looked the part when completed.
There is a great detailed article on all the different rails that can be used to build the standard Euro rack and the Schroff rails are detailed in there, so I got a couple of those to try out (358-7960) . Because of the modular nature of the synthesiser and the fact that I will be adding to it bit-by-bit I can adapt things as I go.
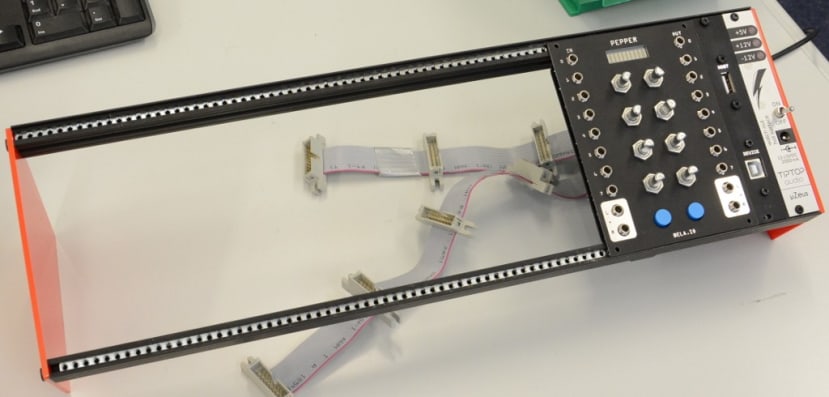
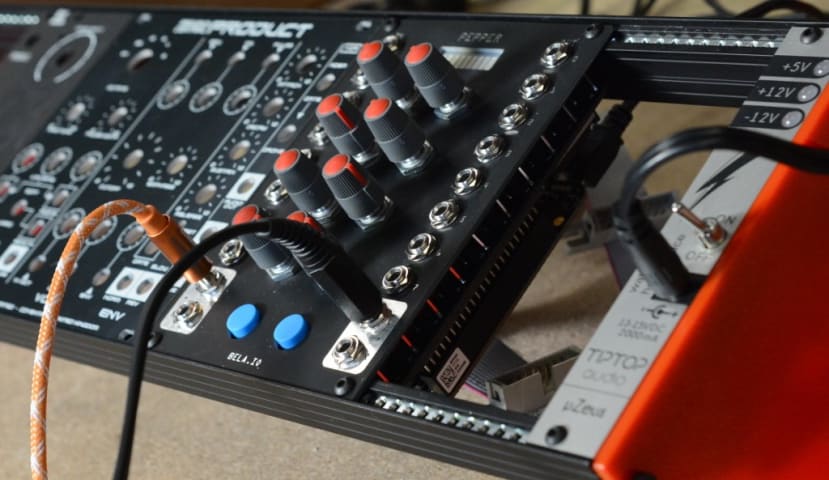
A Eurorack “skiff” is a quick and easy way to get started with a modular synth – it comprises a couple of rails on a simple frame designed to sit on a desktop. I got my hands on some basic rails and laser cut a set of side panels to make my own skiff. It can be seen here with a secondhand power supply and the Bela Pepper module I will be covering the building of in my next post. I’ll be using the skiff to test modules before they are installed in the case, and I will be building my own power supply also, but this was a quick and easy way to get the ball rolling.
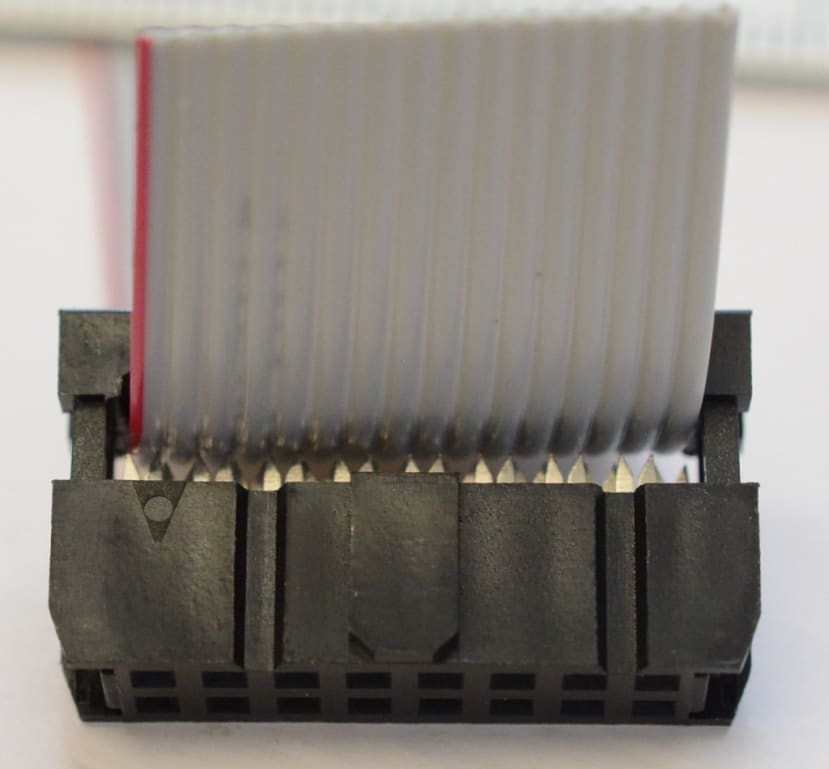
One thing I will need is some power cables and as I noted previously, they are standard IDC plugs and ribbon cable, either 10 way or 16 way. The latter carries a 5V supply in addition to the 12V and +12V. You can, of course, buy the cables ready-made, but they are easy to make yourself which saves a bit of money and means you can make them to a length that suits your setup.
I cut a 30cm length of 16way ribbon cable
(289-9874)
and used a vice to crimp a connector on each end. Care needs to be taken to align the edge of the cable with the red stripe and the end of the connector with the small arrow mark. You can press the parts of the connector together with your fingers until you feel a click and the cable is just gripped. Check that the cable is straight and then use a vice to squeeze it together properly, this applies even pressure across the connection. You just need to make sure you do not overdo it and break the connector – you should feel a click when the top section of the connector is fully pushed home.
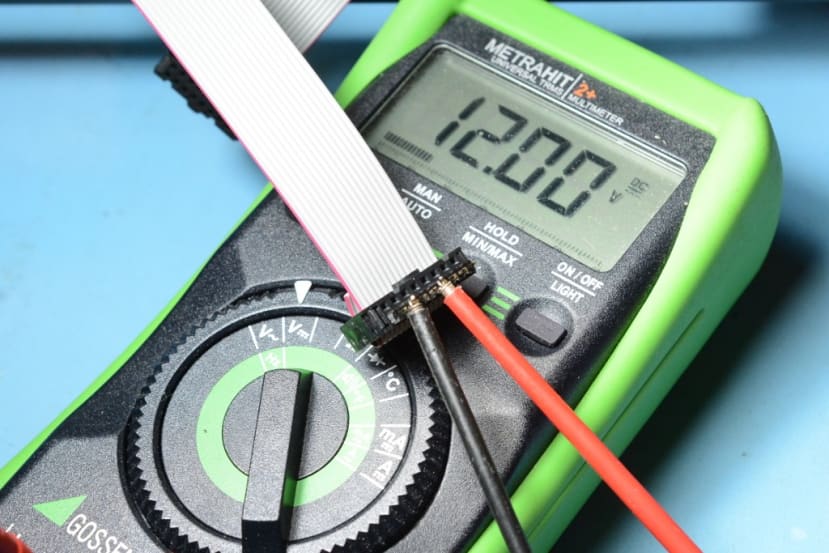
Once I had made my cable, I plugged it into my power supply and tested it just to make absolutely sure it was right.
Next steps
There are many different synthesiser modules available as kits; some complete with all the parts and some as PCBs. Many of them emulate the older original modules from makers such as Buchla, Moog, and Roland. I intend to source some PCBs and start that way.
My plan is to build an oscillator, a filter and a modulator that will, along with the Pepper, form the basis of my very basic first synthesiser.
I am looking forward to making some electronic music and sharing my experience in future DesignSpark updates.
Parts available in this series:
Comments