NVIDIA Jetson AGX Orin Basic Setup
Follow article
 Dave from DesignSpark
How do you feel about this article? Help us to provide better content for you.
Dave from DesignSpark
Thank you! Your feedback has been received.
Dave from DesignSpark
There was a problem submitting your feedback, please try again later.
Dave from DesignSpark
What do you think of this article?
Installing the O/S and Jetpack SDK, connecting a video camera, and building and running an AI inference example with a pre-trained model.
In this article we’ll take a look at NVIDIA Jetson AGX Orin basic setup, using the integrated 64GB eMMC storage for the O/S and SDK installation, and running some of the provided examples with a USB camera to verify correct operation. For an introduction to the Jetson GPU-accelerated System-on-Module (SoM) family, some history and the current flagship AGX Orin specifications, please see the previous article, A First Look at the NVIDIA Jetson AGX Orin.
Installation
The base software installation is comprised of two main components: the operating system (O/S) — a.k.a. board support package (BSP) — and the Jetpack SDK. The former provides us with a familiar Ubuntu-based desktop environment that is configured for the hardware, while the Jetpack SDK provides things such as the CUDA toolkit which is required for building GPU-accelerated applications, together with AI frameworks and examples which leverage this.
Options
There are two main ways of setting up the Jetson AGX Orin Developer Kit software:
- Using the “default setup flow” via Ubuntu setup which is already flashed to the internal eMMC storage;
- Using the “optional setup flow” with SDK Manager running on a Linux system, or a Windows computer with Windows Subsystem for Linux (WSL) installed.
The former is by far the quickest and the mechanism which we will be using. The optional setup flow meanwhile makes use of NVIDIA SDK Manager, which “provides an end-to-end development environment setup solution for NVIDIA’s DRIVE, Jetson, Holoscan, Rivermax, DOCA and Ethernet Switch SDKs for both host and target devices”. This is a tool which is run on another computer and allows us to configure the Linux for Tegra (L4T) BSP and NVIDIA JetPack SDK components and to flash these to the device. We must also use SDK Manager if we wish to install to an NVMe SSD or USB memory stick, instead of the integrated eMMC.
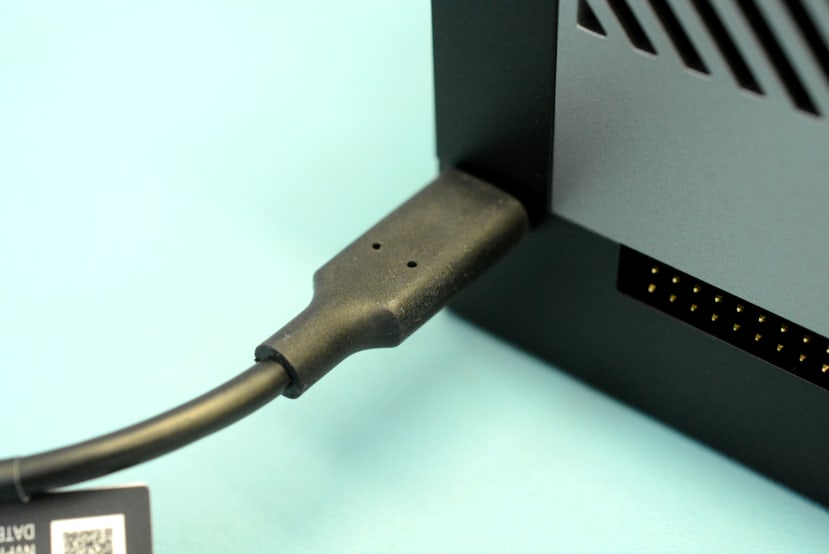
The default setup flow can be driven either via an attached keyboard, monitor and mouse, or alternatively “headless”. In the case of the former, we would need to have a DisplayPort monitor attached, while with the latter we must ensure that a monitor is not connected and then instead insert the provided USB-C cable into the socket by the 40-pin header, with the USB-A end of the cable plugged into another computer where we can run a terminal emulator to complete setup.
It doesn’t matter how we carry out the initial Ubuntu system configuration — via keyboard, monitor and mouse or headless — as either way we will still be able to connect up a monitor for graphical desktop access, and log in via the USB UART accessed via the aforementioned USB C port.
Operating system
We decided to proceed with the default flow for initial software setup and to use a headless configuration. The Getting Started Guide provides details for both this config and using a keyboard, monitor and mouse, via tabs which can be selected at each step.
With the headless configuration and the aforementioned USB-C port cabled to another computer running Linux, we will find a short time after power on that the AGX Orin enumerates as /dev/ttyACM0. We can then connect to the port using screen or alternatively perhaps a terminal emulator such as minicom.
$ sudo apt install screen

$ sudo screen /dev/ttyACM0 115200
If connecting from a Windows computer we might instead use freely available terminal emulation software such as Putty.
Note that if the reset button is pressed the USB UART will disappear and our terminal session will end. Then we will have to reattach once the port re-enumerates.
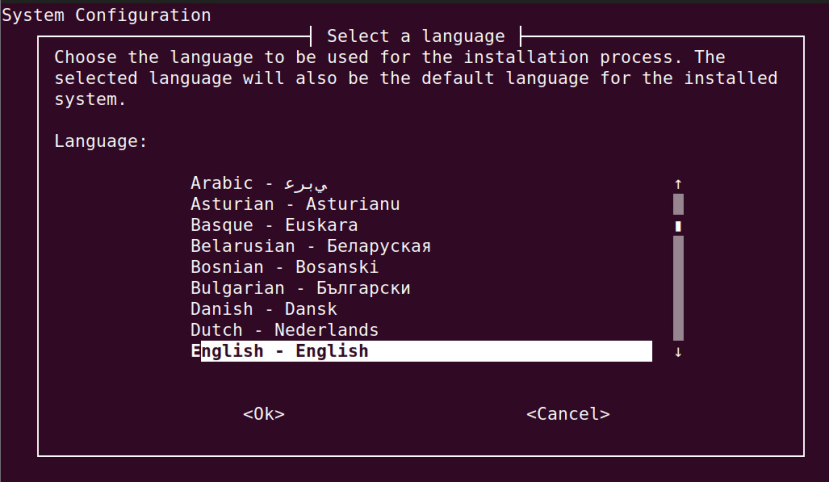
Once connected we were prompted to agree with an EULA, following which we could select the language. The configuration steps which follow are pretty much the same as when installing Ubuntu on a regular computer and rather than cover every one in detail, we’ll just summarise here.
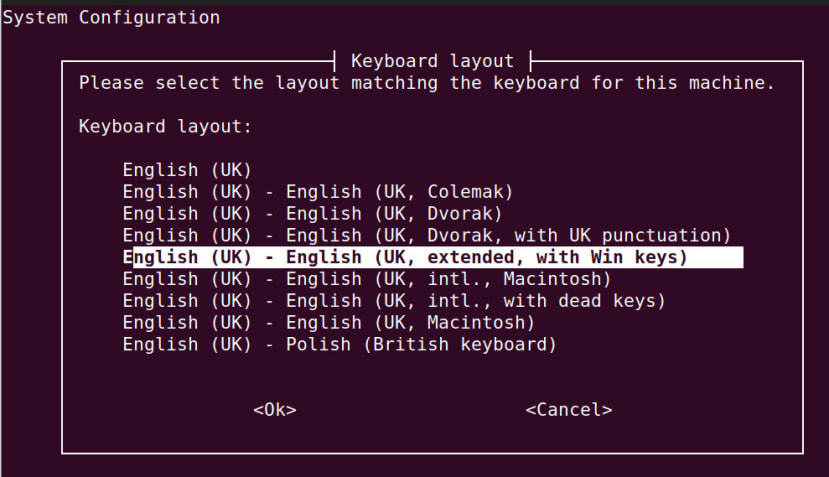
The keyboard we are prompted to select will obviously be the one connected via USB and for use with a monitor and mouse attached also.

The defaults were generally selected, such as the partition size.

Although by default the dummy0: network interface was selected and this was changed to eth0:.
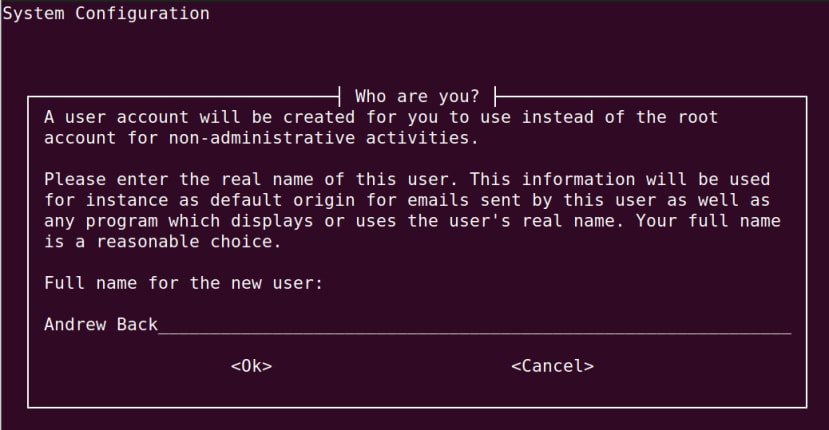
A primary user account was created, which will be set up with sudo (admin) access.
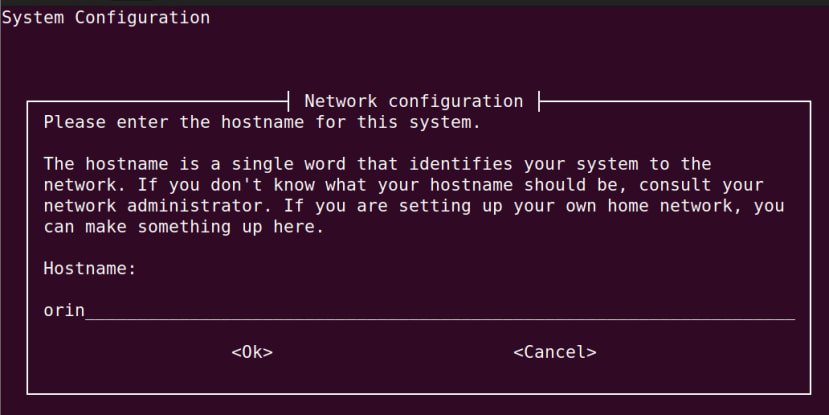
A meaningful hostname was entered.
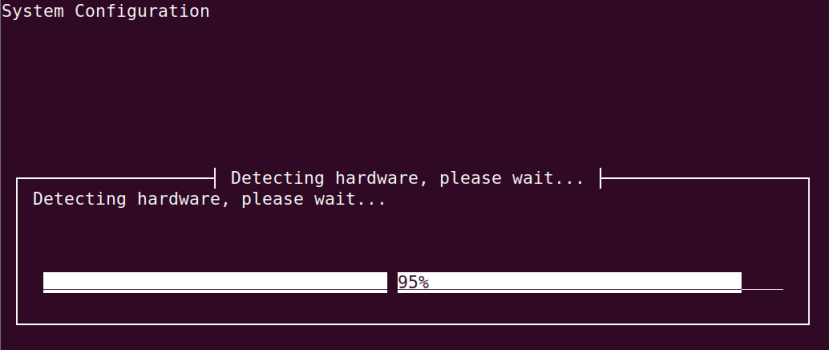
The hardware was probed and installation completed.
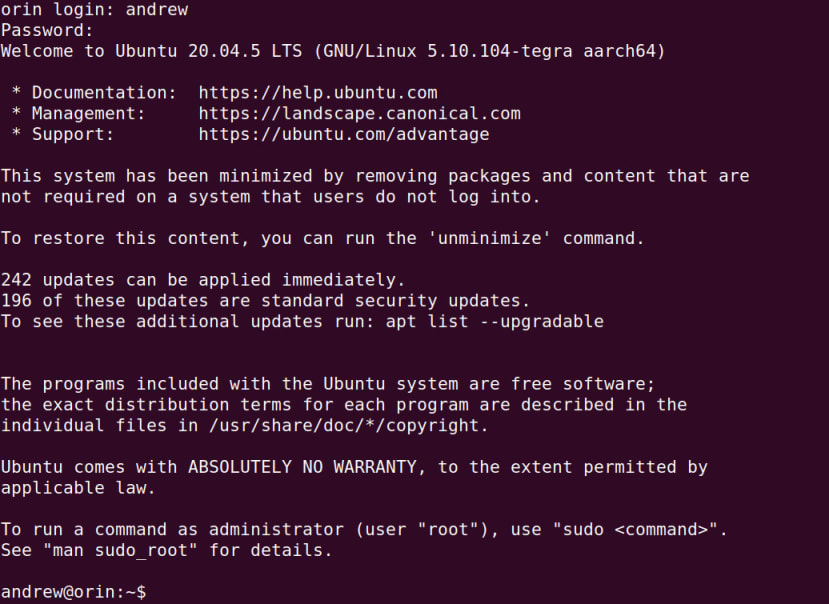
We could now enter the username and password configured earlier to log in to the system.
However, a more convenient way to complete the basic setup now that the AGX Orin was on the network and sshd was running, was to connect from another computer using ssh.
Jetpack SDK

The guide instructs us that if we are running lower than release R34 we will need to first configure the APT repositories. However, upon checking we had release R35 installed and so did not need to complete this step. So all that was needed was to update the Ubuntu distribution packages and then install Jetpack using APT.
$ sudo apt update

$ sudo apt dist-upgrade

$ sudo reboot

$ sudo apt install nvidia-jetpack
This last command took a little while to complete, as the Jetpack SDK bundles a fairly significant amount of software and so there is a lot to download and unpack.
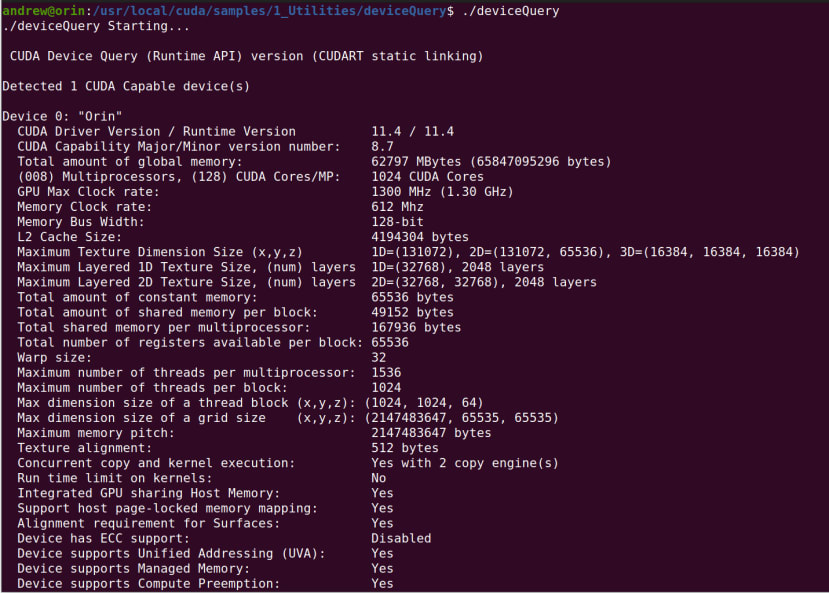
At this point were we on a computer with a PCIe GPU installed we might run the nvidia-smi command line utility to get information about the driver and CUDA versions, along with GPU information such as temperature, utilisation and processes. However, with Jetson we don’t have this , but there is a utility we can compile and then run to get similar information.
$ cd /usr/local/cuda/samples/1_Utilities/deviceQuery

$ sudo make

$ ./deviceQuery
The output of which on Jetson AGX Orin 64GB can be seen above.
So we now have our Ubuntu O/S installed, Jetpack SDK configure and have verified that we have access to a CUDA capable device for GPU accelerated applications.
As many of the provided examples and typical use cases will involve inference with streaming video, next we’ll take a look at setting up a video camera.
Camera options
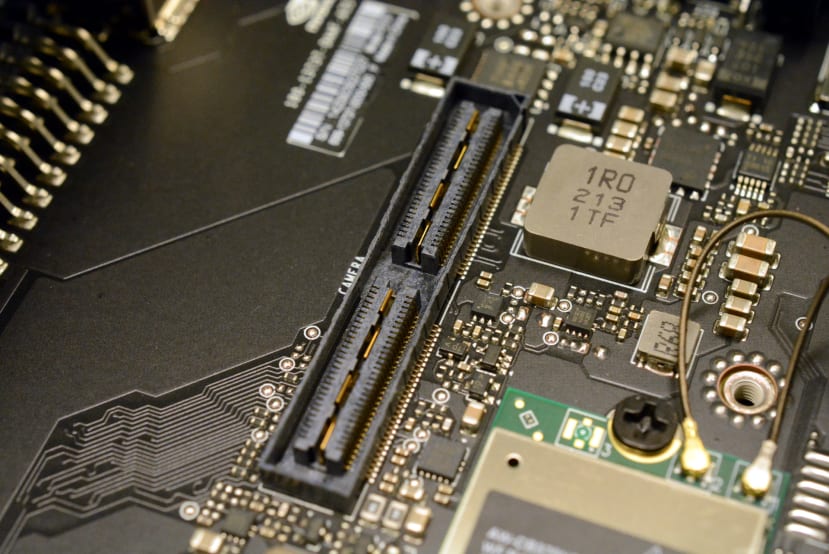
If we wanted to directly interface one or more CSI cameras — Jetson AGX Orin can have up to 8x CSI cameras connected, with up to 6x concurrently streaming — we would need an interface board which connects to the Samtec high-speed digital connector on the underside, which then transitions to one or more FFC connectors or similar.
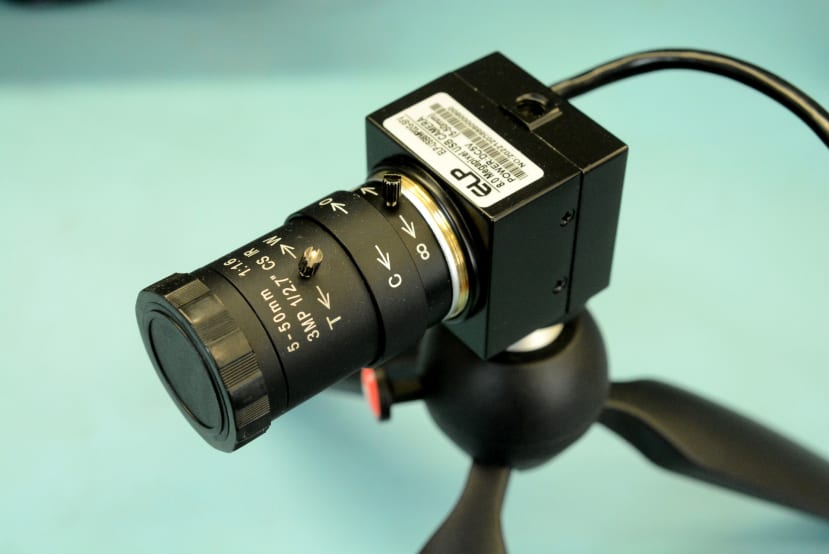
However, in our case and for the purposes of initial testing, we will be using a USB plug-and-play “driverless” UVC camera.
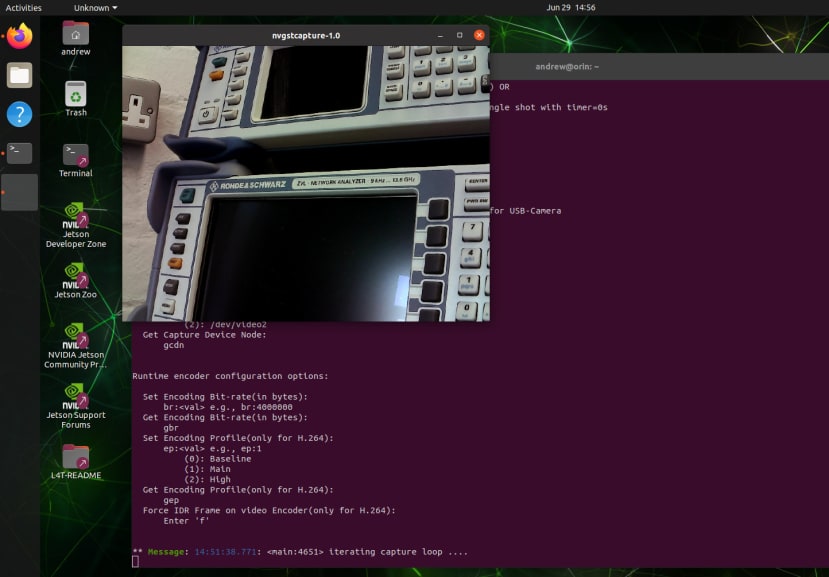
The easiest way to verify the camera is working is to log in to the system via a keyboard, monitor and mouse, then run a capture command:
$ nvgstcapture-1.0 --camsrc=0 --cap-dev-node=0The above will capture a live video feed from the first device. If we had more than one camera we might instead set --cap-dev-node=1 etc.
For further details about the video and still image capture, see Taking Your First Picture with CSI or USB Camera.
Hello AI World
The Getting Started documentation includes a set of links for next steps once everything is set up. This includes links to NVIDIA AI tutorials and courses, such as Hello AI World and Jetson AI Fundamentals Course, amongst others. There is no shortage of material available to guide you all the way from building and running your first AI applications, through to using software such as DeepStream SDK, Triton Inference Server and TAO Toolkit, for example.
We previously took a look at Hello AI World, an “instructional guide for inference and realtime vision DNN library for NVIDIA Jetson devices”, in the article, Hands on with the NVIDIA Jetson Nano. Hence here we will just quickly cover running our first inference example.
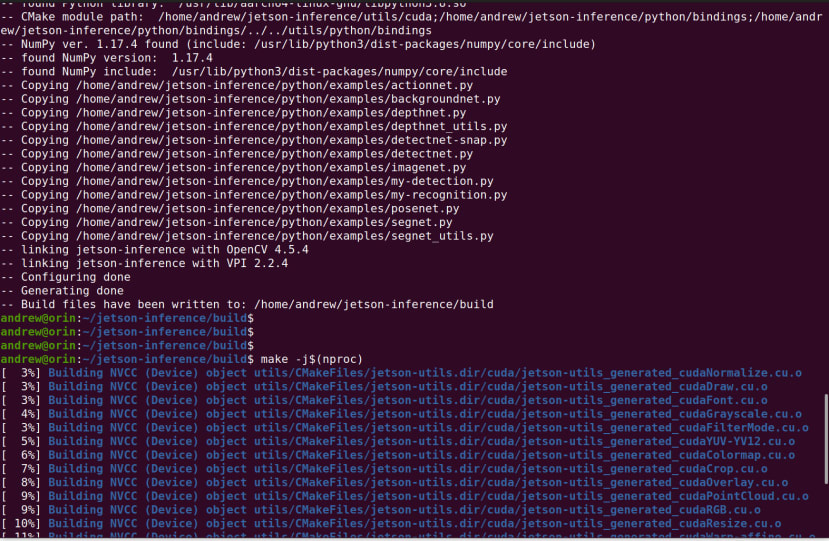
The O/S packaged dependencies were installed, the jetson-inference repo cloned and project built from source with the following steps:
$ sudo apt-get install git cmake libpython3-dev python3-numpy

$ git clone --recursive --depth=1 https://github.com/dusty-nv/jetson-inference

$ cd jetson-inference

$ mkdir build

$ cd build

$ cmake ../

$ make -j$(nproc)

$ sudo make install

$ sudo ldconfig
With the inference examples built and installed it is now just a question of picking one and the parameters, e.g. model, to use with it.
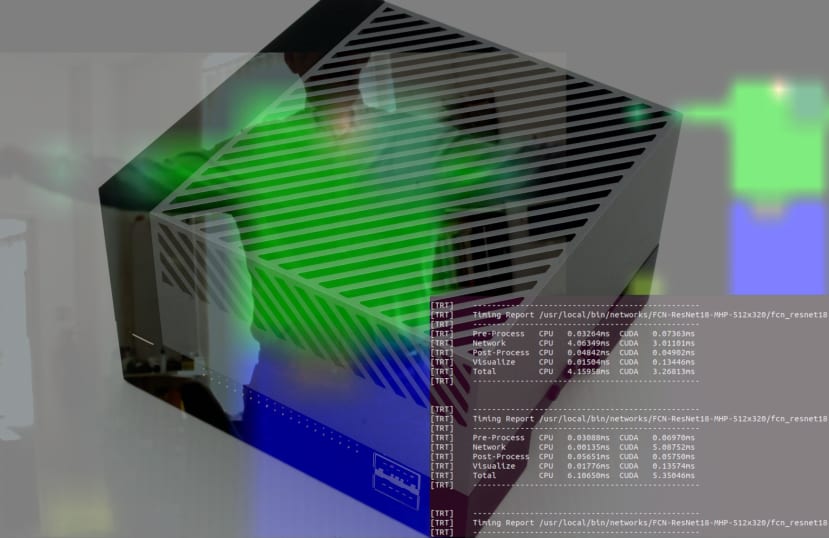
As a random selection, we went with a live camera segmentation example, using a C++ implementation with a pre-trained multi-human parsing (MHP) model. The command to launch this and simultaneously capture the output being:
$ segnet --network=fcn-resnet18-mhp /dev/video0 output.mp4If we didn’t want to record the output stream we would just omit output.mp4.
In the above video, we can see how the model is very effectively detecting the author as a human form. Sadly there were not more humans available at the time to test the multi-human capability.
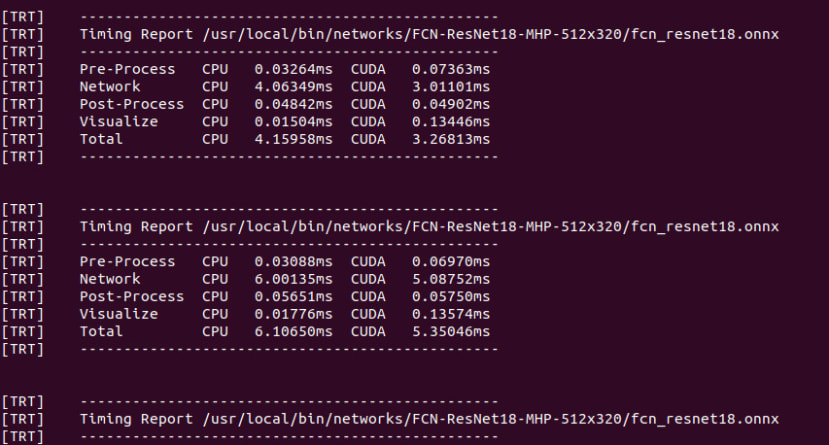
Meanwhile, we can see a timing report being printed out to the terminal window.
Wrapping up
In this article, we’ve taken a look at the options for installing the base software load of Ubuntu O/S plus NVIDIA Jetpack SDK on the Jetson Orin AGX, then carried this out using the default flow to install to eMMC storage, via a headless configuration. We’ve then taken a look at camera options and verified the operation of a USB camera, before going on to build the Hello AI World inference examples and execute one of these with a live video streaming multi-human parsing model.
At this point we have our Jetson AGX Orin system set up and could continue with the provided tutorial and course material, or proceed to develop CUDA accelerated apps for embedded use.