Building Custom Remote Sensing Platforms with the Pi 3 Model B+
Follow articleHow do you feel about this article? Help us to provide better content for you.
Thank you! Your feedback has been received.
There was a problem submitting your feedback, please try again later.
What do you think of this article?
PoE capable Pi provides excellent foundations for custom remote sensing platforms.
Providing the basis for a remote sensing platform is just one of the many uses to which the new Power-over-Ethernet (PoE) capable Raspberry Pi 3 Model B+ is well suited. In this post we take a look at the available interfacing options and some convenient approaches to integrating sensors, before giving a simple real world example which uses the DesignSpark Pmod HAT and a Python script, to take readings from a thermocouple Pmod and publish them via MQTT.
Interfacing options
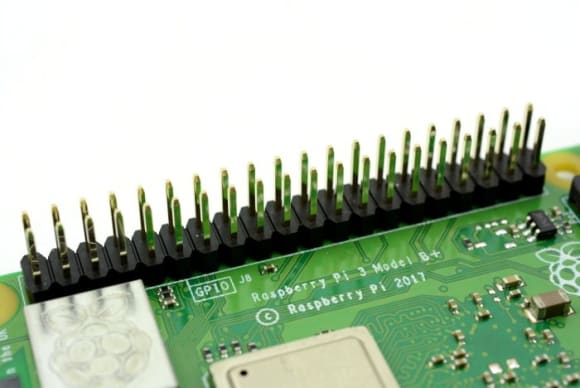
So let’s start with the basics and remind ourselves of the native interfaces we have available:
- USB. More of an end user peripheral interface, but there will be some sensors which use this and indeed adapters to other buses, such as RS-422 and CAN.
- Plain GPIO. A digital pin that we can read the state of and via the wonder of “bitbanging” use software/libraries to implement support for certain generally lower speed buses, such as the 1-wire bus used by the highly popular DS18B20 temperature sensor.
- I2C. A simple serial, master/slave bus, which uses two wires and has a 7-bit address range. A plethora of sensors and ADCs are available for I2C, along with digital I/O expanders to give you more GPIO pins, EEPROMs and other devices.
- SPI. 4 wires for clock, data transfer in either direction, and slave select. Again supported by lots of devices, typically runs at a higher speed than I2C, but since there are only 2x chip enable lines to select peripherals you’re limited to two, unless you also bitbang GPIO.
We could simply integrate sensors via breadboard, jumper wires or perfboard etc. However, there are also highly convenient modular systems available and so let’s take a look at two of these.
MikroElektronika Click
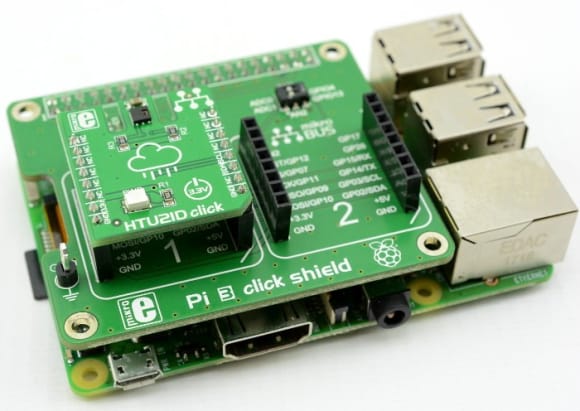
Click boards are compact modules that can be used with a variety of different platforms via interface adapter “shields”, with one of these available that can be used with the Raspberry Pi 3 Model B+ (137-331) to provide instant access to an extensive range of convenient modules.
Python code examples are provided for the following sensor Click boards:
- Colour Click (923-5999) . RGBC Colour Sensor
- Accel Click (923-5999) . 3-axis Accelerometer (882-8900)
- Weather Click (912-5170) . Temperature, Humidity and Pressure Sensor
Of course, there are many more sensor and ADC etc. modules available, with typically C example code provided that can be used as a starting point for your own projects.
To find out more about the Pi 3 Click Shield, see a previous blog post on this.
Digilent Pmod
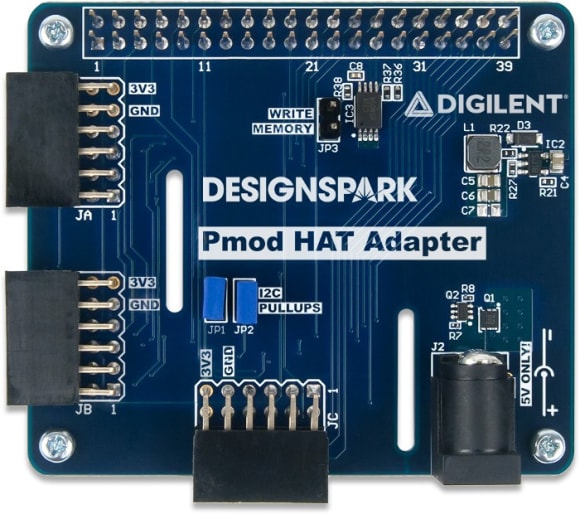
The peripheral module, or Pmod for short, is another open specification standard, but this time from Digilent. Originally associated more with FPGA and microcontroller platforms, the DesignSpark Pmod HAT provides a neat solution for using them together with a Raspberry Pi.
As with Click boards, there are many different Pmods available and quite a few that provide useful sensors and inputs. A Python library for the Pmod HAT provides support for six Pmods and of these four are sensors/inputs:
- PmodAD1 (134-6443) . Two channel 12-bit ADC.
- PmodISNS20 (136-8069) . ±20A DC or AC input, high accuracy current sensor.
- PmodMIC3 (134-6475) . MEMS Microphone Module.
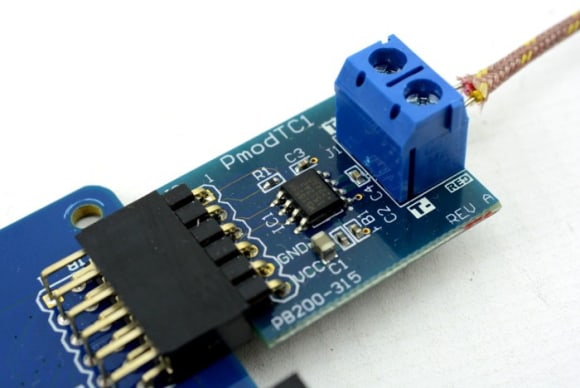
- PmodTC1 (134-6476) . Cold-junction thermocouple-to-digital converter.
The DesignSpark.Pmod Python library provides a simple, consistent interface to getting readings from the above Pmods, along with driving a H-bridge Pmod and RGB OLED Pmod.
For details of the Pmod HAT, library and all the supported Pmods, see a previous blog post.
Next let’s take a look at a practical example using the PmodTC1.
Monitoring temperature
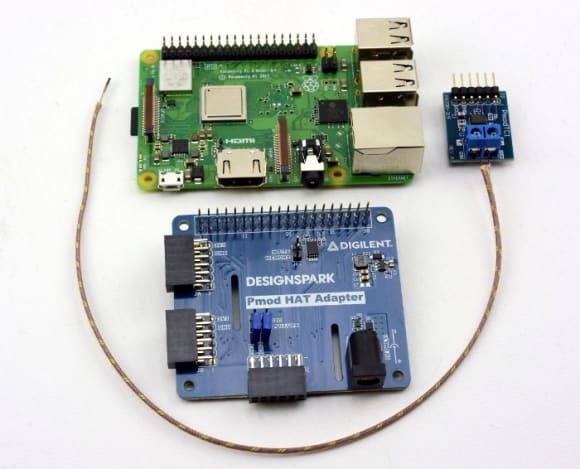
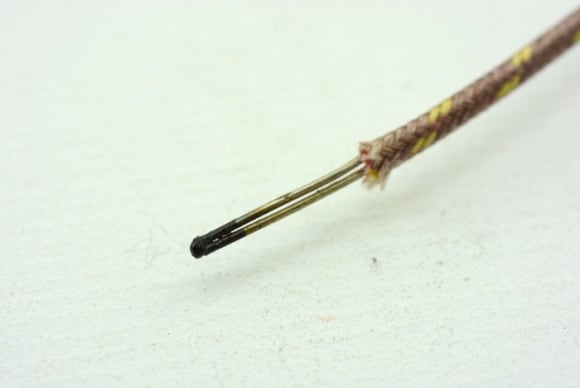
The PmodTC1 comes supplied with a K-type thermocouple wire that has a range of -73°C to 482°C, which means that it could be put to use in all manner of different applications.
So let’s say for example that we wanted to be able to measure the temperature of a hot water tank, because we’d like to try and optimise the timer programme for our boiler or perhaps its thermostat setpoint. The tank is in the attic, there’s no mains power outlet close by and we’d prefer not to have to get an electrician out. No problem — a PoE powered Pi is perfect for such a scenario. We’ll use MQTT for publishing a data feed, since it’s simple to use and is widely supported.
K-type thermocouple wire
With Raspbian — the Lite variant would be sufficient — written out to a Micro SD card that is inserted into our Pi and this booted, we would first need to install the DesignSpark.Pmod library. Following which we would install the Paho MQTT library:
pi@3bplus:~ $ sudo pip install paho-mqttNow we have easy to use libraries that will allow us to take readings from the PmodTC1 and publish these to an MQTT broker. Here’s what our code might look like at its simplest:
import time
from DesignSpark.Pmod.HAT import createPmod
import paho.mqtt.publish as publish

broker = 'localhost'
topic = 'house/boiler/hotwater/temperature'

therm = createPmod('TC1','JBA')

while True:
    cel = therm.readCelcius()
    print cel
    publish.single(topic, cel, hostname=broker, client_id="temp_sensor")
    time.sleep(1)
What does this do?
- Imports the Python modules (libraries) we will need
- Defines the MQTT broker host and topic we want to publish readings to
- Sets up the PmodTC1 module on port JBA (top row of the JB connector)
- Takes a reading every second, prints it to the terminal and publishes it to the broker
If you had an existing MQTT broker running somewhere, on a system of your own or perhaps a cloud based IoT platform, you would configure this as the host. Here we used “localhost” and we can easily test this way by also installing the Mosquitto MQTT broker and clients with:
pi@3bplus:~ $ sudo apt-get install mosquitto mosquitto-clientsThen in one window we can run our Python script with:
pi@3bplus:~ $ python PmodTC1-MQTT.pyAnd in a second window we can can subscribe to the topic to confirm that messages are indeed being published to the broker:
pi@3bplus:~ $ mosquitto_sub -h localhost -t 'house/boiler/hotwater/temperature'Taking the application further
There are of course many different directions in which such an application might be taken further. Assuming you had other sensors connected to the same Pi, you might just run the broker on this as we did in the example and could also install Node-RED to implement some logic, publish data to a web page, set up alerting and/or integrate with some cloud service. You could install a time series database on the Pi for logging data, such as InfluxDB, and perhaps Grafana for visualisation.
Cloud services that could be used include IBM Cloud, OpenSensors and Cayenne, all of which support MQTT, amongst other APIs.
So as we’ve seen, adding sensors to the Raspberry Pi 3 Model B+ and getting data from them is made that bit easier thanks to the DesignSpark Pmod HAT and supporting library. With the combination making a neat solution for prototyping remote sensing platforms, and plenty of open source tools available that can be used to develop applications, along with IoT cloud services also.



Comments