
Utilising a Phoenix Contact WiFi module to enable wireless connectivity to the Can Crusher HMI.
Introduction
The PLCnext controller located within our can crusher has the ability to serve a web-based HMI display that we use for instrumenting compressor voltage and current, system pressures and can crush force.
To access the HMI at present a wired Ethernet connection must be used. We wanted to make this usable over a wireless connection from a mobile device for ease-of-use. In an industrial environment, adding WiFi to a machine opens up the door for convenient maintenance as a service engineer can easily connect and troubleshoot, reprogram and monitor operational status.
The FL WLAN1100 WiFi Module
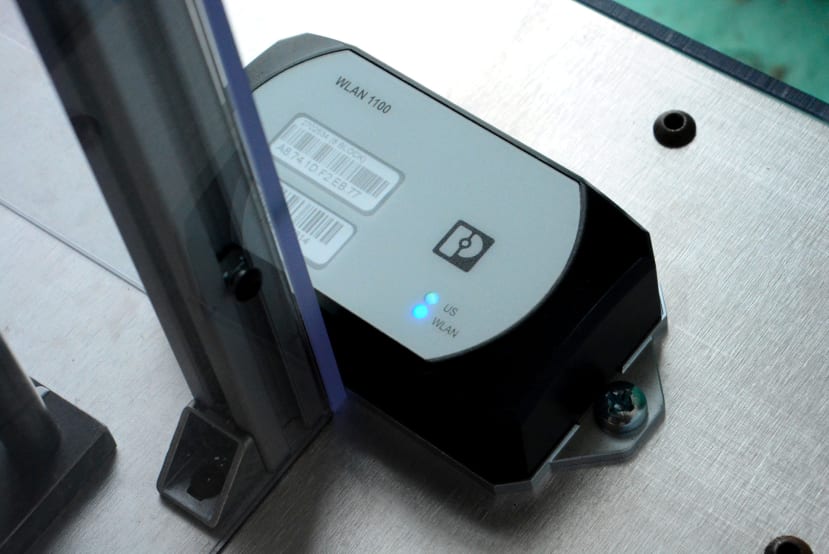
Phoenix Contact has produced the FL WLAN 1100 wireless module
(134-8668)
to enable wireless connectivity on machines and equipment that have only an Ethernet connection, in an industrial environment.

Features include support for 802.11 a/b/g/n, 2.4 and 5 GHz bands, 2x2 MIMO for improved communication speeds, a shockproof enclosure rated to IK08 (equivalent to dropping a 1.7kg mass from 0.3m) plus numerous operating modes and security features.
As the module is designed for industrial operation, a 24V power supply input is present on screwless “combicon” terminals, along with a connection for factory reset. The Ethernet interface uses a standard RJ45 connector and supports up to 100Mbps transmission speeds.
Operating Modes
The FL WLAN 1100 can operate in three different modes: access point, repeater or client adapter with the sub-modes fully transparent, single client (“SCB”) and multi-client (“MCB”) bridge, with support for Network Address Translation (NAT).
In access point mode, the device allows WiFi clients to connect and access devices connected to the Ethernet interface. Numerous security modes are supported, including no encryption, WPA-PSK, WPA2-PSK and finally WPA2-EAP for RADIUS authentication (commonly found within larger networks). Various other services can be configured to support access point mode including DHCP.
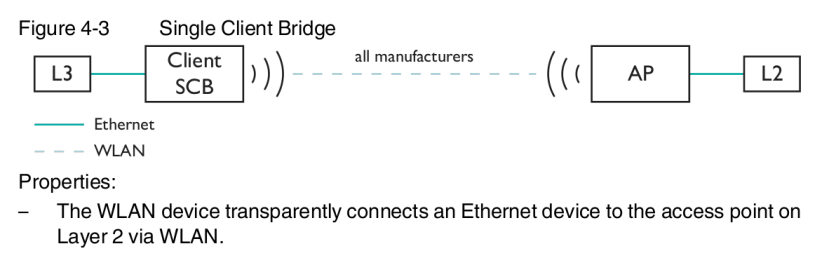
Single Client bridge mode supports one Ethernet-connected device being connected to an existing WiFi network suited for transmission of industrial protocols such as PROFINET and Ethernet/IP. Typically this requires no configuration of Ethernet device MAC address, however, the user manual does specify that if multiple devices are present then the correct MAC address needs to be specified — this will limit access to only the given device over WiFi.
Multi-Client Bridge behaves similarly to SCB, with the difference that protocols such as PROFINET and Ethernet/IP are not transmitted as they utilise Layer 2 communication. Several devices are permitted to be connected to the Ethernet port via a switch, all of which can access the WLAN interface.
A final bridge mode, Fully Transparent, connects multiple Ethernet devices to the WiFi access point on Layer 2. This mode does require the AP to support fully transparent bridge mode, typically only possible with devices from the same manufacturer.
Roaming can be configured for all the client modes, where once the RSSI drops below -60 dBm the module will attempt to connect to another AP with the same name. Various security modes are also supported, including 802.11 r “Fast Roaming” modes for both WPA2-PSK and WPA2-EAP.
To improve the roaming speed, specific 802.11 channels can be selected so that the module will only search on those for a new AP to connect to.
Various other client NAT modes are supported which are “1:1 NAT” and “IP Masquerading”. The first mode, one-to-one, requires that every device on the LAN “behind” the WiFi client requires an IP address assignment from the WAN side (effectively the network connected to the access point). This mode has no limitations on the protocols that can be used and allows communications to be established from both LAN and WAN sides.
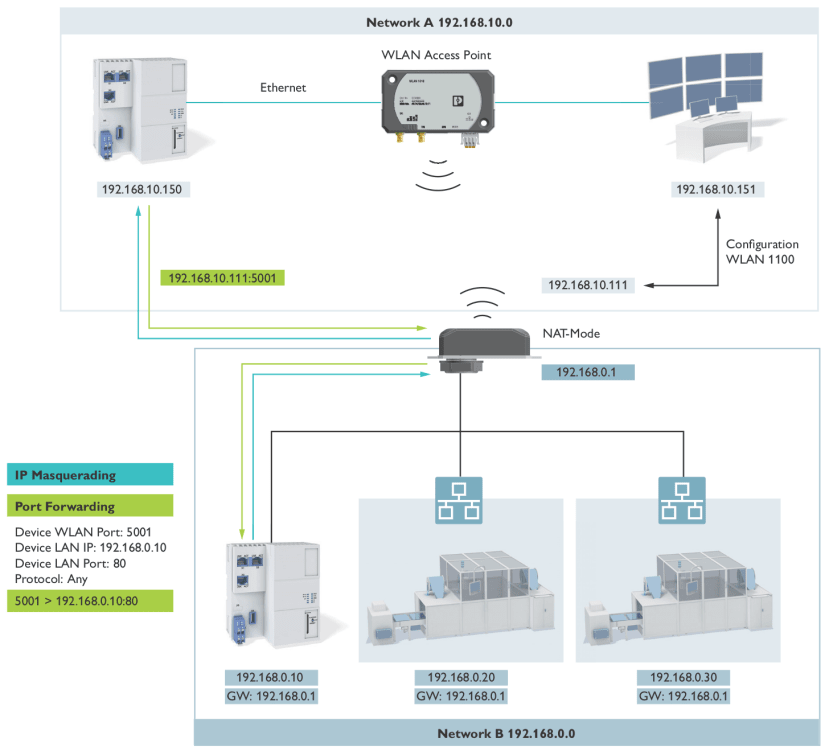
IP masquerading involves multiple devices behind the WiFi client being accessible through forwarded ports. This means that only one WAN IP address is consumed (for the WiFi client itself) for all the other devices, but comes with the drawback that devices on the WAN can only communicate with the LAN devices through a forwarded port. This can sometimes cause issues if devices need multiple ports open that are not documented.
Repeater mode establishes two connections: one as a wireless client connected to an upstream AP, and one as a wireless AP for connection to a downstream device whilst also providing an Ethernet connection.
Other features of the wireless module include a DHCP server that can be assigned to a number of different interfaces, including globally or the two WLAN interfaces, RADIUS for secure authentication, as well as SNMP for monitoring.
A REST API is also present for remote programming, control and monitoring of the module. This presents an interface accessible over standard HTTP that accepts JSON-encoded data on a number of endpoints. As this interface is well-documented, it can easily be controlled from a PLC capable of making web requests.

If the API URL is opened in a web browser there is a Swagger instance that both documents the API and allows for testing. Most of the module functions are exposed via the API, allowing for great flexibility when programming.
REST API Usage Example
To demonstrate the REST API we decided we would disable our WiFi network, change the password and then enable the network. Having the REST API available means that using other platforms and tools to configure, control and monitor the module are possible.
For example, a security operations centre might have a security platform that supports custom integrations where one could be produced that interfaces with the API and allows for provisioning and remote lockdown of the AP. This could be used to give maintenance staff temporary access to a machine or in the case of a network attack to disable one possible attack vector.
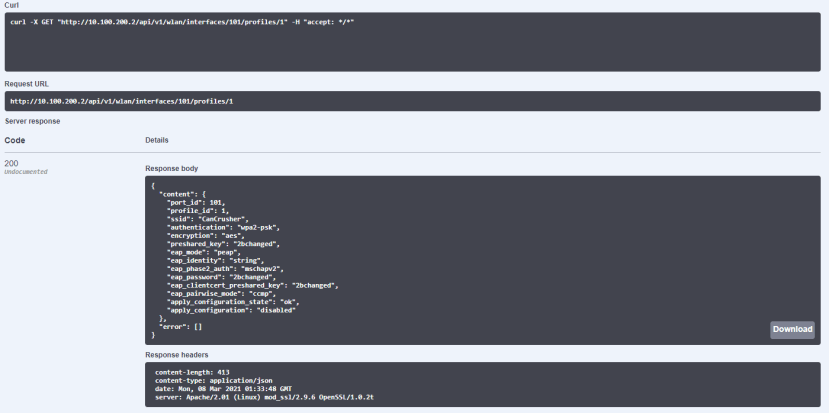
The Swagger interface was initially used to explore the API and pull out the relevant data that we needed.

In the above screenshot, we can see a JSON object containing the status of our configured WiFi network (by default the port ID is 101) including the “enabled_state” key. The object contains more data than necessary for reconfiguring the network; only the key-value pairs to be changed need to be included in the PATCH request.

The included cURL command can also be run directly from the command line, with one additional switch: the `--user` parameter must be supplied to perform HTTP basic authentication.
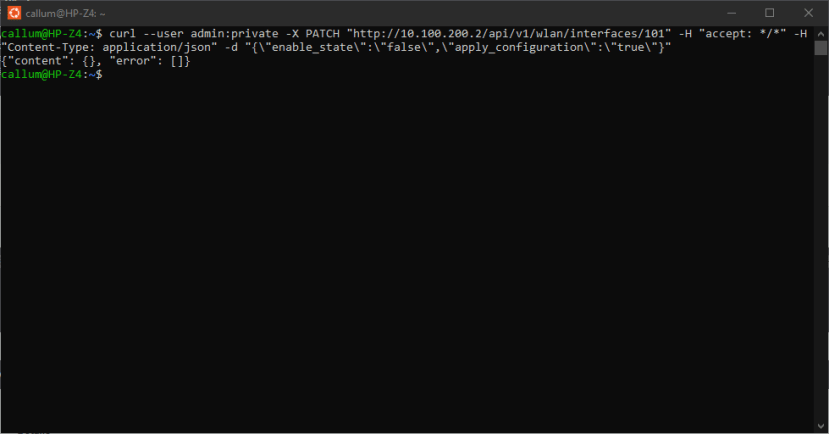
To disable the interface a PATCH request was made containing the “enable_state” and “apply_configuration” keys.
We once again turned to Swagger to find the appropriate methods and objects returned about the WiFi profile, which is where the SSID configuration is held.
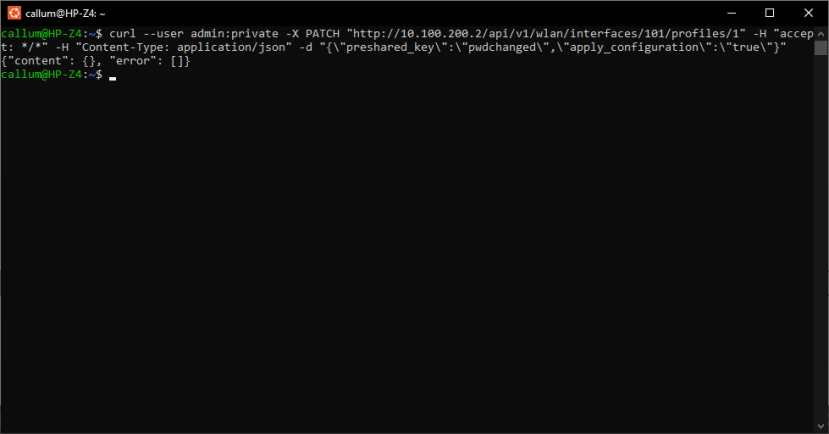
cURL was once again used to modify the SSID parameters, in this case, the preshared key for authentication. The access point could then be re-enabled by running the previous command containing the “enable_state”.
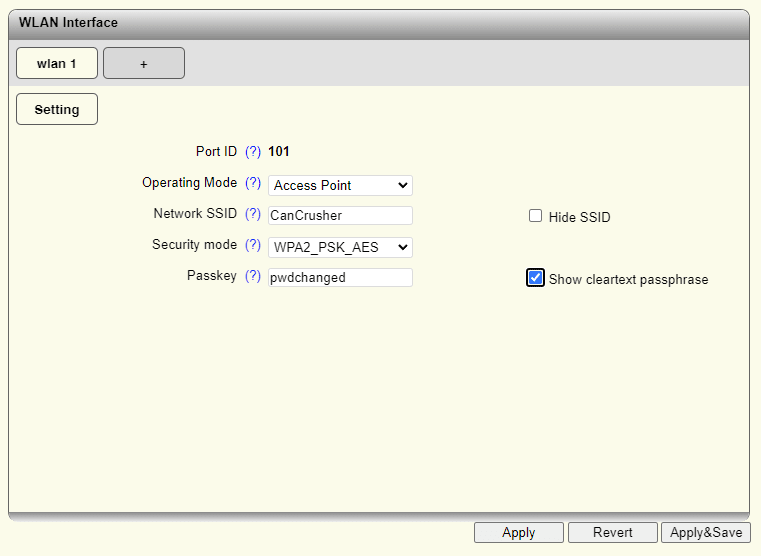
We can see the changes have been reflected in the web UI of the module after executing our API calls.
Use with PLCnext Controller
Phoenix Contact has produced a PLCnext application “WLAN for mobile devices” that accompanies the WLAN 1100 module and enables the secure use of devices within a factory environment.
The application, once installed, provides a number of function blocks that work together to set up a WiFi network with login details that are random and time-limited, as well as establishing a fixed network for use by internal staff or integration into an existing production network (either behaving as an AP or wireless client).
Three function block libraries are installed: “FL_WLAN_Basic” which provides helper function blocks for interacting with the REST API present on the module, “PasswordGenerator” which contains a block specifically for generating random passwords with either a minimum/maximum length or set length, and finally the “QRcodeGenerator” that will generate a QR code for a given input string and then save it as an SVG onto the PLCnext controller filesystem.
Within the “FL_WLAN_Basic” library are function blocks “FLWLRST_COM” that sets up connection parameters to the FL WLAN 1100 module for later use and the “FLWLRST_PATCH”, which executes an HTTP PATCH request to set up the temporary access point. This function block is utilised multiple times within the example project to set up AP parameters (such as channel, mode and transmit power), for modifying the wireless SSID settings and finally to save the configuration.
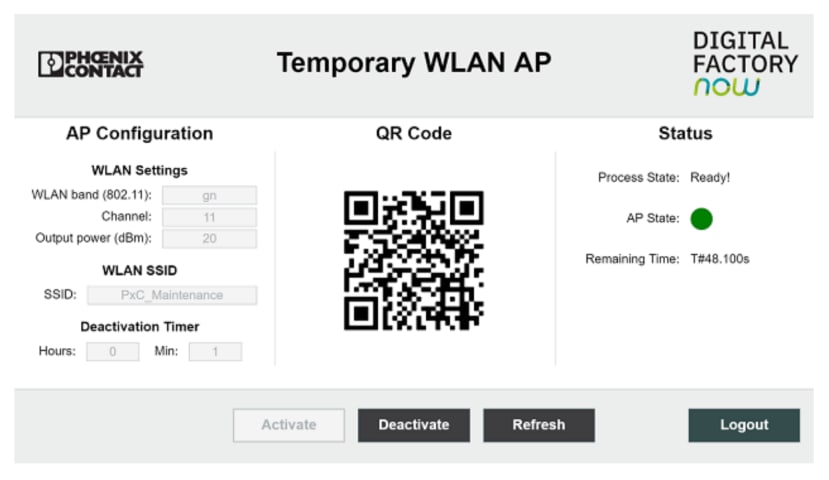
An example project is also included that demonstrates the use of the function blocks together with a Structured Text process and HMI page to create a working temporary WiFi access point solution.
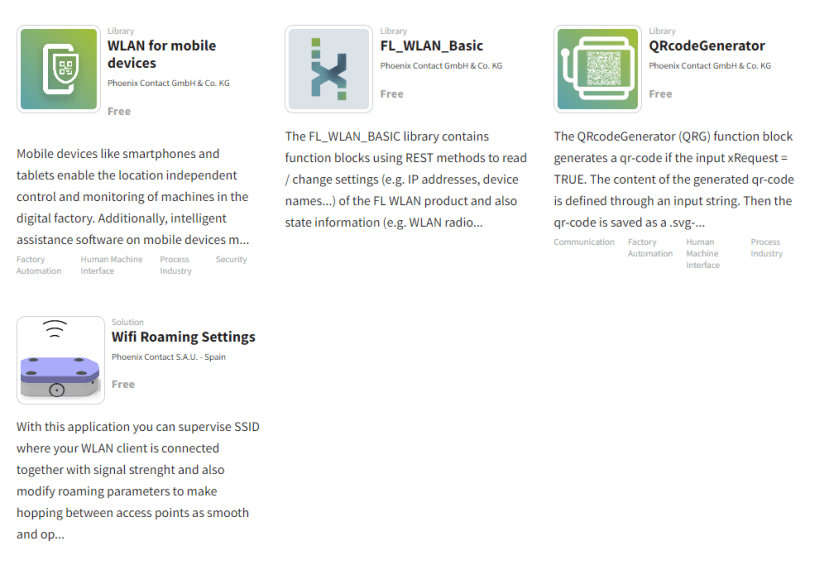
Searching the PLCnext Store also uncovers other libraries and solutions for interacting with the WiFi module, including a library of function blocks specifically designed to handle the JSON REST API, plus another example solution for changing the roaming settings of a WiFi client connection.
The PLCnext Store contains not just libraries, function blocks and solutions, but also applications such as Node-RED and Grafana. Lots of the items are supplied free-of-charge but some incur a small fee of typically around €49.
Pre-built solutions such as pump station controllers can help system integrators reduce time-to-market that would otherwise be spent on setup and troubleshooting. Store items can also be published by other manufacturers and PLCnext community members, opening the door to quick solution development with less effort.
Module Setup
When initially powered up, the module has a set of factory defaults that are listed in the user manual. By default, the WiFi interface is configured to behave as a client looking for a specific access point requiring configuration to be done through the Ethernet interface.
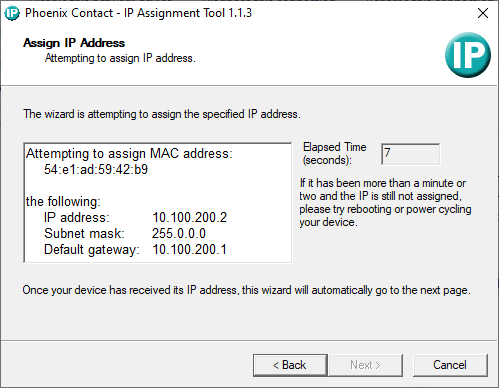
Phoenix Contact supplies an IP assignment tool that utilises the BootP protocol to assign a user-specified address to the WLAN 1100, but we could not get this to detect our module — most likely due to our network setup.
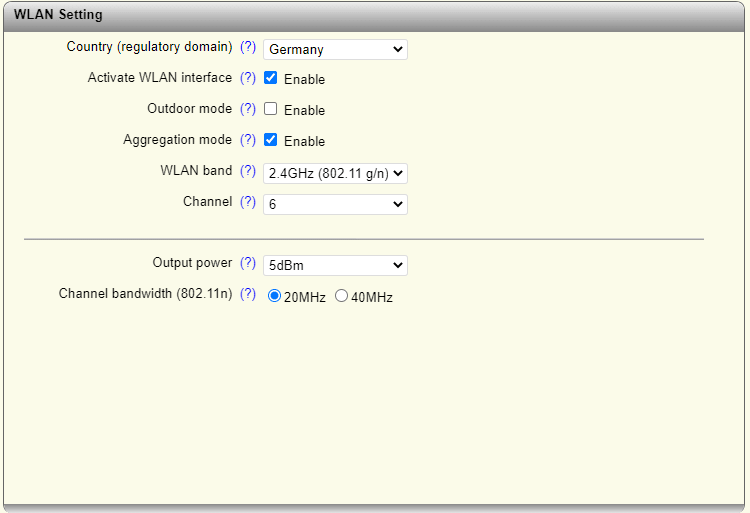
Instead, after a factory reset of the device it could be accessed by using the link-local IP address of “169.254.2.1” and using the default login details. The initial setup consists of setting the correct wireless regulatory domain and other settings such as band, channel, bandwidth and transmit power.
To assist with setup, a “quick start” tool is available that walks through IP assignment, device mode, regulatory settings and SSID setup.
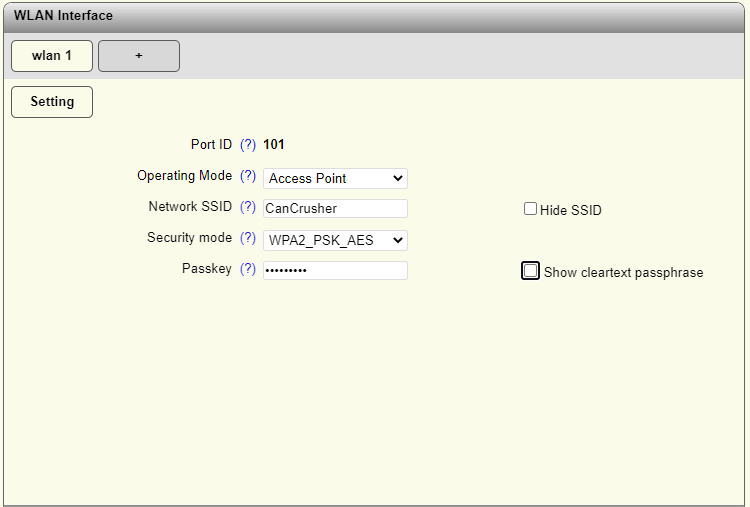
A suitable SSID name was chosen to distinguish the network. To ensure the changes are committed to storage the “Apply & Save” button must be clicked.

DHCP services were enabled and a suitable IP address range set. As the PLCnext controller has an IP address of 10.100.200.1 we assigned the WLAN 1100 an address of 10.100.200.2 with a DHCP range starting at 10.100.200.4.
With the module configured appropriately, we connected a mobile phone and successfully managed to navigate to the PLCnext web HMI.
Conclusion
In this post, we’ve taken a look at the FL WLAN 1100 wireless module from Phoenix Contact, the physical specifications of the module itself, software features plus a demonstration of the REST API and then integration with our Can Crusher.
Comments