Save time and effort using a reference PCB design with your projects
Follow article
 Dave from DesignSpark
How do you feel about this article? Help us to provide better content for you.
Dave from DesignSpark
Thank you! Your feedback has been received.
Dave from DesignSpark
There was a problem submitting your feedback, please try again later.
Dave from DesignSpark
What do you think of this article?
Here, we illustrate using an Arduino Uno shield PCB in a new design. The key features in the existing reference PCB, the board outline, mounting holes and the location of key components such as connectors saves considerable time and allows the reuse of a proven PCB.
The advantage of this method compared with using a PCB outline within DesignSpark PCB is it not just a board outline and includes the additional features mentioned.
With DesignSpark PCB launched and a schematic added to the project, simply design your schematic layout and then add the reference PCB to the project. Forward the design changes and now work on the layout on the proven PCB.
Using an Arduino Uno Sketch created as described in a series of simple FAQs:
- How do I create a custom PCB - board outline
- How do I create a custom PCB - mounting holes
- How do I create a custom PCB - component positions
The FAQ's also have attached the final PCB's including all the steps illustrated for you to explore and create your own PCB reference boards. Please share your creations with the community and send details to support such that a library of designs can be created.
How do I use these reference PCBs?
Create your project folder and project as normal. Add your schematic to the project and create your design.
In Windows file manager copy your reference PCB to the project folder and rename to match the actual project function.
Back in DesignSpark PCB "add your reference PCB design to the project".
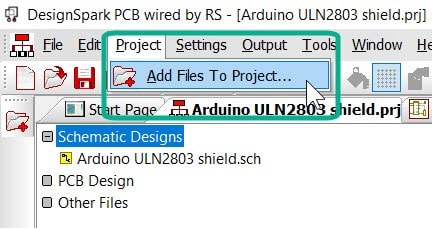
Navigate to the PCB file and add to the project.
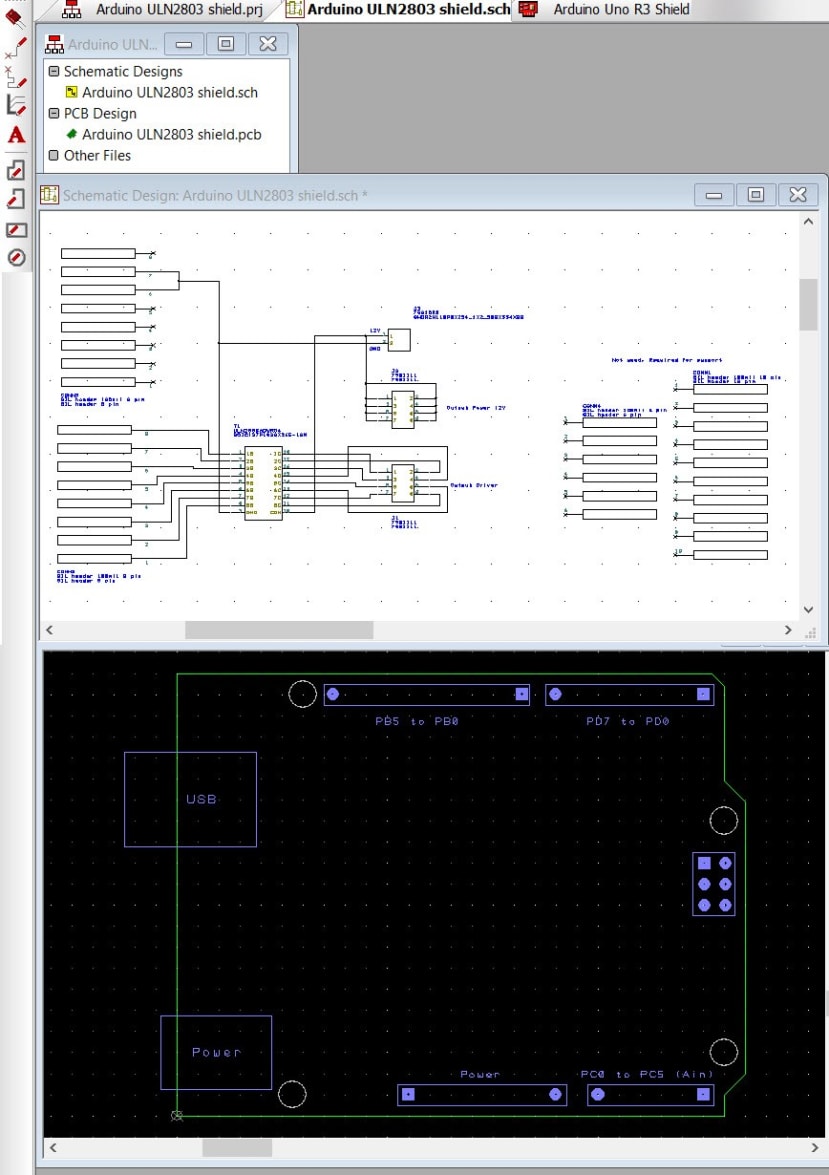
Now simply "Forward Design Changes", position the components and route your PCB.
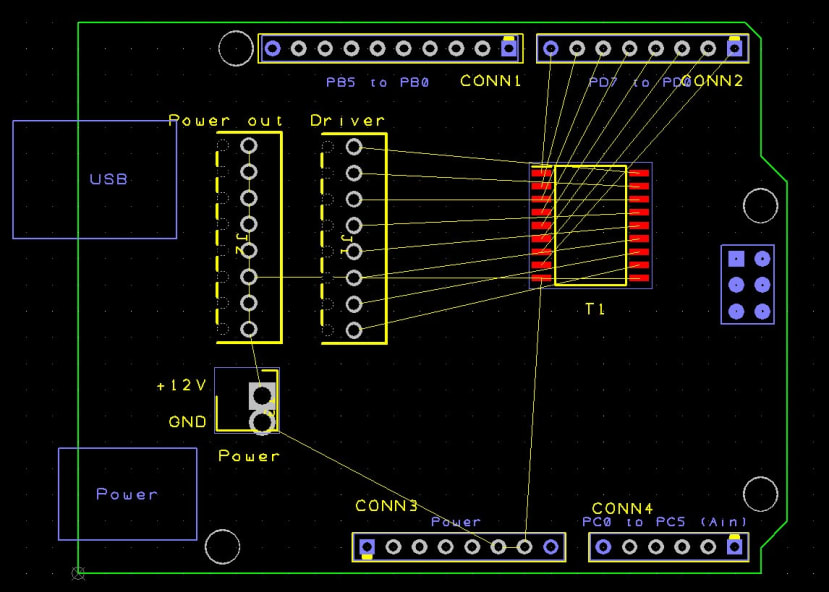
The connectors required to mate with the Arduino Uno are simply placed over the locations on the documentation layer, providing an easy solution to creating your custom shield.
Re-use the reference PCB as often as required within each new project.
Simple and time-saving!
Comments