Prototyping a Spring Reverb Effect using Readily Available Parts
Follow article
 Dave from DesignSpark
How do you feel about this article? Help us to provide better content for you.
Dave from DesignSpark
Thank you! Your feedback has been received.
Dave from DesignSpark
There was a problem submitting your feedback, please try again later.
Dave from DesignSpark
What do you think of this article?
A DIY effect unit using a spring, piezo buzzer, an audio exciter and a Click Board amplifier.
Like many other people at the moment, I am working from home and looking for interesting projects to keep me busy. One handy sound effect that I do not have for my modular synthesiser is reverb. Although I could probably reproduce something close using one of my echo units, it is not the same as old school spring reverb. I decided that I would have a go at building one using some springs I had to hand and some off-the-shelf components.
What is reverberation or “reverb”?
A listener standing some distance from a sound source will perceive sound that is actually a combination of direct sound and indirect sound that has been reflected from walls and objects. The reflections are referred to as reverberation. Reverb can enhance the perceived sound from a source by adding depth, colour and liveliness.
Reverb has two elements; the sound that bounces back directly give the listener an impression of the size of the listening space; the indirect, cluttered reflections convey the “liveliness” of a room.
Imagine you are inside a large hall and you clap your hands once. The length of time required for the arrival of the very first reflections is called the delay time (usually on the order of tens of milliseconds, e.g. 33 ms) and is related to the volume of the room (or distance of the reflective surfaces from the listener). The number and density of reflections increase rapidly with time and they become cluttered, while simultaneously decreasing in level until they are no longer audible.
The length of time required for a sound to decrease in level by 60 dB is called the decay time— usually on the order of a few seconds, e.g. 3 s — and is related to the acoustical properties of the reflective surfaces in the listening area. For example, poured concrete walls will reflect more (absorb less) acoustic energy than drywall.
This sound effect can be replicated artificially, most recently using digital processing, but originally by passing the sound along a spring – hence “spring reverb”.
Laurens Hammond popularized the use of artificial reverberation devices through his church organs in the 1940s and 1950s. "The early Hammond organs were sold to churches on the principle that organ music is greatly enhanced by reverberation, but the minister's speech in the church is hampered by reverberation. Therefore, churches were designed to be acoustically dead, and the Hammond organ had to have its own artificial reverberation.” (Mark Vail; "The Hammond® Organ: Beauty in the B". Published by Backbeat Books)
Spring Reverb
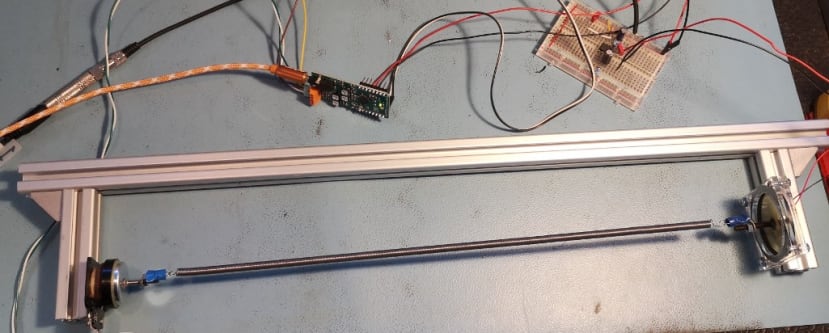
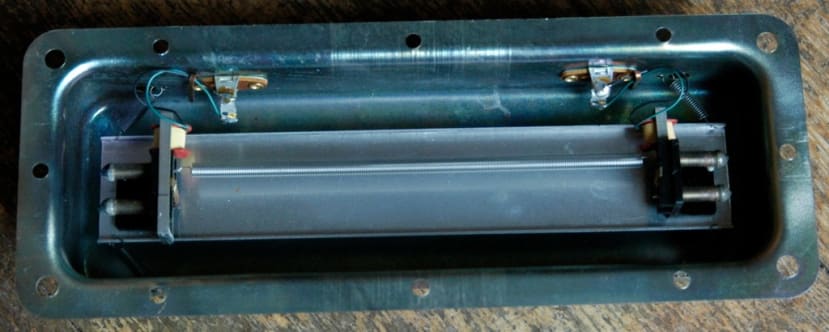
To produce spring reverb you need a “reverb tank”, which consists of a spring (or two) with an audio transducer of some kind at either end, a “drive circuit” for the incoming signal and a “recovery circuit” for the output. I had an old reverb tank with one spring missing lying about that shows what a simple device it is and made me think it would not be too hard to fashion my own.
I found some plans that used a slinky and decided to adapt that. For the incoming signal, I planned on using one of the Click Board amplifiers (165-1405) I had used in my 12V sound system, and for the output one of the audio op amps I had used in my matrix mixer. I am using a piezo buzzer (622-1584) and a Visaton Audio Exciter (121-8641) to act as transducers.
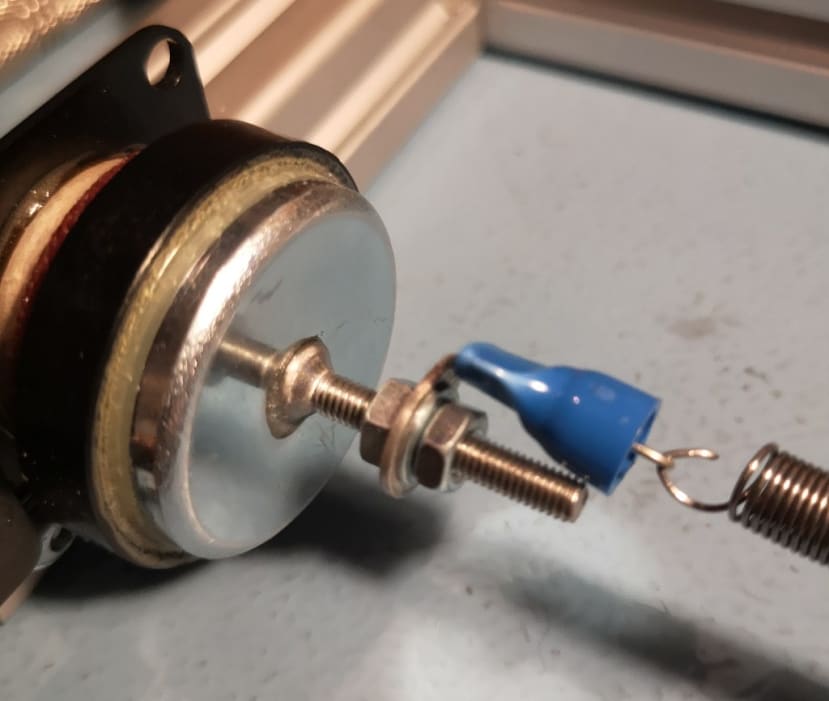
I glued a screw onto each of my two transducers using epoxy resin (085-0940) and left them overnight to harden. These would be used to fasten the spring. I made a frame to hold the transducers from 2020 aluminium extrusion. This allowed me to easily vary the distance between the transducers and thereby the tension and length of the spring by simply sliding the brackets backwards and forwards. I crimped a small loop of wire to a couple of crimp ring terminals and bent the loops on the terminals to about 90 to make fasteners for the spring.
I put together an audio op amp on some breadboard, based on the ones I had used in my Matrix mixer. This used a TL072 (030-4239) Op Amp.

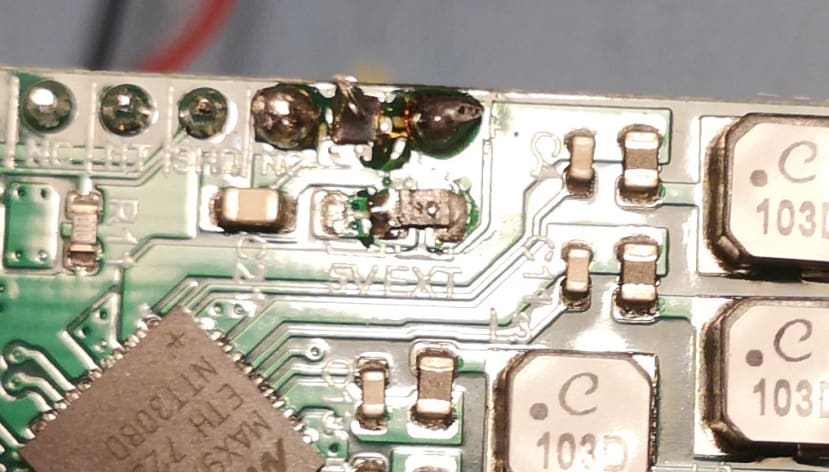
I wanted the Click Amplifier to run on 12V, the same as my Audio Op Amp, so I needed to set its jumper. This involved de-soldering a small Surface Mount resistor and re-soldering it in a new position. I used a hot air solder gun (124-4133) to do the de-soldering and then moved the resistor and soldered it in its new position.
I then put my prototype together for testing. The Mikroe Click Board amp needs both a 3.3V and a 12V supply. I had brought a dual bench power supply
(665-4896)
home with me and so I set one output for each of the voltages I needed.
I then set up a simple patch on my synth to generate a basic repeating pattern of notes, sounding similar to an organ. I split the signal and sent one, untreated, to channel 2 of my mini mixer and the other signal to the input of the Click Board amplifier the output of which is used to drive the audio exciter. The output, via my Op Amp circuit, goes to channel 1 of my mixer.
In the video you can hear the untreated audio signal, then a mix of untreated and then just the signal from the reverb. As you can hear, it is pretty effective.
With a shorter spring, the reverb is “tighter”. I decided I preferred the longer spring.
Next Steps
Now I have a working prototype I need to add some controls for input and output levels and add another channel to make it stereo, that way I can use it with the Red Tin as an effect when I am DJ’ing, as well as with my synthesiser. I will also try adding a second spring and adapt the supporting frame to accommodate it.
Finally, I will need to put it all in a suitable enclosure and I have the perfect thing in mind – a red metal toolbox (773-9348) .
Comments