How do I make an image wrap around a 3D object?
Follow tutorial
 Dave from DesignSpark
How do you feel about this tutorial? Help us to provide better content for you.
Dave from DesignSpark
Thank you! Your feedback has been received.
Dave from DesignSpark
There was a problem submitting your feedback, please try again later.
Dave from DesignSpark
What do you think of this tutorial?
This tutorial requires:
DesignSpark Mechanical V6.0Wrap Around option is not visible until you are adding an image. Note that wrapping an image does not mean it will 3D print with your STL file. The image exists separate to your CAD model and is not part of the geometry yet. You can use various sketch tools (like, spline) to draw an outline of the image and then either:
a. Use the project tool to add it to a curved surface.
b. Convert to an independent surface, use Pull tool to get a solid and export it to STL (if you only want to 3D print a flat logo).
Here are the steps to simply wrap an image without adding to geometry:
- Make a sample 3D object like a cylinder
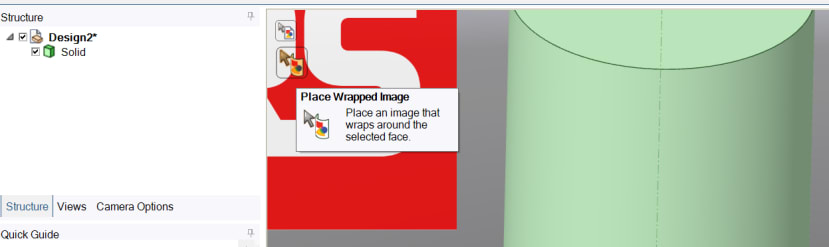
- With the cylinder in the Design View, you then select the File in the insert menu to pick your wrapping image.
- Then select the Logo. In this case, we use an RS logo have saved to Desktop.
- After clicking open, the image will stick to your mouse pointer waiting to be placed. You then select the 'Place wrapped Image' option in the Design View, the other option is a flat surface placement option for image.
- Once the Wrap Around option is selected, you then select the surface of the Cylinder as this is where you want the wraparound. You can position before you set it and scale its size by using your mouse scroll wheel.
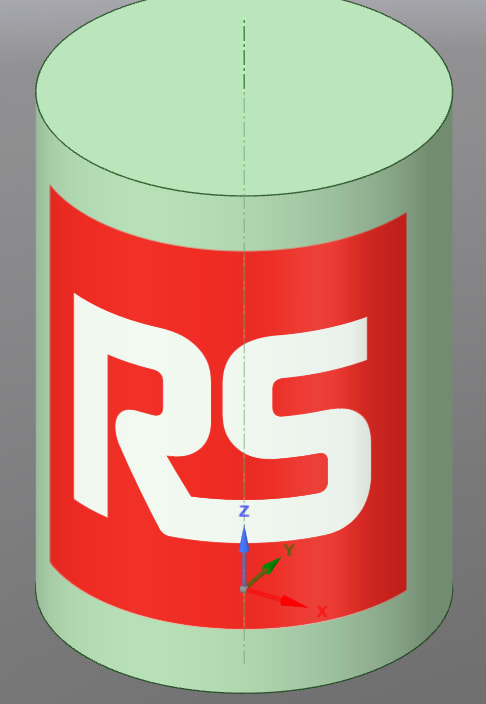
Here is a screen shot of how the RS logo Image looks wrapped around.