Building the Nu:Tekt HA Kit – a Korg Nutube Headphone Amplifier
Follow article
 Dave from DesignSpark
How do you feel about this article? Help us to provide better content for you.
Dave from DesignSpark
Thank you! Your feedback has been received.
Dave from DesignSpark
There was a problem submitting your feedback, please try again later.
Dave from DesignSpark
What do you think of this article?
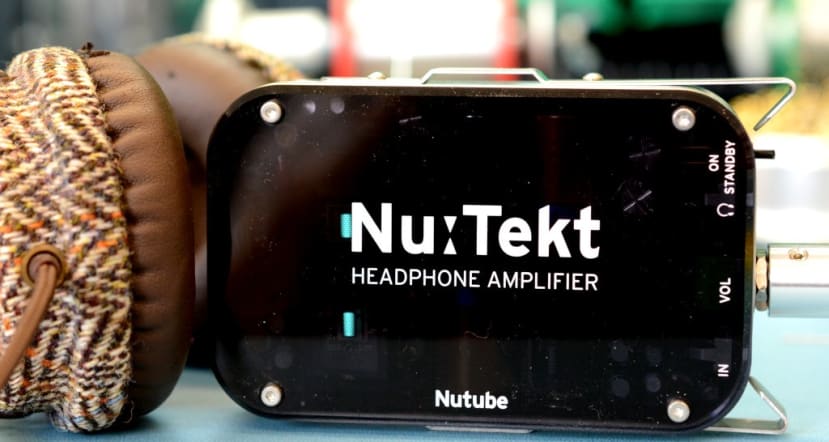
Korg kit provides everything you need to build a vacuum tube headphone amp.
I am no stranger to Korg’s miniature vacuum tube that they christened the NuTube; I designed and built a case for a small guitar amp that featured one, following which I built a stereo pre-amp using two of the circuit boards used in that project. So I was naturally interested when I saw that Korg was producing official kits under the Nu:Tekt name.
The majority of the Nu:Tekt website is in Japanese and so not particularly useful to a monoglot such as myself. However, I could work out that there are at present two kits both featuring the NuTube: a headphone amplifier and a guitar overdrive pedal. I will be taking a look at the latter in a future blog post, but for this one, I am going to run through the build for the headphone amp.
Parts
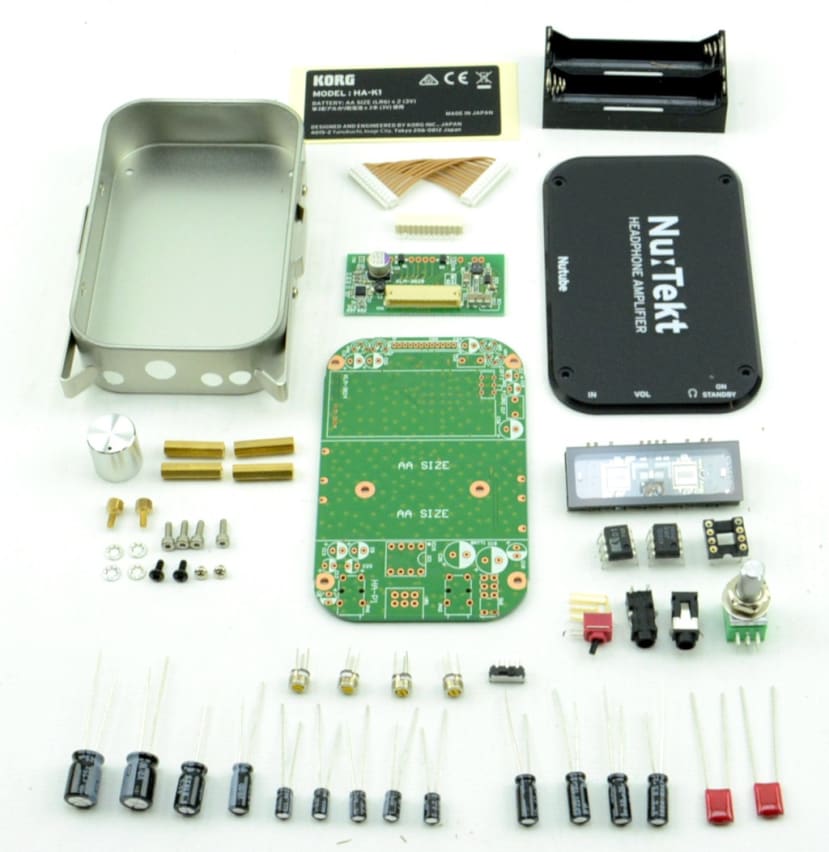
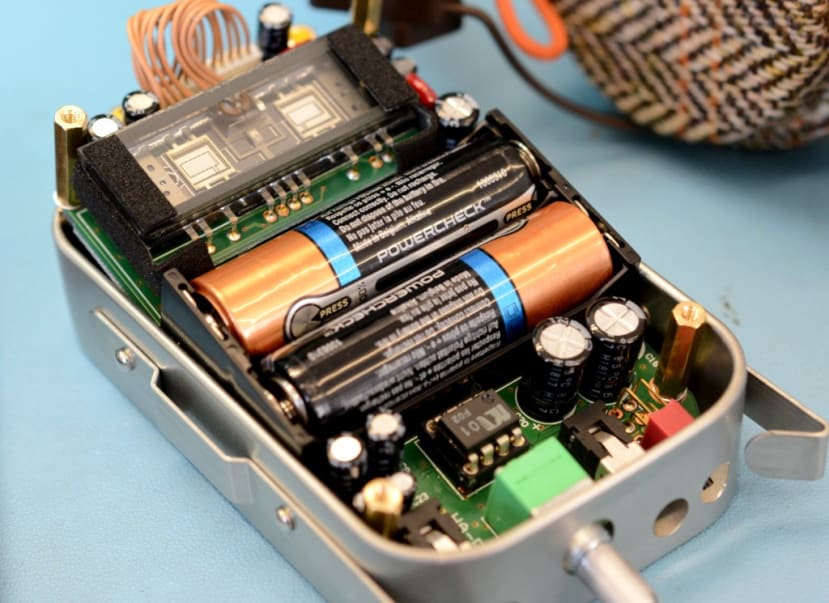
The Nu:Tekt HA-KIT (181-3534) contains everything you need to build the amplifier, apart from the two AA batteries (744-2199) that provide the power.
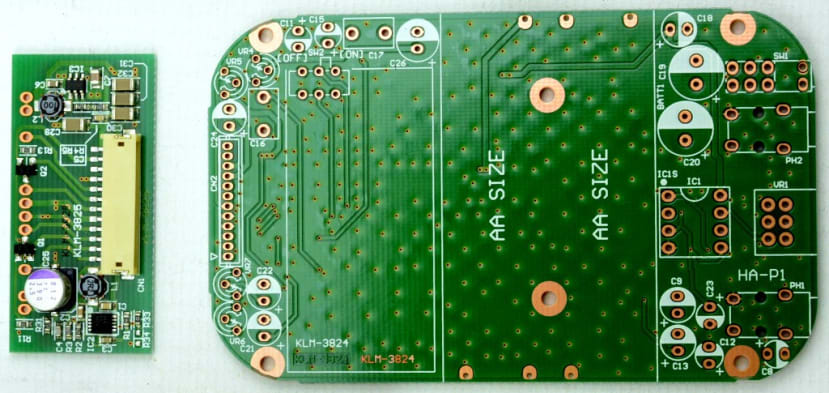
There are two printed circuit boards – the main board and a smaller one that holds the NuTube – as well as a selection of capacitors, some trim potentiometers, an operational amplifier and socket, and all the necessary hardware and connectors.

The main circuit board comes with all the resistors and a couple of the capacitors already mounted. The small Nutube circuit board has all the components pre-mounted apart from the tube itself.
The case is reminiscent of the classic Altoids Tin beloved of electronics hobbyists but has a smoked grey cover so the glowing tube will be visible when it is up and running.
The kit comes with comprehensive and clear instructions on a fold-out sheet and they are also available online on the Nu:Tekt website.

The positions of the the components on the PCB are also clearly marked, so the amplifier quickly started to take shape.
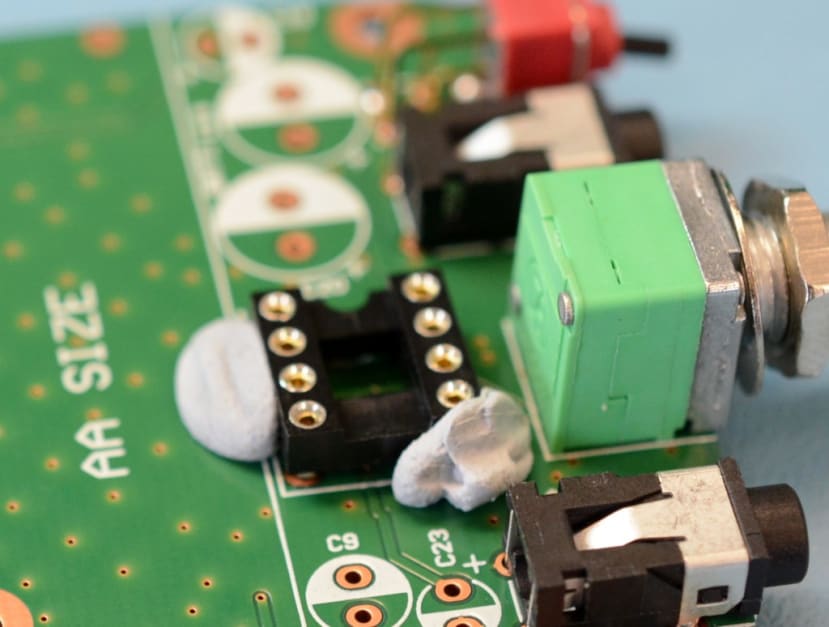
When it came to soldering the socket for the op-amp I held it in place using a couple of small pieces of blu-tac, so that it did not move or drop out altogether when I turned to board over to solder its pins to the board.
The kit comes with a choice of two different op amps — a MUSE01 and an NJM4580 – and there is mention in the instructions of swapping them, although no indication of what effect that would have.

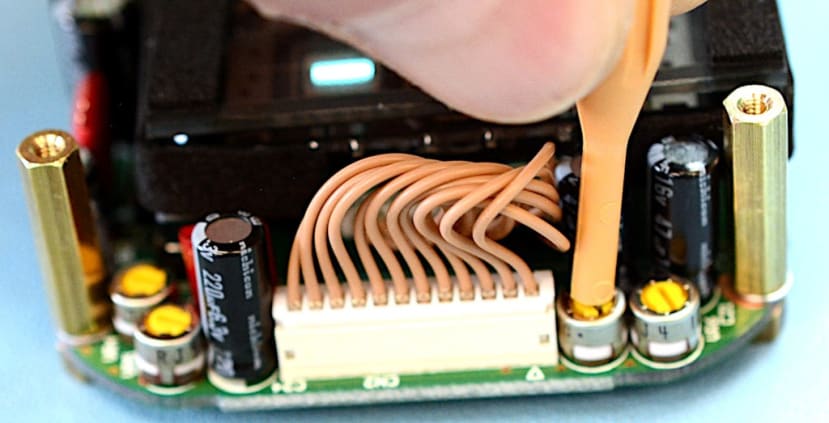
Once the main board was completed, it was time to solder the NuTube itself onto its own “break out” board.

The tube is protected by some pieces of adhesive foam that are applied underneath it and round the edges of the board. Once it is soldered in place, a thicker piece of foam is applied to the underside of the PCB that keeps the components clear of the main board when it is fitted into place. It is then connected to the main board using the supplied cable harness.
Adjustments
The amplifier has two pairs of trimmer potentiometers: one pair for the Nutube bias voltage and one for its anode load resistance. In practice, the first pair adjust the volume and the second the tone. I plugged in a sound source and my headphones, then tweaked the settings until I was happy with what I was hearing.
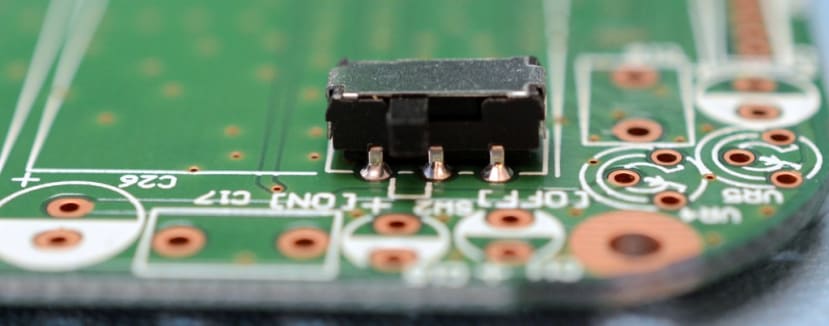
There is also a low-end boost switch that is only accessible with the cover of the amp removed – I set this to on as, even though I was not playing music with heavy bass, I did prefer the sound.
Final assembly
For the final assembly, I needed two Philips screwdrivers, a #1 and a #0, plus a 1.5mm hex key.
As the body of the enclosure is metal it has a sheet of insulation that is fixed to the base inside. Once the stand-offs are fitted to the board, it can be slid into place and secured with two small screws at the tube end. The nut on the volume knob holds the other end in place.

The cover is then secured with four hex socket screws.
Conclusion
This is a neat, comparatively easy kit to put together and a good introduction to the NuTube sound. I like the slightly retro feel to the enclosure, it all feels good and solid once it is put together and the semi-transparent lid revealing the glowing NuTube is a nice touch. I am not sure what the battery life will be like, but the specifications claim approximately 9 hours using alkaline batteries.