Building a Pi Powered Wireless Label Printer
Follow article
 Dave from DesignSpark
How do you feel about this article? Help us to provide better content for you.
Dave from DesignSpark
Thank you! Your feedback has been received.
Dave from DesignSpark
There was a problem submitting your feedback, please try again later.
Dave from DesignSpark
What do you think of this article?
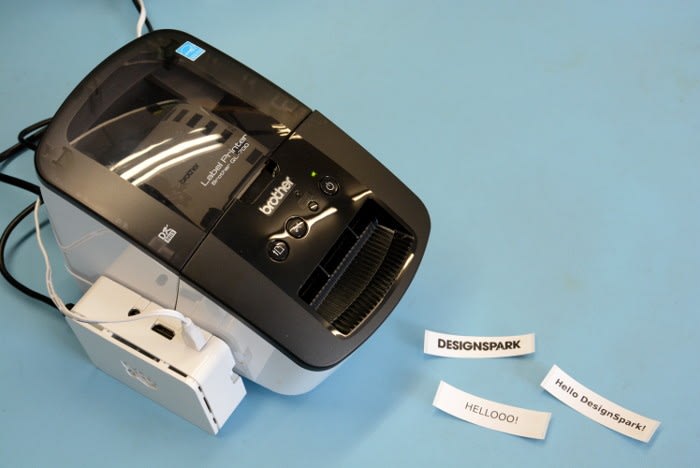
Combining a Raspberry Pi and a Brother QL-700 to create a self-contained wireless label printer complete with an integrated web based label designer.
Every organised workshop needs labels and with the addition of a Raspberry Pi the low cost Brother QL-700 (840-6302) can be turned into a handy wireless label printer with an integrated designer.
QL Label Printers
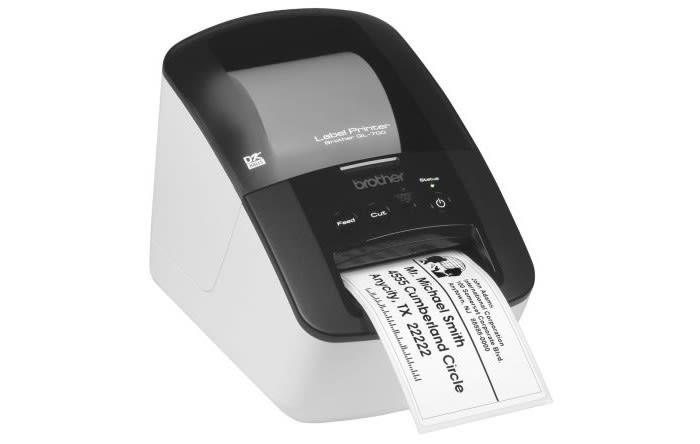
The Brother QL label printers come in various configurations. The QL700 model is reasonably compact and can take various different sizes and types of label stock. Thanks to some neat software from Philipp Klaus, it’s now possible to drive them without needing to have official driver support from Brother — meaning that non-x86 platforms can also be used, such as the ARM-based Raspberry Pi. Which of course is perfect for a bolt-on wireless print server — and more!
Let’s take a look at how we’d configure a Pi to drive the QL-700 via a simple web interface.
Installing Raspbian and dependencies
So first we need to write out Raspbian to a Micro SD card. The Lite variant is perfectly sufficient and highly advisable (no need for desktop software etc). Assuming you used a Linux machine to write out the SD card, once this has completed if you remove and reinsert the card so that its partitions get mounted, we can edit a few files.
$ sudo vi /media/<your username>/rootfs/etc/hostnameChange the hostname to something easily remembered, like “labels”.
$ sudo vi /media/<your username>/rootfs/etc/hostsThen update the hosts file with the same name.
$ sudo touch /media/<your username>/boot/sshAnd create the file that tells Raspbian to enable the SSH server.
Of course, feel free to replace vi with your text editor of choice.
If we now insert the card into our Raspberry Pi and apply power, after a short while we should be able to log in via SSH using mDNS. E.g.
$ ssh pi@labels.localAlternatively, you could just attach a keyboard and monitor.
Next if we update the system.
$ sudo apt-get update

$ sudo apt-get dist-upgrade
And then install the packaged dependencies with:
$ sudo apt-get install python3-setuptools python3-pip libopenjp2-7-dev libtiff5 git fontconfigWireless setup
If you do want to be able to print over a wireless connection instead of wired, you’ll need to also configure the WPA supplicant. If wired Ethernet suits your needs you can skip this step.
To configure the Raspberry Pi to join a wireless network we need to edit a file:
$ sudo vi /etc/wpa_supplicant/wpa_supplicant.conf
And add configuration for the network SSID and passphrase to the bottom of the file. E.g.:
network={
    ssid="MyNetwork"
    psk="NetworkPassword"
}
Following which if we save the file and reboot it should join the network. For further details see the documentation on the Raspberry Pi website.
Brother QL printers Python package

The brother_ql Python package provides the foundations for this project and enables driving QL series label printers without the usually required printer drivers. Once this has been installed raster language files can either be generated via your own programs or from image files using the supplied command line utilities. To install this via PIP we simply enter:
$ sudo pip3 install brother_qlFollowing which we can take a look at the options for the tool which creates language files which are understood by the printer, from image files, by entering:
$ brother_ql_create --helpOne of the nice things about these printers is that they take different sizes of labels, with stock also available as individual labels and on a continuous roll. To list the supported sizes we enter:
$ brother_ql_info list-label-sizesFor details of the options for both of these commands see the GitHub repo.
We had the 62mm wide continuous roll supplied with the printer loaded and so created a PNG file of this width, with the DesignSpark logo centred and a small white border around it
Note that the red background wasn’t present in the image printed and this has just been added to show the image used to scale.
The printer language file was then created with:
$ brother_ql_create --model QL-700 DS_Logo_62mm-wide.png --label-size 62 > DS_Logo.binIn order to access the printer ports we need to be in the “lp” group and we can add the pi user account to this with:
$ sudo usermod -G lp -a piFollowing which it is necessary to log out and then back in again.
Finally, we can print the generated .bin file with:
$ brother_ql_print DS_Logo.bin /dev/usb/lp0With the label printed and length cut according to the size of the image file.
Web service label designer
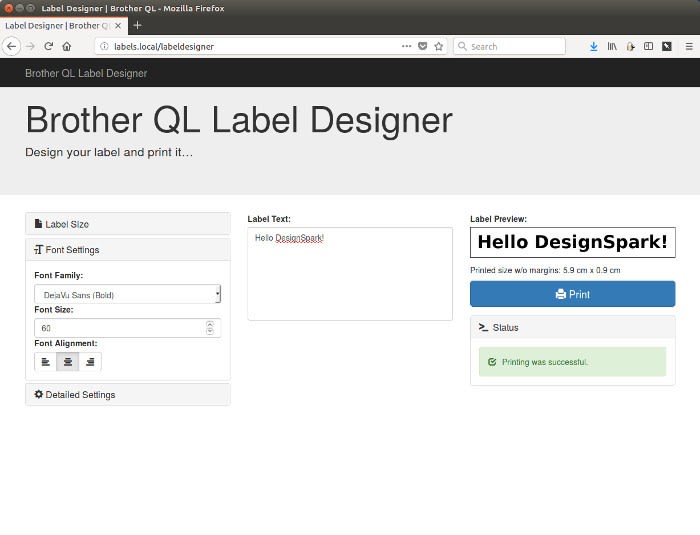
The author of brother_ql has created a very cool piece of software that builds on this to create a standalone web-based label designer, meaning that you can simply point your browser at the Pi, enter some text, set the font and label parameters, and print! To install this we:
$ mkdir src

$ cd src

$ git clone https://github.com/pklaus/brother_ql_web.git

$ cd brother_ql_web

$ sudo pip3 install -r requirements.txt

$ cp config.example.json config.json
It’s then necessary to edit config.json to set the printer model, along with default label size and fonts etc. It’s also worth changing the server port setting to 80 so that you don’t have to remember some non-standard port number to enter as a URL suffice.
Following minimal configuration we can start this with:
$ sudo python3 brother_ql_web.pyPointing a browser at the pi — e.g. http://labels.local — we should get the user interface and be able to enter text and print.

Final touches
If we’d like this to start automatically at boot we just need to edit /etc/rc.local and before the exit 0 line add:
cd /home/pi/src/brother_ql_web; /usr/bin/python3 brother_ql_web.py&Finally, more often than not with something such as this we should configure the Pi such that upon boot it mounts the root filesystem read-only, otherwise we risk filesystem corruption if power is removed without the Pi getting shut down properly. There are various guides that detail how to do this, but one particularly easy solution is to use the rpi-readonly script.
$ git clone https://github.com/ways/rpi-readonly.git

$ cd rpi-readonly

$ sudo ./setup.sh
This does actually make some serious changes and so, as noted in the GitHub repository, it pays to make a copy of the SD card first.