Building an Off-Grid Solar System for a Campervan
Follow articleHow do you feel about this article? Help us to provide better content for you.
Thank you! Your feedback has been received.
There was a problem submitting your feedback, please try again later.
What do you think of this article?
I have wanted a campervan for as long as I can remember. There is a profound appeal about living an off-grid lifestyle and being able to focus on your craft without distraction. For me, my love of writing, engineering and sustainability has helped fuel a growing curiosity that was accelerated by the effects of both the pandemic and the climate crisis. Not long ago I caved and bought an old van to set out and explore what was really feasible in the age of technology. Lockdowns and home-working have shown us all the economies of alternatives and there has never been a better time to embrace this change.
It is my goal in documenting this project to raise awareness of existing alternatives with the potential to build a more efficient and sustainable planet. In this particular article, we will cover the basics of renewable energy through the construction of a simple solar system. The first step will focus on testing a single static solar panel with the eventual goal of installing a full array onto the van in a later article.
System overview and progress VLOG
Parts List
- Solar Panel
- MPPT Solar Charge Controller
- Deep Cycle Leisure Battery
- Mains Inverter
Overview
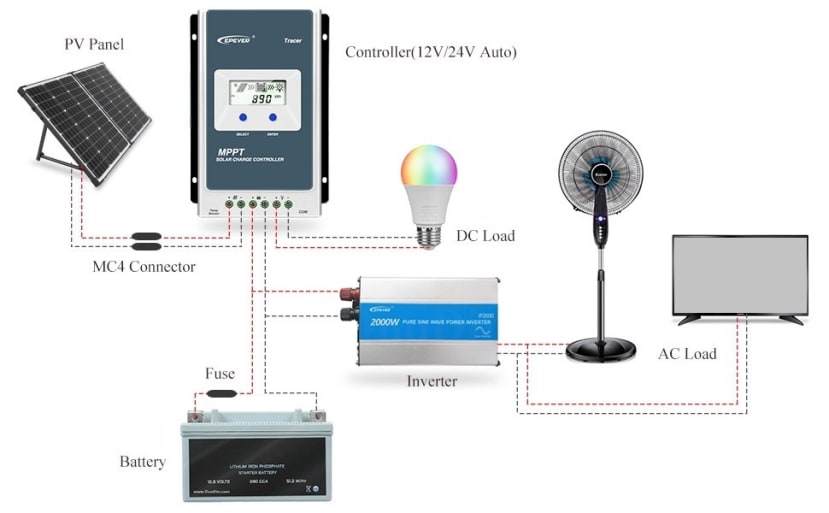
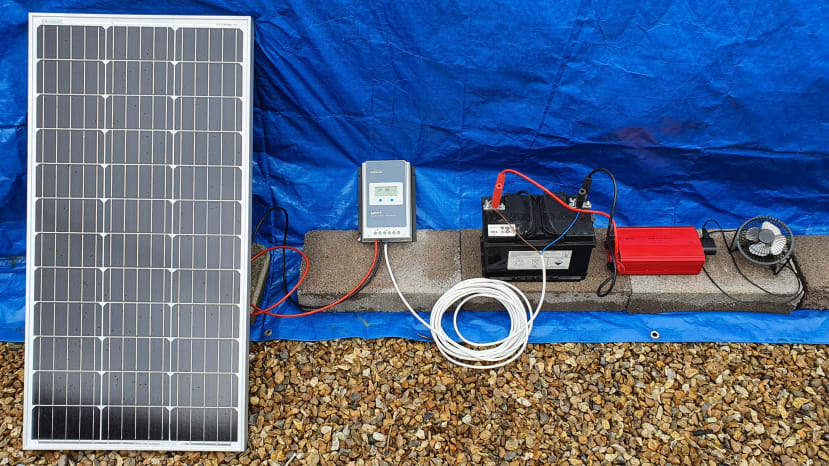
System overview
The appeal of the solar cell as a renewable source of energy is in its simplistic construction as a solid-state technology. The low-maintenance requirements and long-term reliability can be attributed to a lack of moving parts, which makes them especially useful in places where infrastructure is sparse or where small-scale localised power is more practical in remote locations or mobile environments. The classic off-grid solar system consists of four main components which are detailed below.
Solar Panel
The solar panel or array, which generates electrical power proportionally to the intensity of available solar radiation, angle of incidence, temperature and cell efficiency. Solar cells are often categorised into two types, monocrystalline or polycrystalline which relates to the architecture of their photo-sensitive semiconductor structure, with monocrystalline considered superior.
Charge Controller
The charge controller, which is responsible for converting the energy generated by the solar panel or array into power for storage. There are two types of charge controller available, the first being PWM (Pulse Width Modulation) which can achieve conversion efficiencies of around 70% and is considered reliable and cost-effective in small setups. The other controller type is MPPT (Maximum Power Point Tracking) which can monitor and convert fluctuating solar power to battery charge more intelligently to achieve efficiencies of 90% and up!
Battery Storage
The battery storage, which is used to store any electrical energy that cannot be immediately used. Deep cycle lead-acid batteries are often used as they are cheap and reliable but lithium chemistries are becoming more commonplace, especially for mobile environments and other weight critical applications. The battery can be then be used to directly power a range of 12v devices.
Inverter
The inverter, which is used to convert low-level DC from the battery into the same domestic AC that can be found in every household wall socket. This power can then be used to supply a range of household appliances like laptops and kettles. Some more advanced inverters will actually feed into the local electrical infrastructure at a fixed paid rate, but with the fall in government subsidies, there is now more demand for local storage and off-grid solutions.
Building the Solar System
Our goal for this article is to test the concept of an off-grid solar system using a single panel initially with the intention of scaling it into a full solar array later on. To do this we need to connect all the components together and test our system against some expected results and real-world conditions.
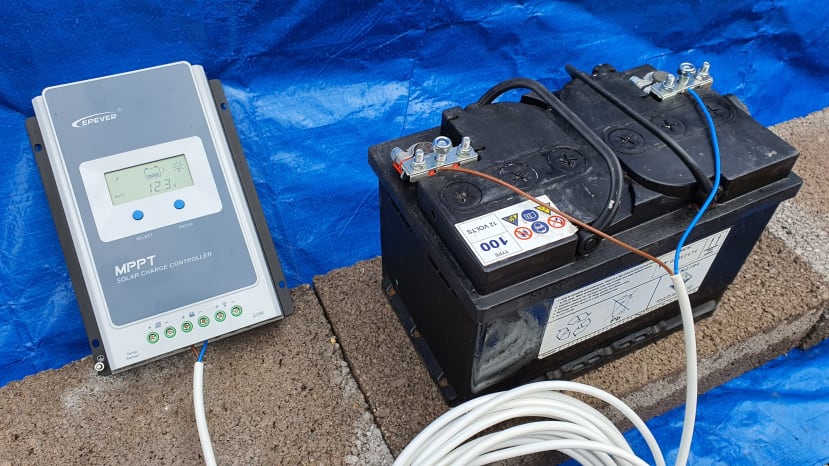
Charge controller connected to the battery
To start we need to power the charge controller by connecting the battery. The charge controller is configured automatically to detect the use of 12v or 24v systems so it is important to initially power it using the intended battery. The storage solution used in this example will be a standard 12v deep-cycle lead-acid battery connected to an MPPT charge controller which will automatically match the voltages of the solar array to the battery in the most efficient way.
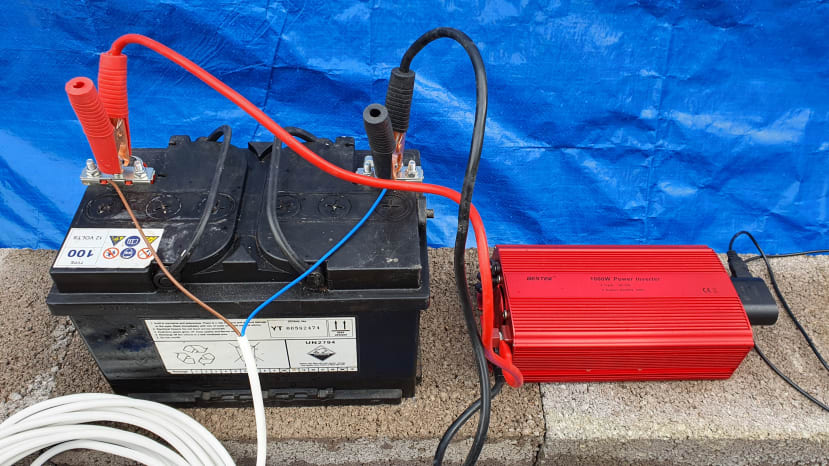
An inverter connected to the battery
The power from the battery alone will limit the range of electrical devices we can run to anything that can operate from 12VDC. However, a lot of domestic electricals like laptops and kettles run on higher AC voltages taken from a domestic wall socket. Therefore, in order to create a feasible off-grid system, we need an inverter to convert our stored battery power to something more useable. Luckily, this is very easy to do and simply a matter of connecting the DC input to the battery terminals and using the mains output socket in the same way as any other domestic wall socket.
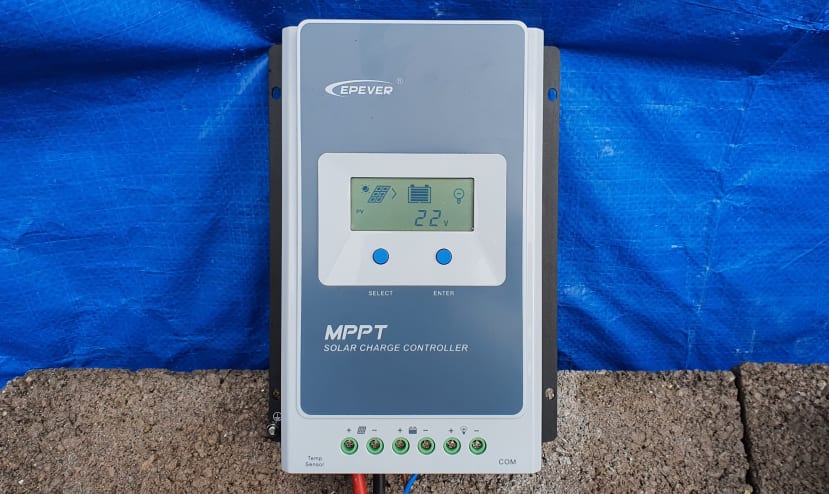
Charge controller displaying solar panel voltage
Finally, we can connect the solar panel to the charge controller and observe the system operating in real-life conditions. The charge controller gives us a range of data to monitor directly from the LCD screen which makes it very easy to measure the performance metrics of both solar and storage. The peak rated power for this solar system is 100W which can be used as a simple benchmark figure to test the overall performance and observe any differences in real-world values.
Fully operational system
It was very overcast on the day of testing which meant I was able to observe the lower limits of the system performance. Despite the extensive cloud cover and mild precipitation, the solar system was still able to generate a reasonable trickle charge into the battery with a steady 15v and 0.6A with the fleeting break in cloud cover revealing encouraging spikes of up to 22v with no drop in current. There was also no perceivable drop in power across the charge controller during testing despite the active regulation of any voltages and current or fluctuating sunlight.
With the success of the single panel system, the next stages of the build will focus on testing the upper limits of the components by observing their performance in direct sunlight and assessing the requirements for safety features such as electrical isolation switches and surge breakers. We will also explore the needs of the system as it grows to include multiple panels and any physical or electrical considerations when mounting it to a moving vehicle.
In Part 2 of this series, I will focus on expanding the system to include multiple panels and explore any considerations required to mount them to a moving vehicle.


Comments