Building an Off-Grid Solar System for a Campervan – Part Two
Follow articleHow do you feel about this article? Help us to provide better content for you.
Thank you! Your feedback has been received.
There was a problem submitting your feedback, please try again later.
What do you think of this article?
I have wanted a campervan for as long as I can remember. There is a profound appeal about living an off-grid lifestyle and being able to focus on your craft without distraction. For me, my love of writing, engineering and sustainability has helped fuel a growing curiosity that was accelerated by the effects of both the pandemic and the climate crisis. Not long ago I caved and bought an old van to set out and explore what was really feasible in the age of technology. Lockdowns and home-working have shown us all the economies of alternatives and there has never been a better time to embrace this change.
In the previous article, we explored the basics of renewable energy through the construction of a simple solar system. Having successfully assembled the basic components, we tested and observed the performance of a single panel with the later intention of building a full solar array. With the initial build process now complete, this article can focus on expanding the system to include multiple panels and explore any considerations required to mount them to a moving vehicle.
Parts List
- Solar Panel x2
- MPPT Solar Charge Controller
- MC4 Cable Assembly
- Deep Cycle Leisure Battery
- Battery Terminal Cable Assembly
- Mains Inverter
- Low Profile Unistrut Rails x2
- M6 Channel Nuts
- M6 Screws
- M6 Washers
- M6 Nuts
- Elastic Sealant
- 3mm Mild-Steel Angle
Electrical Considerations
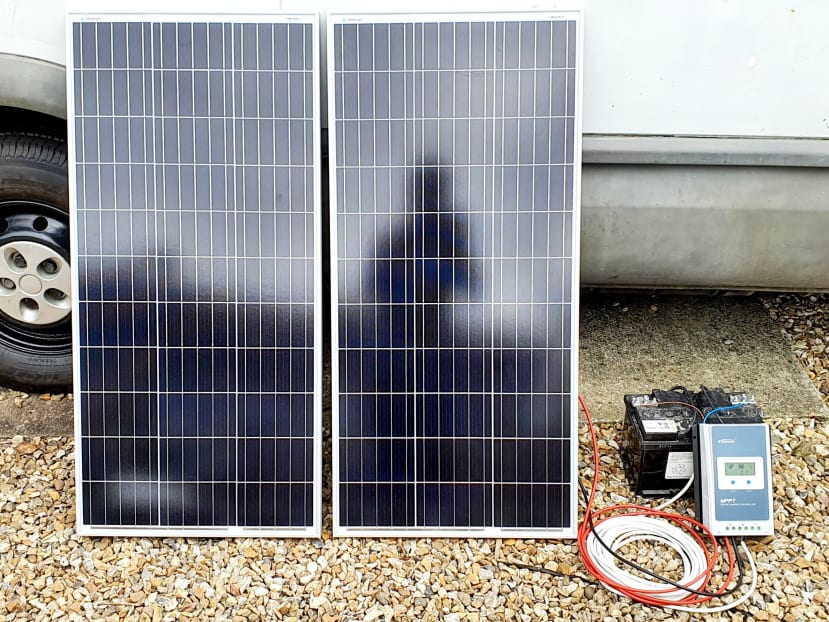
A solar array is considered to be any system that contains more than one solar panel and there are numerous factors involved in its construction. In this project we will be connecting two 100w panels together, so the obvious first question is how this will affect power output? Comparatively to other power sources, we can connect them together either in series or parallel which will naturally have an effect on the subsequent voltage and current levels we observe entering our charge controller.
A series configuration will double our nominal voltage from an expected 18v to 36v which is fairly safe for DC power supplies. This configuration also keeps the current at a sensible level, allowing the use of a thinner wire gauge and incurring lower heat losses, increasing efficiency. However, this can get dangerous as more panels are added, hence a parallel setup may be preferred above a certain voltage threshold. Limiting the array to the nominal voltage is a good way to mitigate any risk of electrocution but will require our charge controller and subsequent components to be rated for higher currents.
As the charge controller used in this project is rated at 100v, and as the voltages will still be within a safe threshold, we will be using a series configuration for this project. The panels can be connected together easily using the standard MC4 male to female connectors which makes this process reassuringly foolproof.
The charge controller is configured automatically to detect the use of 12v or 24v systems so it is important to first connect our battery using the screw terminals on the unit. Once it has detected the battery voltage, we can then use our open-ended MC4 cables to connect the positive and negative ends of the array in the same fashion.
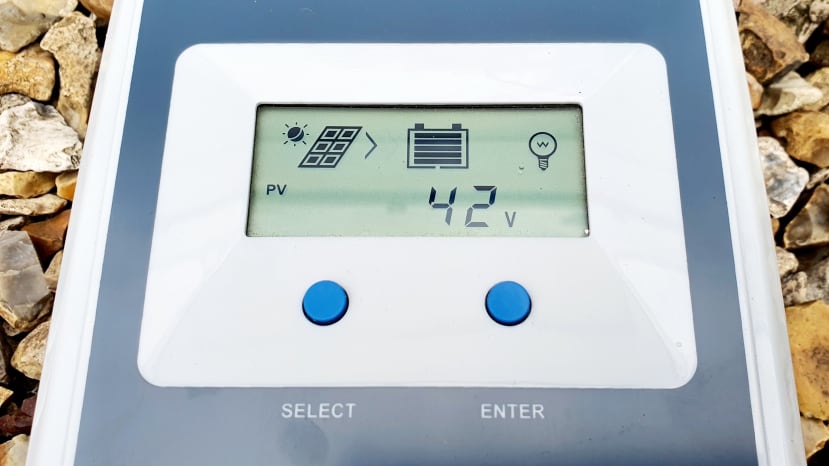
We can start to monitor the voltage and current being produced by our two-panel array using the LCD screen on the charge controller. Even in overcast conditions, the array produces a steady 42v, which is encouraging given the average climate conditions of the UK. However, it is interesting to note that while the maximum power of the array is 200W, the real output is heavily dependent on the capacity of our battery and its current state of charge. Therefore, if we were to use a larger battery in our storage system, we could make better use of the power produced from the array.
With our testing complete we can start to think about installing our array onto the campervan and all the mechanical requirements this involves.
Mechanical Considerations
The mechanical requirements of the solar array are very important where it will be mounted to the roof of a moving vehicle. The top speed of the campervan used in this project is electronically limited to 70MPH to match the UK national speed limit, which means our solar system must be secured sufficiently as a matter of road safety.
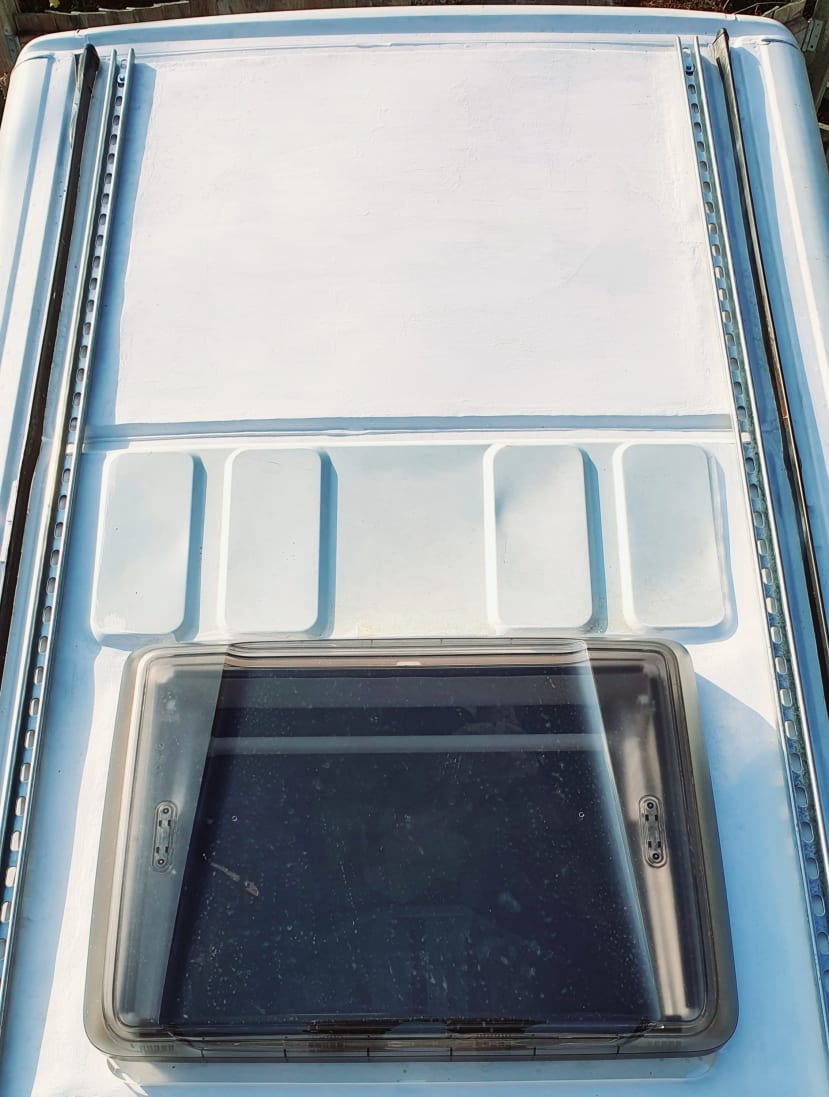
The thin-plate aluminium structure of the solar panels will not be strong enough to withstand this pressure, therefore we need to create a superstructure to secure the array while on the move. To do this, we will mount a pair of Unistrut rails along the length of the roof to improve its longitudinal strength while also providing a reliable mounting system for any external equipment.
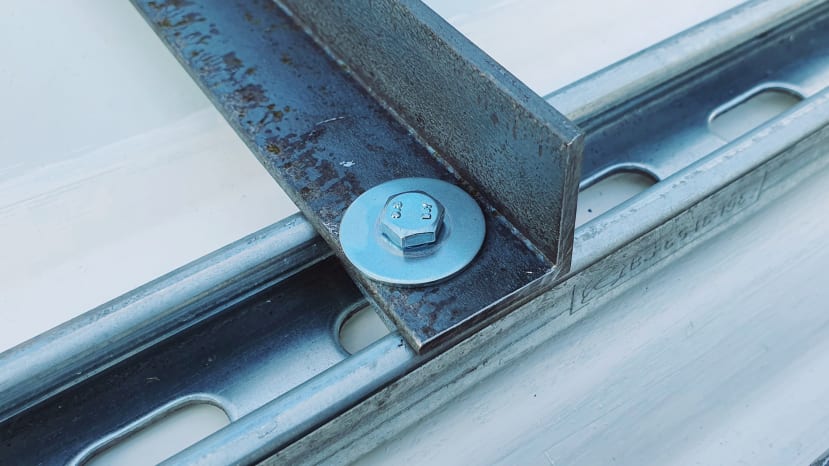
The Unistrut will be mounted close to the load-bearing sills of the roof for added strength and will use M6 screws and nuts to provide adequate purchase. It is extremely important to avoid the use of self-tapping screws as these run a risk of ripping out in strong winds, but instead, use washers or backing plates to spread any mechanical loading across the roof and create an area of uniform strength.
It is also important to protect the roof against ingress and rust once any holes have been drilled, we will therefore be using an elastic sealant to create a strong yet flexible seal around the fixing points which will protect against a broad range of weather conditions. The use of low-profile Unistrut aids in this regard as it is galvanised meaning it will not corrode and look great over a very long period of time.
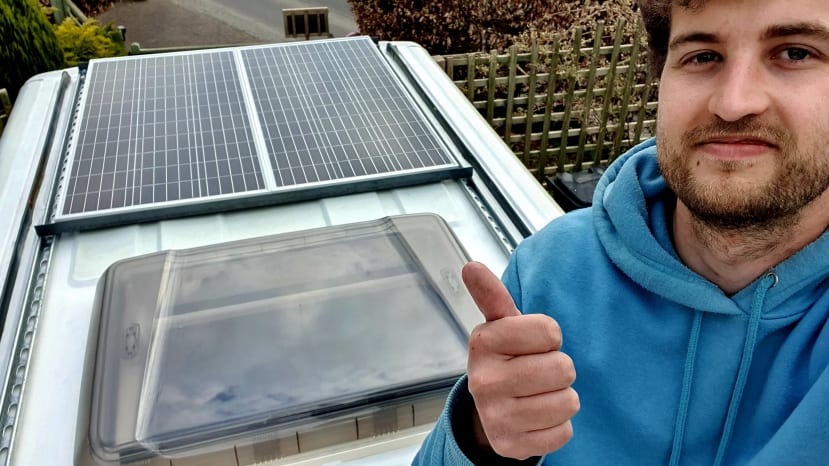
Once the roof rails are installed, we can fit our new solar array neatly behind the campervan skylight using two lengths of 3mm mild steel angle. Once again, we can use M6 screws, nuts and washers to fix the panels to the steel while using M6 channel nuts to secure the array to the roof rails. The metal profile is important in providing the necessary lateral strength to the array while on the move and also helps limit any mechanical deflection caused by strong headwinds and adverse weather conditions.
Job done! In the next article, we look at combined renewables and the application of wind power for sustainable off-grid living environments.


Comments