Build your own Vertical Farm - Part 2
Follow article
 Dave from DesignSpark
How do you feel about this article? Help us to provide better content for you.
Dave from DesignSpark
Thank you! Your feedback has been received.
Dave from DesignSpark
There was a problem submitting your feedback, please try again later.
Dave from DesignSpark
What do you think of this article?
In the previous article, we explored the principle behind vertical faming technology, what it is, the driving factors behind its development, and how it could play a role in future sustainability. In this respect, we wanted to test the viability of building our own miniature vertical farm using off the shelf components, and explore the merits and potential challenges of this technology in the future.

We started by visualising our layout in DesignSpark Mechanical and used the dimensions from the CAD model to build our superstructure out of aluminium and wood. We ultimately decided on a two-level vertical farm design with a third level to eventually house the electronic components that will include any controllers, automation equipment, sensors and most importantly, our LED grow lights, all of which will be the focus of this particular article.
Video
Parts list
- Würth Elektronik Lighting Development Kit (210-8068)
- Würth Elektronik Sensor Feather wing (222-0849)
- Würth Elektronik Horticulture Blue LED 3535 SMD (176-6242)
- Würth Elektronik Horticulture Red LED 3535 SMD (176-6244)
- Adafruit Feather M0 Express (124-5520)
- OKdo ROCK CM3 Single board computer (249-3155)
- OKdo ROCK CM3 IO Board (256-4697)
- RS Pro cooling fans (668-8839)
- RS Pro cooling fan covers (737-3976)
- Arduino Uno (715-4081)
- Seeed Studio Relay Shield (174-3234)
- Submersible Water Pump (763-2538)
Design Mentality
In the interest of scalability, our miniature vertical farm project will focus on the core elements of the technology, making best use of both ambient climate conditions and artificial growing implements to grow our prospective crops. It is important to note that startup costs and volatile energy process are the biggest threats to the viability of vertical farming and therefore we will take particular care to not overengineer our system while paying close attention to the energy efficiency of our farm.
It is also worth noting that the threat of volatile energy prices is purely a symptom of legacy energy infrastructure and while prices are projected to fall with the growth of renewable energy, it is worth maximising the energy efficiency of our system now so as to give it the best chance of success now and in the future. With this in mind, the next section will pay close attention to the operation of the individual subsystems including irrigation, environmental monitoring, and most importantly lighting.
Horticultural Lighting

Würth Elektronik Lighting Development Kit – Horticulture LED Panel
For our vertical farm build, we will be testing the specially designed horticulture LED panel from Würth Elektronik, that has been taken directly from their lighting development kit (210-8068) . This board will give us direct control over the energy efficiency of our farm by allowing us to program the specific light spectrums and intensities that our plants receive over the growing period.
There are three horticultural light spectrums to choose from including far red, hyper red and deep blue that provide targeted light perfect for photosynthesis and the different cycles of farming. These channels can be programmed in different ratios in what is known as the light recipe which can be tuned for the different stages of plant growth. There is also an additional white light channel.

Würth Elektronik graph detailing the useable light spectrum for plants

Würth Elektronik graph detailing the available LED spectrums
Using targeted light spectrums will massively increase the energy efficiency and efficacy of our farm by only delivering the light spectrums that are optimal for plant growth while not wasting energy on any unusable spectrums. Using the targeted LEDs from Würth Elektronik we should therefore be able to maximise our gains while minimising our energy footprint.
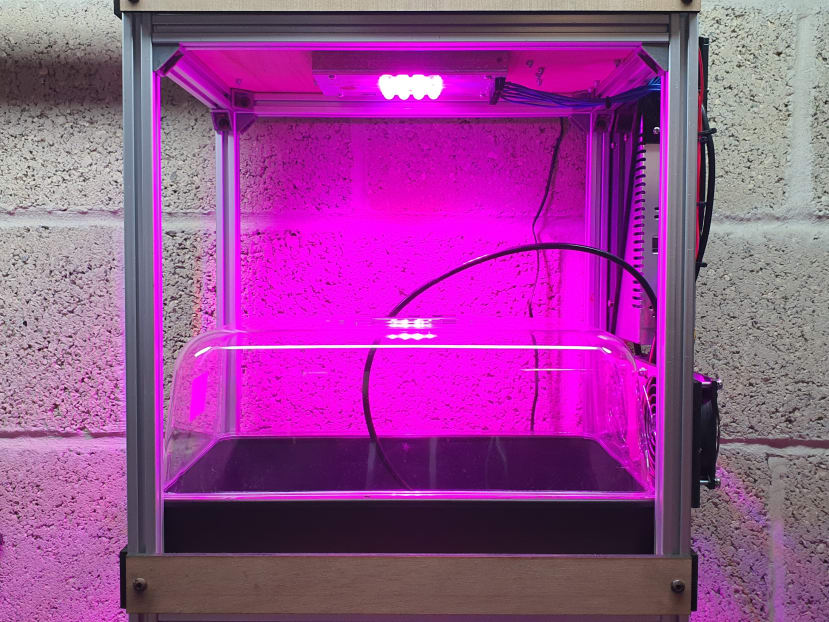
Testing the Würth Elektronik horticulture LED panel over one of our propagator chambers
Having assembled our superstructure in the previous article, we can now mount our horticulture LED panels above our two grow levels and power the four LED channels with the supplied cables. We can then control the specific intensities of four optimised light spectrum channels using the MagI3C multi colour LED driver that can be programmed over Bluetooth low energy using the Würth Elektronik WE illuminate smartphone app.

Würth Elektronik MagI3C Multi Colour LED Driver
The MagI3C LED driver board allows us to precisely and efficiency regulate the power delivery to our LED grow lights, using four programmable PWM channels to control the intensities of each targeted colour spectrum where the onboard Bluetooth adaptor can be used to set the duty cycle of each channel from a smart device. There is a selectable 15v DC regulated supply for short strings of LEDs but as we have connected our two horticulture LED panels in series, we will be using the full 48v DC from the mains adaptor supplied with the lighting development kit. This combination of flexibility and efficiency allows us to reduce our energy consumption and thereby combat the biggest challenge of vertical farming in its current state of development – the cost of energy.

Testing the grow lights with the dedicated WE illuminate app
Programming the lighting on our vertical farm is then simply a matter of downloading the Würth Elektronik WE illuminate app and finding our farm as a Bluetooth low-energy advertisement.
Environmental Monitoring
While it was tempting to have each level of the vertical farm as its own enclosed microclimate with its own environmental monitoring and control subsystem, in practice this would be unrealistic, costly and actually not representative of most full-scale vertical farms.
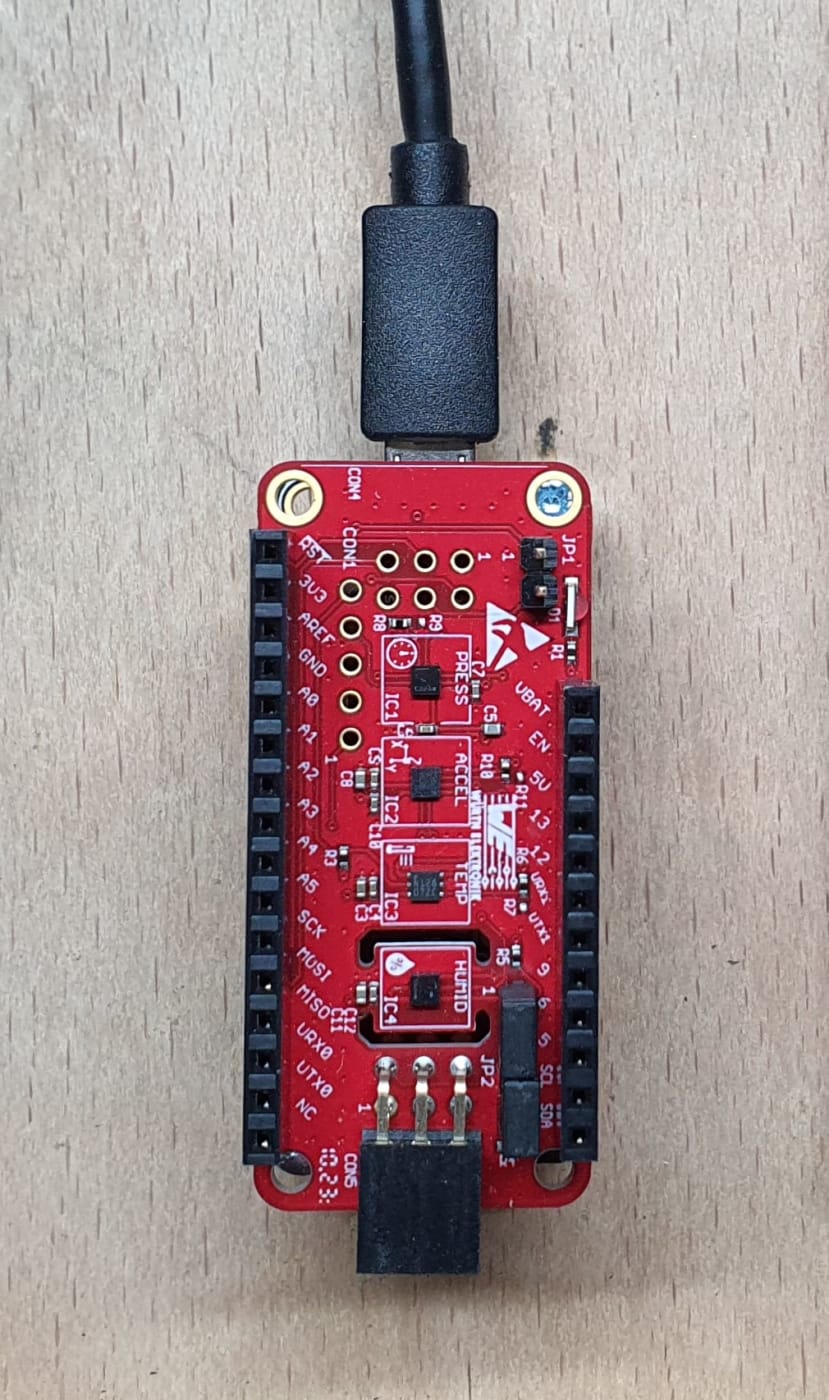
Würth Elektronik Sensor FeatherWing
Instead, we will be monitoring the ambient environmental conditions using the Sensor FeatherWing from Würth Elektronik, which can monitor the temperature, humidity and pressure surrounding our growing environment using three separate sensor chips, as well as an accelerometer chip if we ever needed one. This environmental data will be used to inform the automation processes of our farm such as cooling and watering so as to maintain a more ideal growing environment for our plants.
The Sensor FeatherWing uses a standard Adafruit feather footprint, where the MCU board in this case is the Express M0 which will be used to read data from the wing and periodically send it over USB to our central controller. Programming the FeatherWing is a straightforward process, as there is a great deal of example code on the Würth Elektronik GitHub that can be imported into Visual Studio Code and programmed like an Arduino. See the Würth Elektronik GitHub here.
The full project code can be found on my GitHub repo here.
Central Controller
The brains of the farm will be based around the ROCK CM3 (249-3155) single-board-computer and IO expansion board from OKdo, which will handle all our processing and interfacing needs. Basing our application on the Python scripting language on top of a Debain Bullseye distribution allows us to build high- and low-level processes, whether this be remote connections over local Wi-Fi networks, or basic serial exchanges over USB. The IO board also has a more industrial feel over other single board computers given its 12v DC power socket as well as connections for a PCU, PCIe cards and SATA devices, which lends itself well to more industrial, or in this case, agricultural applications.
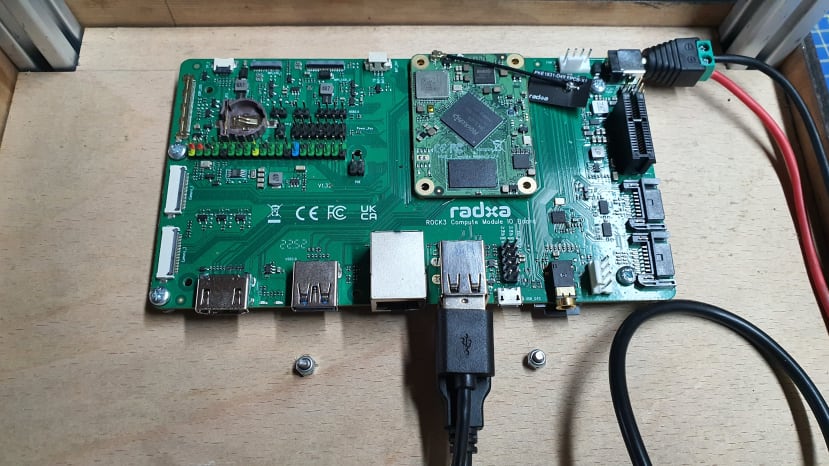
Testing the ROCK CM3 and IO board from OKdo
The CM3 IO board is powered using an upcycled 12v 3D printer power supply, that in turn powers our peripheral devices over the USB ports on the IO board. Our Python script is configured to start on boot, where it will begin listening for environmental data coming from the Sensor Feather wing over one of the USB serial ports. This data will include temperature, humidity and pressure, where our Python script will then compare the dataset against a series of default maximum values. These values will determine the operating threshold for any automation tasks but can be reprogrammed remotely using the onboard Wi-Fi adaptor to establish a TCP/IP connection over the local Wi-Fi network.
These tasks will include the operation of both the 12v cooling fans and the timing of the water pump and will be dictated by command strings sent over another USB port connected to our Arduino relay module. This basic automation capability is fundamental to vertical farming and allows our plants to be kept in much more optimal growing conditions than would otherwise be possible, it also allows any user to monitor the farm remotely and fine-tune any parameters as the farm develops.
The full project code can be found on my GitHub repo here.
Automation Equipment
Lastly, the outputs of our farm are driven by an Arduino Uno (715-4081) and an accompanying relay shield that switches our 12v fans and water pump on and off in accordance with the messages received by the central controller over USB. The Arduino Uno interprets these messages and toggles each relay with 5v logic which in turn toggles an isolated 12v supply that is needed to power our outputs. There are currently two relay channels in use, one for the circulation and cooling fans which turn on if it gets too hot or humid, and the other for the water pump which responds to a programmable timer.
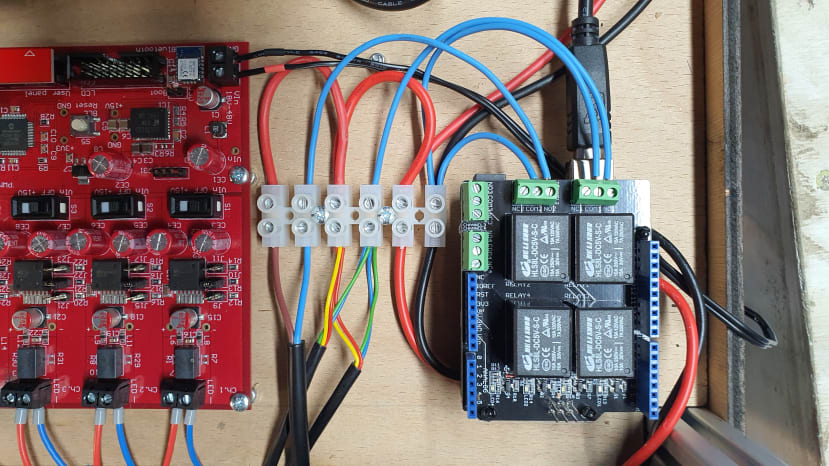
Assembling the relay board and switchgear
The water pump is designed to be submerged in a reservoir of water, supplying both the bottom and the top growing levels of the farm periodically. To avoid splashing, and to emulate the conditions of a proper hydroponic setup, I am using a bottom watering method which should provide the correct level of water saturation to the soil through capillary action while also promoting the growth of strong roots. I will also be using propagator lids during early growth stages or during colder months to promote heat and moisture retention in the soil.
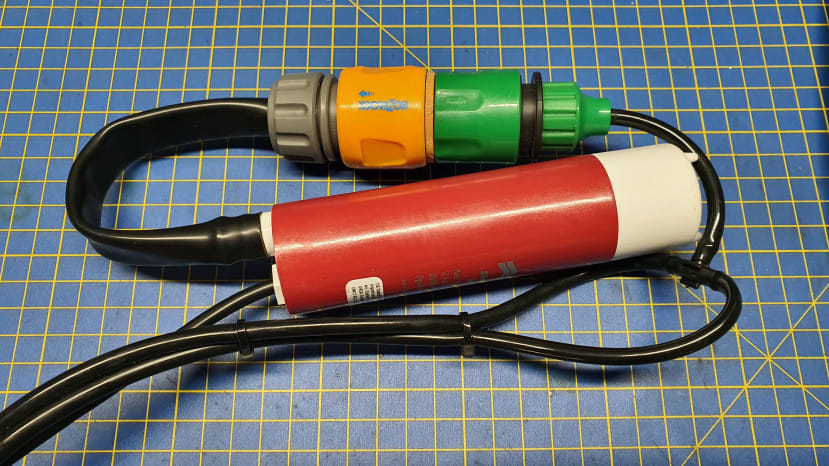
Submersible water pump assembly
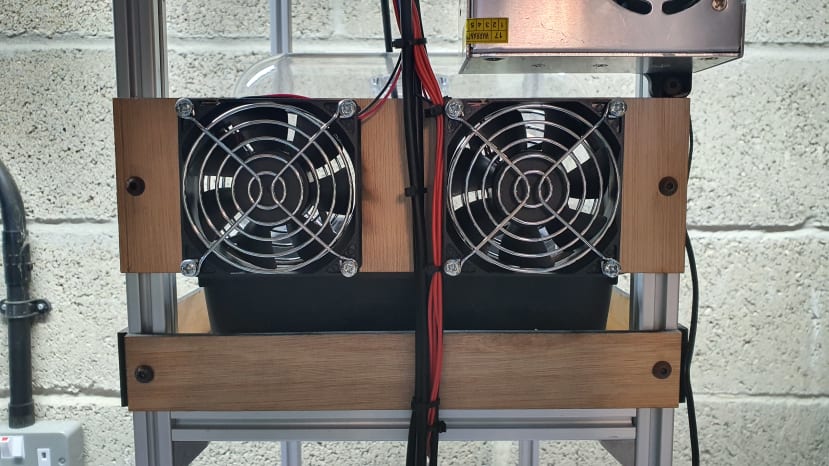
Cooling fans assembled and wired
The cooling fans are switched on and off in accordance with a programmable temperature and humidity thresholds, this is to minimise any heat stress the plants may suffer during the warmer months of the year, in addition to providing adequate airflow that allows the plants to breathe better.
The full project code can be found on my GitHub repo here.
Conclusion
With the structure and electronics of our vertical farm now complete, we can finally focus on the exciting process of attempting to grow something. Obviously, there are a lot of variables with plants, and having now spent a fair amount of time building a two-level vertical farm, the level of complexity required to automate and fine-tune the growing process is apparent and has given me a respect and further curiosity for the technology. In the next article, we will be picking out our plants, determining light recipes, and gauging the success and subsequent accessibility of miniature vertical farms.
Comments