Vertical Gardening, Low To Medium Complexity!
Follow article Dave from DesignSpark
How do you feel about this article? Help us to provide better content for you.
Dave from DesignSpark
Thank you! Your feedback has been received.
Dave from DesignSpark
There was a problem submitting your feedback, please try again later.
Dave from DesignSpark
What do you think of this article?
Tending plants can be a lovely activity, whether purely for pleasure, to brighten up a windowsill or to perhaps grow some low food miles produce. It’s a great feeling to (hopefully) keep a plant alive from seed to flower or crop. There are so many approaches and schools of growing that it’s hard to keep up. One area though, vertical gardening, seems set to stay as an attractive idea for many. The underlying premise is simple enough, instead of the common approach of taking a flattish area and creating a bed for plants in rows, you create a structure to grow plants in vertical columns. There are a few benefits to this but the appeal for many people is that it makes better use of a limited floor area. As such it’s a great approach for those with only a small garden, or balcony, or those with no garden and only a windowsill. Glancing at the complex end of the vertical gardening scene there are some amazing complex systems that really maximise a given yield for a given area. Often these systems deploy hydroponics where plants' roots are suspended in a flowing water-based solution which has the correct regime of nutrients added and may also feature IoT style monitoring with connected sensors sending system information to the gardener/farmer via website dashboards. At even higher complexity you can find aquaponics systems where fish are held in a tank and excrete nutrients that the plants absorb in turn cleaning the water for the fish, an elegant balanced solution but quite complex to set up at home.
In this article, we wanted to look at some simpler low to medium complexity ideas for vertical farming or gardening that are a more approachable starting point for people wanting to have a go. Perhaps the simplest of all ideas is the humble shelf! If you have a well lit windowsill you can simply place small plants in pots on the windowsill and then create a shelf over them and place more plants on top. A slight disadvantage to this is that you may reduce the light available to the plants under the shelf. You can of course mitigate this a little by perhaps using a glass shelf, or a clear piece of acrylic to allow the light through, or you might consider researching plants that require a little shade to grow on the lower levels making use of the environment you create.
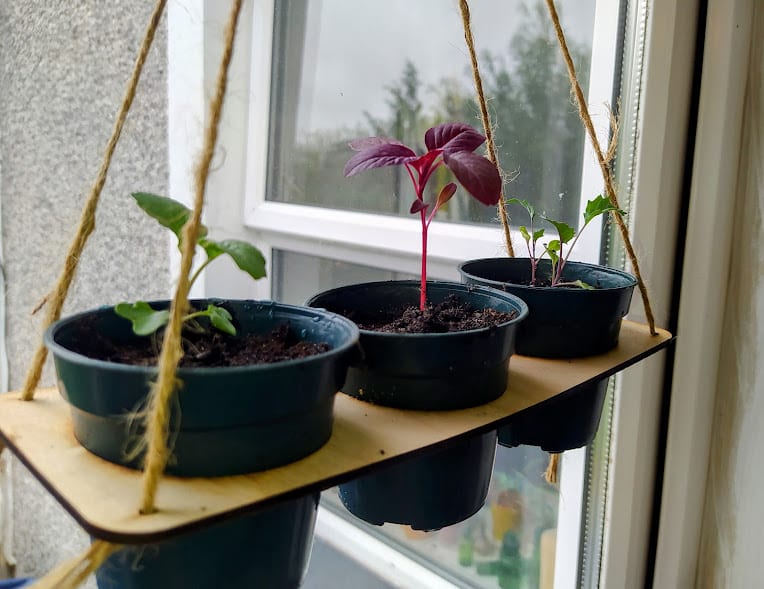
If you fancy a simple woodwork project, or if you have access to a laser cutter, a neat solution for using windows without a sill is to create a hung shelf. You can use your imagination for this but we made a simple rounded corner shelf with three large holes into which you can insert plant pots. We then added four corner holes and tied in two loops of garden twine. With these small 65mm diameter pots we’ve found that it will securely stay attached to a window hung from a small plastic suction cup hook. An added bonus of this simple system is that the hanging loops also double as a carry handle so this is a great way to move small plant collections around or to make a portable plant-based gift for someone short of growing space.
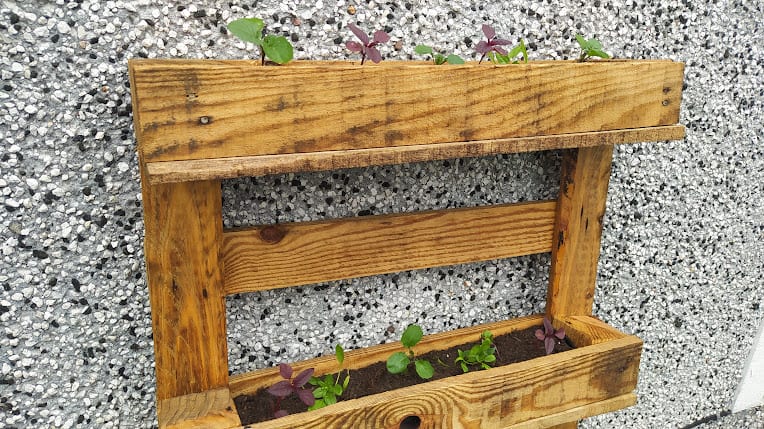
Stepping up the complexity a little is a slightly larger vertical garden idea that reuses or upcycles small pallets into a useful growing space. We think this vertical garden is perfect for those who only have a small outdoor area or a balcony. Keeping an eye out for pallets, often seen outside companies on business parks, often yields pallets that are perhaps a little too large to slip into the average vehicle but on occasion, smaller pallets can be found such as the one we found for the basis of our build. Larger pallets can also be trimmed with a saw so that you cut on one side of the centre blocks to create a similar small pallet to the one we used. You’ll either need one small pallet and a few pieces of scrap wood, or if possible one pallet to act as the body of the build with another pallet you can prise apart as a wood donor.
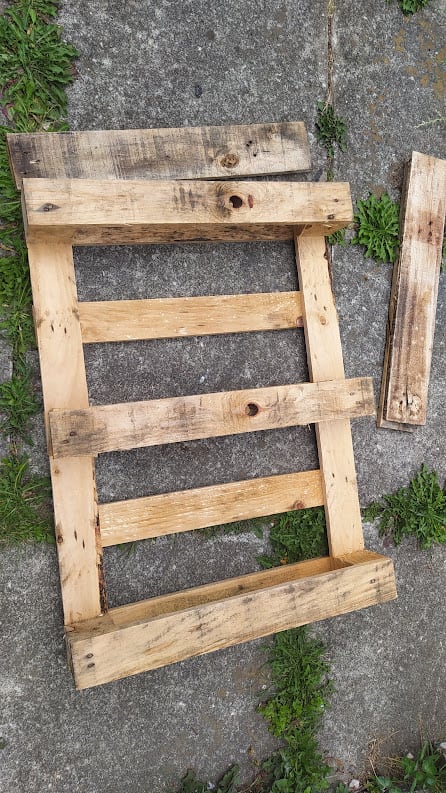
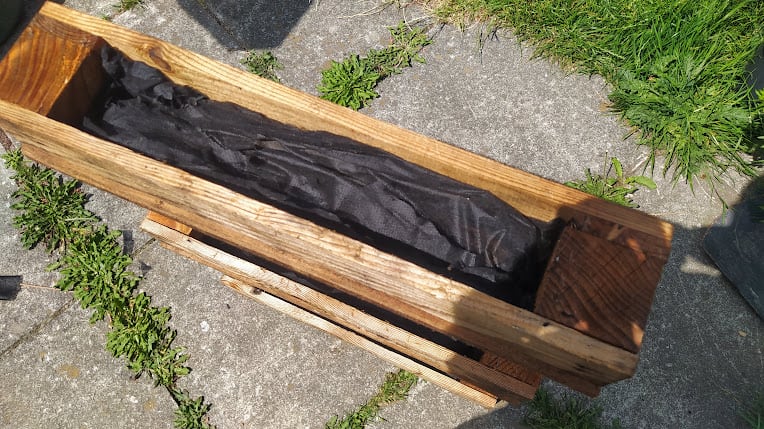
The build is straightforward, we’re going to create small growing beds in each of the 3 pallets “feet section” that would be the section of the pallet on the ground when it was loaded with goods. Standing your pallet on one edge measure and cut a piece of your scrap timber to fit under one side of one foot section to create a base for the growing bed. Don’t worry if you have a huge gap due to the size difference of your timber, that’s actually a good thing as you need some of the base to be open for drainage or else the growing bed will become waterlogged. Continue to make a base for each of the growing areas on your pallet. With this done we quickly painted the project with some wood preserver, we made sure to then leave the project to cure for a few days to ensure that the preserver was fully fixed into the wood and would not leach into the soil. The next task is to line the growing areas with barrier matting. Barrier matting is a cheap material sold in most garden centres or DIY stores and can be used for a variety of tasks, commonly for placing overgrow areas stopping weeds from getting light but allowing water through to keep the soil in good condition. We’ve used the barrier matting to line the grow area bases. We’ve actually built a couple of these pallet vertical gardens and for the earlier attempt, we ran the lining out of the growing area and over the sides. This is a bit overkill and doesn’t look great as it’s hard to get the outside edge looking neat, it’s better to just line the base of the growing area with a couple of layers of the matting. We used a staple gun to make sure it was staying in place. Our pallet had a couple of knot holes in the sides of the grow areas, we simply patched over it on the inside with a couple of small pieces of the barrier matting stapled in place.
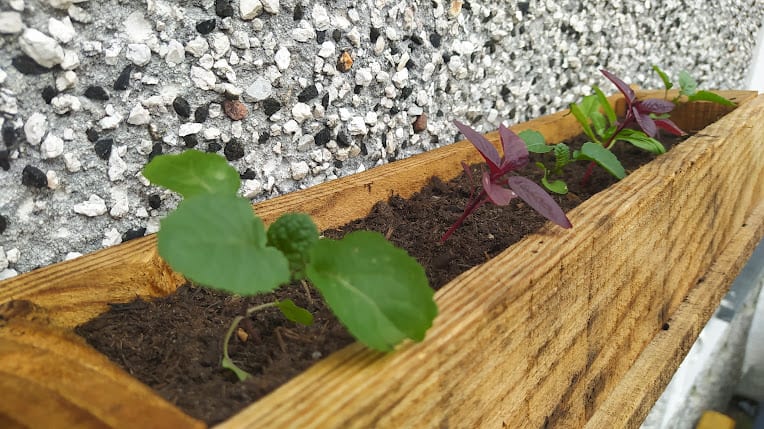
Finally, with that done we just need to fill the three grow areas with some compost and either sow seeds or transplant some seedlings to the beds. As the back of the unit is made from wood there are plenty of options to screw this to a wall, cable tie or strap it to a balcony railing, or indeed you can screw two short sections of wood across the base at 90 degrees to the pallet to create feet to make the garden free-standing. We’ve found that these little recycled pallet gardens have some of the advantages of raised beds, the grow areas are off the ground and away from any potential near frosts, the upper levels seem less attractive to slugs and other plant predators and also, they are great for people to garden if they have some mobility issues as you can raise them up to a height that makes them accessible.
If you have a little more budget and perhaps less access to a well-lit, or outdoor spot there are lots of interesting designs for indoor vertical grow areas that include lighting systems. These can be a good compromise for those seeking a good growing solution for small salad crops, or micro greens but who perhaps don’t want to get involved in the full complexity of a hydro/aquaponics system in their home. A great design is the Quarter Metre Farm which was a project undertaken in Bangor Universities Pontio Fablab. The design brief was for a simpler home system that costs less than £300 to build.
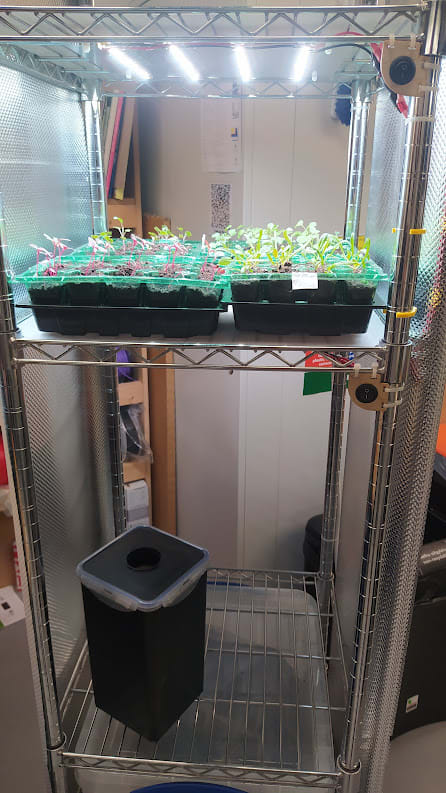
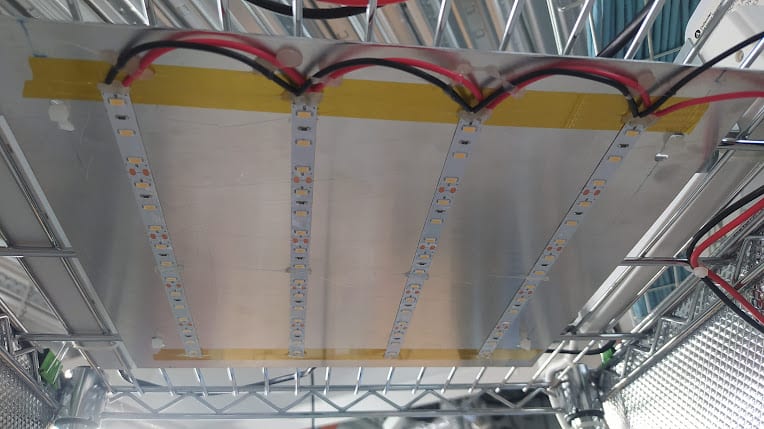
The main structure is a corner shelving unit made out of stainless steel. It has re-positionable shelves and is mounted on castors which means it’s pretty easy to move around and position. Each shelf underside is fitted with a custom-made LED panel which is made from 12V LED strips cut to length and soldered together. The LED strips are self-adhesive and are mounted onto a square panel of thin aluminium sheet. This adds rigidity and structure to the lighting panels but also acts as a heatsink, though it’s fair to say the LED are fairly efficient and don’t waste much energy through heat. Wiring the LED strip sections together is a simple soldering job and the cable management and a little reinforcement is applied with some kapton tape and some hot glue.
The shelving can be covered in some thin reflective foam insulation material, the type of stuff people might use to slightly insulate a campervan or garden shed. In this instance, it’s more of a use for enclosing and reflecting light back in and around the shelving system to maximise the light available to the plants whilst minimising the amount of light in your home. These panels are simply cut and attached using binder clips so can be adjusted and or removed whenever needed.
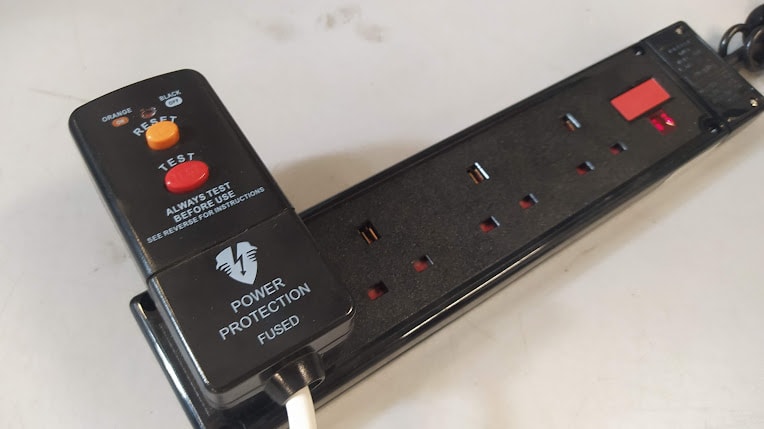
Each panel is wired up and connected to a 12V power supply which in turn is plugged into a mains timer plug all of which is plugged into an extension socket mounted on the top shelf of the unit. This makes sense to keep the power and plugs above the shelves where water may be present but equally, it was great to see the Quarter Meter Farm has a RCD plug at the input end of the power supply system, a cheap but essential safety addition to any build where water is near.
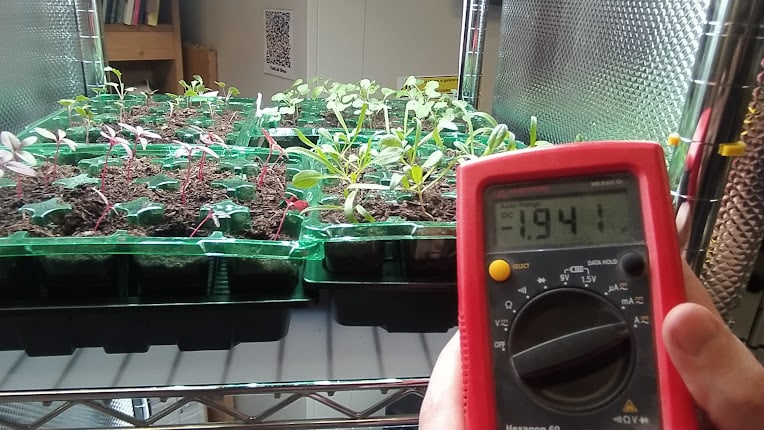
On the 12V side the wiring is all using lower cost auto mobile accessory grade wire and connectors rated for 10 amps, these are again affordable and easy to work with and well specified for the small amount of power the LED units draw. Plugging in an ammeter the whole lighting system is pulling just under 2amps. As to the LED’s themselves the project avoided expensive horticultural branded LED’s but looked for LED’s that are closest to natural light that plants need. One indicator of this is an LED’s colour rendering index (CRI) value. The CRI value is a value between 0 and 100 and the higher the value to 100 the more closely the LED light compares to the visible spectrum of sunlight. Another value of interest is the K value of a given LED strip. The K value refers to the colour temperature of the light emitted and daylight has a colour temperature of 5600K. This is referred to as cold light and is considered good light for vegetative growth. As such the LED strip selected had a high CRI of 95 and was 5600K. Growing salad leaves or micro greens most systems want to have the light timing to a cycle of around 18hrs on and 6 hours off, of course, if you want to minimise costs and have a suitable location you can always use natural light for the majority of hours placing the unit next to a window but augment the day length using the timer to switch on the LED panels for the remaining time.
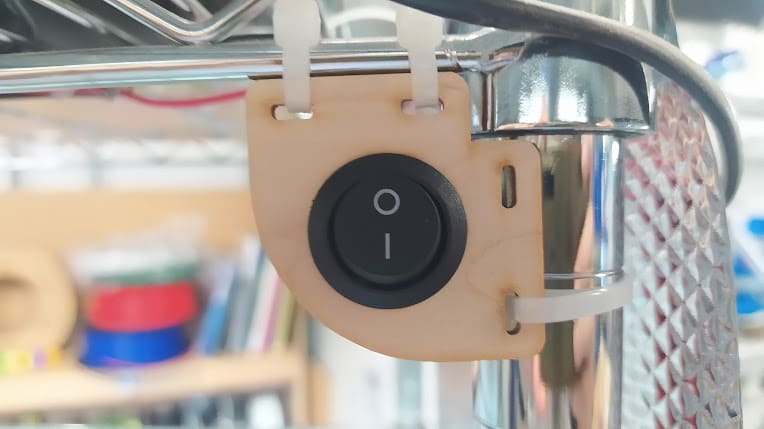
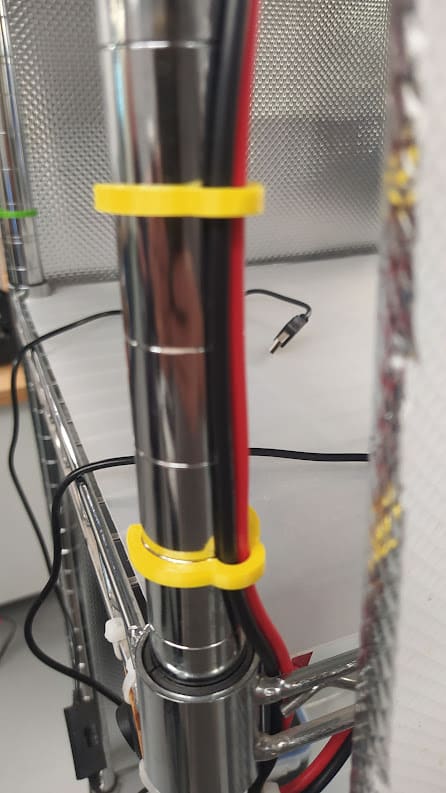
The attention to detail on the Quarter Metre Farm is excellent, each shelf is switchable, which is useful in terms of efficiency if you have some shelves without crops you can turn off the LED’s. The neat switches (793-2563) are panel mounted in a small laser cut plywood panel which is cable tied neatly to the shelf edge. Dotted around on each of the units legs are lovely 3D printed PLA (832-0309) cable clips retaining and routing the cables cleanly. All in all it’s an excellent and efficient build at a scale that could fit in most homes and could provide delicious healthy veggies all year around.
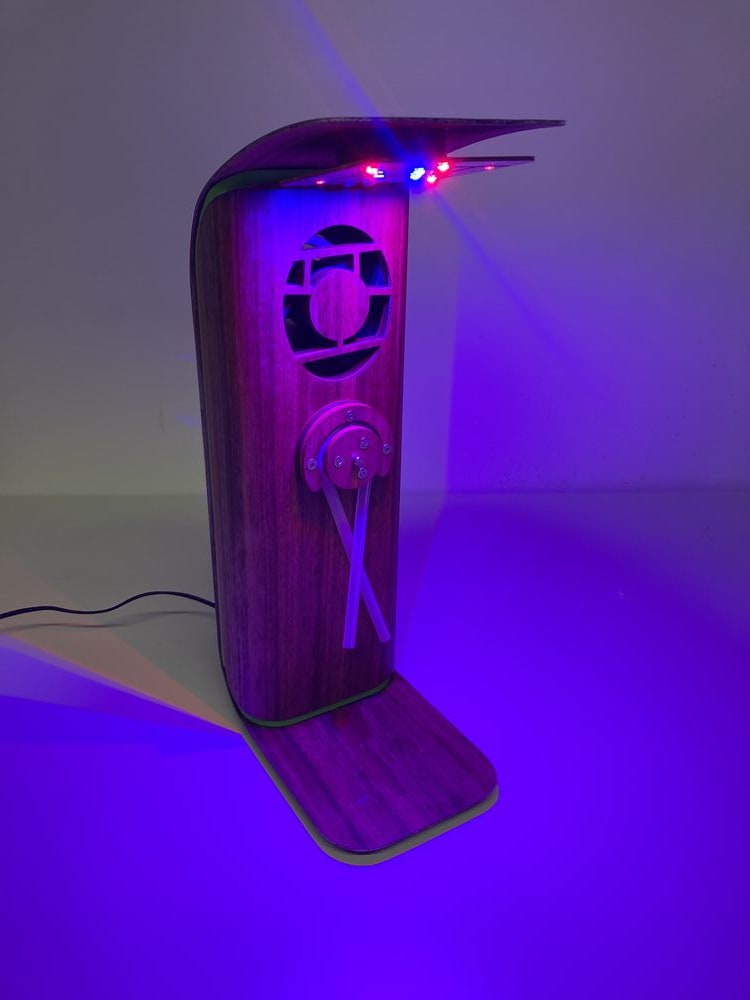
Finally, whilst talking to John Story at the Pontio Fablab we noticed another amazing small grow system. This tiny tabletop system was a project for the Fablab Fab Academy program and John really went to town with some lovely design and engineering. The system uses a bespoke array of LED’s including a mixture of far red, red (215-1729) and blue (215-1722) . John has also designed a small pump driver board and a laser-cut peristaltic pump automated watering system. The unit itself is a breathtaking combination of 3D printing, laser cutting and DIY composite work. Whilst John would admit this is very much a passion project and technical overkill for a system to support one small plant, it is a beguiling and inspiring object and would look amazing on any table. Everything is detailed on the Fab Academy Project log here. To sum up, we hope that this collection of ideas has got you thinking, the combination of low food miles, concerns about food scarcity and food quality makes homegrown greens a tantalising and delicious subject we hope you delve into.