Upgrading a CNC milling machine Part 2
Follow articleHow do you feel about this article? Help us to provide better content for you.
Thank you! Your feedback has been received.
There was a problem submitting your feedback, please try again later.
What do you think of this article?
Installing and configuring Machinekit on the BeagleBone Black.
In Part 1 of this series we took a Denford Novamill and retrofitted the control cabinet with updated stepper drivers and a BeagleBone Black (BBB). In this post we cover installing and configuring Machinekit, set up homing switches and calibrate control of the 3 axes.
Note that CNC machine control cabinets often have dangerous voltages present, so care must be taken when working on them.
The BeagleBone Black. Photo by Gareth Halfacree
Originally the Novamill was controlled by a desktop PC running proprietary software. As this did not boot and we did not have the software licence, another option had to be sought. The BBB is a great choice: a low cost, single-board Linux system with plenty of GPIO and 2 realtime units, the PRUs. These are high performance microcontrollers which can be used for software step generation, freeing up the ARM processor and Linux system from this timing-critical task.
There are many BBB 'capes' – daughter boards akin to the more familiar 'shields' for the Arduino – available that plug in to the header pins on the BBB, to provide additional functionality. For example buffering, RF isolation and convenient screw terminals for connecting to stepper drivers and limit switches. As discussed previously, we chose to use the Probotix PBX-BB cape.
The BBB also has a great community of people using it to control CNC machines, including 3D printers, CNC lathes and milling machines. In particular, it has been embraced by the Machinekit project, which has developed a platform for machine control applications.
Configuring Machinekit with the BBB, PBX-BB and Novamill
Machinekit is a fork of the long-standing open source LinuxCNC, with added support for platforms such as the BBB and it's PRU. As with LinuxCNC, it is based on a modular HAL (Hardware Abstraction Layer) component architecture, giving it inherent flexibility.
There is also a Machinekit Linux image for the BBB, with Debian, a realtime kernel and Machinekit pre-installed. Alternatively it can be built from source.
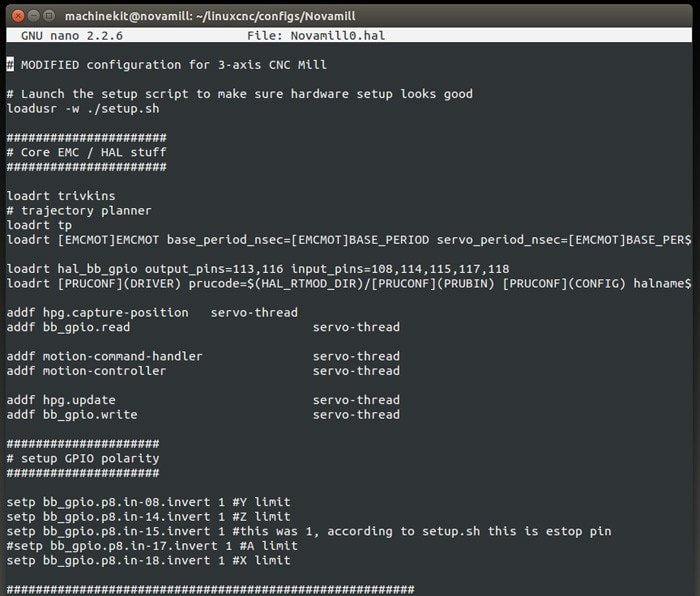
The latest image was downloaded from here and written to a micro SD card. The card was inserted into the BBB, peripherals connected and the system booted. Once the Linux desktop had loaded we could browse the example configuration files provided and attempt to launch Machinekit. Upon our first try, an error was printed to the shell and Machinekit failed to load. Upon closer inspection and with help from the active Machinekit mailing list, some changes needed to be made to the example configuration files to fix an issue with the PRU driver HAL names. We had to make the changes manually but this has now been fixed in the latest image linked to above.
Despite there being plenty of example configuration files, including some for Probotix hardware and the BBB, there were none specifically for the PBX-BB cape and a 3-axis CNC mill. Therefore we chose to use the Probotix Comet router configuration as a starting point, as this seemed to be the closest to our machine.
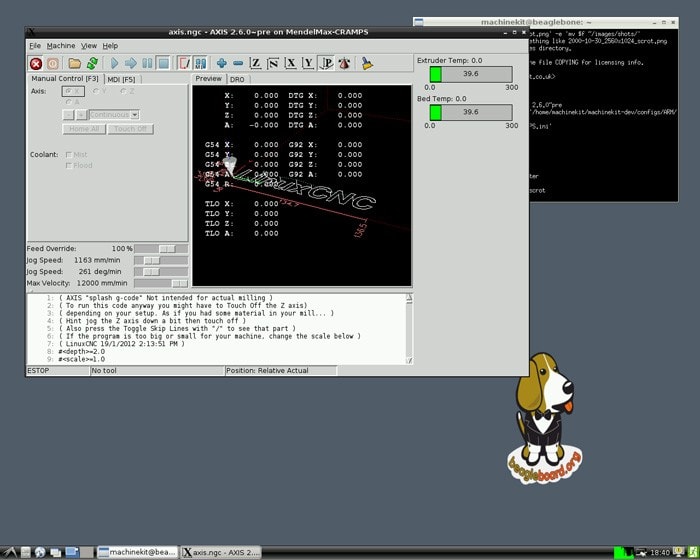
With the edited configuration files Machinekit could be started.
Wiring the emergency stop switch
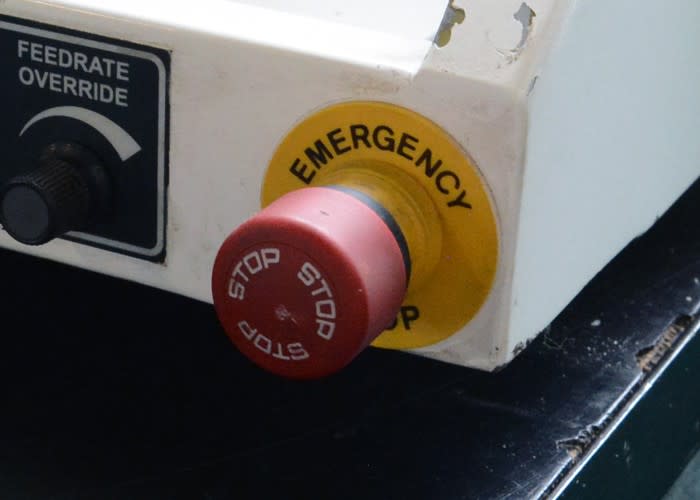
Whilst Machinekit has a software emergency stop that can be activated by hitting the 'F1' key or clicking the 'Emergency stop' toolbar button, this isn't really a satisfactory alternative to having a big red button to hit during an emergency!
The Novamill has an emergency stop switch wired to a contactor that cuts power to the spindle drive and stepper drivers. There was a spare pole on this that we connected to the ESTOP input on the PBX-BB.
Extra DIN terminals were added to accommodate the additional ground connections we needed: one for the ESTOP and one for the home switches, as well as some spare terminals for future use.
With the wiring completed, the hardware emergency stop was tested to ensure it also triggered the emergency stop in Machinekit.
Testing axis movement
Now that Machinekit was integrated with the hardware emergency stop, movement on each axis was tested. Both the X and Z axes moved as expected, but the Y axis did not. After double-checking the software configuration – including by swapping the GPIO pins between the X and Y axes – the wiring was next checked.
Looking at the PBX-BB, there was something odd about the silkscreen and output terminals, specifically the order of the labelling of the 'YSTP' and 'YDIR' outputs. Referring to the PBX-BB signal diagram, it became apparent that the silkscreen labelling on our board had the YSTP and YDIR pins swapped. A quick email to Probotix confirmed the issue and swapping the wires remedied the problem, giving us 3 axes of movement.
Wiring the home switches
The Z-axis home switch on the Novamill
The Novamill has a micro switch on each axis that can be used for homing. It does not have limit switches at the upper end of travel so these limits have to be 'soft set' in the .ini configuration file. This should prevent the machine from trying to travel past the physical limits of each axis. Before the homing switches could be used, we needed to trace the corresponding wires in the control box.
With Machinekit running, each axis could be moved to determine if we had identified the correct wires. This involved using a multimeter across a suspected switch wire and ground, moving the axis until an audible micro switch 'click' was heard, and checking if the resistance had changed as expected.
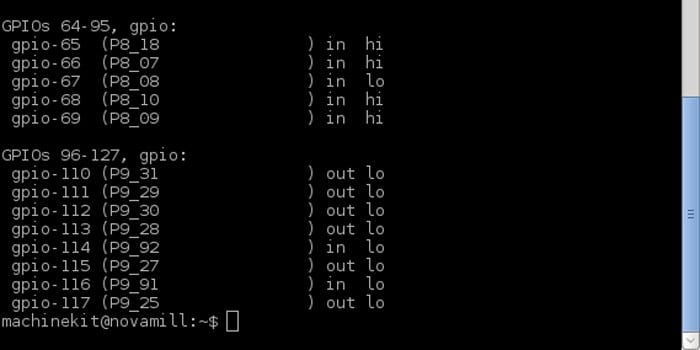
Once the correct wires for the home switches had been confirmed, they were connected to the PBX-BB. These were then configured with the aid of a handy spreadsheet, and tested by running the following command before and after closing each home switch:
$ cat /sys/kernel/debug/gpio
Debugging the GPIO
These pins were set in the .hal file and upon re-launching Machinekit the homing procedure completed successfully. Note that the homing order was set as follows: Z,X,Y – homing the Z axis first reduces the chance of crashing your tool if it was left low down when the machine was last used.
Fine tuning the axes
With the homing set up and the ability to control each axis from Machinekit it was time to fine-tune the movement and check that the scaling was correct. The documentation is really helpful for this.
The specifications for our machine are as follows:
- Stepper motors: 200 steps/rev
- Stepper driver micro-stepping: x10
- Leadscrew pitch: 5mm
- Drive pulley ratio 2.5:1
The above gave a figure of 1000 steps per mm. After changing the existing SCALE values in the .ini configuration file, axis movement was tested. To do this, the axis jog setting in Machinekit was set to 5mm increments and a ruler placed on the moving bed. This allowed for rough indication that the machine was moving as expected before using a dial gauge to assess axis movement more precisely.
The dial gauge was attached to a magnetic base and placed on the machine bed. Axis jog increments were then reduced down to 0.05mm and each axis checked in turn. Backlash was also measured and noted, with the values added to the .ini configuration file. After the .ini file was modified the backlash was double-checked in case of error.
Next steps
Now that the Novamill can be controlled from the BBB and each axis is calibrated, we can focus our attention on getting the spindle drive working, before generating CAM files and finally milling some material. This will be covered in the next post.
The modified configuration files for the BBB and PBX-BB cape are available here. Note that these are specific to our Novamill and will require modification for use with a different setup.
Part 3 of this Blog






Comments