Upgrading a CNC Milling Machine Part 1
Follow articleHow do you feel about this article? Help us to provide better content for you.
Thank you! Your feedback has been received.
There was a problem submitting your feedback, please try again later.
What do you think of this article?
Retrofitting modern stepper drivers and a BeagleBone Black for control.
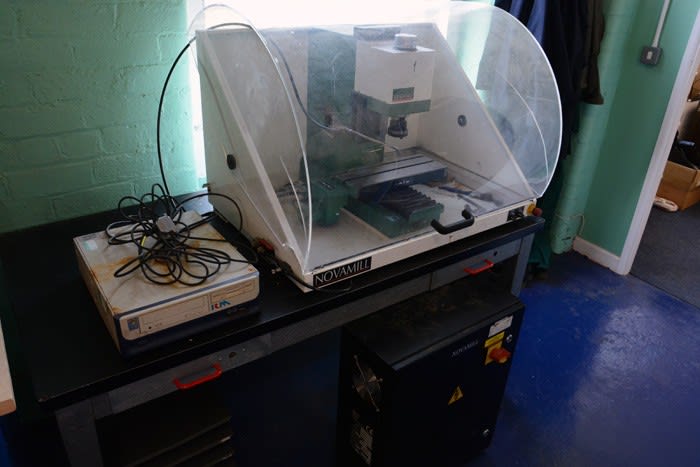
The mill, control computer and control cabinet
Compact CNC machines have been around for a long time and there are affordable and often well built units available to buy from surplus suppliers and via auction. Provided a machine is of good quality and has not been abused the hardware will likely work for many years to come.
Though the mechanical side may be serviceable it can be a different story when it comes to the software; the machines may not come with their original control computers, if they do this may not boot or may be missing the security 'dongle' for the control software. In addition there have been numerous improvements in motor drive technology in recent years.
We have a Denford Novamill 3-axis mill that came with a rusty old computer that did not boot up. From initial inspection the mill itself looked promising, leaving us with the challenge of connecting a new computer with new software to run the machine.
In this first post we will determine how our machine is wired and bring it up to date with new stepper motor drive electronics, and with a brand new embedded control computer.
Note that CNC machine control cabinets often have dangerous voltages present so care must be taken when working on them.
Out with the old
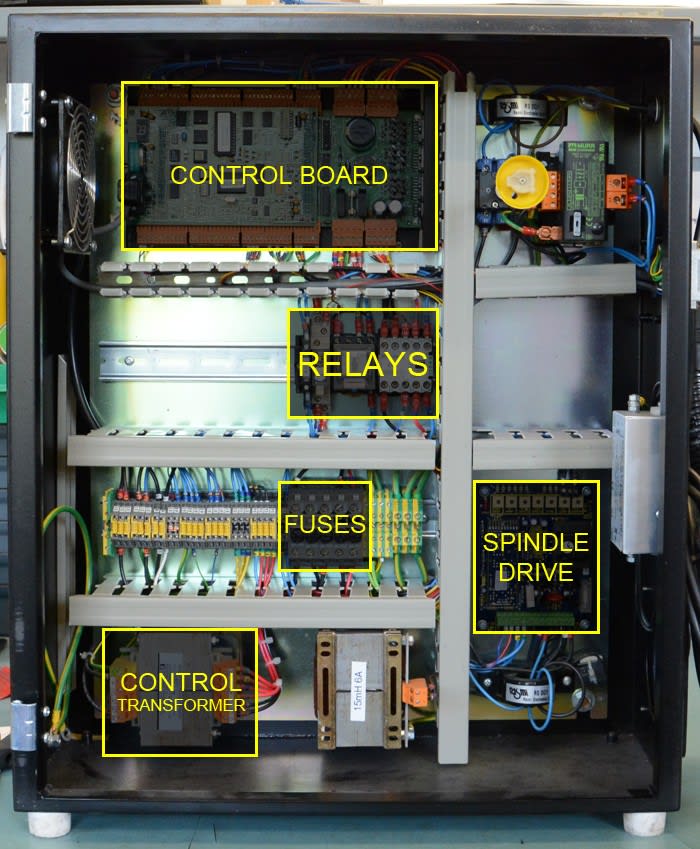
Inside the control box
Fortunately for us, Denford provide plenty of documentation for their old machines, facilitating modification and repair. They also have an active forum where people discuss their machines and changes they have made. This was incredibly useful when researching updates for the Novamill.
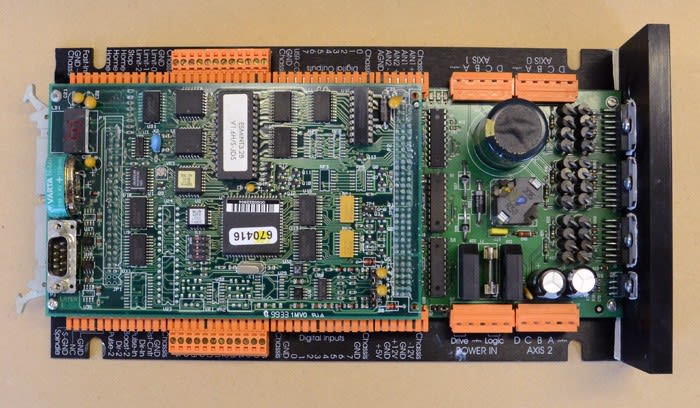
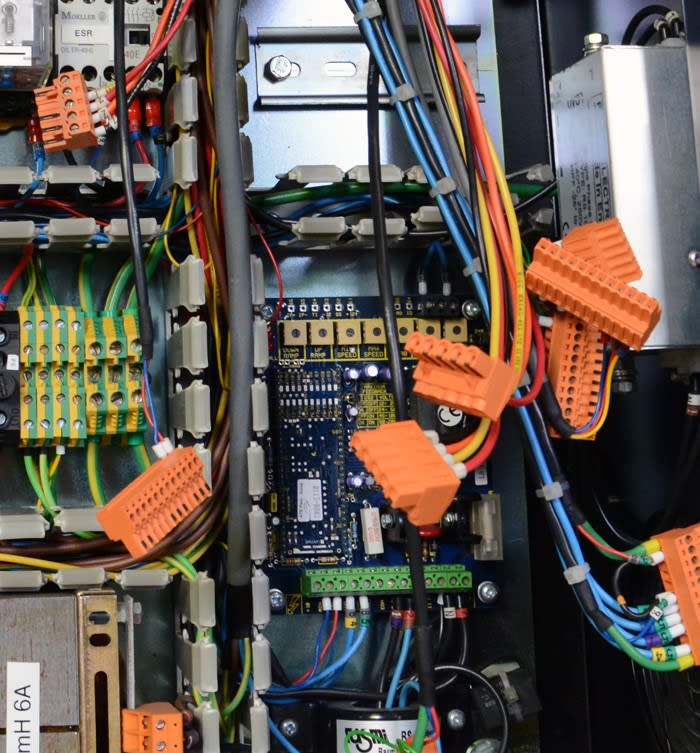
The original control board was removed as it is designed to work with the original, proprietary software via an RS232 connection. This sits on top of a larger board with the electronics to drive the stepper motors. Whilst it would be possible to interface with the old driver board, it was instead replaced with modern higher performance driver modules, the Geckodrive G201X (793-4127) .
The original control board
Next it was determined that the control PC was to be replaced with a much more compact solution: a BeagleBone Black (775-3805) and Probotix breakout board. This will allow use of LinuxCNC, an open source machine control software. It also has the added benefit that the control computer can be placed inside the cabinet.
Fitting the stepper drivers
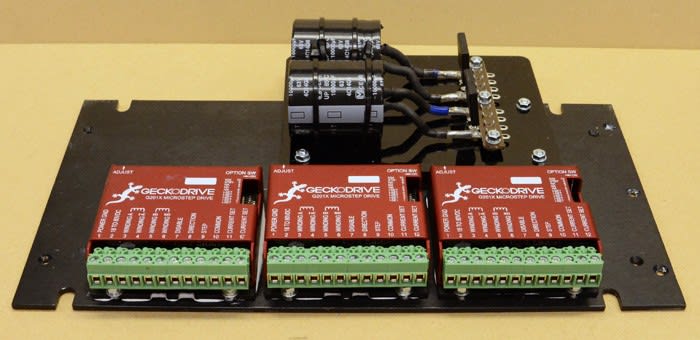
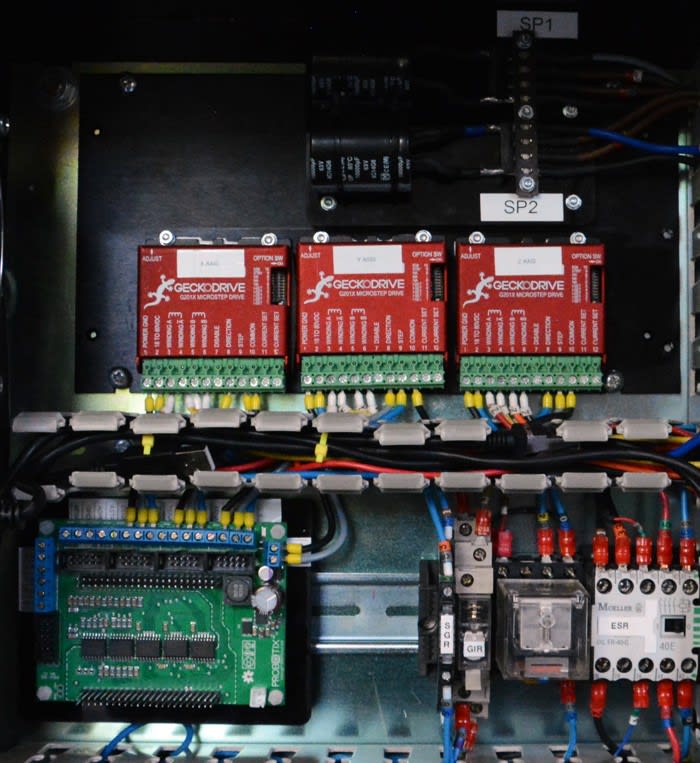
The original control board was mounted on an aluminium plate. This was reused as a solid surface on which to mount the new drivers, with the additional benefit of acting as a heat sink. Heat sink compound was applied to the drivers before mounting.
The new Geckodrive driver modules and power supply mounted on original aluminium plate
DIP switches on each module allow for setting of the output current, with a maximum of 7A. After checking our stepper motors these were set to 1.6A.
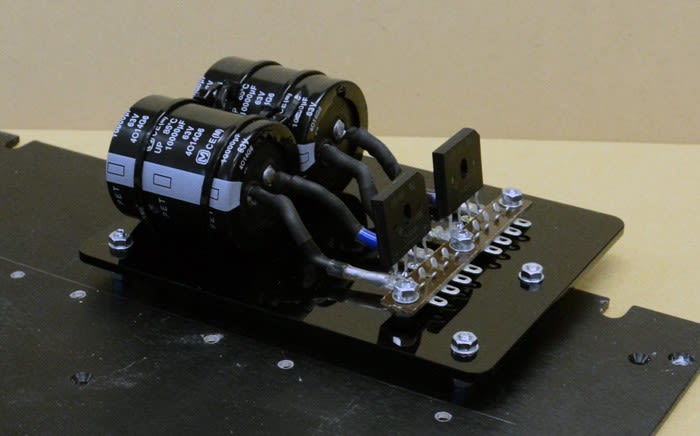
Detail of the power supply
Originally power to the steppers and control electronics was provided by a large transformer with rectification, smoothing and fuse protection on the driver board. This was replaced with bridge rectifiers (708-2703) and capacitors (790-0437) mounted on an acrylic plate, with a DIN rail fuse holder (050-1837) .
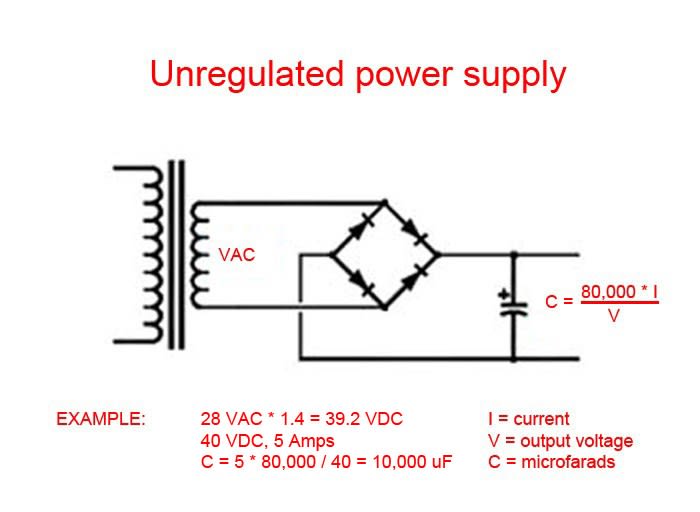
Geckodrive provide guidelines for specifying power supply components. We budgeted for 40V at 5A using the formula below and chose components accordingly.
Above diagram taken from the GeckoDrive website. Values changed according to our application. Note 39.2VDC rounded to 40VDC.
Mounting the BeagleBone Black and Probotix cape
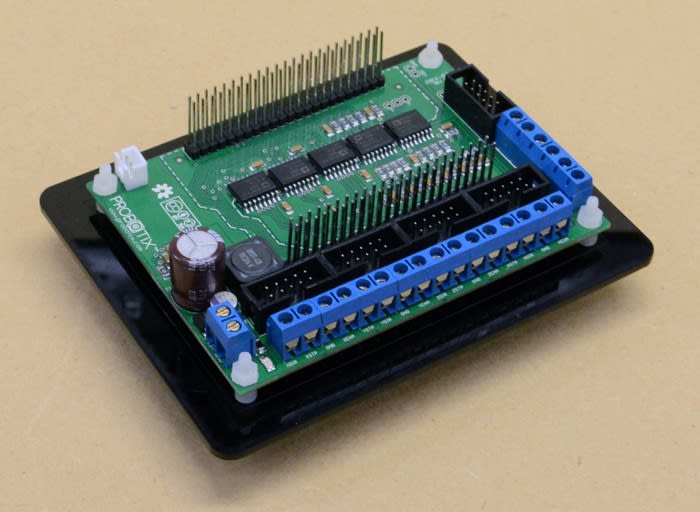
The Probotix cape on mounting plate
An acrylic plate was cut for mounting the BeagleBone and cape. This was secured in place with DIN rail clips.
Conveniently the cape can be powered by 12-76VDC. It is also possible to power the BeagleBone from the cape as 5V is bussed out through header pins. To enable this two jumpers on the cape were soldered, as detailed in the wiki.
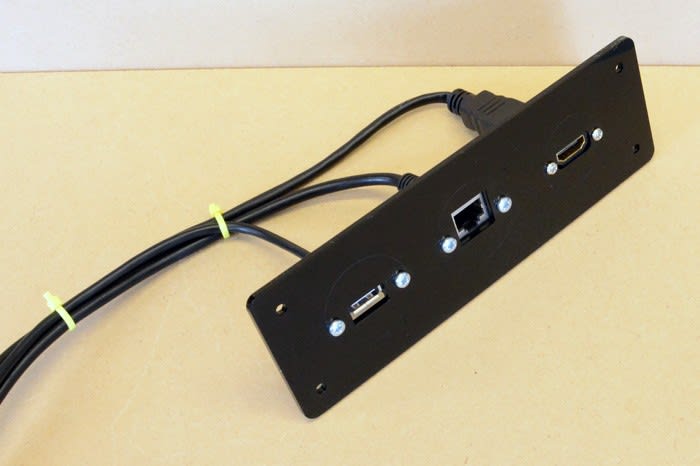
Short extension cables with panel mounted connectors for USB, HDMI and RJ45 were used to extend the BeagleBone ports. Holes were drilled into the side of the cabinet – using a vacuum cleaner to minimise spread of swarf – and a mounting plate made up for the three connectors.
Panel mount connectors on mounting plate
After drilling an air line was used to blow out any remaining swarf that may have fallen into the cabinet. Removing this is essential as metal filings could easily short things out, resulting in damaged electronics or worse!
Rewiring
Wires in the cabinet
Removing the original control board left plenty of wires to be identified. Referring to the data sheets it was clear that there were several revisions of this machine and control cabinet, so despite there being thorough information we felt it prudent to double-check connections with a multimeter.
Useful connections such as the emergency stop and manual override potentiometers were noted down for later reference.
Once tested, the logic and stepper drive power supply was connected. The drivers were then connected to the cape and stepper motors. Where possible the original wires were used, otherwise new wires were cut to length and the markers were swapped over. All changes to the wiring were noted down.
The retrofitted cabinet
Care was taken to ensure that all wires not yet connected were adequately insulated and secured in order to prevent accidental shorting and unnecessary clutter.
Next steps
In part two we will get LinuxCNC up and running on the BeagleBone and configure this to drive the mill.


Comments