Shy and retiring flouncing peacock
Follow articleHow do you feel about this article? Help us to provide better content for you.
Thank you! Your feedback has been received.
There was a problem submitting your feedback, please try again later.
What do you think of this article?
“I am shy and retiring 95% of the time – and a flouncing peacock the other 5%”
My friend Matthew sent me this message and a request for help. He and his partner Hannah have been together for twenty years. They were not going to get married. However, they were going to have a party to celebrate.
Hannah’s dress for the party was a surprise. So Matthew wanted to surprise her with what he was wearing too.
“I want a suit – I want a really different suit – I want to hide LEDs in a suit and control them in a dramatic way. I want something hidden until it is switched on.”
Definitely a problem I could get my teeth in to. I wanted to make it!
Matthew – the shy and retiring flouncing peacock
A month or so later, Matthew bought a new suit and sent it to me. It was beautifully tailored. I was a little scared to hack it!
Suit – straight from the shop
As the trousers were only a single layer of material thick, I could try different things without cutting any material. I played around with various lighting effects. Electro-luminescent or EL wire wasn’t bright enough to shine through the fabric. Fibre optics poked through the material and gave the suit a rough “5 ‘o’clock shadow” feel.
Eventually, I realised there was no “quick fix, easy way” and that the addressable LEDs called Neopixels were the way forward.
As I just wanted something that would switch on or off I didn’t need connectivity from Bluetooth or Wi-Fi. But I wanted the lights to do different patterns. Which made it an ideal project for the Adafruit Gemma (124-5508) .
The first step was to program the Gemma using the Arduino IDE. (Adafruit have a great tutorial on how to set up the IDE and how to add the Adafruit Gemma board here: https://learn.adafruit.com/introducing-gemma/introduction)
I have used the Arduino IDE a few times before, and something that took me a long time to work out was that although I saw that Gemma didn’t have a “serial console” capability, I didn’t realise that this meant that I didn’t need to select the “port” in the “Tools” menu. It had to be left unselected. And the “programmer” needed to be changed to USBTinyISP.
The other stumbling block I found was that when I connected the Gemma board to my laptop via a USB cable, the red light flashes brightly for 10 seconds and then goes dim. You can only upload the program if it is flashing brightly – if it has stopped, pressing the onboard reset button starts it again.
Once I had the onboard LED flashing, I disconnected the cable and connected some neopixels using crocodile clips and ran the examples strand test example file (File, Examples, Adafruit Neopixel, strandtest). I needed to change the pin number and the number of pixels, but this was relatively simple.
Now I knew I could control some LEDs using the Gemma, I started to work out how to put them in the suit.
For the cuff of the sleeve, I wanted the lights to go all the way around, but also up the sleeve buttons. I used Adafruit skinny neopixels but had to take them out of their sleeve as they were too bulky.
I put tape on the back of the strip to protect it slightly.
Tape on the Neopixels – cutting the excess off was interesting
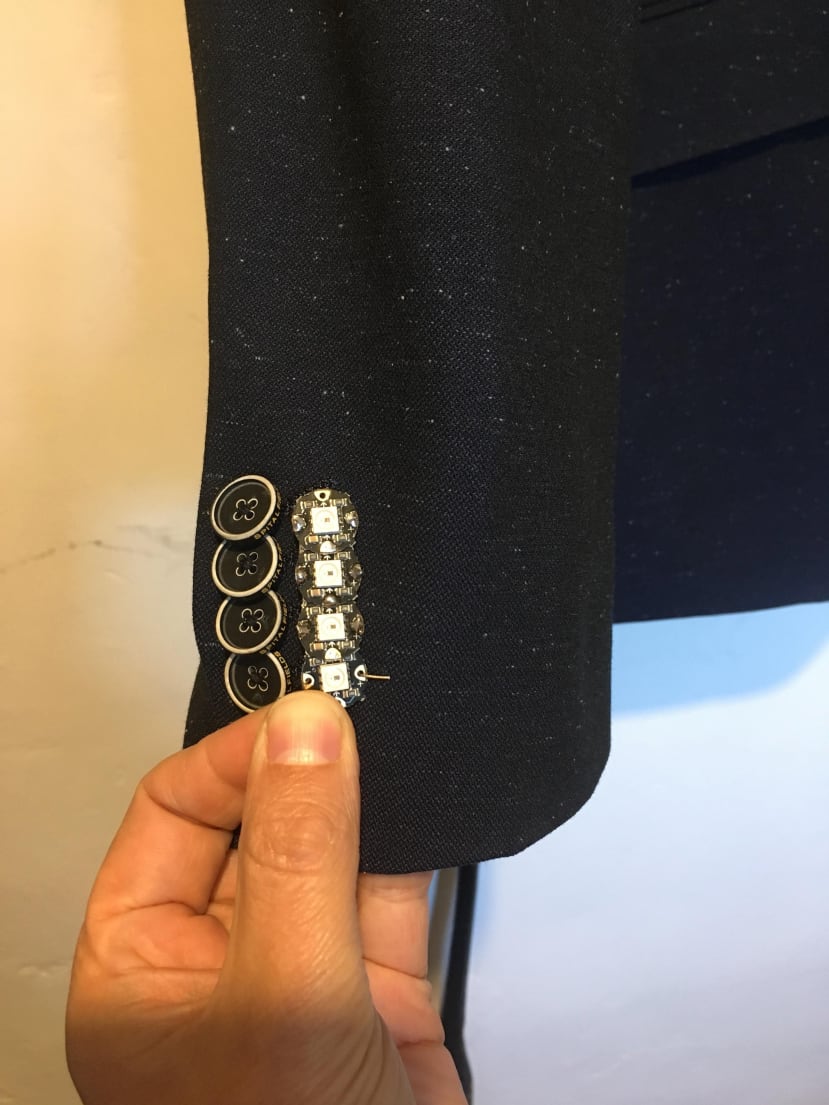
For the cuff buttons, I used four individual neopixels
(124-5440)
and soldered them together with wire.
Cuff Buttons
Button Neopixels hard-wired to the cuff skinny Neopixel strip

Having proved all the electronics worked, I had to take the scissors to the suit.
The inside of the cuff – Before inserting the Neopixels
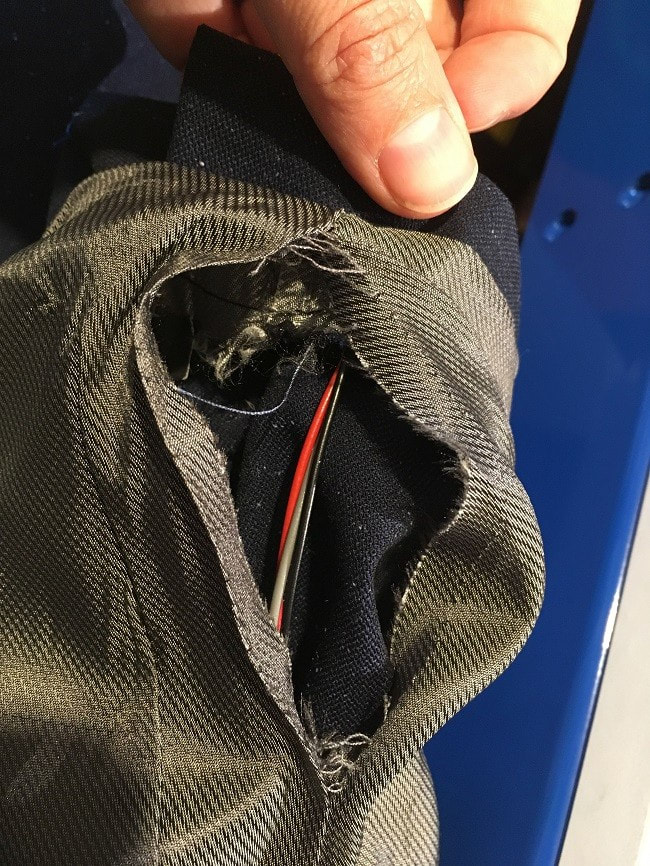
I cut the seam of the lining and with much manual dexterity (and swearing) threaded the neopixels and roughly sewed (tacked) them into position.
The inside of the cuff
The three wires (5V, Ground and Data in) from the Neopixels went up the sleeve and out of the armpit. The other end of the wires I connected to JST 3pin connectors, so I could disconnect the Gemma and leave the Neopixels in place.
Serviceable sewing
I then did exactly the same on the other sleeve, but ran the wired through the inside of the back of the jacket, so they came out of the same armpit.
As I wanted both cuffs to do the same thing, I soldered six wires to the Gemma (two sets of three wires for the VOut, Gnd and D1). The other ends were connected to JST 3pin connectors.

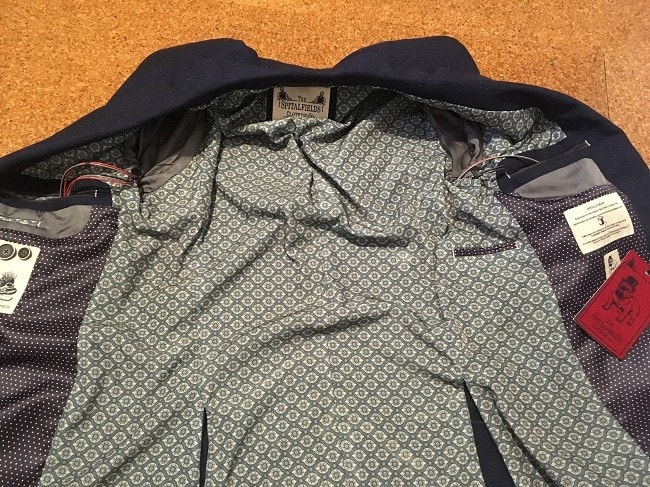
I used a LiPo battery to power the Gemma and Neopixels – and these fitted neatly into the inside breast pocket.
The left-hand cuff wires ran up the sleeve through the innards of the back of the jacket, and out of the right armpit

Lapels
For the lapels I used the regular neopixel strips (adafruit 1460)
I cut two parts – one for going up the lapel, one for going across, and soldered, wired and taped these together. I also added another couple of single neopixels for the jacket buttons.
Everything was done through a few holes in the seam of the lining to the jacket. Once I was sure it worked, I tacked them in place.
I did exactly the same for the other lapel (but without the buttons). I had forgotten about the buttonhole though, and this needed extra work to get the LEDs into place.


The Gemma and the batteries fitted in the jacket pockets
From the outside, you couldn't see what was going on inside the jacket.

The finished jacket – turned off and turned on
Shy and Retiring
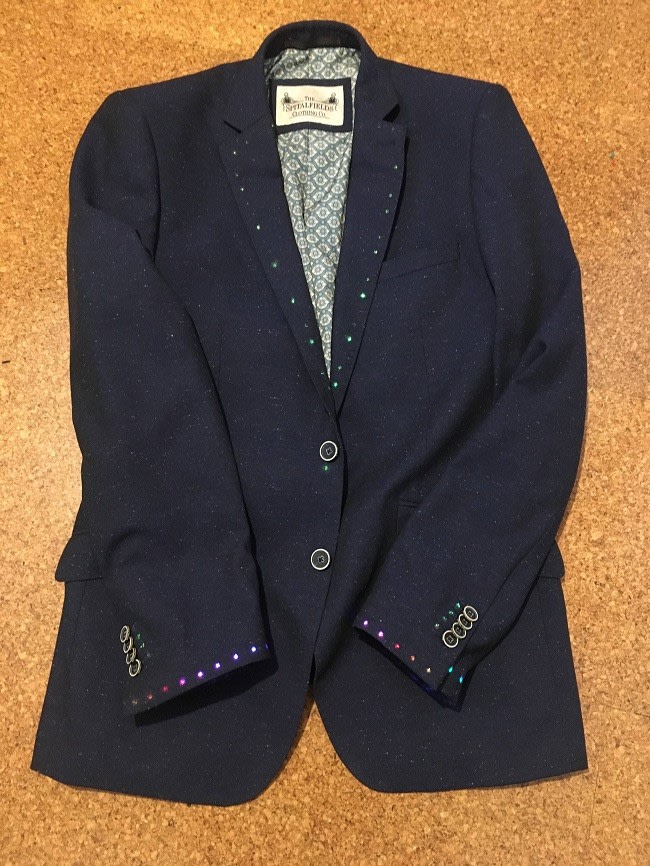
Verdict – Hannah guessed something was going on as she could feel the wires, but all the guests were surprised and loved it! I had also secretly made Hannah a necklace – so she wouldn't be out-blinged.
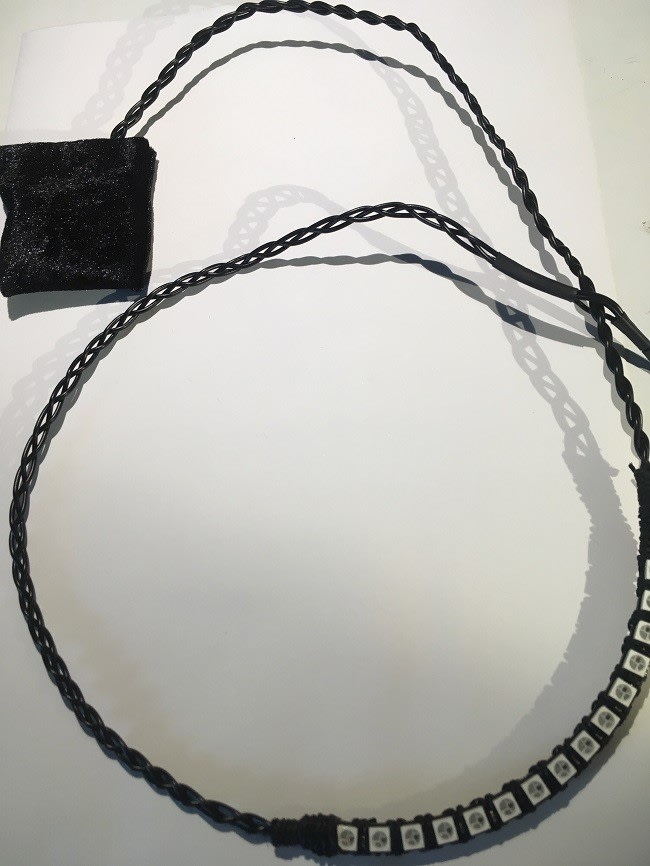
Neopixel Necklace for Hannah
Note: Article on creating a neopixel necklace will follow soon!

Congratulations Matt and Hannah – it was an honour to be part of your celebrations.
Parts list
| Item | Supplier | Stock number |
| Adafruit Gemma | RS Components | (124-5508) |
| Skinny Neopixels | Adafruit | 2964 |
| Neopixel Strip | Adafruit | 1460 |
| Adafruit Individual Neopixels | RS Components | (124-5440) |
| Lithium Ion Polymer Battery – 3.7v 2500mAh | Pi Supply | - |
| JST 3pin SM plug and receptacle set | Adafruit | 1663 |






Comments