RasPiO® Products for Raspberry Pi®, Designed Using DesignSpark PCB.
Follow article
 Dave from DesignSpark
How do you feel about this article? Help us to provide better content for you.
Dave from DesignSpark
Thank you! Your feedback has been received.
Dave from DesignSpark
There was a problem submitting your feedback, please try again later.
Dave from DesignSpark
What do you think of this article?
Alex Eames the creator of RasPIO products, is an old friend of DesignSpark, using DesignSpark PCB to design and create loads of great products for use with the Raspberry Pi. In this article, Alex tells us all about his products and how he came to use our PCB CAD software to create them all.

I’m Alex Eames, I created the popular RasPiO range of Raspberry Pi add-ons and accessories and I also run RasPi.TV – a Raspberry Pi blog and YouTube channel, which between them have 8 million views. I specialise in clear, complete “How-to” articles, reviews and general “Maker” projects. It’s all about fun, discovery and learning. I’ve been blogging/vlogging full-time since May 2012, when my first Raspberry Pi (bought from RS) arrived. All of my PCBs to-date have been designed using DesignSpark PCB.
In 2014 I started off with:
- Port identification labels that you can actually read
- Breakout boards with clear labels, multiple breakouts and optional protective circuitry.
In 2015 I released:
- The Duino – a board to learn Arduino programming on the Pi
- A 6″ RPi.GPIO reference ruler
In 2016, so far I’ve released:
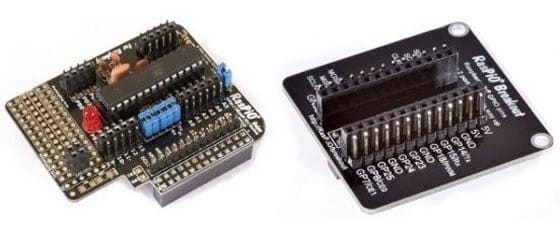
- The Pro Hat – which protects the Pi ports and breaks them out in numerical order.
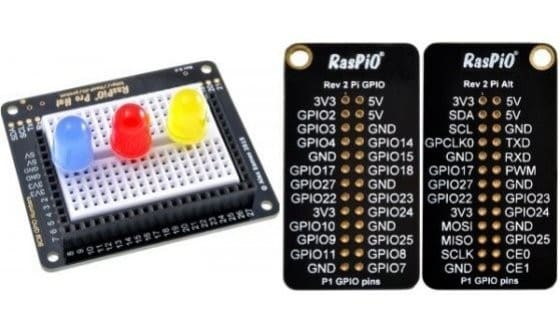
- Analog Zero – a Pi Zero sized Analog board
- A 12″ GPIO Zero reference Ruler
I make products that I want to use.
All my products are things that I wanted to be able to use myself. My newest product that was funded on KickStarter, is the RasPiO GPIO Zero Ruler. It’s a 12″/30cm reference ruler with all the most commonly used GPIO Zero code and Raspberry Pi GPIO pinouts on it. An incredibly useful tool for GPIO tinkerers and as a learning aid. I tend to launch products on KickStarter these days because I find it quite a good way of reaching people interested in my boards, and it’s a great way to gauge demand.
Finding DesignSpark PCB and designing.
Back in October 2012, I went to the Oxford Raspberry Jam, hosted by Pete Wood at RS Headquarters. I had a very attention-grabbing flag-waving Gertboard demo that I showed at the Jam and also got talking to Pete about hardware and PCBs. He suggested I take a look at DesignSpark PCB. So I did. I also looked at a whole bunch of other tools. I have to be honest, getting into PCB design is a fairly steep learning curve. You can’t just do it in an afternoon. It’s something you have to really want to do. This is the same no matter which software you choose.
At the time, DesignSpark PCB had just enough tutorials online to get me started, there are lots more now which is great for beginners. Thereafter, it was many hours of “learning by doing” with very occasional requests for help on the DesignSpark forums.
I spent a lot of the summer of 2013 designing various different boards and launched my first three products in March 2014. Since then I’ve used DesignSpark PCB to create and launch at least 8 more PCB products. There are other packages available, but DesignSpark PCB fits the bill almost perfectly for me at the current time.
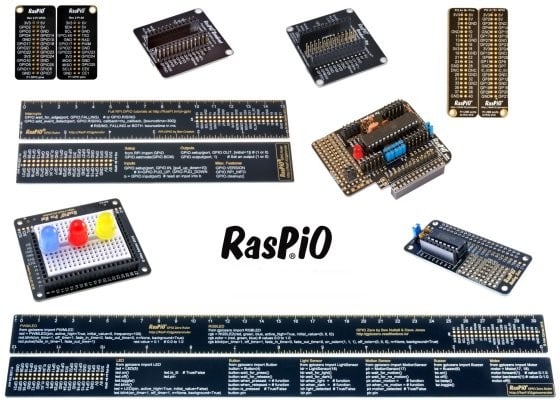
The following RasPiO PCB products have been designed on DesignSpark PCB:
- RasPiO Port labels (now EOL)
- RasPiO Breakout
- RasPiO Breakout Pro (now EOL)
- RasPiO Portsplus
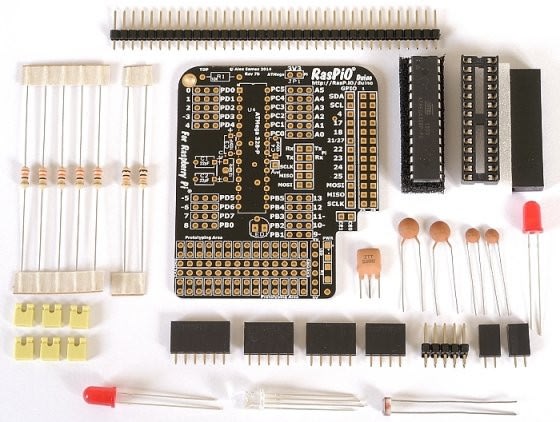
- RasPiO Duino
- RasPiO GPIO Ruler
- RasPiO Pro Hat
- RasPiO Analog Zero
- RasPiO GPIO Zero Ruler
And I have many other designs in the works at any given time!
At the moment I tend to work straight into the PCB design mode, skipping the schematic step. As my boards get more complex I will probably not be able to do that, but for now, it works for me. I prefer to place everything manually and do all the routeing and tracking manually as well. As with any package, there are things I love and things I don’t love about DesignSpark PCB. My favourite feature of all is the 3D render capability. You get to see what your finished board will look like – and it’s very realistic. You can also enlarge it, rotate it in any direction, enable and disable any layer in the design. This gives you a great sanity check on your design before sending the Gerber file out to production.
I also love the fact that:
- It’s free
- There are no board size restrictions
- There are no layer restrictions
- There are no commercial use restrictions
Things I love less but can work with…
- It’s windows-only
- It’s closed source
Missing features…
The killer feature I’ve been badgering RS about for a while would be to add an easy graphic import. Currently, the only feasible way to get a graphic on your PCB is to create a TrueType font of the graphic and that is time-consuming, clunky and unsatisfactory. If DesignSpark PCB had graphic import it would make it so much easier to create beautiful PCBs or PCBs with company logos on. The software is free, so you can’t really complain about missing features, but adding this capability would make it a really competitive application for professionals. DesignSpark PCB has really helped me to get established in PCB design. It offers some great features, unrestricted commercial usage and all at the unbeatable price of FREE.
If you want to have a closer look at some of the products featured in this article, click here.
Download DesignSpark PCB today!
Comments