My Raspberry Pi Thinks It’s a PDP-8!
Follow article
 Dave from DesignSpark
How do you feel about this article? Help us to provide better content for you.
Dave from DesignSpark
Thank you! Your feedback has been received.
Dave from DesignSpark
There was a problem submitting your feedback, please try again later.
Dave from DesignSpark
What do you think of this article?
Constructing the PiDP-8 minicomputer front panel for SimH.
Some time (2 years?) ago I purchased a PiDP-8 kit, an extremely cool Raspberry Pi (896-8660) powered project that combines an “operator front panel” comprised of switches and indicators, with the SimH multi-system computer history simulator, to create an authentic looking, albeit miniaturised, PDP-8. In this post we take a quick look at the PDP-8 and SimH, before moving on to finally assembling the PiDP-8.
But what is a PDP-8 I hear you cry? Well, a 12-bit machine introduced in 1965 and seemingly the world’s first successful minicomputer. Which is to say not a mainframe computer filling up a room with many racks of equipment; something that could sit on top of a desk, no less!
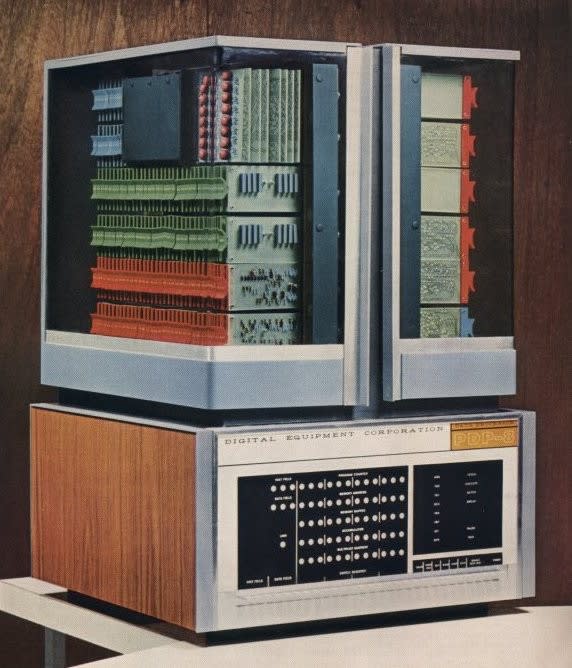
And what a beautiful thing the original “Straight-8” was, with logic modules on display behind hinged acrylic doors and a base festooned with indicators. Which it ought to be, considering it was priced at $18,500. That said, such an iconic computer, it has gone on to become highly collectible and you’d be lucky if you could buy a Straight-8 in good condition now for the same figure.
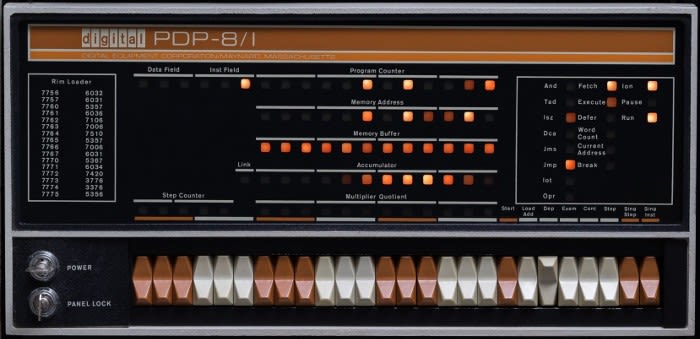
Image source: yaymii.org
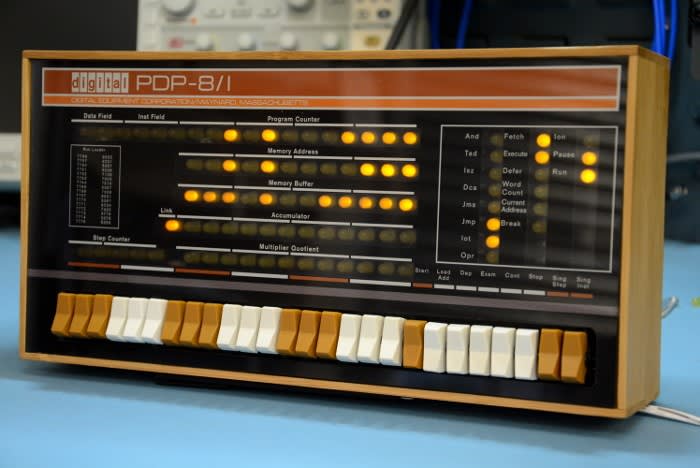
The later PDP-8/I, introduced in 1968, doesn’t quite have the same retro-futuristic appeal, but does feature an enticing selection of indicator lamps and toggle switches. While these can be had for much less, they are still highly collectible and fairly hard to get hold of. On top of this they are rather bulky and a great deal more so if you add useful peripherals, such as a tape punch and reader.
SimH
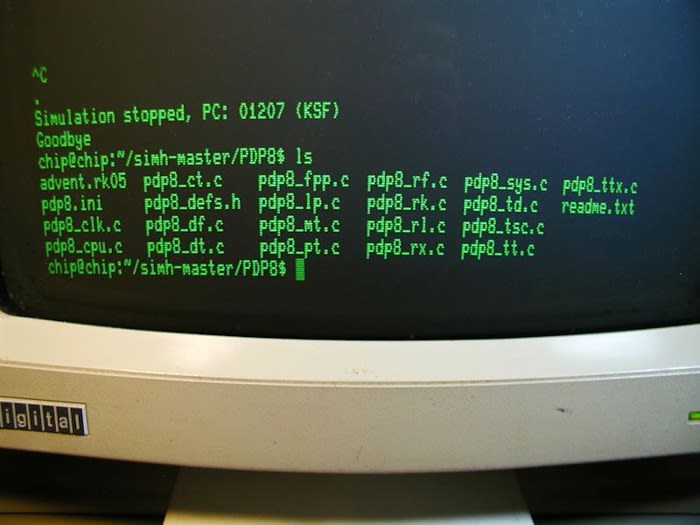
Image source: vintagecomputer.net
SimH, the Computer History Simulation Project, is a fantastic collection of software that allows you to use modern hardware to simulate a plethora of classic computer architectures; from the legendary 1974 Altair 8800 microcomputer that ran Microsoft’s first ever product, Microsoft/Altair BASIC — to that venerable 1980s minicomputer powerhouse, the DEC VAX. Many other architectures are supported, including the incredibly successful PDP-11 and, of course, its ancestor the PDP-8.
SimH can be compiled to run on Linux — very well too on a Pi! — BSD and other UNIX platforms, and there are even Windows executables. Support is also included for simulating useful peripherals, such as tape, card and disk storage, and in some cases network interfaces.
However, it’s all well and good using a terminal window to interface with a simulated computer, but nothing really beats the experience of having the switches and indicators of an operator front panel!
Assembling the PiDP-8

Note: if assembling your own kit please consult the official assembly also.
The kit comes packaged in its bamboo enclosure and upon removing the front panel there were a couple of bags of components, along with the main PCB and a smaller switch bracket PCB.
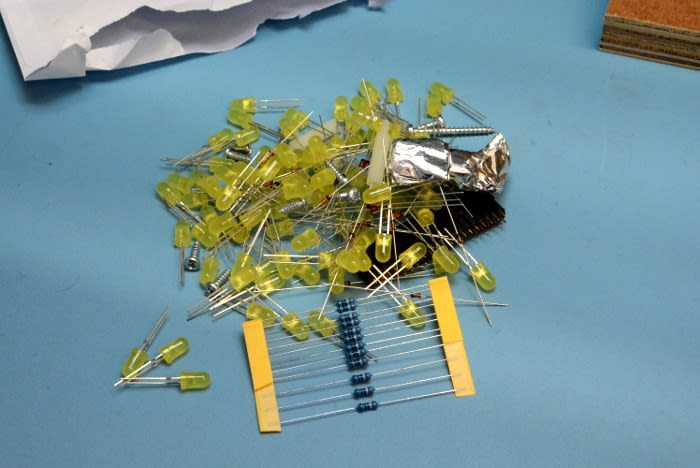
One bag contained a lot of yellow LEDs, along with resistors, diodes, an IC and screws.
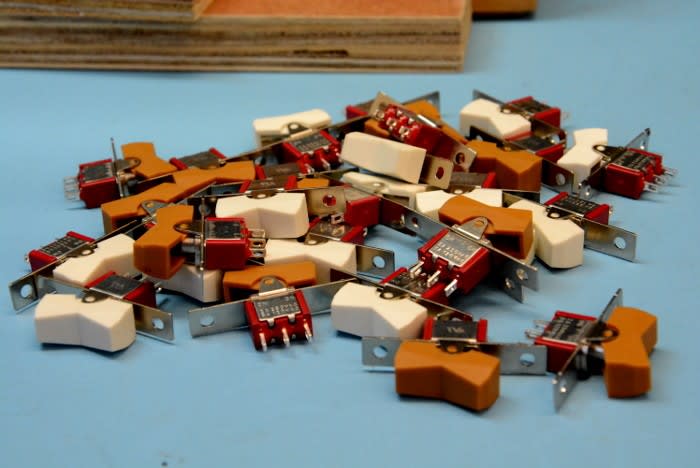
The second bag was filled with rocker switches, featuring what I’m guessing are custom plastic caps.
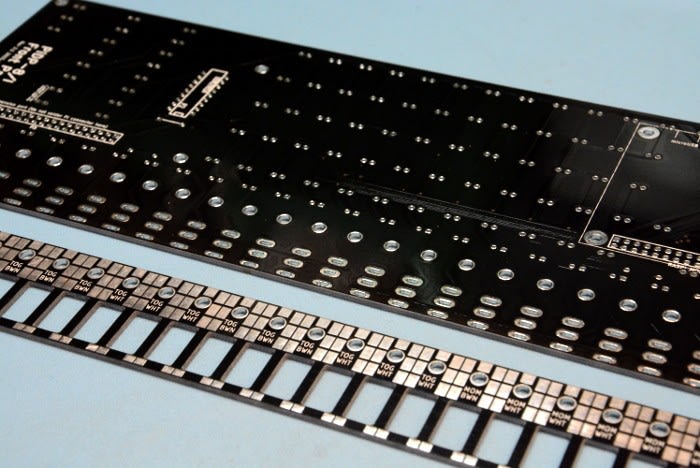
As previously mentioned there are two PCBs, but the smaller one is really just to aid switch alignment — how frustrating it would be if they were all fixed at odd angles.
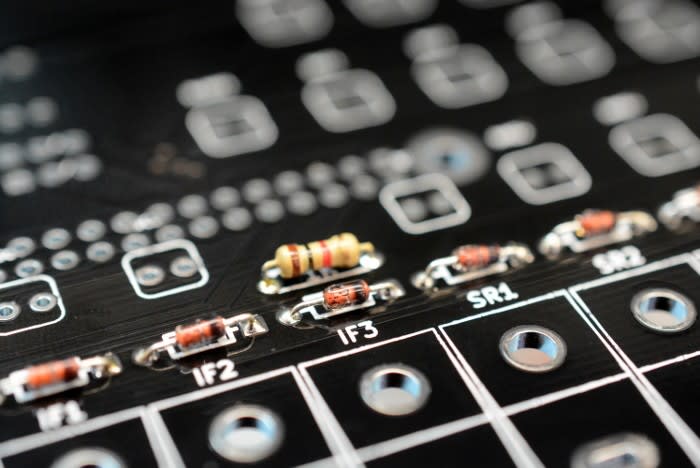
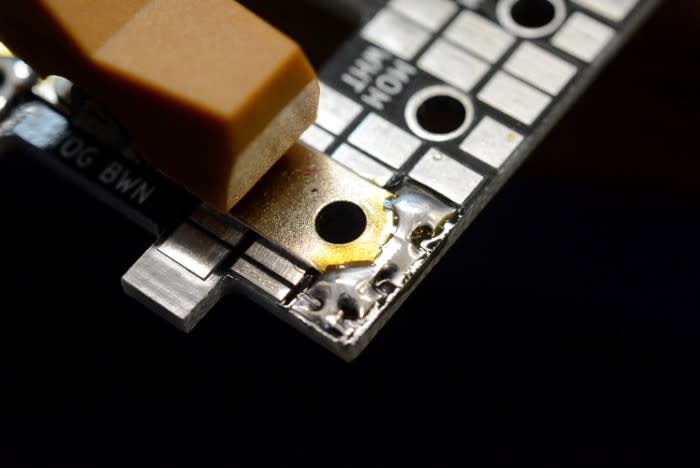
Diodes and resistors were fitted first.
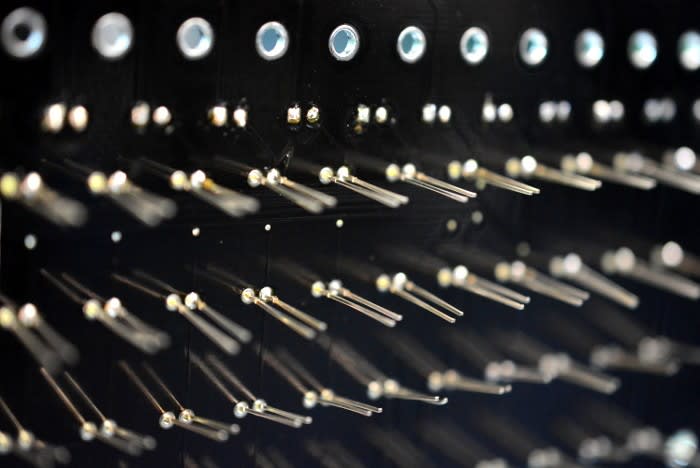
LEDs were fitted next — 89 of them to be precise!
Switches were lined up using the PCB bracket and soldered to this to secure them in place.
The pins were obviously soldered to the main PCB.
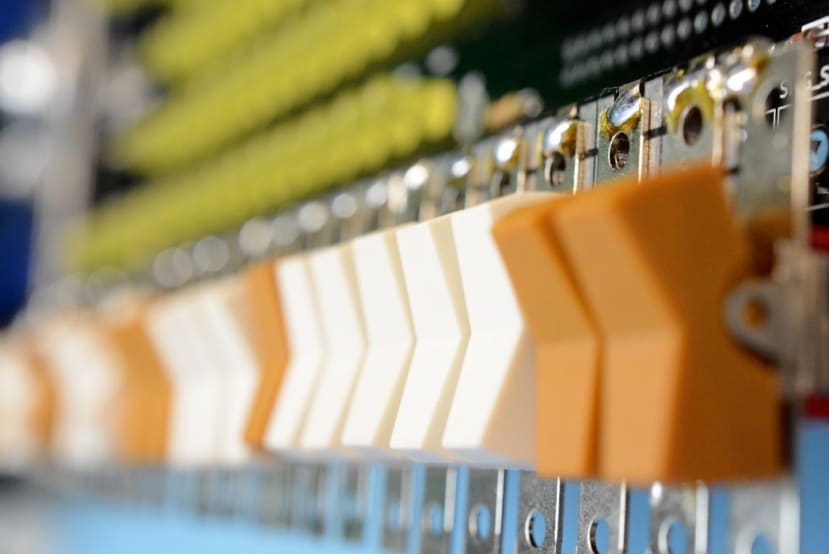
By carefully following the instructions, checking and re-checking the alignment before soldering pins into place, a neat row of switches was obtained.
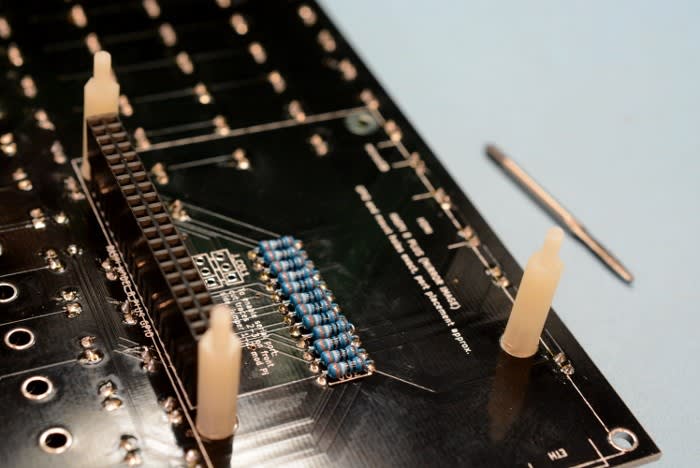
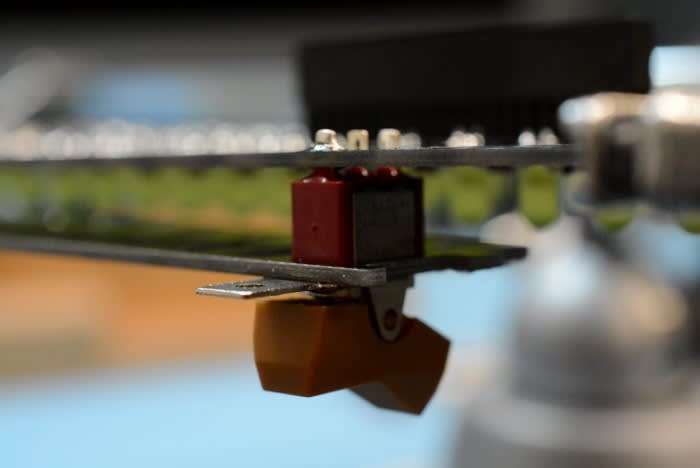
Next the Raspberry Pi header and stand-offs were fitted.
First test
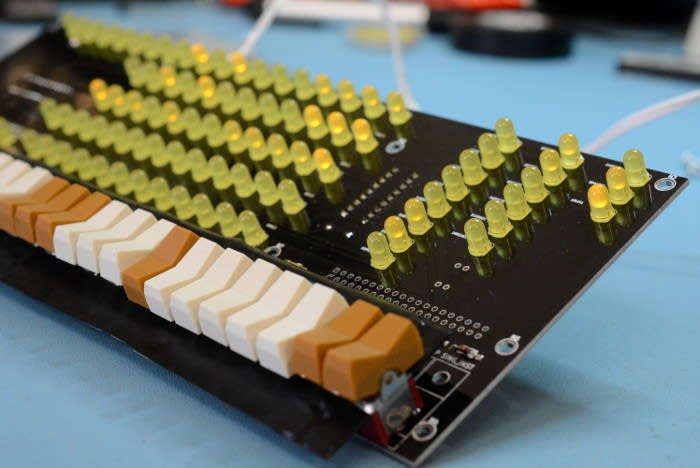
While the kit can be used with older and smaller Raspberry Pi boards, a version 3 Model B (896-8660) was used, as this integrates wireless and with its additional processing power is able to simulate incandescent lamp glow, while also running the PDP-8/I simulator at 24x times the speed of original hardware.
A ready-to-run original disk image is provided by Oscar Vermeulen, creator of the PiDP-8. However, it’s now recommended to use the new and updated images from Warren Young.
The disk image was written out to an SD card, this was inserted into the Pi and power applied. After a short delay, the front panel sprung into life as the SimH simulator started.
Final touches
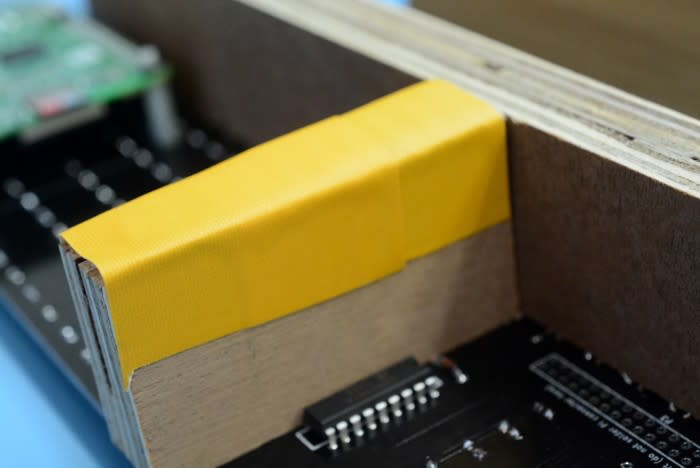
The supplied wooden blocks were secured to the underside of the PCB, with one of these requiring — as the instructions suggested might be the case — a piece of cardboard taping to it in order to raise the board a little higher in the enclosure. Next, the wooden case was drilled where screws would secure the assembly in place and a Micro USB cable would enter for power. Finally, the assembly could be fitted together
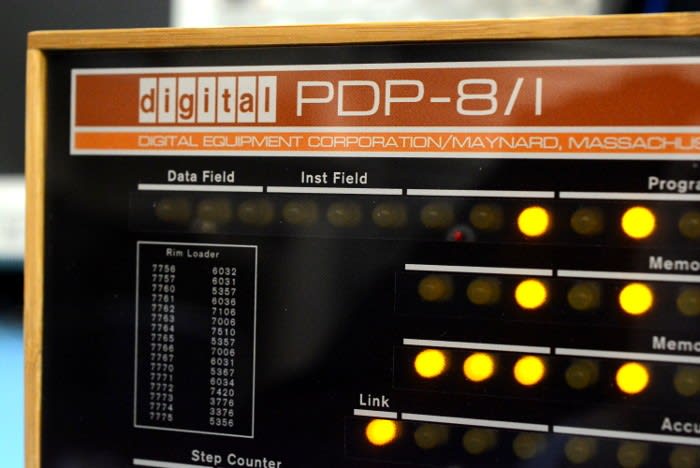
I must say that Oscar has done a fantastic job with this kit, and in particular with the attention to detail paid to the switch caps and printed front panel.
Now that we have our functional and eminently aesthetically pleasing PDP-8 simulator, in a future post we’ll take a look at running programs on it. In the meantime, if classic computer architectures are your thing, you might be interested in taking a look the following posts:
- My Raspberry Pi Think It’s a Mainframe
- A Raspberry Pi (VAX) Cluster (also SimH powered!)