Making Faces To Air Quality Part 1: Process
Follow article
 Dave from DesignSpark
How do you feel about this article? Help us to provide better content for you.
Dave from DesignSpark
Thank you! Your feedback has been received.
Dave from DesignSpark
There was a problem submitting your feedback, please try again later.
Dave from DesignSpark
What do you think of this article?
This project comes as an illustration of how we approach technology at my studio, FDDS, either for brand or art projects. I personally feel that the "magical" abilities of technology (like here sensing the invisible) are too often impaired by the complexity of the "technological" device. So when approached about doing a project about Air Quality, the question I wanted to answer was how to make it fit into most personal environments, and therefore how to get the components to disappear.
My take on it was to reduce it to a friendly super-nose that can be added to anything: a bust, a teddy bear, a flower pot, a tree... What the project is not intended to be is a full-feature electronic device, but it is a straightforward plug-and-play object with a simple function.
This article is about the Process, but you can also see the How-To article (in the next part).
Process
Size and material
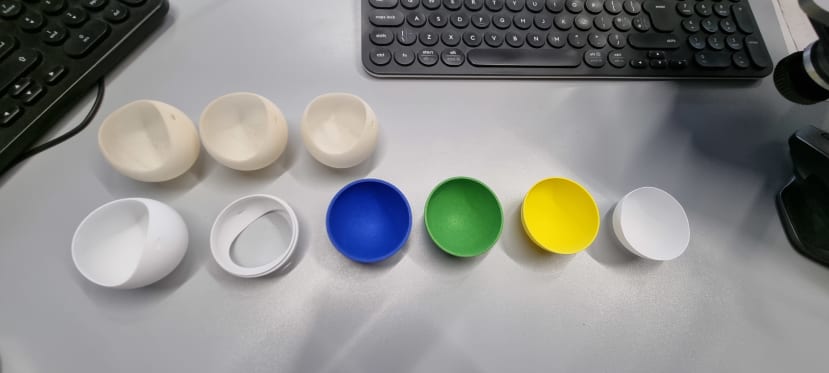
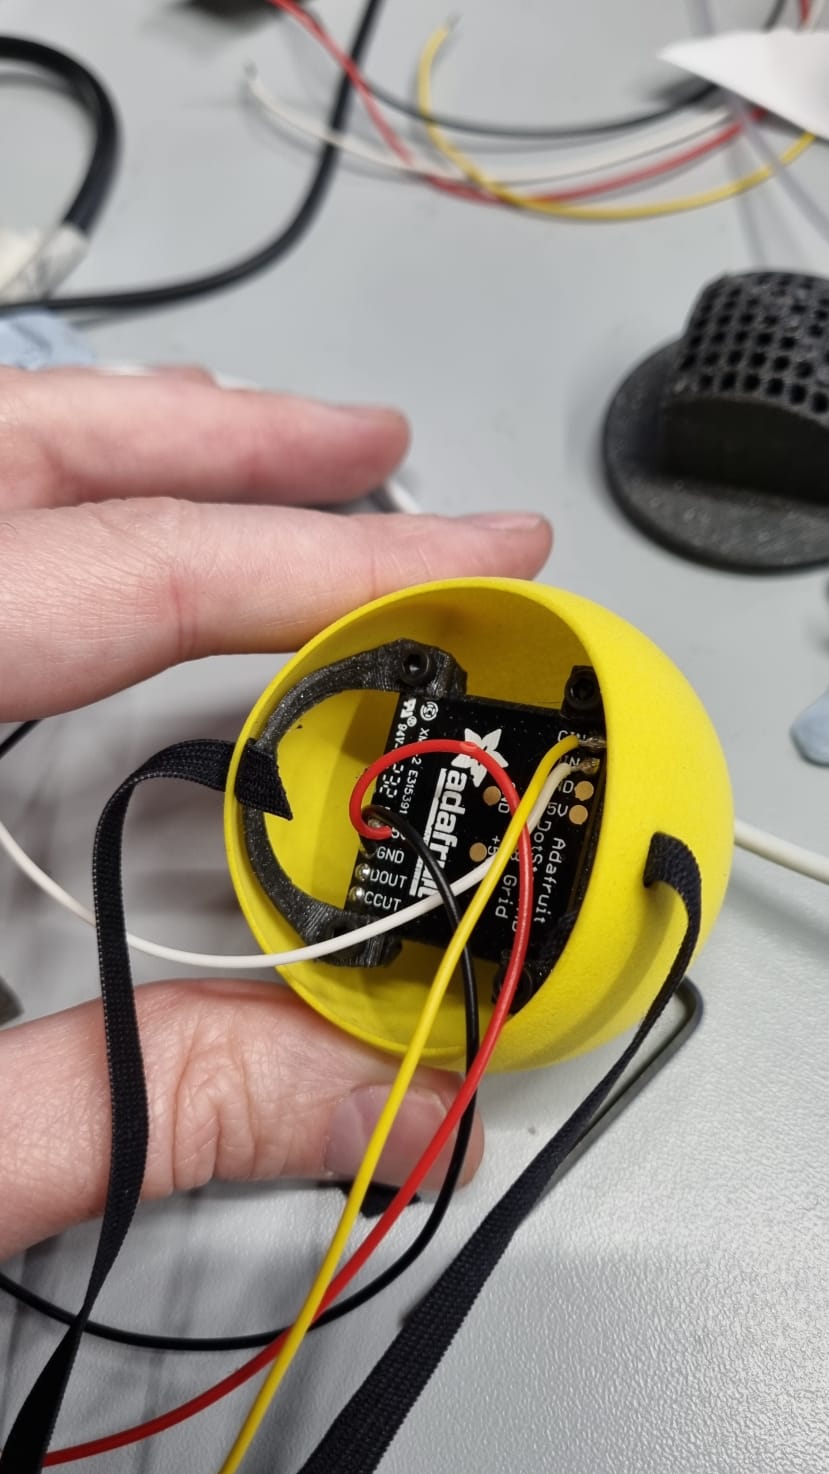
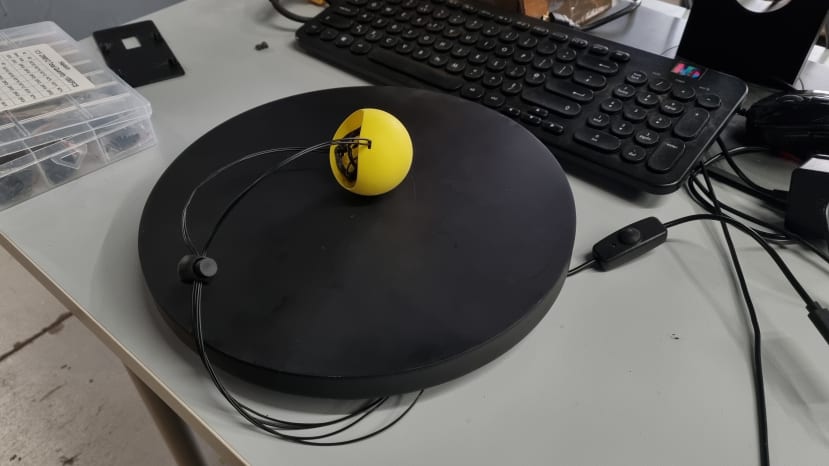
The initial part of this project was to define the overall dimensions. The first task was getting the rough dimensions of a clown nose. Then source a small enough LED display to shine through the material. The High-Density 8x8 Matrix from Adafruit fitted the bill nicely (except for the burning out easily part).
In order to break away from the constraint of bulky sensor components, I decided to hide that backstage along the power cable as we do with power supplies. This will leave the small nose to be the central focus.
With this information, we sketched the concept, drew it to scale in 2D then modelled the nose in 3D.
From this file, we produced an STL format to do a rough FDM print at the studio to confirm the dimensions before sending the file to print SLS to get a better finish quality.
To make use of the minimum order and lead time we printed different thicknesses, colours and materials to choose from. Some were printed as a single unit, others as an assembly of 2 parts in case the components will be too big for the cut-out. All worked pretty nicely.
Code
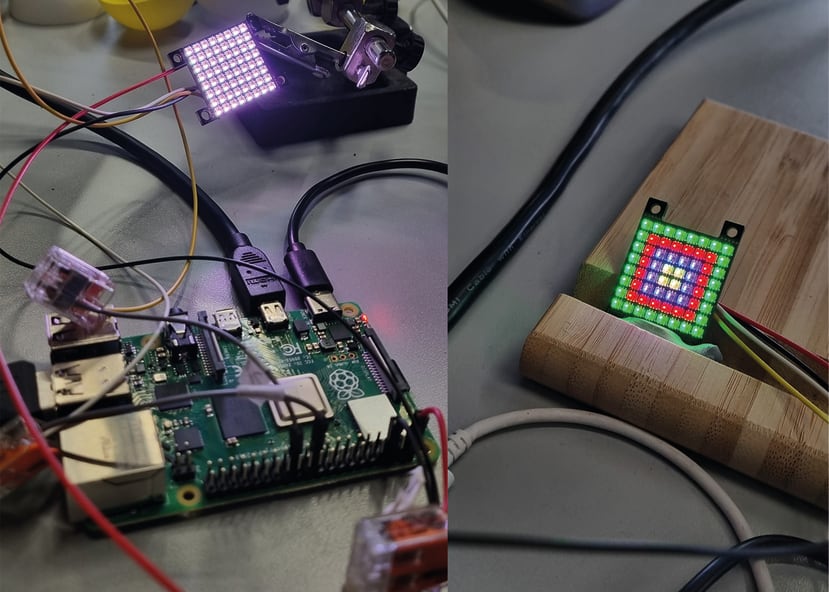
We originally planned to use the future (at the time) comprehensive AQ Sensor Kit from DesignSpark. As it is running on Raspberry Pi and is coded in Python we decided to give CircuitPython onto Pi a go.
We installed the CircuitPython library and the matching Dotstar library to control the Dotstar LED matrix.
We picked this Matrix thinking it was going to be quick to adapt the library examples out of the box but unfortunately the CircuitPython /Dotstar library examples for Raspberry Pi were incomplete or glitchy. Controlling individual LED was fine but the more complex examples were mostly for other boards.
Researching various codes and adapting them for our situation, we then got the GIF animation working. Which is probably the main thing as from there we can make any animation on Photoshop or similar software. If you want an existing GIF you can resize it (to crop it properly). If you want to create a new animation, it's better to work directly onto an 8x8 pixel great to properly control the pixels.
The text scroller was really glitchy and the code needed to be reworked so this took longer than expected. The scrolling text support is not essential but brings a lot of flexibility for people who want to adapt the project, to show data reading for example. In our case, the GIF animation is flexible enough and more elegant if we want to do more work on that.
Internal structure
In parallel with the code, we tested the light diffusion of the various nose thicknesses and different distances from the surface. The screen being so far off, the diffusion was great for abstract graphics but not so great for text display. We anticipated it could be the case so I already had a few plans to try:
- to add a concave glass lens (which worked but not as well as the next ideas)
- to create a matrix mount with a grid to channel the light of each LED
- with the possibility to add optical fibre into each channel to carry more lights to the surface if needed.
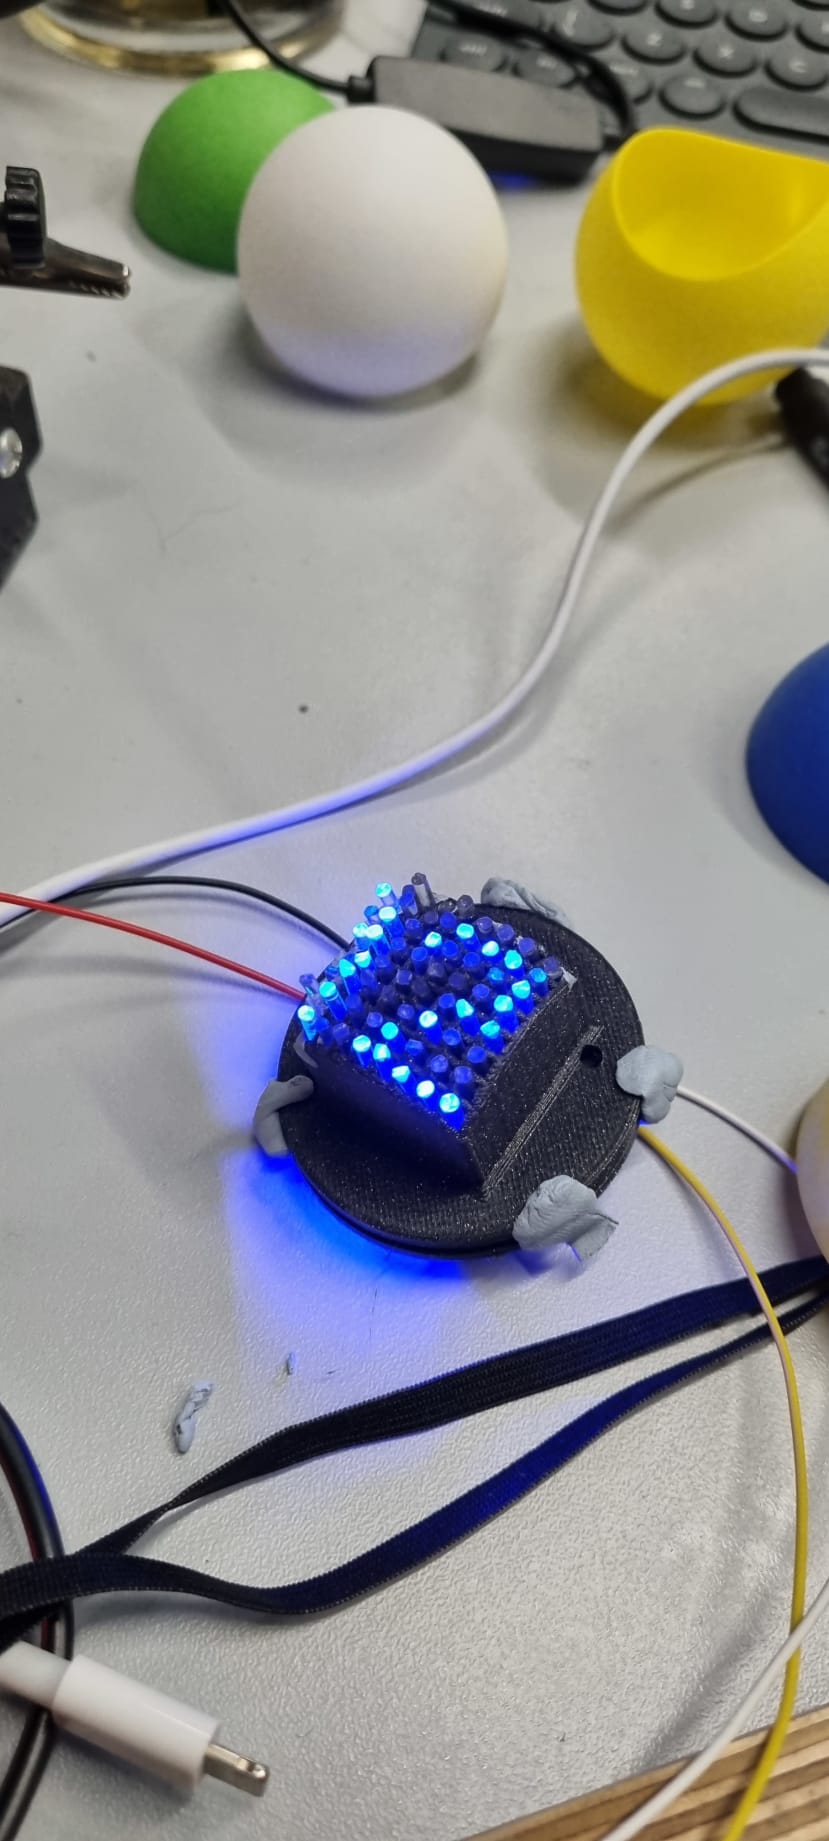
We designed little legs to keep the mount in place inside the nose, while still being able to be dismantled.
Straps
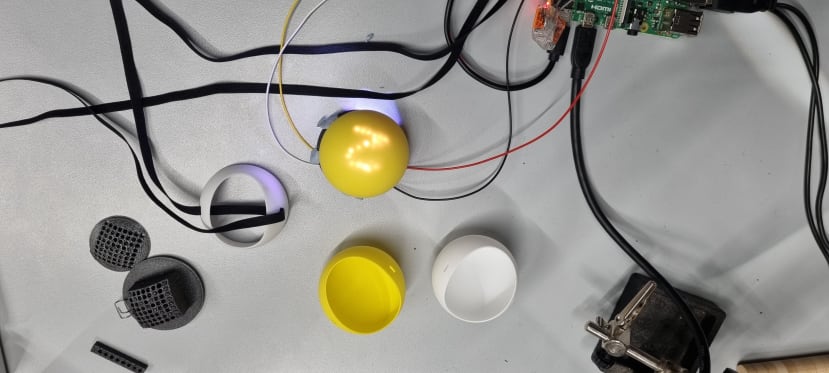
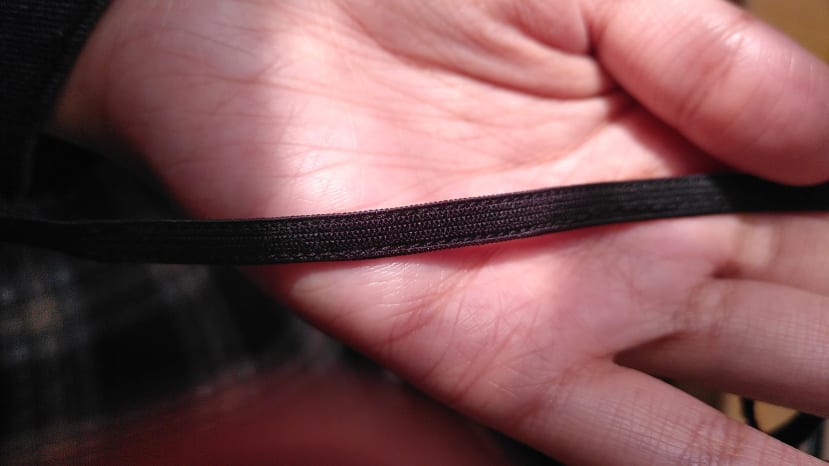
To hold the nose onto various support we initially tried using the same elastic as for face masks – 2 of them sewed together to let 2 wires pass through on both sides (2 for power, 2 for matrix control), but it was too tight. Using a larger elastic worked but it was visually too big.
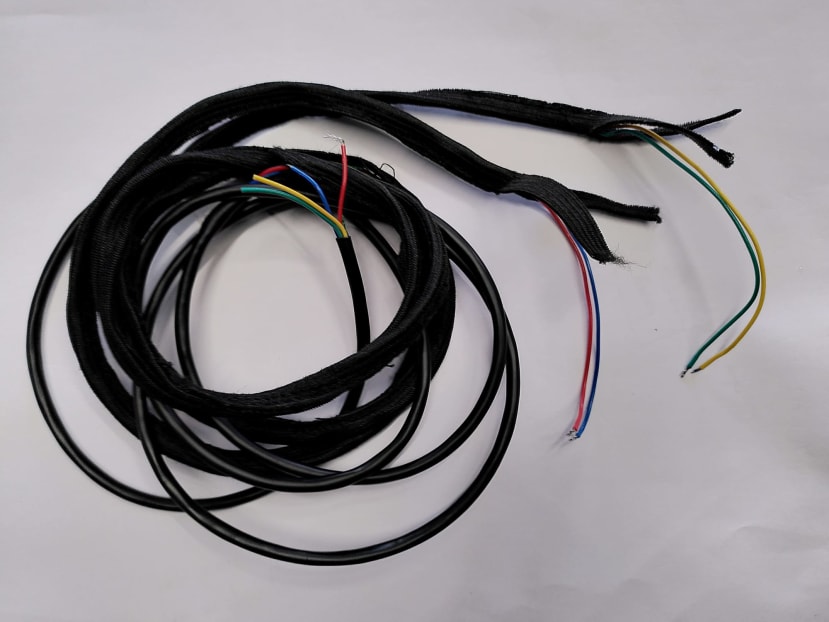
In the end, to keep things slim we went with using 2 black wires on each side with a push connector. The wires feed through the leg mount to reduce the tension and pull of the wires in the nose.
Sensor
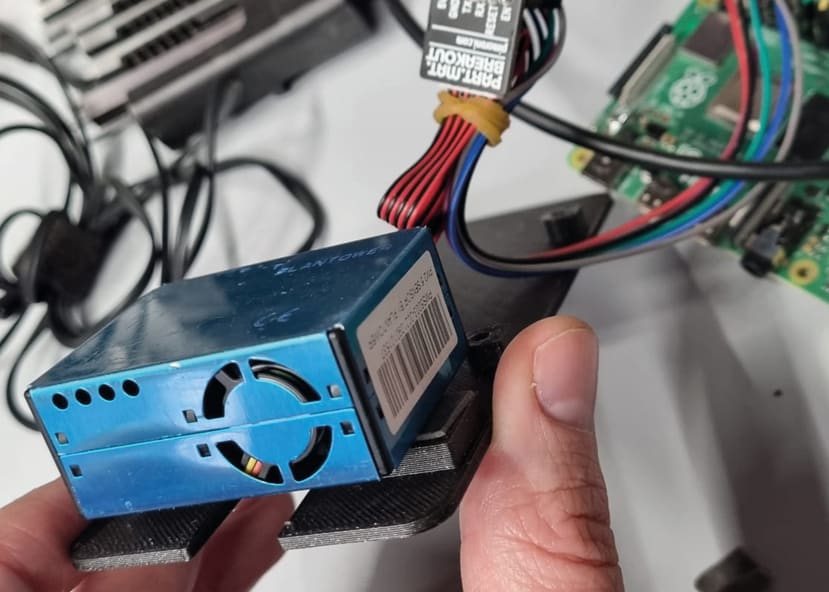
When receiving the powerful DesignSpark AQ Sensor we realised that it was designed to run onto its separate Pi board with Wifi access to really use all the features. We didn't want to have 2 microcontrollers for a project about simplicity, so we went for a less full feature but simpler to integrate Particle Sensor, able to give us information about PM1.0 (ultrafine particles), PM2.5(combustion) and PM10 (dust, pollen). But the project could be used with the sensors of your choice.
We picked the Plantower PMS 5003 has it had a python library and example code for us to use. With it we ordered a breakout board to convert the small connector into terminal pins to save time – we thought... After a fair bit of head-scratching, we realised that the breakout board bought with the sensor was labelled wrong. The datasheet of the sensor itself is correct.
From there we could combine our display code and sensor code into one, creating some threshold on the sensor reading to trigger various text or animations on the LED display.
Enclosure
We designed a simple 3D printed enclosure to keep the components together.
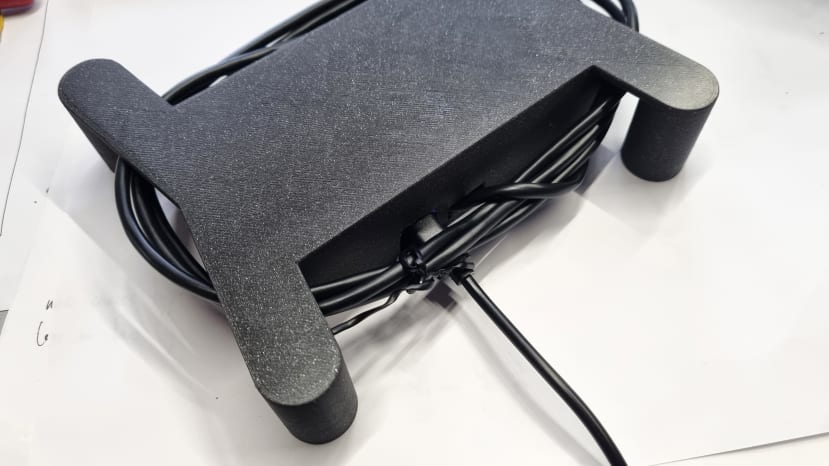
Then we got the idea to put it under a tray that can act as a plinth under your nose-enhanced object. The enclosure can be fitted under this platform, hiding discreetly in its shadow. The enclosure has 4 spacers to let the air circulate to the sensor. If you prefer not to have a tray you will not need the spacer legs and can simply print off your own enclosure for the particle sensor and raspberry pi board.
The final project and resources are in the next article.
Comments