DesignSpark Mechanical on a Latte Panda Development Board.
Follow projectHow do you feel about this article? Help us to provide better content for you.
Thank you! Your feedback has been received.
There was a problem submitting your feedback, please try again later.
What do you think of this article?
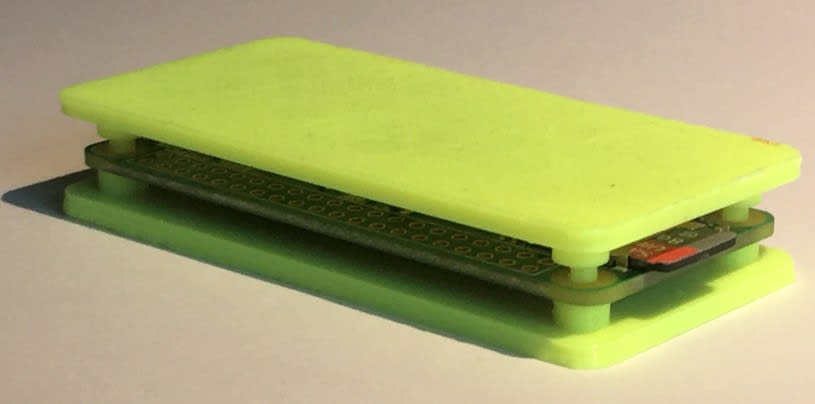 I find it much easier to learn by doing than by watching - so having watched the DesignSpark Mechanical tutorials, I set about making a Pi Zero Case - here's my step by step guide ...
Parts list
| Qty | Product | Part number | |
|---|---|---|---|
| 1 | DFRobot LattePanda (with Licence) SBC Computer Board DFR0418 | 124-4684 | |
The difference between the CAD package I learned at University, and the ones available now are about as different as Windows 3.1 is to Windows 10. So although I "thought" I knew how to draw in CAD - I kept stumbling on the first steps.
The YouTube tutorials are good, but it's not how I like to learn. I prefer to follow a step by step guide to make something I will actually use.
So I have written such a guide here - how to make a Pi Zero Case using DesignSpark Mechanical.
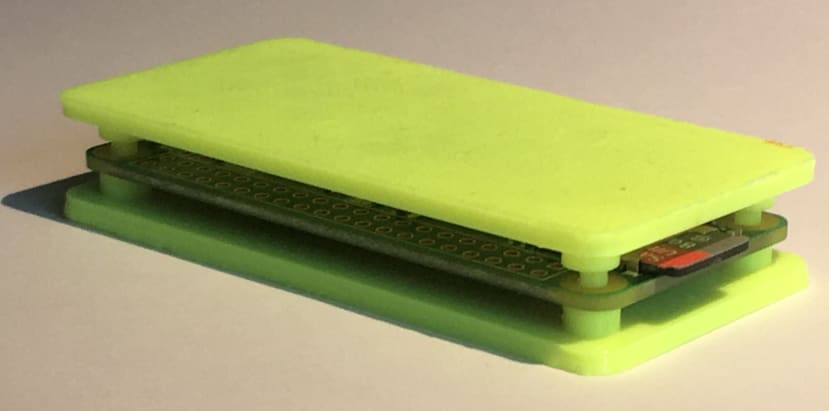
However, I discovered it will run on a Latte Panda (124-4684) - which is far cheaper than a Windows Machine, so I gave it a go.
Before you actually start using the CAD package:
- Update the Latte Panda with the latest Windows update - time required: about a day.
- Download and install DesignSpark Mechanical (DSM), following the guide - time required: a few hours. Note: Do complete steps 1 and 2 before restarting your PC - it does tell you to, but it's tempting not to!
- Watch the DesignSpark Mechanical Tutorial 1: User Interface Familiarisation Youtube video (I watched this at 1.5x speed - however, all the other tutorials in the set I watched at normal speed) - time required: about 6 minutes. This will help show you where each icon is. Note: You can watch all the tutorials in order now, but for the purposes of making this Pi Zero enclosure, I will point to the relevant Tutorials at each step.
Useful things to note:
- There may be easier ways to do parts of this - this is what worked for me.
- Ctrl Z is undo last command.
- Scissors tool in the Clipboard Menu is cut.
- There is no "mirror" tool.
- If the axes go white, it means the item is locked and you can't move it.
- There are lots of shortcut keys available. I have not listed any of them.
- You can insert PCBs and components directly into DesignSpark Mechanical. RS Components provide a lot of 3D models, including one for the Raspberry Pi 3 Model B - but not the Pi Zero.
- It probably took me a week of faffing to get from zero to a 3D printed case - mainly as I kept going off down rabbit holes and watching YouTube videos that although were interesting, did not help on the problem I had encountered. However, I am now confident I can make a basic "thing" relatively quickly. There were some things I tried but they were unsuccessful (see the end of the project) - but I know the theory of how they could be done!
- The DSM on the Latte Panda occasionally freezes. Make sure to save regularly!
- At times DSM is not intuitive - for example, to make a hole in something you can use Pull or Combine. However, there are many great resources on the internet. Google is your friend.
- The Latte Panda is not intuitive! Also, make sure the HDMI cable is fully inserted - otherwise you may think you have a dead Panda!
- When the Latte Panda has gone to sleep, a brief touch of the "on" button wakes it up.
- Cura seems slow on the Latte Panda (compared to my Macbook) - but then I suppose it would! It seems to work fine.
Make the base
- Watch Tutorial 2 - Sketching
- Open DesignSpark Mechanical, and open a new design (File, New, Design)
- Click on Sketch Mode (Mode Menu) - a grid will appear if it wasn't there already.
- Click on Plan View (Orient Menu) - you're now looking down along the Z-axis.
- Click Rectangle tool (Sketch Menu) and then click on the centre of the axes (the Origin).
- THAT LAST BIT WAS IMPORTANT - UNDO AND DO AGAIN IF YOU MISSED IT!
- Start dragging a rectangle upwards and to the right of the axes. Edit the dimensions by clicking on them to make your rectangle 68mm wide by 33mm tall.
- Click 3D Mode (Mode Menu), then Home (Orient Menu)
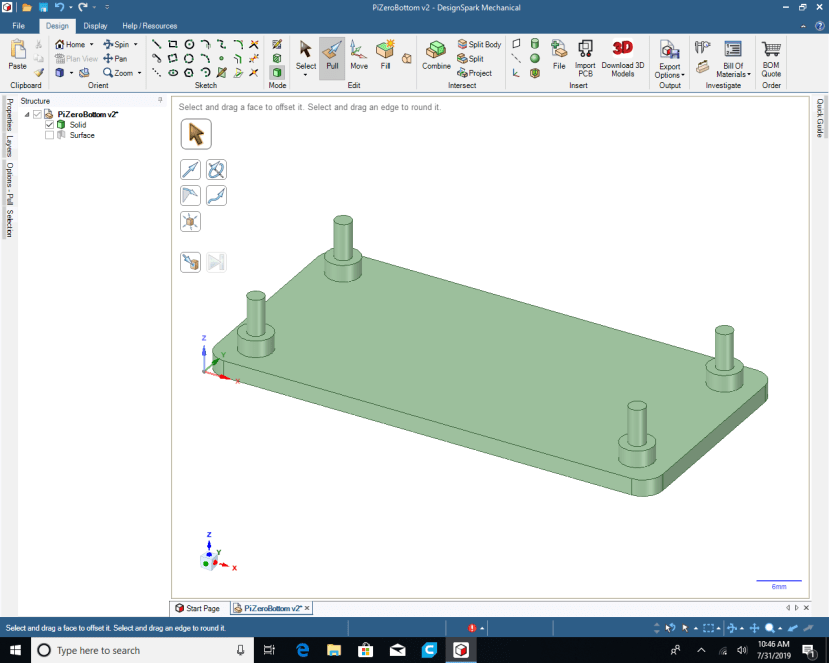
- Click the Pull tool (Edit Menu) then the rectangle. It will go orange. Pull the rectangle upwards and change the dimension to 2.5mm.
Round the Edges
- Watch Tutorial 3 - Edges
- Select Pull tool (Edit Menu) then right-click on one short vertical edge of the rectangle. You will then get a selection of icons. When I first did this on the Latte Panda, I got a new page with the icons at the top - when I changed my display settings it intermittently fixed that. If you can't get out of the new page, minimise the DSM window and then reopen it.
- Select Round Edge.
- Stretch the edge and make the radius 3mm.
- Spin the box (Using Spin in Orient menu) and do the same to the other three uprights.
Make the locating nubules
- Go to Sketch Mode (Mode), click on the rectangle, and then on Plan View (Orient).
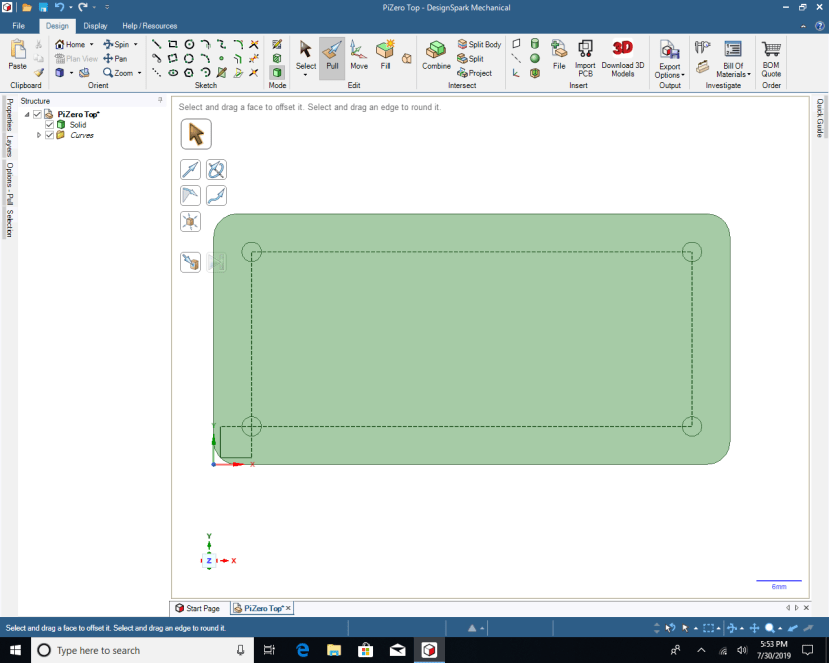
- Starting on the origin (same as the base plate), draw a rectangle with dimensions 58mm wide x 23mm tall.
- Click Select (Edit) and then double click on one of the rectangle edges, so that the whole of the rectangle is highlighted.
- Right-click and click on the dotted construction line icon to make it a construction line.
- Select Move, then double click on the rectangle.
- Grab the ball in the middle of the "move" axes and move it so it is at the bottom left corner of the rectangle.
- Double click the rectangle again and then right-click and click the XYZ icon.
- Make x=5mm, y=5mm, and z=2.5mm
- Now draw two circles at each corner of the rectangle using the circle tool (sketch menu). Diameters 5.5mm and 2.4mm.
- Click 3D mode and Plan View.
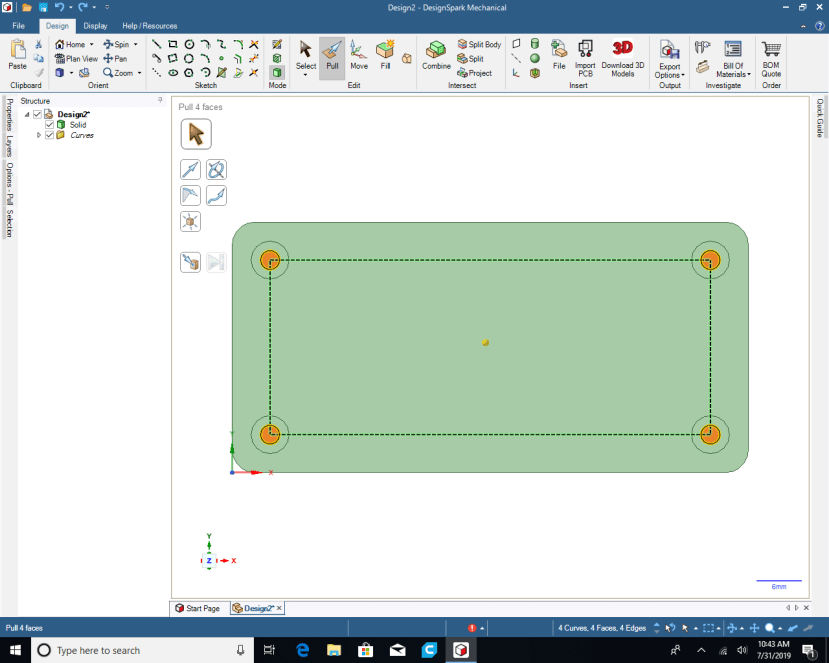
- Select the inside and circumference of each of the smaller circles (use ctrl to select more than one) - they will turn orange, and the circumference will be bold.
- Select Pull (Edit menu) and Home View
- Pull the circles up 7mm - to give you columns. If you pull the wrong way, it makes holes in the base.
- Repeat with the larger circles (don't highlight the inner circle circumference), pull up 2.5mm.
- Save as an STL and print.
Save and Print
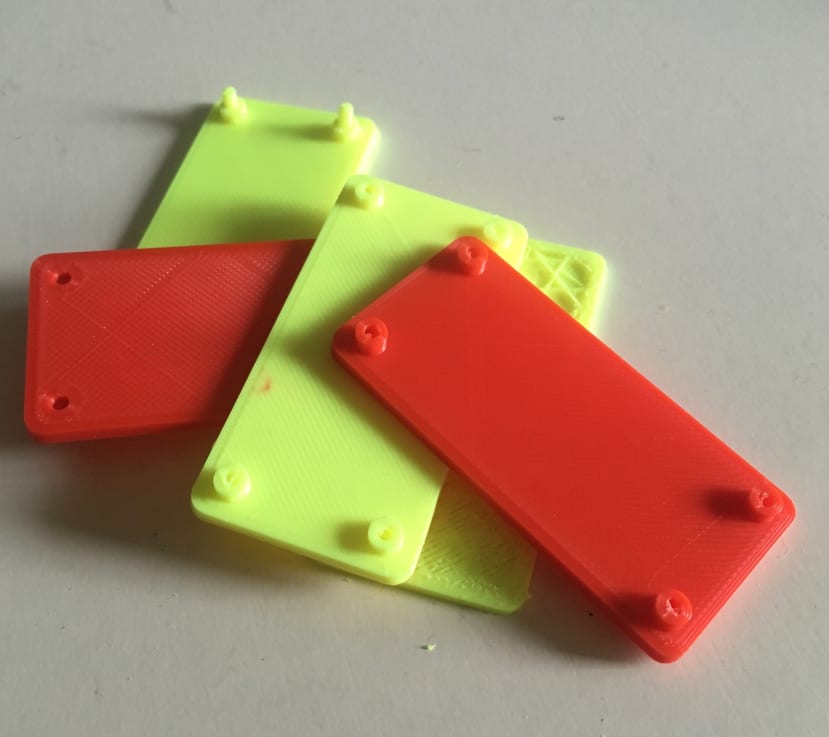
I saved the file as an STL and used Cura on the Latte Panda to slice it. I used the 3D Printer Creality 3D Ender 2 to print. Both the base and the lid took about 45 minutes to print.
Make the top
- Repeat the "Make the Base", "Round the Edges" and points 1-8 of the "Make the locating nubules" listed above.
- Now draw two circles at each corner of the rectangle using the circle tool (sketch menu). Diameters 5.5mm and 3mm.
- Click 3D mode and Plan View.
- Select Pull (Edit menu). Select the inside of the outer circle - to give a doughnut (use ctrl to select more than one) - they will turn orange.
- Select Home View
- Pull the doughnuts up 2.5mm.
- Save as an STL and print.
Things I tried but failed at (and spent far too long faffing with):
I initially wanted to make a full enclosure with walls and cutouts, as demonstrated in Youtube video DesignSpark Mechanical Training Tutorial 9 Positioning.
Note: Walls 3mm thick will mean the mini HDMI adapter will not insert correctly into the case!
I downloaded a STEP file of the Pi Zero (there is not a 3D model of the Pi Zero in the RS 3D models library) from GrabCad.com. STEP files are locked (read-only), but there's a workaround to unlock it described here - which seemed to work OK.
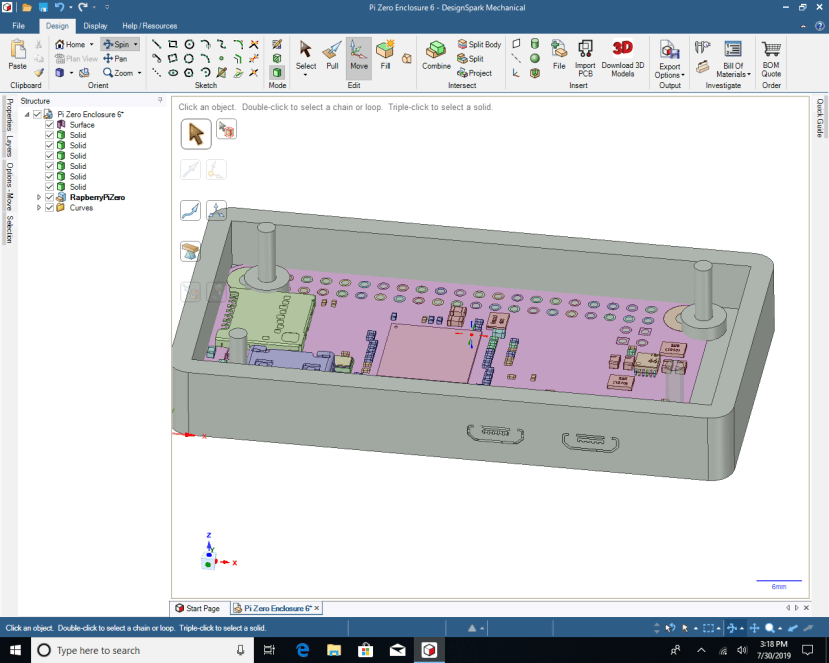
I then tried to use the combine tool to make cutouts for the mini USB and mini HDMI ports - I spent too many hours trying to do this. The DSM kept crashing, and I couldn't get it to do it nicely. I either deleted the whole of the case or some of the profile and where the pins are on the mini USB's (see screenshot), and the mini HDMI just wouldn't select/cut out at all. This could well be a problem with the geometry of the STEP file I used.
I also tried to replace the components, but this option was greyed out.
3D Print failures - due to design or printer errors:
BONUS: How to build walls (not used in making the Pi Zero Case)
- Watch Tutorial 3 - Edges
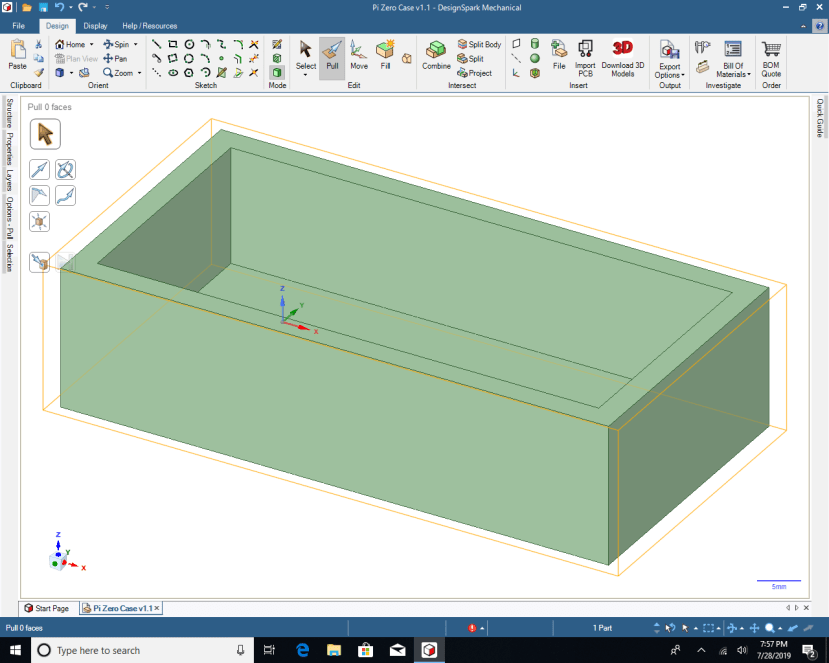
- Select Pull tool (Edit Menu) then right-click on the top right short edge of the rectangle. You will then get a selection of icons. When I first did this on the Latte Panda, I got a new page with the icons at the top - when I changed my display settings it intermittently fixed that. If you can't get out of the new page, minimise the DSM window and then reopen it. Click Copy Edge, then on the little yellow down arrow, then drag the edge upwards. Hit the space bar and enter 10mm into the dimension box. This will give you a 2D wall.
- Click Pull tool (Edit menu) and then click on the inner face of the 2D wall you have just made, then on the little yellow right arrow, then drag the edge to the right. Hit the space bar and enter 3mm into the dimension box. This will give you a 3D wall - if you only get the top part of the wall, undo and reselect the wall, not the edge. The edge goes yellow, the wall goes orange.
- Repeat and make the other three vertical walls of the box.


Comments