Building a Controller for The Good Air Canary
Follow article
 Dave from DesignSpark
How do you feel about this article? Help us to provide better content for you.
Dave from DesignSpark
Thank you! Your feedback has been received.
Dave from DesignSpark
There was a problem submitting your feedback, please try again later.
Dave from DesignSpark
What do you think of this article?
This article supports the Good Air Canary from Jude Pullen, once you have finished here, please go back to Jude's article to complete your Canary project.
Step 1: Arduino MCU
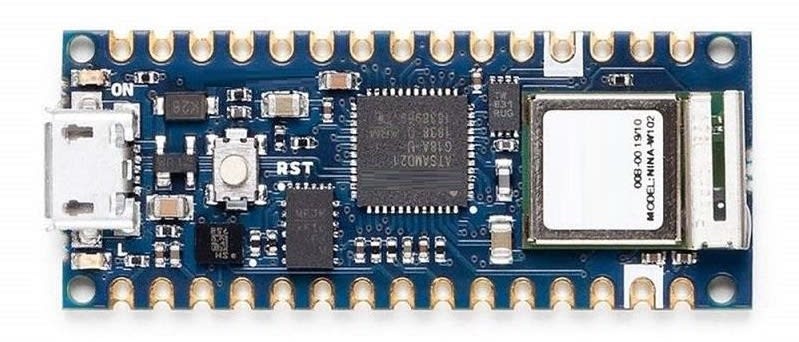
At the centre of the hardware is the Arduino Nano 33 IoT board. This has a SAMD21 Cortex®-M0+ 32bit ARM MCU with 256KB flash memory and a u-blox NINA-W102 Wifi module.
The board connects to Wifi, runs an MQTT client that receives the sensor data from the DesignSpark Environmental Sensor Development Kit (ESDK), processes the JSON messages and controls a servo to actuate the canary through a clever mechanical mechanism. The servo is driven by a PWM servo control board and high-quality audio is provided by a dedicated audio board with a built-in amplifier and single speaker attached.
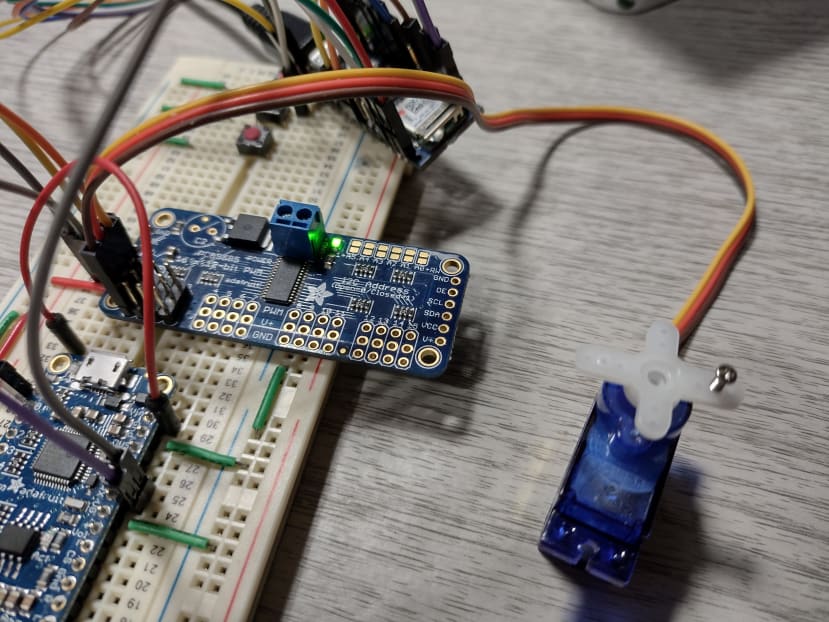
Step 2: Prototype circuit
The circuit can be built up and tested in stages to make sure that each component is working before adding the next. Just take care with voltage levels. Here are the main components:
Warning: The Arduino Nano GPIO operates at 3.3V and the circuit also uses 5V for some components - be careful not to connect 5V to the Arduino GPIO or you will damage it!
Adafruit 16-Channel 12-bit PWM Servo Driver
This board operates at 3.3V (VCC) powered from the 3.3V pin on the Arduino. The servo has a separate 5V supply (V+) from the linear regulator. Communication is via an I2C interface using a driver library from the manufacturer. Originally we thought that we might need more than one servo for the canary, as it worked out we didn’t but we left the board in the design as it simplifies the hardware and programming.
TowerPro SG90 Analog Servo Motor
This operates the wing mechanism of the canary
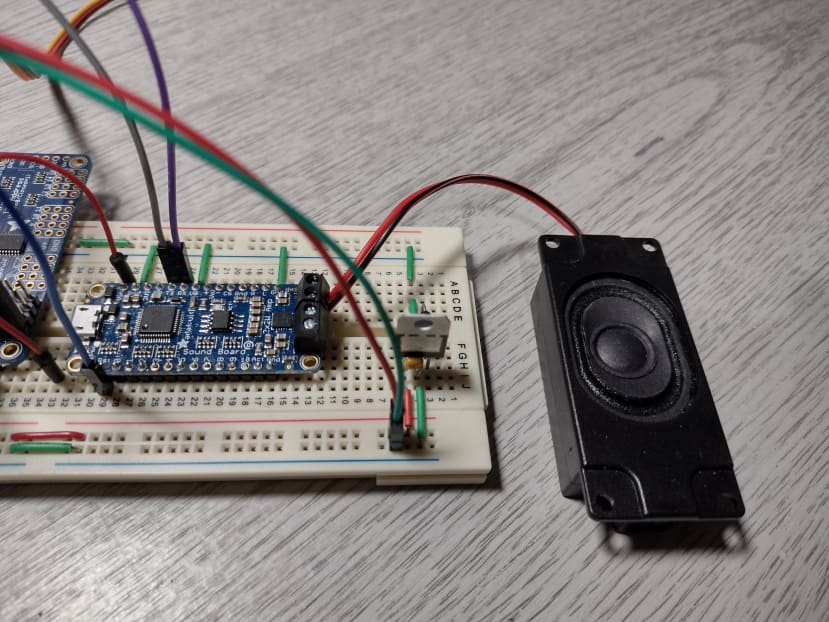
Adafruit Audio 2MB FX Sound Board with Amp
Plays 44.1KHz 16 bit OGG format sound clip recordings that are pre-loaded onto the device in USB mass storage mode. It uses a serial interface operating at 9600 baud controlled by the Arduino using a driver library provided by the manufacturer.
4 Ohm / 3W Stereo Enclosed Speaker
We purchased a set of two speakers as the soundboard supports stereo but it was decided to just use one speaker for a compact design.
Note: Use 4 - 8 Ohm impedance speakers and keep the cable length to less than 10 cm.
L7805 powers linear regulator and capacitors
We built in an independent 5V power supply to power the Arduino (via VIN) and for the audio board and servo. You may be able to get away with using the USB connector on the Arduino to supply the circuit, depending on your servo power requirements but it will be at the upper limit safe to use with the Arduino.
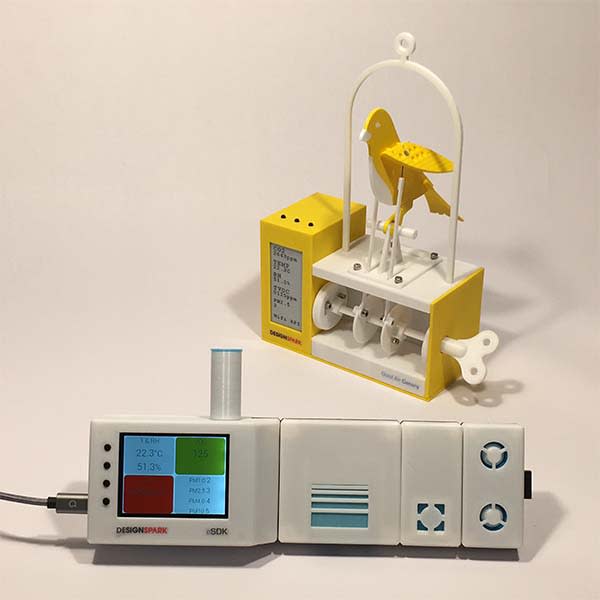
2.9 inch E-ink display from Waveshare
We wanted a contemporary display to show all the sensor readings received from the ESDK. The display was tricky to program and we had issues with the hardware versions being different, even though they had the same part number. The code libraries also seem to change during development so we have included the working version in our GitHub for the project.
Note: The E-ink display code and library version only works for Waveshare 2.9in Black & White displays marked V2

Here’s an image of the prototype circuit being tested with the ESDK - you can see the ESDK between the screen and keyboard and the canary circuit to the right. The screen is showing the JSON messages being received from the ESDK in the Terminal.

Step 3: Arduino sketch
Programming and flashing the Arduino IDE was done using the Arduino IDE. The full source code is available on the DesignSpark GitHub:
Download the zip file or clone the repo to your Windows / Mac / Linux or Raspberry Pi.
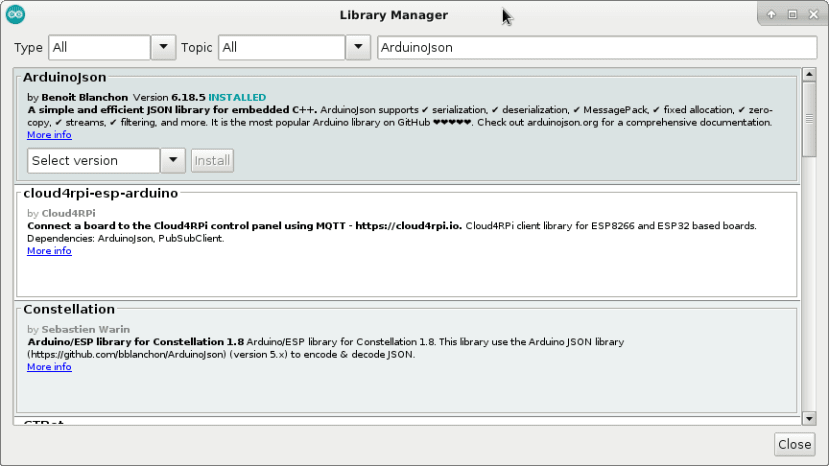
You will need to install a number of different Libraries into the IDE using the Library Manager before you can compile and upload the code to the Arduino:
- Arduino WiFiNINA library
- Adafruit Soundboard library
- Adafruit PWM Servo Driver Library
- ArduinoJson - not Arduino_JSON which didn’t handle the large JSON payload well
- PubSubClient
Attaching the Arduino to your Wifi will require editing the following lines in the arduino_secrets.h file which should appear in one of the tabs in the IDE.
Change the defined statements to match your own Wifi SSID & password (with inverted commas):
#define SECRET_SSID "YOURSSID"

#define SECRET_PASS "YOURPASSWORD"
Depending on your network, you may need to change the default hostname of the ESDK. This is in CanaryController.ino. Change the character string from “airquality” the IP address of the ESDK on your network. You can find this by logging into your router as administrator and looking at the connected devices.
// ESDK server name or IP address

//const char broker[] = "192.168.0.75";

const char broker[] = "airquality";
You can change the frequency with which the canary checks CO2 levels. For testing we set it to every 20 seconds but you may want to extend this by updating the define statement, in milli-seconds:
// Interval between audio / physical warings - change if it's

// nagging you too often

unsigned long DELAY_TIME = 20000; // 20 seconds
Once all these changes have been made you should be able to compile and upload the code to your Arduino, then open the serial monitor to see debugging information.
When the system boots it displays the credits screen, initialises the servo and soundboard, then plays a “yawn” sound clip. The Arduino then tries to connect to the network and if successful, subscribes to the ESDK’s MQTT server, where it waits for the first messages to appear. At that point, the screen will start to display the sensor readings from the ESDK.
Periodically the canary evaluates the CO2 level data received and performs one of its actions according to the current level.
If you ignore the canary it will get persistently more agitated until it keels over. Don’t let that happen as it’s bad for your health and you will have to reset the Arduino, which is intentional!
Step 4: MQTT
If you have a Linux box or a Raspberry Pi you can view the MQTT message payload coming from the ESDK by subscribing to its MQTT server.
Make sure you have the mosquitto-clients package installed:
sudo apt install mosquitto-clientsSubscribe to the ESDK service using the following command:
mosquitto_sub -F '%I:%t:%p' -h airquality -t airquality/#You should see the JSON payload update every 5 seconds, similar to the output below:

Step 5: Servo tuning
Each servo behaves slightly differently so you may need to tune the parameters to suit your servo. Do this by adjusting the following defined statements in the ESDKCanary.h file which should appear as one of the tabs in your IDE:
#define WINGS_DOWN 495
#define WINGS_UP 445
#define PASS_OUT_POS 225
#define DEAD_POS 150
Tweak the settings by a small amount and then re-compile your code until the canary movement is correct and your servo is not chattering.
Step 6: Sound effects
Our sound effect files were recorded on a windows PC in M4A format. They were converted to Ogg Vorbis format on a Linux box or Raspberry Pi using ffmpeg (other converters are available).
Make sure the ffmpeg package is installed:
sudo apt install ffmpegThis command, used in the Terminal converts the “yawn” clip in M4A format to the Ogg Vorbis format using the naming convention required by the soundboard:
ffmpeg -i yawn.m4a T00.oggThe board can play up to 9 different files, which must have a specific naming convention. The first file is named T00.ogg, second T01.ogg etc.
Before the board is installed into the circuit, flash the Ogg sound clips onto the soundboard’s EPROM by attaching it to your PC with a USB cable and copying the files using a file manager or terminal.
You can record your own sound effects or use the ones provided in a Pytonesque voiceover - let your creative side go wild!
Small 4 Ohm / 3 W speaker attached on short cable.
Step 7: Troubleshooting
The Arduino IDE serial monitor is your friend when finding out what’s going on with your firmware. We included loads of serial output to help with debugging.If you have trouble, uncomment the while loop after the serial interface begins in the setup section to see all the output from the running code. You should see helpful error messages which will help in tracking down any issues.
 Serial.begin(115200);
 while (!Serial) {
  ; // wait for serial port to connect
 }
Arduino is not connecting to the network
Change the “airquality” hostname to the IP address of the ESDK and reflash the code.
Canary screen continues to display the credits screen
Check that the ESDK is on the same network if you have more than one and that you can subscribe to its MQTT messages using the method in step 4.
Canary is not moving correctly
Check the servo parameters are suitable for your servo as in Step 5
The soundboard makes a popping sound but sound clips don’t play
Check you have set it to use 9600 baud rate in the setup section of CanaryController.ino
E-Ink display is blank
Check you have the V2 version of the 2.9in Waveshare display
MQTT messages are not being processed
Make sure you have enough memory allocated to hold the JSON document in the MQTT callback function
// ESDK sends a large JSON payload

// - ensure you have enough memory allocated

StaticJsonDocument<384> doc;
This article supports the Good Air Canary from Jude Pullen, once you have finished here, please go back to Jude's article to complete your Canary project.