How do I create a pattern of objects in DesignSpark Mechanical?
Follow tutorial
 Dave from DesignSpark
How do you feel about this tutorial? Help us to provide better content for you.
Dave from DesignSpark
Thank you! Your feedback has been received.
Dave from DesignSpark
There was a problem submitting your feedback, please try again later.
Dave from DesignSpark
What do you think of this tutorial?
This tutorial requires:
DesignSpark Mechanical V6.0In DesignSpark Mechanical, you can either create a pattern of 2D sketched shapes or of 3D objects. This tutorial is divided into two sections with step-by-step instructions:
1. To create a 2D pattern
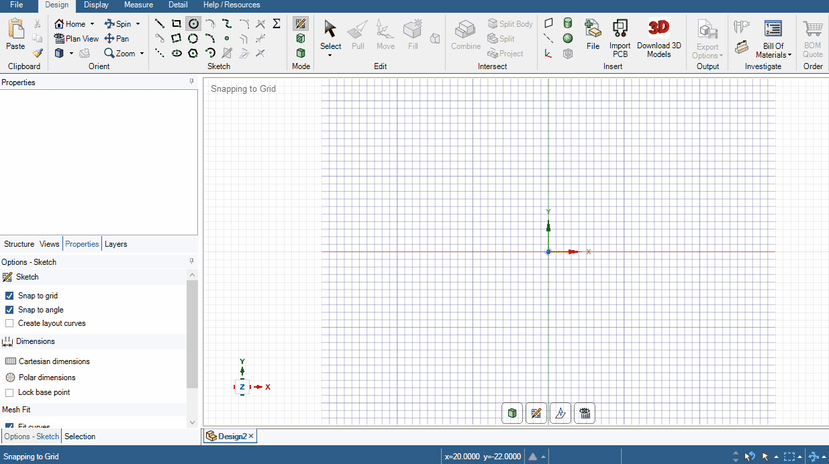
- Open a new/existing design file and go into sketch mode. A grid will appear in your workspace.
- Sketch any shape, such as a circle.
- Select the Move tool from the Design tab.
- If building a linear pattern, select the circle with the Move tool, tick the ‘create patterns’ option and drag in any direction to make equally spaced copies. These copies are grouped into a pattern. You can adjust the number of pattern members. Watch the GIF demo.
If building a rotational pattern, first place a point at the axis of the intended pattern. Next, select the circle with the move tool and then drag the move tool to the point your placed earlier. Tick the ‘create patterns’ option and rotate the move tool. You can adjust the number of pattern members. Watch the GIF demo.


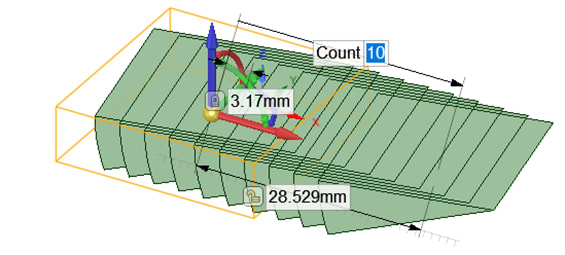
2. To create a 3D pattern
- Click Move in the Edit group of the Design tab.
- Select the Create patterns checkbox in the Options -> Move panel.
- Select a protrusion, depression, sketch, points, axes, planes, origins, or 3D curves to be the first member of the pattern.
- Drag a move handle to copy the first pattern member to the location of the last member of the linear pattern.
- Type a new value for the pattern count.
- Press Tab to change the distance or spacing.