Cypress WiFi-BT Pioneer Kit Embedded Networking, The Easy Way
Follow article
 Dave from DesignSpark
How do you feel about this article? Help us to provide better content for you.
Dave from DesignSpark
Thank you! Your feedback has been received.
Dave from DesignSpark
There was a problem submitting your feedback, please try again later.
Dave from DesignSpark
What do you think of this article?
With so much emphasis in current marketing materials for ‘Smart’ everything, it can seem to run against the grain to say that not every ‘connected’ application needs a cloud.

Sometimes it is enough for an embedded device to simply retrieve some data from a known location or communicate with other devices over your local area network. Maybe you just need to let someone interrogate your device over a local network; with a web browser, for example.
Thanks to some powerful libraries, these kinds of interactions can be built in Python with just a few lines of code: making it easy to try out different approaches and find what suits you best. All in the same amount of time it would normally take to code just one these interactions.
The Zerynth toolchain makes this process even easier by providing a large range of practical code examples that you can build on to create your own bespoke applications. We will explore some of this in today's article using a Cypress WiFi-BT Pioneer Kit (175-4669) , the latest addition to the Zerynth ‘family’ of supported boards.
Getting Started
I am going to assume that you have already installed Zerynth and followed the instructions for setting up your Pioneer Kit, including connecting, registering and virtualising your device.
With that done, we are free to load up any of the example programs onto the board. As I mentioned before there are quite a lot of them and they can be found by clicking on the ‘lightbulb’ icon to the left of the IDE project window. So let’s do that now and select one of the examples from the ‘Networking’ section:
Mini Web Server

I have started with the Mini Web Server example as this shows us the basics of how to remotely present information to a human user in a format they will be able to read, using HTML. In order to use this example ourselves, we need to click on the ‘clone’ button and save it into our own project directory. We can rename the project and it can be anywhere we like on our hard disk.

Now we have our own copy we can modify it to work with our board. There are only two things we need to do:
- Import the correct driver for the WiFi device we have on the board. This is just one line of code.
- Provide the program with our network credentials so it can log on to our network. I have modified the code a little more than necessary, as I like to have this information at the top of the program file, so it is easy for me to find and change for different locations.
So now we can try it out.
###############################################################################
# Mini Web Server
#
# Created by Zerynth Team 2015 CC
# Authors: G. Baldi, D. Mazzei
###############################################################################

# import streams & socket
import streams
import socket

# import the wifi interface
# the wifi module needs a networking driver to be loaded
# in order to control the board hardware.
from wireless import wifi
from murata.lbee5kl1dx import lbee5kl1dx as wifi_driver

NetName = "Network_Name"
NetPassword = "Network_Password"


streams.serial()

# init the wifi driver!
# The driver automatically registers itself to the wifi interface
# with the correct configuration for the selected board
wifi_driver.auto_init()
# use the wifi interface to link to the Access Point
# change network name, security and password as needed
print("Establishing Link...")
try:
    # FOR THIS EXAMPLE TO WORK, "Network-Name" AND "Wifi-Password" MUST BE SET
    # TO MATCH YOUR ACTUAL NETWORK CONFIGURATION
    wifi.link(NetName,wifi.WIFI_WPA2,NetPassword)
except Exception as e:
    print("ooops, something wrong while linking :(", e)
    while True:
        sleep(1000)

# Yes! we are connected
print("Linked!")

# Let's print our ip, it will be needed soon
info = wifi.link_info()
print("My IP is:",info[0])

# Now let's create a socket and listen for incoming connections on port 80
sock = socket.socket()
sock.bind(80)
sock.listen()


while True:
    try:
        # Type in your browser the board ip!
        print("Waiting for connection...")
        # here we wait for a connection
        clientsock,addr = sock.accept()
        print("Incoming connection from",addr)

        # yes! a connection is ready to use
        # first let's create a SocketStream
        # it's like a serial stream, but with a socket underneath.
        # This way we can read and print to the socket
        client = streams.SocketStream(clientsock)

        # let's read all the HTTP headers from the browser
        # stop when a blank line is received
        line = client.readline()
        while line!="\n" and line!="\r\n":
            line = client.readline()
        print("HTTP request received!")

        # let's now send our headers (very minimal)
        # hint: \n is added by print
        print("HTTP/1.1 200 OK\r",stream=client)
        print("Content-Type: text/html\r",stream=client)
        print("Connection: close\r\n\r",stream=client)
        # see? as easy as print!
        print("<html><body>Hello Zerynth!",random(0,100),"</body></html>",stream=client)
        # close connection and go waiting for another one
        client.close()
    except Exception as e:
        print("ooops, something wrong:",e)
As a side note – if you didn’t have your board to hand, you can still compile (or ‘Verify’) your code to make sure it is syntactically correct. You do this by clicking the ‘Device:’ box above the main window. Click on choose virtual device and (in our case) select PSoC6 WiFi-Bt Pioneer Kit and the ‘Set’ button at the bottom of the list. Then you are good to go. Click on the Verify button (the leftmost of the 3 buttons to the left of the device box) and your code will be compiled – hopefully without errors.
To get the code onto the board, we need to hit the upload button - the centre button of the three to the left of the Device box. This will start the code compilation and upload. There is a point in the process where the board memory is erased before loading the new program:

This auto-erase can take a while so don’t be too disconcerted when nothing appears to happen for 30 seconds or so.
The loaded program will begin running and you can open a console window, to see the feedback, by clicking the right-most button of the group to the right of the Device box.

If we open a web browser on a PC on the same network as our PSoC6 and enter the IP address from the console window in the address bar of the browser, we will get a message:

Great! We have the message and the random number we expected. Now we can just as easily try something else.
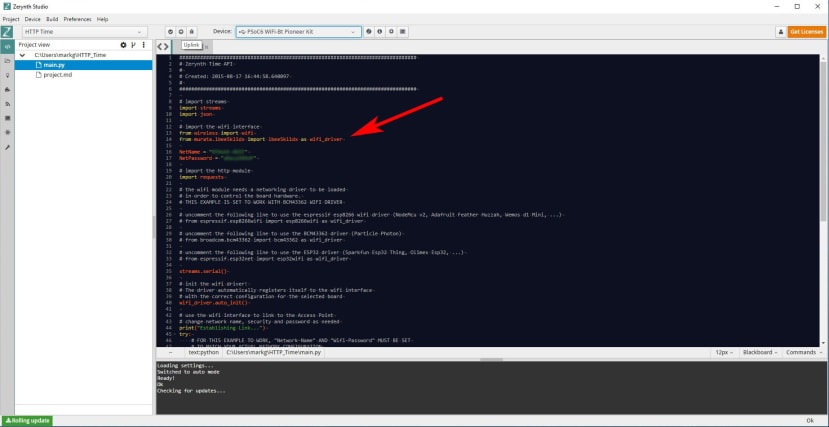
HTTP Time
This time let’s get some data from a remote source. How about the time? We can open an example like we did before:

We can then clone the example and make the same modifications as before:
The program, when loaded, will contact the server and pull the time data from it to display in our console window:

Time Served
Of course, we can quickly build our own examples by using these code examples as the basis for each of the things we would like to do. What if we wanted our device to get some data from a server and display it to a user on a web browser? We could just combine the examples like this:
###############################################################################
# Mini Time Web Server
###############################################################################

# import streams & socket
import streams
import socket
import json
import requests

# import the wifi interface
from wireless import wifi
from murata.lbee5kl1dx import lbee5kl1dx as wifi_driver
#from espressif.esp32net import esp32wifi as wifi_driver

NetName = "Network_Name"
NetPassword = "Network_Password"

def getTime():
    for i in range(3):
        try:
            print("Trying to connect to time server...")
            # go get that time!
            # url resolution and http protocol handling are hidden inside the requests module
            response = requests.get('http://now.zerynth.com/')

            # let's check the http response status: if different than 200, something went wrong
            print("Http Status:",response.status)
            # if we get here, there has been no exception, exit the loop

            js = json.loads(response.content)
            StrDate = ("Date:",js['now']['rfc2822'][:16])
            StrTime = ("Time:",js['now']['rfc2822'][17:])
            return StrDate,StrTime
        except Exception as e:
            print("Error while getting date and time")
            print(e)


streams.serial()

# init the wifi driver!
# The driver automatically registers itself to the wifi interface
# with the correct configuration for the selected board
wifi_driver.auto_init()
# use the wifi interface to link to the Access Point
# change network name, security and password as needed
print("Establishing Link...")
try:
    # FOR THIS EXAMPLE TO WORK, "Network-Name" AND "Wifi-Password" MUST BE SET
    # TO MATCH YOUR ACTUAL NETWORK CONFIGURATION
    wifi.link(NetName, wifi.WIFI_WPA2, NetPassword)
except Exception as e:
    print("ooops, something wrong while linking :(", e)
    while True:
        sleep(1000)

# Yes! we are connected
print("Linked!")

# Let's print our ip, it will be needed soon
info = wifi.link_info()
print("My IP is:",info[0])

# Now let's create a socket and listen for incoming connections on port 80
sock = socket.socket()
sock.bind(80)
sock.listen()


while True:
    try:
        # Type in your browser the board ip!
        print("Waiting for connection...")
        # here we wait for a connection
        clientsock,addr = sock.accept()
        print("Incoming connection from",addr)

        # yes! a connection is ready to use
        # first let's create a SocketStream
        # it's like a serial stream, but with a socket underneath.
        # This way we can read and print to the socket
        client = streams.SocketStream(clientsock)

        # let's read all the HTTP headers from the browser
        # stop when a blank line is received
        line = client.readline()
        while line!="\n" and line!="\r\n":
            line = client.readline()
        print("HTTP request received!")


        # let's now send our headers (very minimal)
        # hint: \n is added by print
        print("HTTP/1.1 200 OK\r",stream=client)
        print("Content-Type: text/html\r",stream=client)
        print("Connection: close\r\n\r",stream=client)
        StrD, StrT = getTime()

        # see? as easy as print!
        print(StrD,"",stream=client)
        print(StrT,"",stream=client)

        print("\r\n\r",stream=client)
        # close connection and go waiting for another one
        client.close()
    except Exception as e:
        print("ooops, something wrong:",e)
Try this example yourself on your own platform. Kudos to the first person to put a link in the comments showing their output!
From this basis we can build out for the data we actually want to fetch (e.g. the latest available firmware version) and browser appearance that we want in our end application - e.g. comparing our current firmware with the latest version.
Final Thoughts
I always enjoy running up a quick Python program on Zerynth, whatever hardware platform I’m using. It’s quick, it’s fun and you see results fast.