
 Dave from DesignSpark
こちらの記事について、内容・翻訳・視点・長さなど、皆様のご意見をお送りください。今後の記事製作の参考にしたいと思います。
Dave from DesignSpark
Thank you! Your feedback has been received.
Dave from DesignSpark
There was a problem submitting your feedback, please try again later.
Dave from DesignSpark
こちらの記事の感想をお聞かせください。
現在、どのアプリケーションも「スマート」を求められる。一方で、すべてのアプリケーションがクラウドとの接続を必要としているわけではない。このように言うと、トレンドに逆行しているように思われるかもしれない。

時には、組み込み機器で離れた場所からデータを取得したり、LAN経由で他のデバイスと通信したりするだけで十分な場合もある。例えば、Webブラウザーを利用して、LAN経由でデバイスを応答させれば十分である場合もあるだろう。
こういった程度の通信の内容であれば、ごく数行のPythonコードで構築できてしまう。これはひとえにPython の強力なライブラリのおかげだ。記述が簡単であるということは、プロトタイピングの迅速化にもつながる。
Pyhthon言語を使った組込み開発ツール Zerynthには実用的なサンプルコードが多数用意されている。Zerynthについては、Cypress WiFi-BTパイオニアキットを使用したこちらお記事でも紹介している。このキットは、Zerynth開発に対応しているボード「Zerynthファミリー」のひとつだ。
はじめに
まずZerynthをインストールする。そして手順に従ってパイオニアキットをセッティングし、デバイスの接続・登録・仮想化を行う。
ここまで完了すれば、サンプルコードをボードに自由に書き込める。サンプルプログラムは、IDEプロジェクトウィンドウの左側にある電球のアイコンをクリックすると見つけられる。
それでは、さっそくサンプルコードを1つ選択してみよう。
ミニWebサーバ

まずは、ミニWebサーバーのサンプルから試してみよう。このサンプルは、HTMLを使用してテキストを表示する基本的なコードなので、入門にはよいだろう。
[Clone (クローン]ボタンをクリックしてこのコードをコピーし、自分のプロジェクトディレクトリに保存する。プロジェクトは名前を変更できるほか、ハードディスクの好きな場所に保存できる。

これで、ボードに実行させるコードが用意できた。つぎに、下の2つの作業を行う。
- ボードのWiFiデバイスに、適切なドライバをインポートする。
- ネットワークにログインできるよう、プログラムにネットワークの認証情報を与える。例では、認証情報を場合に応じて変更しやすくするために、少し必要以上にコードを変更している。
それでは、さっそくやってみよう。
###############################################################################
# Mini Web Server
#
# Created by Zerynth Team 2015 CC
# Authors: G. Baldi, D. Mazzei
###############################################################################

# import streams & socket
import streams
import socket

# import the wifi interface
# the wifi module needs a networking driver to be loaded
# in order to control the board hardware.
from wireless import wifi
from murata.lbee5kl1dx import lbee5kl1dx as wifi_driver

NetName = "Network_Name"
NetPassword = "Network_Password"


streams.serial()

# init the wifi driver!
# The driver automatically registers itself to the wifi interface
# with the correct configuration for the selected board
wifi_driver.auto_init()
# use the wifi interface to link to the Access Point
# change network name, security and password as needed
print("Establishing Link...")
try:
    # FOR THIS EXAMPLE TO WORK, "Network-Name" AND "Wifi-Password" MUST BE SET
    # TO MATCH YOUR ACTUAL NETWORK CONFIGURATION
    wifi.link(NetName,wifi.WIFI_WPA2,NetPassword)
except Exception as e:
    print("ooops, something wrong while linking :(", e)
    while True:
        sleep(1000)

# Yes! we are connected
print("Linked!")

# Let's print our ip, it will be needed soon
info = wifi.link_info()
print("My IP is:",info[0])

# Now let's create a socket and listen for incoming connections on port 80
sock = socket.socket()
sock.bind(80)
sock.listen()


while True:
    try:
        # Type in your browser the board ip!
        print("Waiting for connection...")
        # here we wait for a connection
        clientsock,addr = sock.accept()
        print("Incoming connection from",addr)

        # yes! a connection is ready to use
        # first let's create a SocketStream
        # it's like a serial stream, but with a socket underneath.
        # This way we can read and print to the socket
        client = streams.SocketStream(clientsock)

        # let's read all the HTTP headers from the browser
        # stop when a blank line is received
        line = client.readline()
        while line!="\n" and line!="\r\n":
            line = client.readline()
        print("HTTP request received!")

        # let's now send our headers (very minimal)
        # hint: \n is added by print
        print("HTTP/1.1 200 OK\r",stream=client)
        print("Content-Type: text/html\r",stream=client)
        print("Connection: close\r\n\r",stream=client)
        # see? as easy as print!
        print("<html><body>Hello Zerynth!",random(0,100),"</body></html>",stream=client)
        # close connection and go waiting for another one
        client.close()
    except Exception as e:
        print("ooops, something wrong:",e)
ちなみに、手元にボードがない場合でも、コードをコンパイル(または「Verify (検証)」)すれば、構文が正しいことを確認できる。手順は以下の通りだ。
- メインウィンドウ上部の[Device (デバイス)]ボックスをクリックする。
- クリックして仮想マシンを選択し、(ここでは)「PSoC6 WiFi-Bt Pioneer Kit」を選択して、リスト最下部の[Set (設定)]ボタンをクリックする。
- [Verify (検証)]ボタン([Device (デバイス)]ボックスの左側にある3つのボタンの一番左側のボタン)をクリックする。
- うまく行けばエラーが発生せずに、コードがコンパイルされる。
ボードへの書き込みを行うときは、[Upload (アップロード)]ボタン([Device (デバイス)]ボックスの左側にある3つのボタンの中央のボタン)をクリックする。するとコードのコンパイルとアップロードが開始され、新しいプログラムが書き込まれる前に、プロセスのある時点でボードメモリが消去される。

この自動消去にはしばらく時間がかかる場合がある。
こうしてプログラムの実行が開始する。[Device (デバイス)]ボックスの右側にあるグループの一番右のボタンをクリックすると、コンソールウィンドウが開かれフィードバックを表示することができる。

PSoC6と同じネットワーク上にあるPCでWebブラウザーを開く場合、ブラウザーのアドレスバーのコンソールウィンドウからIPアドレスを入力すると、以下のメッセージが表示されるだろう。

上図のように、メッセージと乱数が表示されれば成功だ。以上が一連の流れになる。
時間の表示
次に、リモートソースからデータを取得してみよう。ここでは時間の取得と表示を行う。まずは先ほどのように、サンプルを開く。

次に、サンプルのクローンを作成し、先ほどと同じように変更を加える。
結果、サーバーへのコンタクトと、時間データの取得、コンソールウィンドウへの表示を行うことができた。

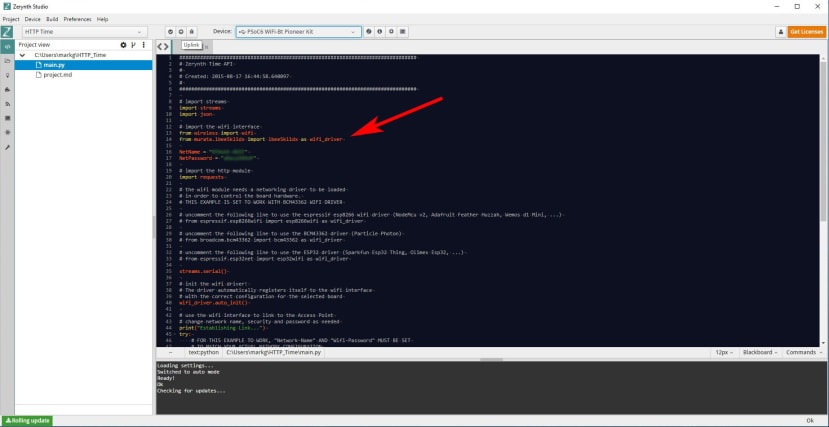
時刻の取得 & Webページへの表示
こうした豊富なサンプルを改変すれば、オリジナルのプログラムの構築も簡単に行える。それでは、デバイスでサーバーから時刻データを取得し、Webブラウザーでユーザーに対して表示したい場合はどうなるだろうか。その場合、以下のようにサンプルを組み合わせればよい。
###############################################################################
# Mini Time Web Server
###############################################################################

# import streams & socket
import streams
import socket
import json
import requests

# import the wifi interface
from wireless import wifi
from murata.lbee5kl1dx import lbee5kl1dx as wifi_driver
#from espressif.esp32net import esp32wifi as wifi_driver

NetName = "Network_Name"
NetPassword = "Network_Password"

def getTime():
    for i in range(3):
        try:
            print("Trying to connect to time server...")
            # go get that time!
            # url resolution and http protocol handling are hidden inside the requests module
            response = requests.get('http://now.zerynth.com/')

            # let's check the http response status: if different than 200, something went wrong
            print("Http Status:",response.status)
            # if we get here, there has been no exception, exit the loop

            js = json.loads(response.content)
            StrDate = ("Date:",js['now']['rfc2822'][:16])
            StrTime = ("Time:",js['now']['rfc2822'][17:])
            return StrDate,StrTime
        except Exception as e:
            print("Error while getting date and time")
            print(e)


streams.serial()

# init the wifi driver!
# The driver automatically registers itself to the wifi interface
# with the correct configuration for the selected board
wifi_driver.auto_init()
# use the wifi interface to link to the Access Point
# change network name, security and password as needed
print("Establishing Link...")
try:
    # FOR THIS EXAMPLE TO WORK, "Network-Name" AND "Wifi-Password" MUST BE SET
    # TO MATCH YOUR ACTUAL NETWORK CONFIGURATION
    wifi.link(NetName, wifi.WIFI_WPA2, NetPassword)
except Exception as e:
    print("ooops, something wrong while linking :(", e)
    while True:
        sleep(1000)

# Yes! we are connected
print("Linked!")

# Let's print our ip, it will be needed soon
info = wifi.link_info()
print("My IP is:",info[0])

# Now let's create a socket and listen for incoming connections on port 80
sock = socket.socket()
sock.bind(80)
sock.listen()


while True:
    try:
        # Type in your browser the board ip!
        print("Waiting for connection...")
        # here we wait for a connection
        clientsock,addr = sock.accept()
        print("Incoming connection from",addr)

        # yes! a connection is ready to use
        # first let's create a SocketStream
        # it's like a serial stream, but with a socket underneath.
        # This way we can read and print to the socket
        client = streams.SocketStream(clientsock)

        # let's read all the HTTP headers from the browser
        # stop when a blank line is received
        line = client.readline()
        while line!="\n" and line!="\r\n":
            line = client.readline()
        print("HTTP request received!")


        # let's now send our headers (very minimal)
        # hint: \n is added by print
        print("HTTP/1.1 200 OK\r",stream=client)
        print("Content-Type: text/html\r",stream=client)
        print("Connection: close\r\n\r",stream=client)
        StrD, StrT = getTime()

        # see? as easy as print!
        print(StrD,"",stream=client)
        print(StrT,"",stream=client)

        print("\r\n\r",stream=client)
        # close connection and go waiting for another one
        client.close()
    except Exception as e:
        print("ooops, something wrong:",e)
このサンプルを、自分のプラットフォームで試してみてほしい。丁寧にコメントを記述してくれたこのコードの作成者を、私は心から称賛したい。
以上のコードを下敷きに、実際に取得したいデータ(最新のファームウェアバージョンなど)と、エンドアプリケーションのブラウザーの外観(現在のファームウェアと最新のバージョンの比較など)を変更・構築することも可能だ。
さいごに
ZerynthでPythonのクイックプログラムを実行するのは非常に楽しい。Zerynthは、ラピッドプロトタイピングに最適のツールであるといえる。