AI Powered Identification with the Pidentifier!
Follow article
 Dave from DesignSpark
How do you feel about this article? Help us to provide better content for you.
Dave from DesignSpark
Thank you! Your feedback has been received.
Dave from DesignSpark
There was a problem submitting your feedback, please try again later.
Dave from DesignSpark
What do you think of this article?
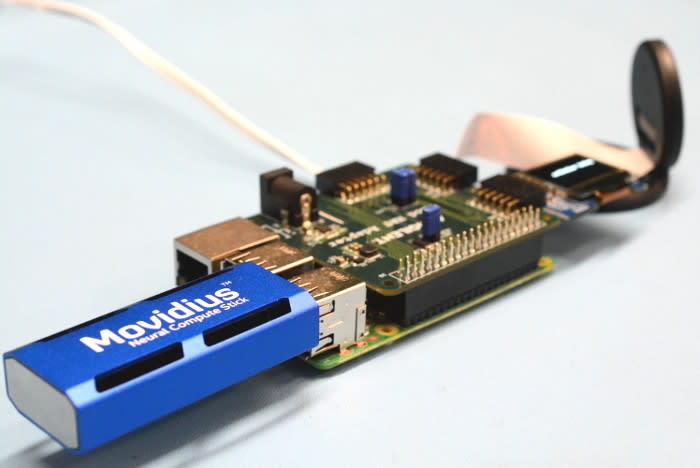
Build a Raspberry Pi-based object-identifying appliance with a Pi 3 Model B, Pi Camera, Intel Movidius NCS, the DesignSpark Pmod HAT, and a Digilent OLED Pmod.
Think artificial intelligence and deep neural networks (DNNs) are the reserve of expert engineers, scientists and mathematicians? Well, creating new neural networks may not be for the faint of heart, while training them can be notoriously time and resource intensive. However, fortunately for us, we can take existing networks that have been trained against useful image sets and — thanks to the Movidius NCS and its SDK — with relative ease build simple applications which use them and deploy these using compact, low power computing platforms such as the Raspberry Pi.
This post takes a look at how you can quickly put together a self-contained system which integrates a camera and a compact OLED module, which will capture images and offload these for processing by GoogLeNet running on an NCS, before displaying the top result on the OLED module.
Hardware
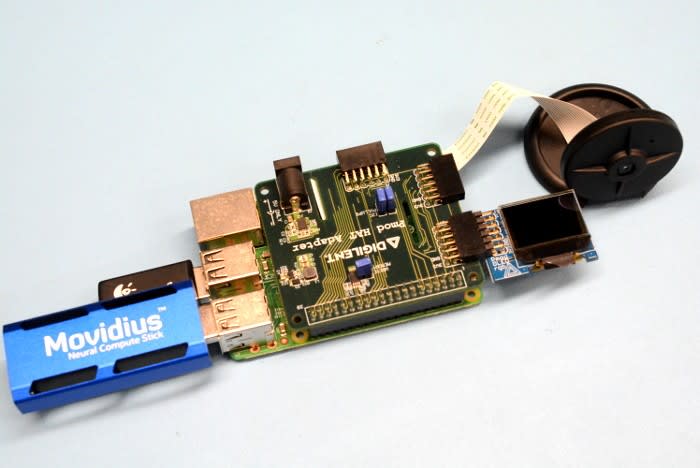
This project uses a Raspberry Pi 3 Model B running Raspbian Stretch, together with the official Raspberry Pi Camera. In addition to this and the Intel Movidius NCS, we also have the DesignSpark Pmod HAT and Digilent PmodOLEDrgb for displaying the results.
- Raspberry Pi 3 Model B (896-8660)
- Raspberry Pi Camera (913-2664)
- Raspberry Pi Camera Case (867-9049)
- Intel Movidius NCS (139-3655)
- DesignSpark Pmod HAT (144-8419)
- Digilent PmodOLEDrgb (134-6481)
With Raspbian installed and the Pi booted it’s always a good idea to start by upgrading to the latest versions of the packaged software.
pi@pidentifier:~$ sudo apt-get update
pi@pidentifier:~$ sudo apt-get dist-upgrade
We’ll also need to enable the camera interface and SPI for the OLED module.
pi@pidentifier:~$ sudo raspi-config- Option 5 - Interfacing
- P1 - Camera
- Enable → YES
- Option 5 - Interfacing
- P4 - SPI
- Enable → YES
Software dependencies
We can get most of the software dependencies via the O/S package management system.
pi@pidentifier:~$ sudo apt-get install -y build-essential git libusb-1.0-0-dev libprotobuf-dev libleveldb-dev libsnappy-dev libopencv-dev libhdf5-serial-dev protobuf-compiler libatlas-base-dev git automake byacc lsb-release cmake libgflags-dev libgoogle-glog-dev liblmdb-dev swig3.0 graphviz libxslt-dev libxml2-dev gfortran python3-dev python3-pip python3-setuptools python3-markdown python3-pillow python3-yaml python3-pygraphviz python3-h5py python3-nose python3-lxml python3-matplotlib python3-numpy python3-protobuf python3-dateutil python3-skimage python3-scipy python3-six python3-networkx libfreetype6-dev libjpeg-dev python3-gst-1.0 python3-picameraNext, use the Python package manager to install support for OpenCV.
pi@pidentifier:~$ sudo pip3 install opencv-pythonInstall just the API component of the Movidius NC SDK. Note that it may be possible to install the full SDK on a Raspberry Pi, but this is generally not advisable as it is much quicker to do the necessary compilation on a PC and then copy the binary graph file across.
pi@pidentifier:~$ mkdir workspace
pi@pidentifier:~$ cd workspace
pi@pidentifier:~$ git clone https://github.com/movidius/ncsdk
pi@pidentifier:~$ cd ncsdk/api/src
pi@pidentifier:~$ make
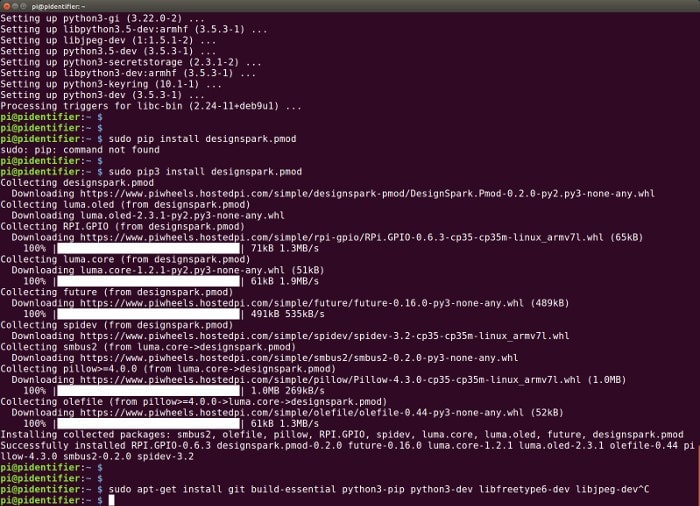
pi@pidentifier:~$ sudo make installThe DesignSpark Pmod HAT support library can be installed via a single command.
pi@pidentifier:~$ sudo pip3 install designspark.pmodFinally, the Movidius NC SDK will need to be installed in full on another computer running Ubuntu, so that we can compile models for use on the Raspberry Pi.
user@laptop:~$ mkdir workspace
user@laptop:~$ cd workspace
user@laptop:~$ git clone https://github.com/movidius/ncsdk
user@laptop:~$ cd
user@laptop:~$ sudo make install
Testing the hardware

If we start by testing that the Pi camera is working as expected.
pi@pidentifier:~$ raspivid -dThis should display video on the screen.
Next, we can run the Hello World for the NCS to confirm its operation.
pi@pidentifier:~$ cd ~/workspace
pi@pidentifier:~$ git clone https://github.com/movidius/ncappzoo
pi@pidentifier:~$ python3 ncappzoo/apps/hello_ncs_py/hello_ncs.py
To test the PmodOLEDrgb if we create a file named helloOLED.py with the following contents:
from DesignSpark.Pmod.HAT import createPmod
from luma.core.render import canvas
from luma.oled.device import ssd1331

if __name__ == '__main__':
    try:
        oled = createPmod('OLEDrgb','JA')
        device = oled.getDevice()

        with canvas(device) as draw:
            draw.rectangle(device.bounding_box, outline="white", fill="black")
            draw.text((16,20), "Hello, World!", fill="white")

        while True:
            pass
    except KeyboardInterrupt:
        pass
    finally:
        oled.cleanup()
Then execute this.
pi@pidentifier:~$ python3 helloOLED.pyDocumentation for the Pmod module, along with other examples, can be found on ReadTheDocs.
Model compilation

We will be using a trained model which is a replication of the model described in the GoogLeNet paper. But first, this will need to be compiled on the Ubuntu machine where we performed a full installation of the NC SDK. We’ll compile all the examples that come supplied with the SDK at the same time — and note that the NC must be plugged into this computer during compilation.
user@laptop:~$ cd workspace/ncsdk
user@laptop:~$ make examples
Application
Now on to creating the application.
We will need to copy across the freshly compiled binary graph for the GoogLeNet model from the Ubuntu computer to the Raspberry Pi.
user@laptop:~$ scp workspace/ncsdk/examples/caffe/GoogLeNet/graph \
user@laptop:~$ pi@pidentifier.local:workspace/ncappzoo/caffe/GoogLeNet/
Next, if we use a text editor to create a new file on the Raspberry Pi called pidentify (replace “vi” with your favourite editor):
pi@pidentifier:~$ vi pidentify
And we can start by entering the following to import the required Python libraries.
#!/usr/bin/python3
import os
import sys
import time
import numpy

import picamera

import mvnc.mvncapi as mvnc
import skimage
from skimage import io, transform

from DesignSpark.Pmod.HAT import createPmod
from luma.core.render import canvas
from luma.oled.device import ssd1331
Next, we need to define some NCS input parameters.
NCAPPZOO_PATH           = os.path.expanduser( '~/workspace/ncappzoo' )
GRAPH_PATH              = NCAPPZOO_PATH + '/caffe/GoogLeNet/graph'
IMAGE_PATH              = '/tmp/i-spy.jpg'
IMAGE_MEAN              = [ 104.00698793, 116.66876762, 122.67891434]
IMAGE_STDDEV            = 1
IMAGE_DIM               = ( 224, 224 )

NETWORK_STAT_TXT = NCAPPZOO_PATH + '/apps/stream_infer/googlenet_stat.txt'
NETWORK_CATEGORIES_TXT = NCAPPZOO_PATH + '/apps/stream_infer/googlenet_categories.txt'
Note that this is where we would make changes if wanted to use a different neural network.
The following two lines will create a Raspberry Pi Camera instance configured with the correct resolution for our neural network.
camera = picamera.PiCamera()
camera.resolution = IMAGE_DIM
Next, we open the NCS and get a device handle.
ncsdevices = mvnc.EnumerateDevices()
if len( ncsdevices ) == 0:
        print( 'No NCS devices found' )
        quit()

ncs = mvnc.Device( ncsdevices[0] )
ncs.OpenDevice()
We also need to create a DesignSpark Pmod OLEDrgb instance.
pmoddev = createPmod('OLEDrgb','JA')
oled = pmoddev.getDevice()
With the initial device setup out of the way, we can now load the graph file onto the NCS.
with open( GRAPH_PATH, mode='rb' ) as f:
        blob = f.read()

graph = ncs.AllocateGraph( blob )
And we can load the network categories.
with open(NETWORK_CATEGORIES_TXT, 'r') as f:
    for line in f:
        cat = line.split('\n')[0]
        if cat != 'classes':
            gNetworkCategories.append(cat)
    f.close()

last = len(gNetworkCategories)-1
We’ll create a function to offload an image to the NCS, run inference and return the top result.
def getTopInference(img):
    img = print_img = skimage.io.imread( IMAGE_PATH )
    img = skimage.transform.resize( img, IMAGE_DIM, preserve_range=True )

    img = img[:, :, ::-1]

    img = img.astype( numpy.float32 )
    img = ( img - IMAGE_MEAN ) * IMAGE_STDDEV

    graph.LoadTensor( img.astype( numpy.float16 ), 'user object' )

    output, userobj = graph.GetResult()
    order = output.argsort()
    top = gNetworkCategories[order[last-0]]

    return top
And a simple function to write text to the PmodOLEDrgb module screen.
def display(message):
    with canvas(oled) as draw:
        draw.text((16,20), message, fill="white")
Finally, the main loop.
try:
    while True:
        camera.capture(IMAGE_PATH)
        thing = getTopInference(IMAGE_PATH)
        display(thing)
        time.sleep(2)

except KeyboardInterrupt:
        pass

finally:
        graph.DeallocateGraph()
        ncs.CloseDevice()
        oled.cleanup()
This will capture an image, display the top inference, pause for 2s and then repeat.
If we now save the file and make it executable.
pi@pidentifier:~$ chmod +x pidentifyPutting it to the test
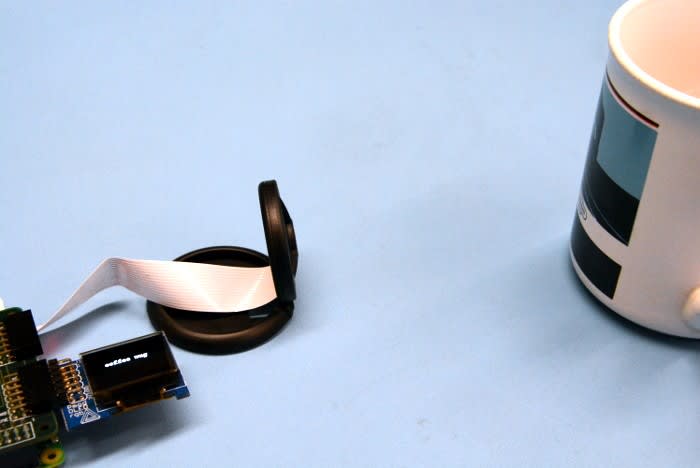
Finally, the exciting part: putting it all to the test!
pi@pidentifier:~$ ./pidentifyAfter a short delay, it should now display the top inference, with this being updated every few seconds. At this point, it’s important to note that the network was trained with images that are in 1 of 1,000 categories, so there are limits to what it can classify. Also, the top-1 inference accuracy — we only display the top result — is 68.7% and with top-5 this goes up to 88.9%.
Potential improvements
It was possible to quickly put together a simple application that integrates a Raspberry Pi Camera, Intel Movidius NCS and a Pmod HAT with OLEDrgb display, thanks to the availability of Python support for these and provided examples. There is certainly room for improvement and fun to be had with further experimentation. This might include, for example:
- Trying different networks, which should just be a matter of copying across the compiled binary graph files and updating the NCS input parameters accordingly.
- Using a video stream instead of still captures. The NC App Zoo includes a stream_infer app example that could be used as the basis for this.
- Using multiple NCS. Again NC App Zoo includes example code.
- Optimising camera capture parameters.
- Better formatting of the text displayed.
Or even for the more adventurous, training a model on your own data/set of images!