CodeXtremeApps 2014: Lessons Learnt From Singapore's Biggest Hackathon
Follow article Dave from DesignSpark
How do you feel about this article? Help us to provide better content for you.
Dave from DesignSpark
Thank you! Your feedback has been received.
Dave from DesignSpark
There was a problem submitting your feedback, please try again later.
Dave from DesignSpark
What do you think of this article?
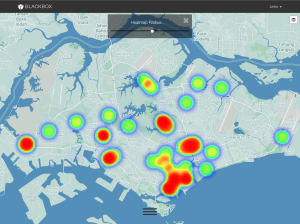
As the hardware guy for the team Tria Artifex, I had to deal with the Raspberry Pi and all its inner workings. Our team came up with something quite unique: a blackbox for the car, hence the name Blackbox. Its purpose is simple: to shave off the precious minutes for an ambulance to arrive in a serious car crash which could mean the difference between life or death, by sending out SOS signals to hospitals, together with a live feed of what is happening inside the car. Vital medical details, such as blood type, allergies and medical history will be also be sent, so emergency responders can prepare appropriately for the victim(s) of the car accidents. Data was also recorded of the ambulance response times so it can be analysed and improved in the future, according to the trends on the roads.
The idea, we felt, was interesting to pursue because it technically difficult, and provided real value to consumers, by enhancing safety, which was one of the themes of the competition.

Our hardware and our app :)
Preparation:
One of the most important things to do to prepare for a Raspberry Pi hackathon is to buy an assortment of parts for the Raspberry Pi and play around with them, if you haven't already. It's important to know what tools you require on the actual day and pack accordingly. Soldering iron, multimeter, buttons, LEDs, jumper cables, breadboard, resistors, capacitors are some examples of the things you'll require to make a fully functional product on the Hackathon day. Figuring out how different parts (e.g. GPS, Temperature Sensor) work will also help you save some time on figuring out how you would actually implement it on the actual hackathon day.
Challenges We Faced For Our Setup:
Our solution uses an accelerator module, a GPS, the PiNoir camera and USB Tethering for internet connectivity.
The Raspberry Pi does not come with libraries for Python to interact directly with the camera, so we highly recommend using the picamera library for its ease of use: http://picamera.readthedocs.org/en/release-1.7/
Our use of the accelerometer went quite smoothly, but when we ran our Blackbox for too long, we found it to crash the Raspberry Pi. After some research, we found the reason. So, a fair warning to those who use the bcm2835 driver for the accelerometer, it is known to have memory leak issues as documented here: https://community.freescale.com/thread/324396
so if you sample too much too quickly, it is known to cause your Raspberry Pi to crash. We lowered the sampling rate for our demo until we could resolve the issue.
Because the mathematical algorithm to detect the crash (measuring g-force of more than 5G) was impossible to simulate without crashing a real car, we used a simpler algorithm for demo purposes for the crash detection, taking the absolute changes in the xyz planes and if it's more than a small threshold, a crash is detected. It worked great for the demoes.
We split the accelerator logic and picamera logic on 2 separate threads, because we were sampling at different rates, and used a deque as a means of storage between the 2 threads. Because the operations were IO-bound rather than CPU-bound, threading didn't affect performance much. Of course, this may not have been the best way of doing this, and we're always open to new ideas, so if you have better ways of implementing, please do leave a comment.
For more information on Python concurrency, check out this highly informative set of slides by David Beazley:
http://www.slideshare.net/dabeaz/an-introduction-to-python-concurrency
One of the biggest problems was implementing the GPS. Admittedly, we didn't have too much experience with playing with hardware, but this was what we did with the Adafruit's Ultimate GPS Breakout for the Raspberry Pi. Firstly, our accelerometer sensor module had a 26-pin Female Flat Ribbon Connector, so it took up all the GPIO pins originally. After some trial and error and reading the manual on what pins the MEMS Sensor Kit used, we used the Adafruit breakout kit to breakout the GPIO pins and only connected the pins that were required onto the breadboard. Then we needed to free the UART on the Raspberry Pi. The rest of the circuitry was pretty straightforward: connecting the TX, RX, GND and 3.3VIN to their respective places on the breadboard. However, our biggest gripe with the GPS was that it took so long to get a fix and needed quite a clear view of the sky, so I would say getting an antenna as well as installing the battery are both necessary in making it more usable. With the GPS Coordinates of the crash, you can do a reverse lookup with Google's Geocoding API: https://developers.google.com/maps/documentation/geocoding/
Thankfully, Python comes with good libraries for easy handling of the json that is returned.
USB Tethering is simple on the Raspberry Pi but not too well documented on the web.
- Add the following line in /etc/network/interfaces
auto eth0
iface eth0 inet dhcp
iface usb0 inet dchp - Issue the following commands with the phone connected via USB and with USB Tethering switched on:
sudo ifup usb0
sudo dhclient usb0 - Check if usb0 has an IP Address with ifconfig
If it has, you're done!
If not, make sure your phone has internet connectivity and try doing step 2 again.
Conclusion:
We would like to thank IDA and ITSC for organizing this awesome competition. We would also like to thank SMU SIS senior Andre Ng for preparing and conducting Raspberry Pi workshops prior to the actual hackathon to pass on his knowledge to the rest of us, and we hope that our blog helps you out in your next Raspberry Pi project. Hack on!
Wong Wai Tuck
Tria Artifex