CEL Robox 3D Printer - out of the box Review
Follow articleHow do you feel about this article? Help us to provide better content for you.
Thank you! Your feedback has been received.
There was a problem submitting your feedback, please try again later.
What do you think of this article?
I have recently become the proud owner of a CEL Robox 3D printer.
I'm always very conscious of "out of the box" experiences, and, indeed am a harsh critic of poor experiences. I'm pleased to say getting my Robox out of the box and making my first 3D printed object was a pleasant experience!
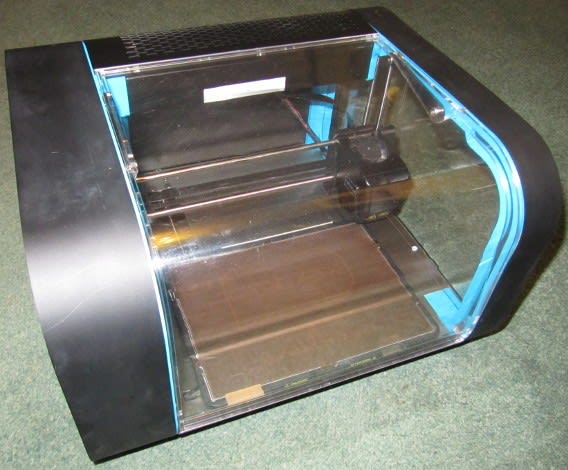
The printer looks, and is sized, a bit like a bread-bin - but a bit more space-age looking (LOL - we still say "space-age", which was (presumably) the 1960's!) There's a clear lid that hinges up to give access to the print chamber, and the filament reel clips into a hub on the left side, not sticking out at all beyond the edges of the case.
There's an "extras" box which has things like the power cable, USB-C (printer) cable, a Quick Start Guide, a USB stick (well, card, actually) with the printing software on it, and a box of really very sharp tools which are for cleaning up any random dangles from your print jobs. There's a handy pair of tweezers too - we'll come to what those are used for, shortly.
There's some blue plastic tape to peel off, and a couple of plastic clips which hold the bed in place during transit. They're clearly 3D printed, which I think is a really nice touch, and indeed, in the samples folder on the USB stick, there's the STL file for printing one. I like the idea of 3D printers printing new 3D printers, and this is just one tiny step towards that - it prints its own packing materials! The Quick Start Guide explains this step-by-step, apart from the plastic clips, but that bit is easy.
Software
The next step is to install the printing software. This is an application called AutoMaker, which is much more than just a printer driver - it's an application for loading up printable files, positioning them on the print bed, you can rotate and scale them if you want to, and the most useful thing I use is to "lay flat" - you pick a side of the object and that becomes the "bottom", i.e the surface in contact with the bed, which gets printed first as the print builds upwards. There are various reasons for flipping things over, mainly to do with gravity, which we'll talk more about later. AutoMaker also lets you control all the settings for your print (if you need to - quite often you just hit "Make" and off it goes), and monitor the status of the printer. I like how it shows a picture of the printer, and even shows the filament reel in the colour you have mounted.
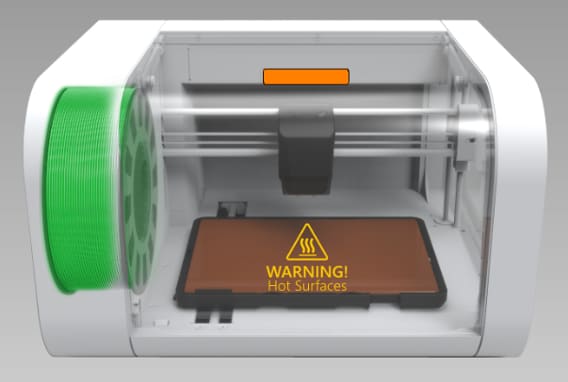
I use Ubuntu linux, so was delighted to see there was a folder for linux on the USB stick. There are also folders for Windows (7+) and MacOS (10.6+). I didn't try either of those, but AutoMaker is a Java application, so I presume it looks and behaves exactly the same once it's installed in an operating-system specific way.
In an ideal world, you'd double click the install icon in the folder on the USB stick, and it would install. But now that all the OS vendors have realised that allowing the running of executables off memory sticks is rapidly destroying civilisation, you can't do that.
So I dragged the linux folder off the memory stick and into my home directory.
Then from a command prompt I made the .run file executable (chmod +x ...), and then I could run the installer (./Auto)
Since I first installed AutoMaker, I have upgraded Ubuntu to a newer version (12.04 to 14.04 LTS if your'e interested!). This "changed" (read: "broke") the way serial devices are initialised, and so required a bit of hackery of some files to get it working again (a thing called modemmanager sends speculative AT commands down the line to see if it's a modem. The Robox really doesn't like this, and goes into a big sulk. If this happens to you, the fix is here .)
When you start AutoMaker it checks to see if there is a newer version of either itself or the printer firmware, and upgrades itself automatically and painlessly (it's done that once so far.)
First print
The printer comes pre-calibrated and all wound up and ready to play. You'll want to print something immediately, of course! The Quick Start Guide takes you step-by-step through this process. The next step after installing AutoMaker, is to get your reel of filament mounted and spooled-up. This seems a bit tricky at first, but after the first few times becomes second nature, and very quick. The instructions talk about trimming the end off at an angle - if you do this, I found side-cutters do the job very nicely. However, I have now discovered that as long as the end is tidy, you can just feed it in without trimming. You feed it into the upper of two holes (the one marked "1", which is good to check out visually the first time, but you soon do it by feel. You feed the filament in gently until the motor starts, and then keep pushing until the rollers grab it from you and draw it slowly into the depths of the machine. There are about 26" (67cm) of filament inside the machine, so don't be surprised by how much you have to feed in.
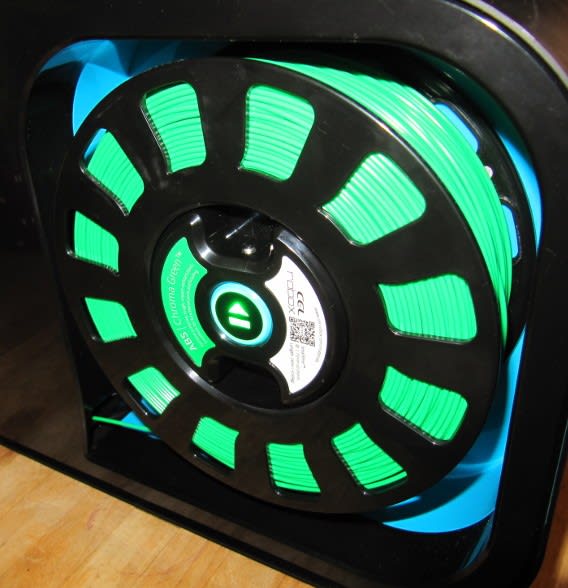
The Robox is unique in using "Smart Reels", which have a little chip inside the reel which tells the printer what type of filament it is (the Robox can print most popular material types (PLA, ABS, HIPS, Nylon, PC and PVA), the temperature parameters needed to melt it optimally, what colour it is (the exact colour name, like "Chroma Green"), and how many metres are left on the reel. You quickly take this totally for granted, and really can't imagine a world where you'd have to convey this information to the printer by hand. This is a great feature of the Robox!
Other attractive features of the CEL Robox (and I'm no expert - I've only owned the one 3D printer) are that it has a heated bed (to make the printed piece stay put whilst printing), an enclosed and heated print chamber (to make the plastic stay sticky enough for the next layer to adhere properly and not warp the piece), the Smart Reels that I just mentioned, and the capability to swap-out the print head in the future for other goodies like a two-colour extruder (coming soon, they assure me, in fact you can pre-order that now), or a CNC cutter, or a laser cutter, maybe one day.
On the subject of two colour extruders, I was initially a bit confused by my Robox as it has two nozzles, and filament feed slots marked 1 and 2. That all seemed to suggest I could feed in a second reel of filament... but where would it mount? It turns out the second feed slot is for when the dual colour extruder comes along, and the new head will come with an second spool hub on the outside of the first one.
The second nozzle on the print head is for coarse printing: depending on whether you choose draft, normal or fine quality printing, you get the larger (draft) or the smaller (normal and fine) nozzle. Obvious when you see it in action and realise what's going on, but a bit confusing at first when I briefly thought I had a two-colour printer!
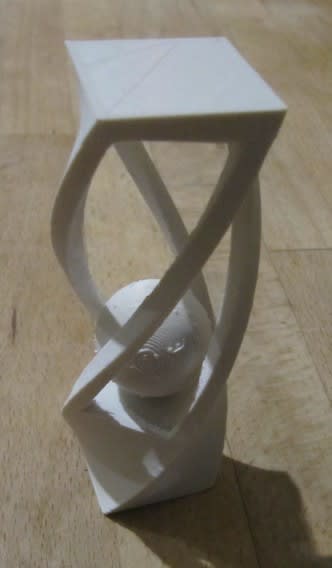
There are *loads* of things out there on the Internet to download and print - it's very exciting to visit http://thingiverse.com or http://yeggi.com and search for a key fob, or a ball-in-a-cage, or... whatever you think of, really! I have had a particular fascination with the ball-in-a-cage model since I first heard about 3D printers: the fact that the ball is created inside a complete cage, with no chance of having been inserted after manufacture is strangely compelling, so several of my early prints were of these. You can get some cool twisty ones from the customiser on Thingiverse (you have to sign up for a free account to use the customiser).
It's amazing how generous people are with their designs - of course people love the "likes" and praise on the blog, but it really is amazing to think how many hours have gone into designing some of these pieces for you to just download and print for yourself!
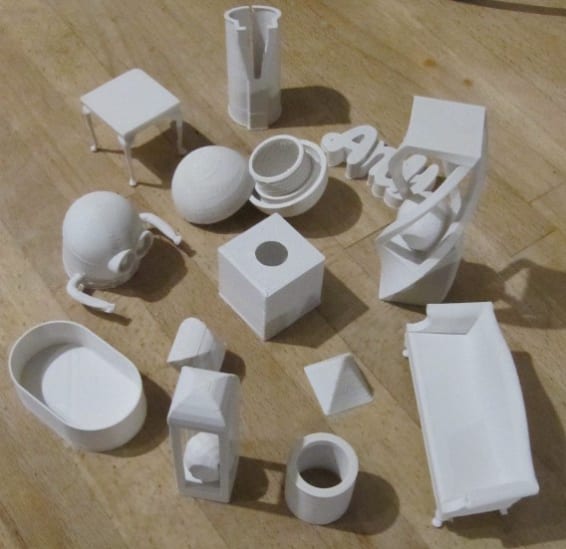
Here's a selection of my early prints
Gravity
The pull of gravity is an ever-present thought when you're 3D printing, particularly when designing an object for printing, but also when it comes to printing something from an existing STL file. As I mentioned before, AutoMaker lets you flip a piece onto any of its sides before printing, and there are some other tricks you can turn on in the settings options before you hit the MAKE button - "print support material" is the most useful.
If there are "gravity defying" parts to your model, i.e. sections which have nothing below to support them, then the printer can't just print "in thin air": gravity kicks in and the blob of plastic falls downwards. Actually, it's amazing what you can get away with - as long as the "hole" curves gently inwards, the printer will stick a bit extra onto a sticking out bit (I hope I'm not getting too technical for you, LOL!), which builds out a "bridge" into empty space. So you can actually print some impressively gravity-defying things anyway.
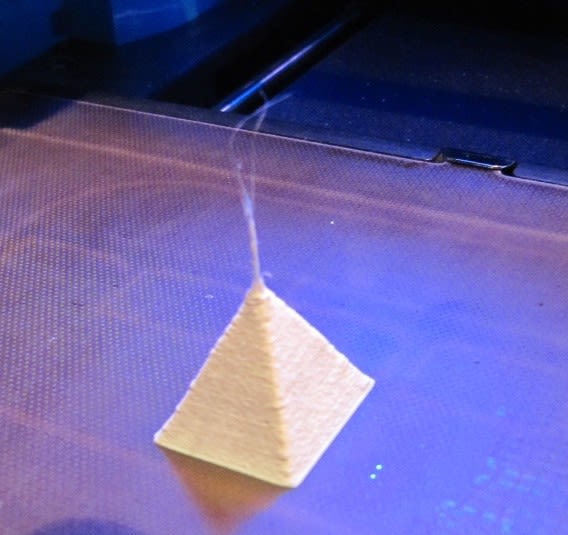
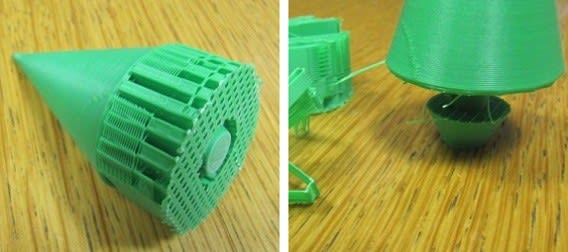
But if you can't, then "print support material" comes to your rescue. This feature prints extra filament, which I affectionately call "frizzle", underneath the gravity-defying sections of your model, so when the time comes to step out into thin air, there's a fine mesh of plastic under it to support that part of your model. When the print has finished, you break away the frizzle (or cut it away carefully with the very sharp tools provided with the printer), et voilà, there's your model. It feels a little bit like peeling a hard-boiled egg - the frizzle is low density and comes away easily. But it does leave a rougher surface on the model where it has been in contact, than if you can print without frizzle. So it's usually desirable to find a way to print without support material if you can.
Here's a photo of an object printed with frizzle, and what came out.
The other interesting parameter to tweak, is "fill density". This is a slider, which defaults according to whether you've selected draft, normal or fine print, but you can drag it to another value. This parameter determines what happens in the places you can't see: inside solid parts of your model, for example within the walls of a box, or the inside of a solid object like a sphere or a cube. If you set the infill to 100%, it makes it completely solid. Full of plastic, strong as an ox. If you reduce it, it prints a sort of honeycomb pattern inside the walls - they're solid on the sides that you can see, but a bit like cavity wall insulation on the inside. Even with quite low infill densities (e.g. 30%), the walls are still amazingly strong. As I said, you never actually see this unless you watch it being made (which of course you will for the first few hours of having your new Robox!).
There are some other parameter like "brim" and "raft", which I'll explain in a later article. If you want to, you can make a completely custom profile and change everything. But I haven't yet found any good reason to do that - I'd rather let the clever people at Robox make the printer do what it's good at, and just get on and print it!
One thing that surprised me a bit when I first got the printer, was how slowly 3D printing happens. It depends hugely on the size and shape of your model, the fill density and the print quality you select, but it rarely takes less than 45 minutes to print an object, and sometimes takes 3 hours or more. Luckily, AutoMaker does a pretty good job of estimating the print time before you start, so you can either change some parameters if you think you need it sooner, or just set your alarm for a few hours time and forget about it. Really - you have to try to forget about it: watching a 3D printer at work is soul-destroying. It's just relentlessly monotonous. Back and forth, across, this way, that way. Gah! Walk away and leave it to it.
Tweezers
Ah, yes, the tweezers - I said I'd mention those. When the print job starts, the printer does a "nozzle purge" into a little rubber tray at the front of the heated bed. This is to get rid of the "crusty bit" left in the final section of the print head, before it starts work on your new creation. This purging process has evidently improved quite a lot over the relatively short product life of the Robox, and according to the forums, has been a matter of some debate. Happily, it's much, much better now, and almost always works fine. Occasionally, though, the bit of extruded goo curls up and catches on the bottom of the print head, and then gets dragged onto the bed as the print job starts. Even when that does happen, it doesn't necessarily cause a problem, but it *can* get caught up in part of the printed object and cause the print to go wrong.
So the tweezers: if you wait around long enough to see the purge sequence happen (it takes about 5 minutes for the bed and print-head to heat up to working temperature at the start of the job), then if the goo sticks to the print head, you have a limited opportunity to rescue the situation. The lock that holds the printer's cover closed isn't quite as sturdy as it looks, and you can gently pop the cover up, then dive in with the tweezers, grab the bit of plastic off the print-head, and remove it before it causes trouble. Close the cover gently and let it get on with the print.
I'm sure this process isn't recommended or endorsed by CEL, but it has saved several print jobs from disaster for me, so it's a handy trick to know!
CEL
On the subject of CEL, the creators of the Robox - I have to say they are *fabulously* responsive and helpful. Questions on the forums get answered very quickly and comprehensively, and if you raise a support ticket, again you get rapid and thorough assistance. The ticket system is on the web and in email, so you can use either or both to add to your ticket as the diagnosis and discussion progresses.
The printer comes with a 240m / 600g reel of filament (mine was Polar White ABS). AutoMaker estimates how many grammes of filament your print will use, based on the settings you've selected, and an estimate of how much that will cost. Reels of filament come in all kinds of colours, with great names (e.g. Dynamite Red and Slime Green), and cost about £30 plus postage (depending on where you buy them - RS stocks a wide range). So printing costs about 10p per metre, or 5p per gramme, which means that most things you print cost very little indeed. I've been amazed by two things:
1) how long a reel of filament lasts, and
2) how cheap items are to print!
For example this object, which is 35mm (1.5") high and 25mm (1") wide, used 2 metres of filament and cost 20p to print. The printer also uses electricity, which you could also factor into the price: my working figure is 3p per hour of printing for electricity (I'll save the explanation of that for another post.) This print took 45mins, so creating that object actually cost me 23p :)
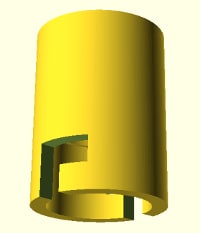
Before long, the novelty of printing other people's 3D objects wears off and you want to start designing your own things. There are a number of ways of doing this: most 3D design applications can export to "STL" - that's what AutoMaker takes as input, so if you can make an STL file, you can print it! The popular visual design tools are DesignSpark Mechanical and SketchUp. Personally, as a software engineer, I wanted a bit more repeatability and control over my designs, so I looked at 3D solid modelling languages and found OpenSCAD, a hugely popular application for scripting your 3D creation with easy parameterisation of sizes, angles, etc. So I started playing with that. Read more about my experience with OpenSCAD in the next blog post!
But for now, I am delighted with my CEL Robox, which is stocked by RS Components. 3D printing really is an interactive sport: seeing the effect of your design changes and being able to quickly iterate on the design of an object is very powerful, and is something that using a bureau service just can't recreate.
In the next post, I'll describe my early adventures with designing and printing my own objects, and some more of the tricks and tips I'm learning about 3D printing on the CEL Robox.


Comments