Alexa And Pi, Please.
Follow article
 Dave from DesignSpark
How do you feel about this article? Help us to provide better content for you.
Dave from DesignSpark
Thank you! Your feedback has been received.
Dave from DesignSpark
There was a problem submitting your feedback, please try again later.
Dave from DesignSpark
What do you think of this article?
Got a pi-topPULSE and want to use it to power Amazon Alexa services on your pi-top or your Raspberry Pi 3? Then you have come to the right place...

On a Pi-Top
If you are using a pi-top or pi-topCEED, the process is particularly easy, as it is all done on the Raspian/pi-top desktop environment, so we will start with that.
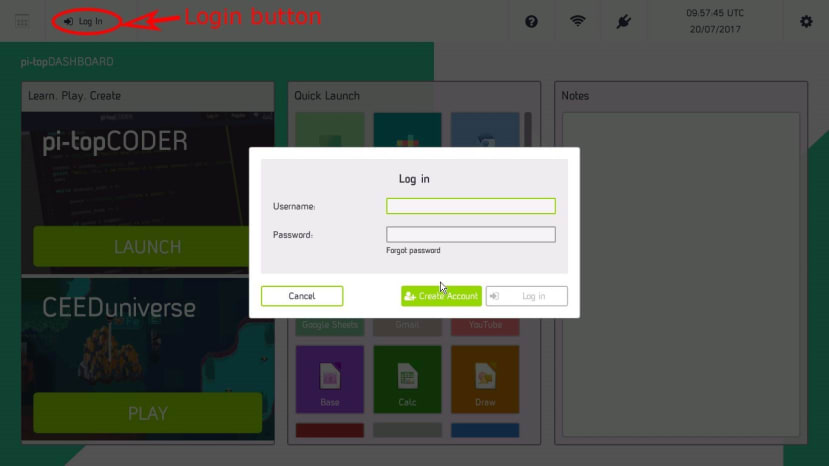
The first thing to do, after installing your pi-topPULSE, is click on the [Log In] button at the top left of the pi-topDASHBOARD. A pop-over login window will appear where you can enter your Username and Password or click on the big green [Create Account] button if you haven’t already signed up.
If you are creating an account, the next window will ask you the type of account you want to register – your choice is between a ‘school user’ and ‘not a school user’:
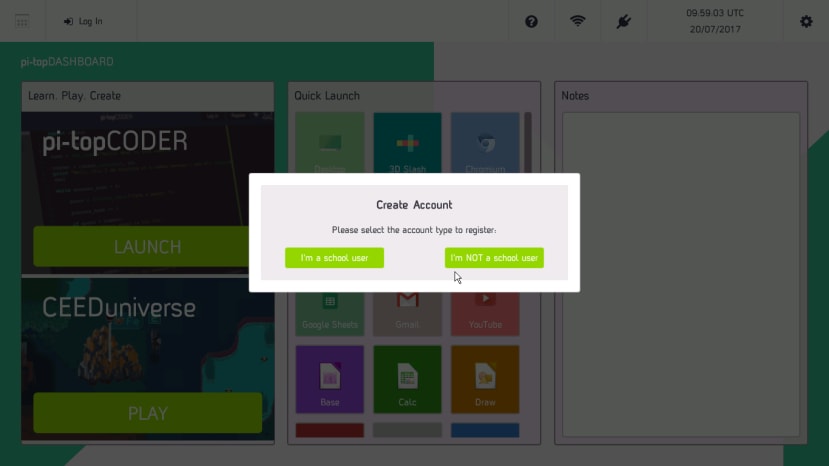
For most of us, we can select “I’m NOT a school user”, which will take us to the form we need to fill:

The only difference between this form and the ‘school user’ form is that the school form doesn’t ask for your email address. When you are done filling the form, you can hit the submit button and wait for the confirmation email that will be sent to the address you provide in the form. When you click on the confirmation link in the email, your account is live.
If you now login to your pi-top, you will find that a new microphone icon appears at the top of your screen:
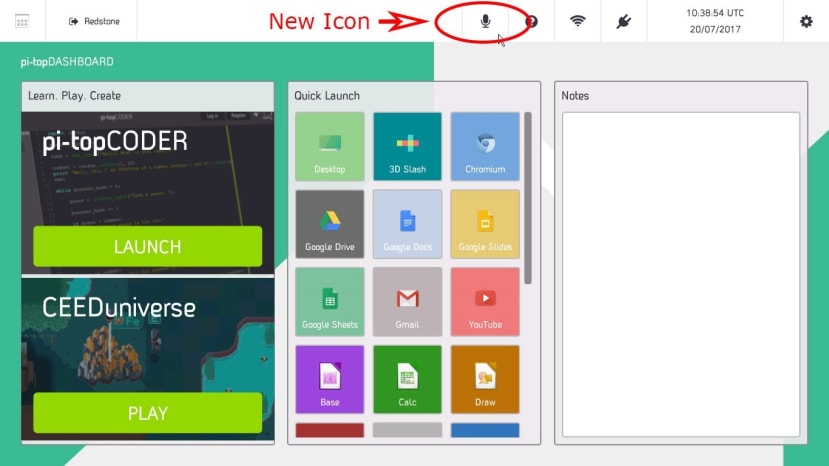
Clicking on this icon starts the listening process to record the message we want to pass on to Alexa. Clicking on this icon for the first time will present us with this message:
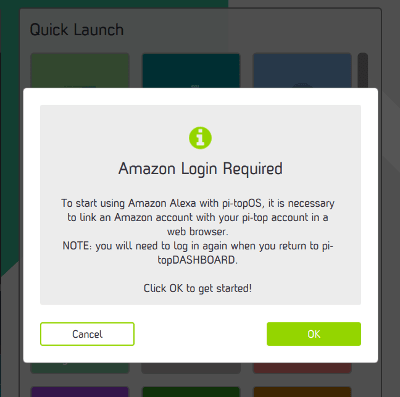
Clicking on [OK] will open the Chromium web browser, taking you to the login page for your pi-top account. From here we can fill in some of our details if we should feel so inclined, but most importantly we can associate our pi-top account with our Amazon account by clicking on the ‘Link’ box:

This will take us over to Amazon so that we can link the pi-top account with our Amazon account. You don’t need any kind of special developer account for this, just your regular account.

When you sign in to Amazon, you will see something like this (without the obfuscations, of course):
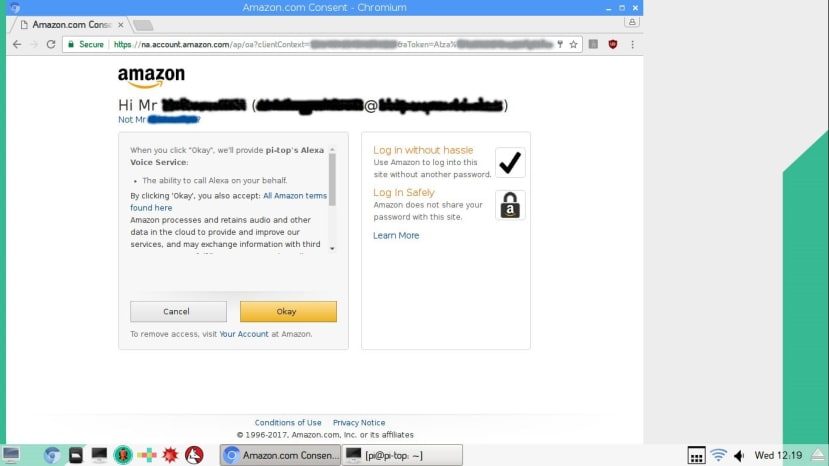
Assuming you are happy to accept Amazon’s terms and conditions, click Okay. The software will do its thing in the background and will return you to pi-top:
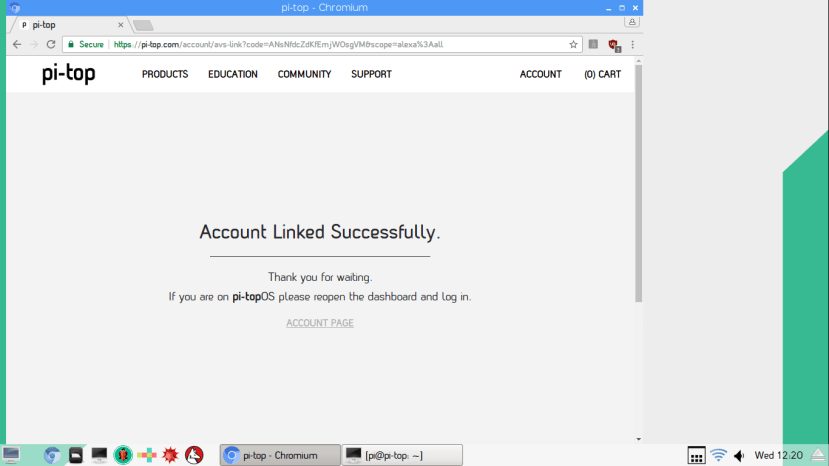
You will have to log in again on your pi-topDASHBOARD but once you do, you are ready to talk to Alexa. That is a simple as clicking on the microphone icon, which will start recording your verbal input:

Click on ‘Done’ when you have finished your question/statement and wait for Alexa’s reply!
On a Pi Tip
OK, so I know what some of you are thinking: “That’s all very well, but I don’t have a pi-top; give me the skinny on getting the pi-topPULSE going with Alexa on my R-Pi3”.
OK, OK: That’s coming next.
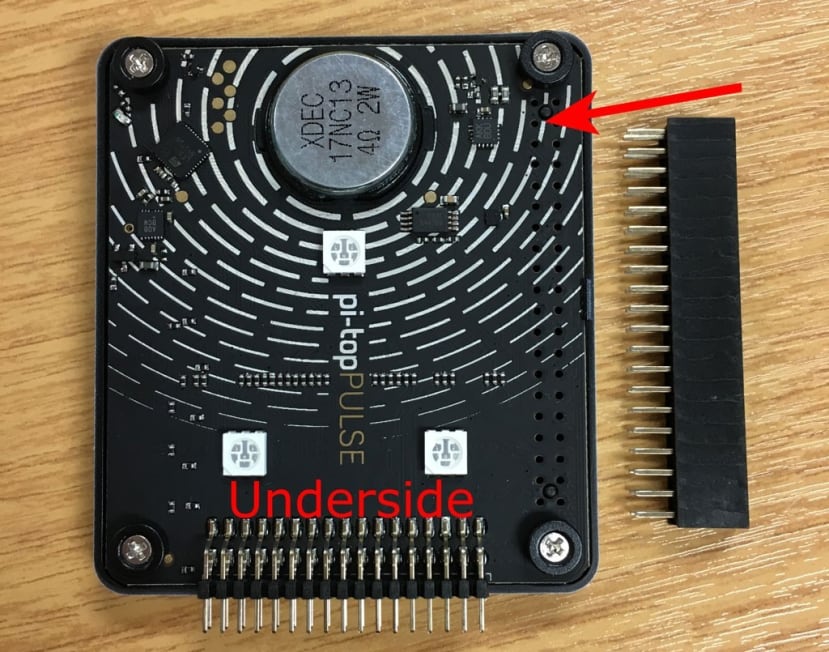
First off, you are going to need to install the pi-topPULSE module onto your Pi using the connector hardware and fixings that were included in the box. The connector should be inserted into the double row of holes on the underside of the PULSE module:
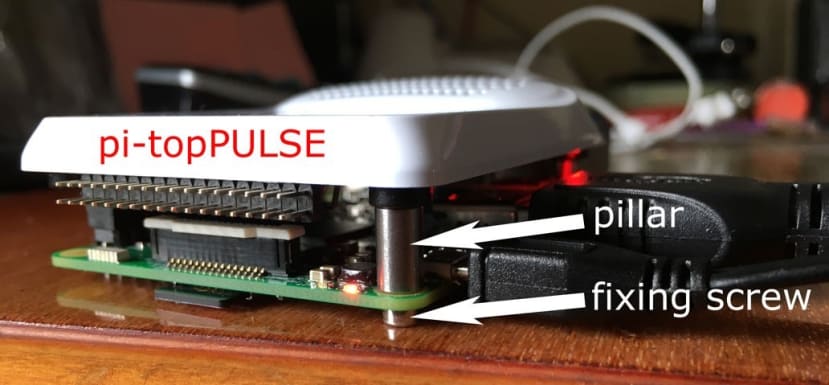
While the metal feet should be attached to the top side of your Raspberry Pi to brace the weight of the PULSE module and prevent the connector from bending:
Just as with the pi-top or pi-topCEED, you will also need a pi-top account that you can link to your Amazon account. You can do this bit on any computer, so if you don’t already have an account, get one here, then follow the instructions above for linking to Amazon.
Once that is all set up, make sure your Raspberry Pi has internet access and open a terminal. At the command line, we are going to enter:
sudo apt-get update
sudo apt-get install pt-avs-demo pt-pulse
This will update the Raspian operating system and install the software and relevant dependencies we need to get access to Alexa services.
To make the demo script easier to use, we can copy it to our home directory:
cp /usr/lib/pt-avs/demo/demo.sh ~/alexa.sh
…and that is us done for the installation.
We can try running the script with:
sudo /home/pi/alexa.sh or
sudo ./alexa.sh (assuming we are in our home directory)
The script will ask us for our username and password. After you enter those details, the script will set up and then let us know that is has started recording. After it has finished recording (it is set to record about 5 seconds of input), it will upload this recording to Amazon cloud servers running natural language algorithms to decode what we just said. A reply (in the form of a .wav file) is returned and played to us:
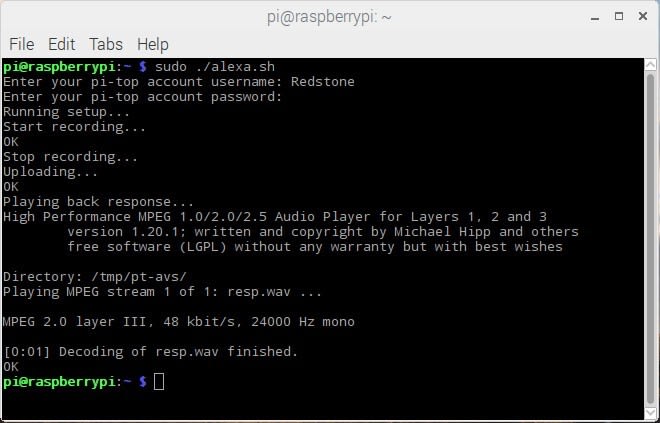
Yea, us! We have Alexa on our Raspberry Pi 3!
This is all very well, but entering our account username and password is going to get pretty tedious, pretty quickly. Our recourse is to mod the script to already have our details in it. We can do that with nano:
nano alexa.sh
we then down-arrow to MY_PT_USERNAME and add our pi-top account username in between the quote marks. Our password fills the quote marks for MY_PT_PASSWORD:
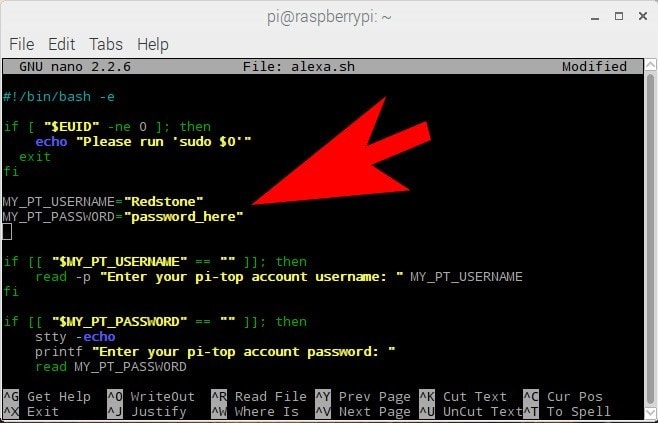
You will, of course, need to use your own account details here. We save our change with [Ctr][x] followed by [Y].
Now when we type
sudo ./Alexa.sh
we don’t need to enter our username and password:

…and we can use auto complete (i.e. hit the up arrow key) to keep repeating the process of calling Alexa services with two keystrokes (up-arrow and enter).
Conclusions
The pi-topPULSE provides a quick and easy way of getting Alexa on our pi-top or Raspberry Pi 3. It also gives you the opportunity to get under the hood of how these services work and toy with the scripts to get something more personal to you.
It is worth noting that, as we are manually initiating each exchange using the microphone icon or a command-line script call, we don’t actually need to say the word ‘Alexa’ at all: that is simply what the Amazon hardware is always listening for as a cue to know when to start recording your voice. If you do want to say “Alexa”, you still can; it won’t cause any problems.
If you already have any of the Amazon hardware running Alexa services, you may already be aware of the ‘Easter eggs’ that Amazon has in some of Alexa’s replies. Here are a few questions (that amused me) you can ask to get some of those great pop-culture answers:
- I want the truth
- Where is Chuck Norris?
- What is the first rule of Fight Club?
- Witness me!
- Open the pod bay doors
- What is the meaning of life?
- Do you like green eggs and ham?
Like Game of Thrones? Ask Alexa:
- Who is the Mother of Dragons?
- Is Jon Snow Dead?
- Winter is coming
How about some Star Wars?
- I am your father
- Execute order 66
- Use the Force
- That’s no moon
Or some Star Trek?
- Warp 10
- Tea, Earl Grey, Hot
- Beam me up!
- Live long and prosper
There are thousands more for you to discover but one last one to leave you with: ask Alexa to sing you a song…