3D Printing from Recycled Plastic Bottles, Part 1
Follow article Dave from DesignSpark
How do you feel about this article? Help us to provide better content for you.
Dave from DesignSpark
Thank you! Your feedback has been received.
Dave from DesignSpark
There was a problem submitting your feedback, please try again later.
Dave from DesignSpark
What do you think of this article?
I imagine we don’t need to explain how wonderful 3D printing is to many Designspark community members! There are heaps of interesting areas within the 3D community to entertain, educate and explore. One area of particular interest is the reuse of plastic materials, other than commercially manufactured printer filament, as stock for 3D printing. There are some commercial offers in this area that utilise “Pellet Extrusion” where the printer is fed pellet grains of plastics instead of filament which is extruded into the desired design but DIY approaches are becoming common. Whilst there is the odd DIY pellet extruder system out there, a common is to build a “pullstruder” or “pulstrusion” machine. The premise is pretty straightforward, you take used PET bottles, commonly used for all types of fizzy carbonated drinks and you cut the bottle into a long continuous strip. You then pull that strip through some kind of heated nozzle and as it is pulled through the strip is extruded into a filament suitable to be used in a regular 3D printer.
In this 3 part series, we’ll work through the building of a DIY pullstruder, we’ll break this into 3 subject areas. In this part 1 we’ll look at the tools and approaches to stripping the bottles, which is actually quite an art in itself. In part 2 we’ll look at creating and assembling the heated section of the pullstruder and the formation of a nozzle through which we will pullstrude. Finally, in the third section, we’ll look at the mechanical end of the pullstruder, creating a system that, slowly but surely, pulls the extruded plastic strip through the heated nozzle. In the final section, we’ll also look at printing with the pullstruded filament completing the cycle of bottle to object!
So bottle stripping! This has existed as an activity way before people had ideas about making DIY 3D printer filament. If you cut a bottle into a long continuous strip this material has been used for all kinds of DIY cordage tasks, useful for perhaps tying up garden canes and other structures, it’s a very handy material. There are numerous approaches to cutting the strip but I think it’s fair to say that all of them require a little practice.
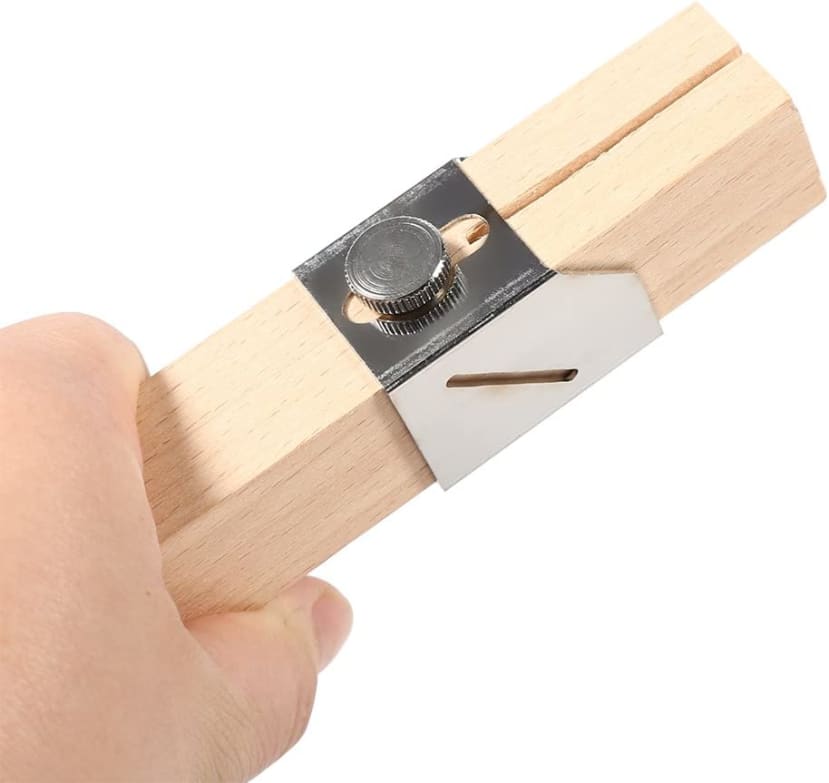
The first way we explored was a cheap commercially available bottle stripper tool. This tool was a block of wood with a small adjustable metal section and a couple of slots and an inserted razor blade. The idea was that you can adjust the position of the metal guide relative to the razor and as such you can create different widths of cut strip. The instructions indicate that you cut the base of the bottle off and then cut a small flat diagonal starting strip that you can feed through under the razor blade. Despite many practice sessions I found it really difficult to create a consistent strip and frequently the cut strip would tear or snap so you would only end up with very short sections. Before giving up on the blade based solution I also rigged up some other devices that worked in a similar way, clamping a hobby blade or utility cutter blades to see if I could create a dependable system, but I found the approach didn’t work well enough for the task in hand.
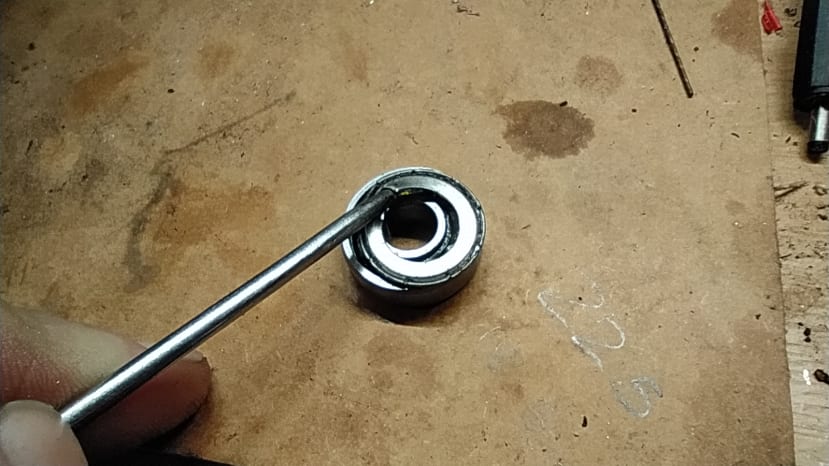
Another approach that the emergent Pullstrusion community uses is to create a bottle stripping system using skateboard, or larger, bearings which have been customised and arranged to create a turning cutting blade. Most skateboard bearings are constructed from hardened steels and have a bevelled edges on the outer circumference. The stripping systems use two bearings and each bearing needs to be modified so that it has one side where the bevel has been removed creating a sharp 90 degree edge. As this is hardened steel it’s a challenge perhaps to achieve this with a lathe or a milling machine even so some kind of grinding approach usually works best. Before you get to grinding though you need to remove the small thin metal bearing covers that seal the bearing as they sit above the height of the base of the bevel so you are going to grind through the area they occupy. It’s not too hard to remove the seal cover, I found that is you use a sharp punch and hammer, or even perhaps a small nail, you can punch a hole in the seals surface. Once the surface has a hole you can use your nail or punch to pry the seal up before pulling it out with a pair of small pliers.
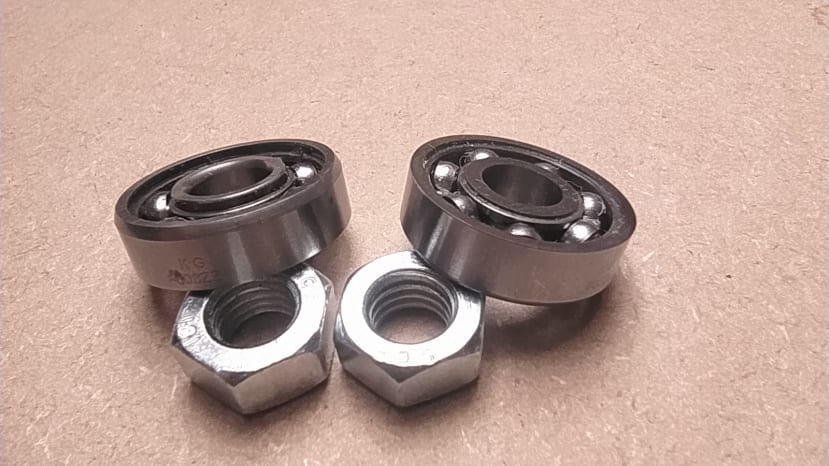
You can find examples of people securing the centre of the bearing with an 8mm bolt, whilst still allowing the outer bearing shell to rotate, and then using an angle grinder to grind the bearing flat as it rotates. I used a small bench top belt sander to grind down each bearing, it’s important that, however you do this, you end up with a flat ground surface and don’t introduce any angles as the two flat bearing surfaces need to run in contact with each other. You can see in the image above that the left hand bearing has the original bevelled edge but the right hand bearing is what you are aiming for, a ground back flat sharp edged surface.

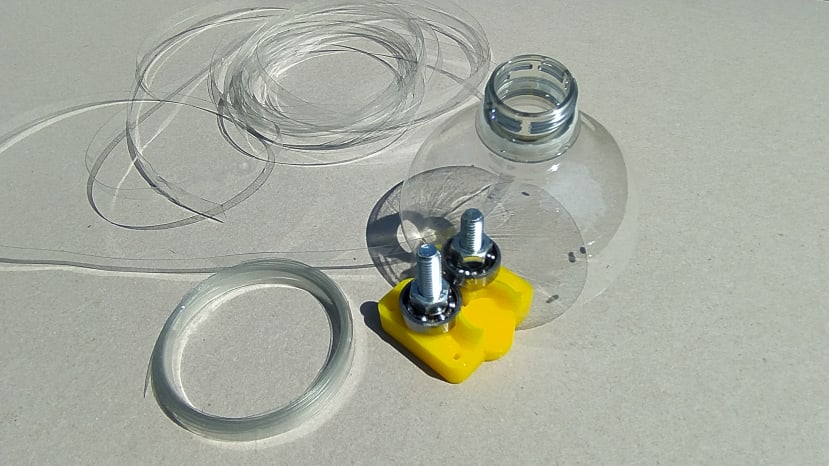
The idea of the bearing cutter is to stack the bearings spaced so that they overlap as slightly as possible so that you create a system where if you rotate one bearing the other bearing rotates as well. For the first exploration into this approach I carefully measured the bearing diameter and then simply drilled two accurate holes in a piece of wood allowing me to bolt the two bearings into a position where they overlapped by around 0.5mm. Using a couple of M8 bolts and some nuts and washers I could create a standoff so that the first bearing rotated freely just above the wood surface on a washer whilst the higher bearing was supported by a nut and a collection of washers to shim it up to the correct height so it just touched the lower bearing. You then, similar to the earlier approach with the blade based systems, cut a starting strip and feed it underneath the upper bearing. Pulling reasonably firmly this resulted in the bottle producing nice long sections of strip that were the thickness of the distance between the wood and the upper bearing.
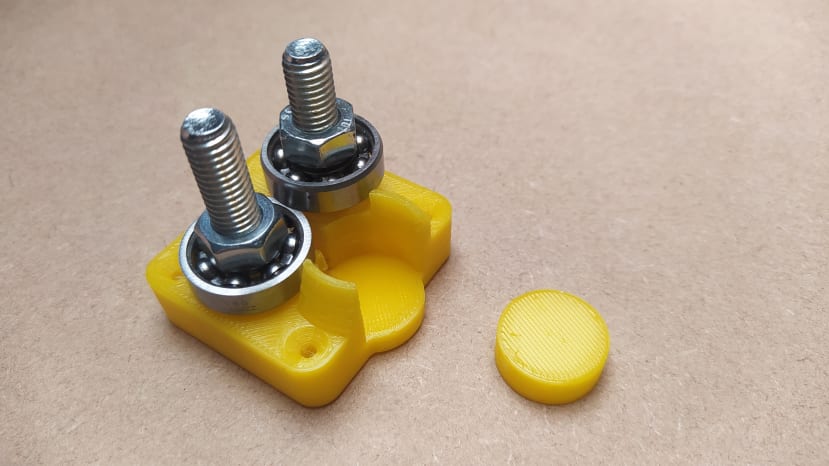
Pleased with this success we realised that we probably needed a system where the strip thickness was adjustable to help us produce the correct dimensioned filament. Searching online we found numerous designs for bottle stripping bearing rigs that can be 3D printed. One that caught our eye was https://www.printables.com/model/345984-adjustable-bottle-cutter-pet on the Printables site, as it had a tray area into which you could stack discs to vary the cutting height of the system varying the strip width. We quickly printed one and assembled it for testing. The cutter is designed to receive a small stack of US Pennies to adjust the depth of cut/thickness of the produced strip. As we are UK based we didn’t have any of these but quickly drew and printed a small 19mm diameter cylinder to bring our cutter to cut a 7mm wide strip. It performs excellently although, as said earlier, all these stripping tools need a little practice to get consistent results.
So with a method to cut bottles into a strip, we are ready to look at the next stage of our build, look out for part 2 of this series where we’ll explore making the heated nozzle section of the system!
Comments