Smart Muramatsu Batons
Follow articleHow do you feel about this article? Help us to provide better content for you.
Thank you! Your feedback has been received.
There was a problem submitting your feedback, please try again later.
What do you think of this article?
Hello everyone and welcome back. Here's another Arduino project for today. If you read my previous articles, I believe you will find that I am also a music lover. Before, I made pianos, GarageBand keyboards, and more with Arduino.
Today, I want to make a smart soul tool for an orchestra or band.
If you've ever been to a concert before, I'm sure you know who the conductor is, who interprets the score according to specific instructions in the score, sets the tempo, and makes sure the ensemble members play it correctly. Typically, conductors will use the Muramatsu baton and may use other gestures or signals, such as facial expressions and eye contact, to communicate with their musicians. Therefore, a conductor who has a good rhythm is indispensable in the orchestra, in order to lead the orchestra to a higher level. Of course, they may make some adjustments in rhythm to make the music more human, but in the rehearsal stage, a good rhythm is very important for every player.
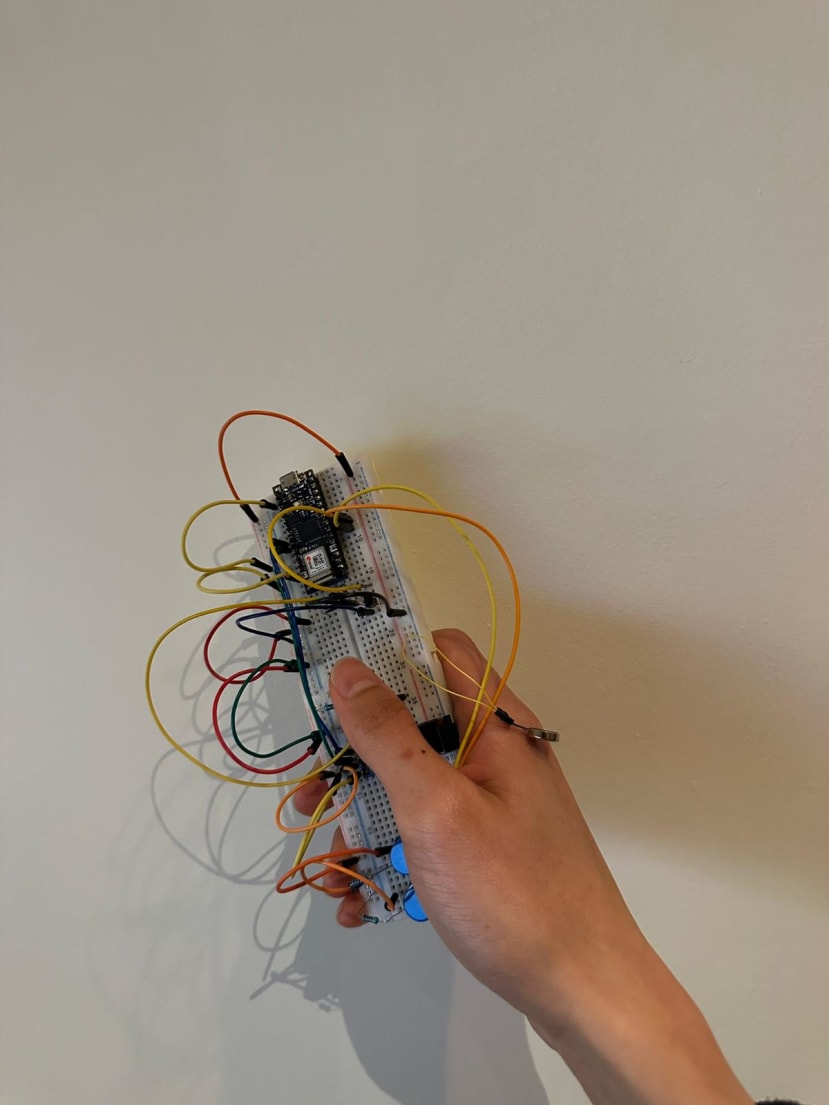
In this project, I wanted to make a smart Muramatsu baton for conductors to assist them in good rhythm during the rehearsal phase.
Make a smart baton to help conductors keep the beat. I believe many people will think of a metronome. Yes, the idea of the smart baton comes from the metronome. But if you've ever played in an orchestra, you know that the conductor can't hear the metronome or see the light from the metronome when the musicians are playing their instruments. So, to help conductors keep the beat, we can start with the baton. Since sound and light don't help them, I was thinking if I did a vibration it might be a good way to help them.
For this project you will need (For reference):
| Arduino, Nano 33 IOT Module with headers | RS Stock No.: (192-7589) |
| Breadboard Prototyping Board | RS Stock No.: (215-3175) |
| Jumper Wire | RS Stock No.: (791-6463) |
| Push Button | RS Stock No.: (111-5941) |
| 220 Ohm | RS Stock No.: (707-8965) |
| 10 KOhm resistor | RS Stock No.: (707-8300) |
| OLED Display | RS Stock No.: (225-6194) |
| LED | RS Stock No.: (708-8035) |
| Vibration Motor | RS Stock No.: (184-5122) |
| 1N4007 Diode | RS Stock No.: (917-5386) |
| BC547 NPN Transistor | RS Stock No.: (671-1113) |
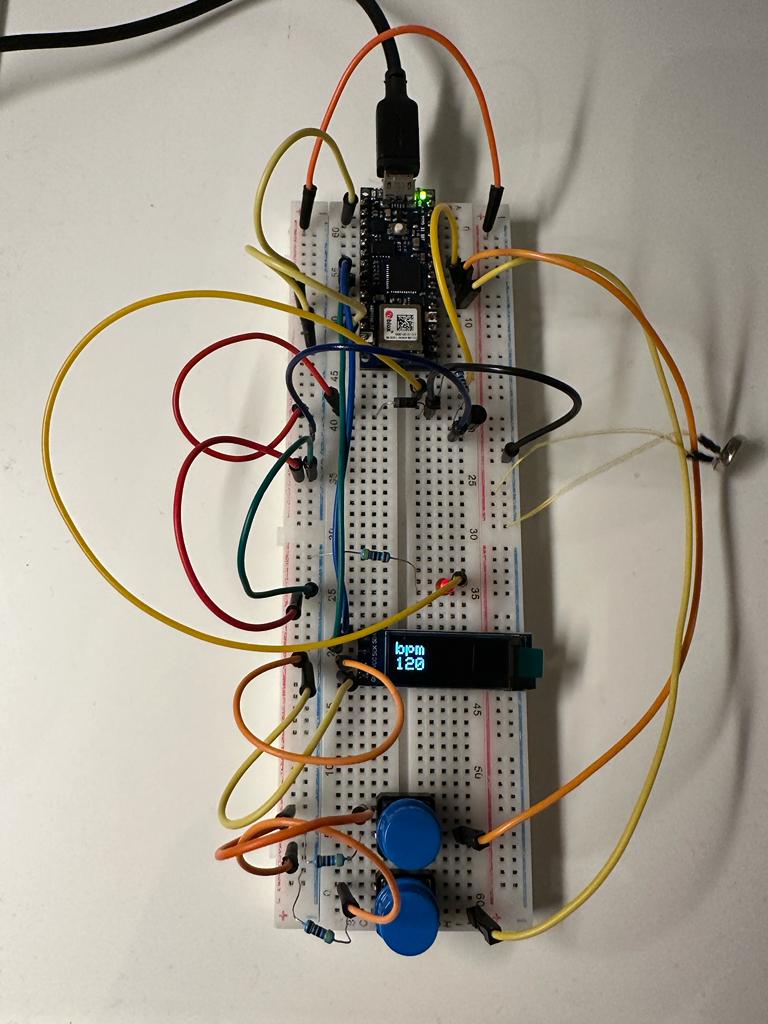
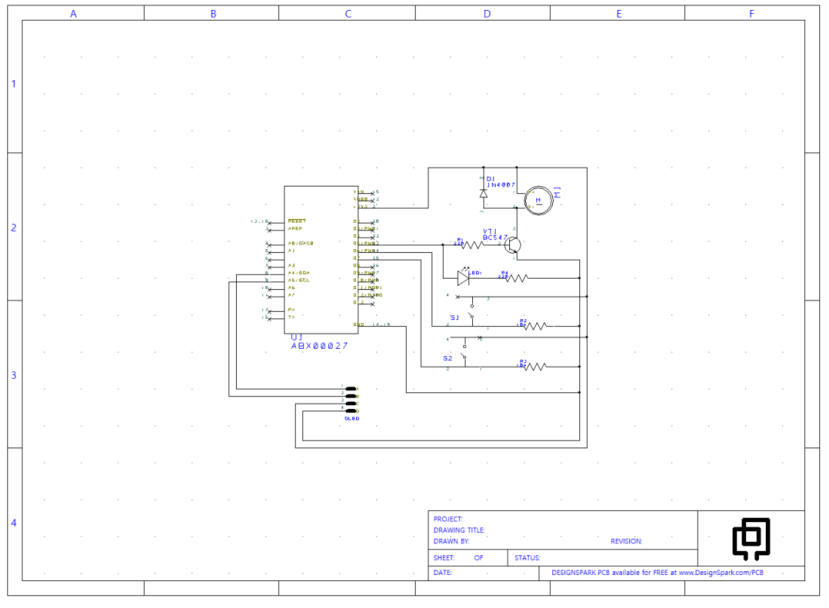
To reduce the size of the batons, I used an Arduino Nano 33 IOT this time. Of course, you can also use an Arduino Uno or any other MCU. As I mentioned before, to help the conductor keep the rhythm, I'll be using a vibration motor to help get their attention. At the same time, in order to demonstrate more clearly, I will also use an LED light to indicate. In order to provide high power to the motor by using a small voltage signal from Arduino, I used 1N4007 diode and BC547 NPN transistor to make the motor drive circuit. Also, I used two buttons to adjust the tempo and displayed the bpm on the OLED display.
OLED Display
In the project, I used a 0.91” OLED display. If you are using another OLED display or any others display, please follow the datasheet.
#include <Wire.h>
#include <Adafruit_GFX.h>
#include <Adafruit_SSD1306.h>

#define OLED_RESET 4
Adafruit_SSD1306 display(OLED_RESET);
In the main loop, as the display is only to display the bpm of the vibration motor, show I only need to set the text size, and the position of the text is enough.
void loop() {
  display.setTextSize(2); // Set the text size to 2
  display.setTextColor(WHITE); // Set the text color to white
  display.setCursor(0,0); // Set the cursor position to (0,0)
  display.println("bpm"); // Print "bpm" on the display
  display.setCursor(0,18); // Set the cursor position to (0,0)
  display.println(bpm); // Print "bpm" on the display
  display.display(); // Update the display
  display.clearDisplay(); // Clear the display
}
To adjust the tempo of the rhythm, I used two buttons to increase and decrease the tempo. Also, I used 120 bpm as the initial speed for the batons.
const int buttonPin1 = 3;
const int buttonPin2 = 4;

// variables will change:
int buttonState1 = 0;
int buttonState2 = 0;

const int motorPin = 5; // Connect the motor to pin 5
int bpm = 120; // Set the desired beats per minute
Setup
If you have an I2C display, you need to search with the address of the display first. If you don't know the address, you can search for "Arduino i2c address scanner".
void setup() {
  display.begin(SSD1306_SWITCHCAPVCC, 0x3C); // Initialize the display with I2C address 0x3C
  display.clearDisplay(); // Clear the display
  pinMode(motorPin, OUTPUT); // Set the motor pin as an output
  pinMode(buttonPin1, INPUT);
  pinMode(buttonPin2, INPUT);
}
Vibration motor (Metronome)
The vibration motor part is actually a metronome. Therefore, we only need to calculate the trigger speed, and it is easy to calculate the length of each beat (in milliseconds) divided by two to determine the trigger on and off.
  unsigned long currentMillis = millis(); // Get the current time
  int beatLength = 60000 / bpm; // Calculate the length of each beat in milliseconds
  unsigned long previousMillis = 0; // Keep track of the last time the motor was turned on

// Check if it's time for a new beat
  else if (currentMillis - previousMillis >= beatLength) {
    previousMillis = currentMillis; // Update the previous time
    digitalWrite(motorPin, HIGH); // Turn on the motor
    delay(beatLength/2);
    digitalWrite(motorPin, LOW); // Turn off the motor
    delay(beatLength/2);
  }
Adjusting the bpm
Adjusting the bpm is also as simple as programming a counter to increment or decrement a number. Then, put it back through the adjusted numbers to calculate the bpm.
buttonState1 = digitalRead(buttonPin1);
buttonState2 = digitalRead(buttonPin2);

if (buttonState1 == HIGH) {
      bpm -= 1;
      Serial.print("bpm");
      Serial.println(bpm);
      delay(10);
  }else if (buttonState2 == HIGH){
      bpm += 1;
      Serial.print("bpm");
      Serial.println(bpm);
      delay(10);
  }
Finally, I hope you enjoy this project. If you have any comments, please leave them below.


