Pop-Up Particle Pavilion Part 2: The Build & Demo
Follow article Dave from DesignSpark
How do you feel about this article? Help us to provide better content for you.
Dave from DesignSpark
Thank you! Your feedback has been received.
Dave from DesignSpark
There was a problem submitting your feedback, please try again later.
Dave from DesignSpark
What do you think of this article?
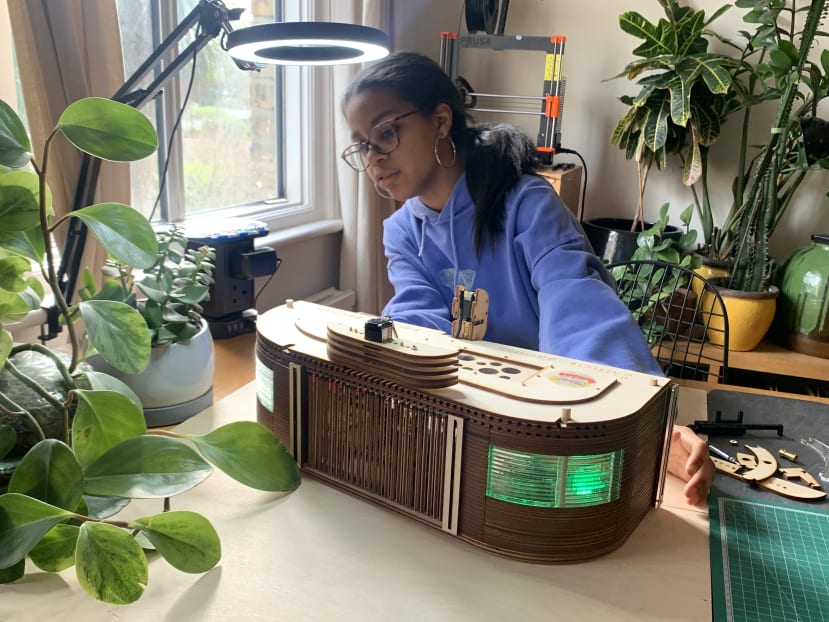
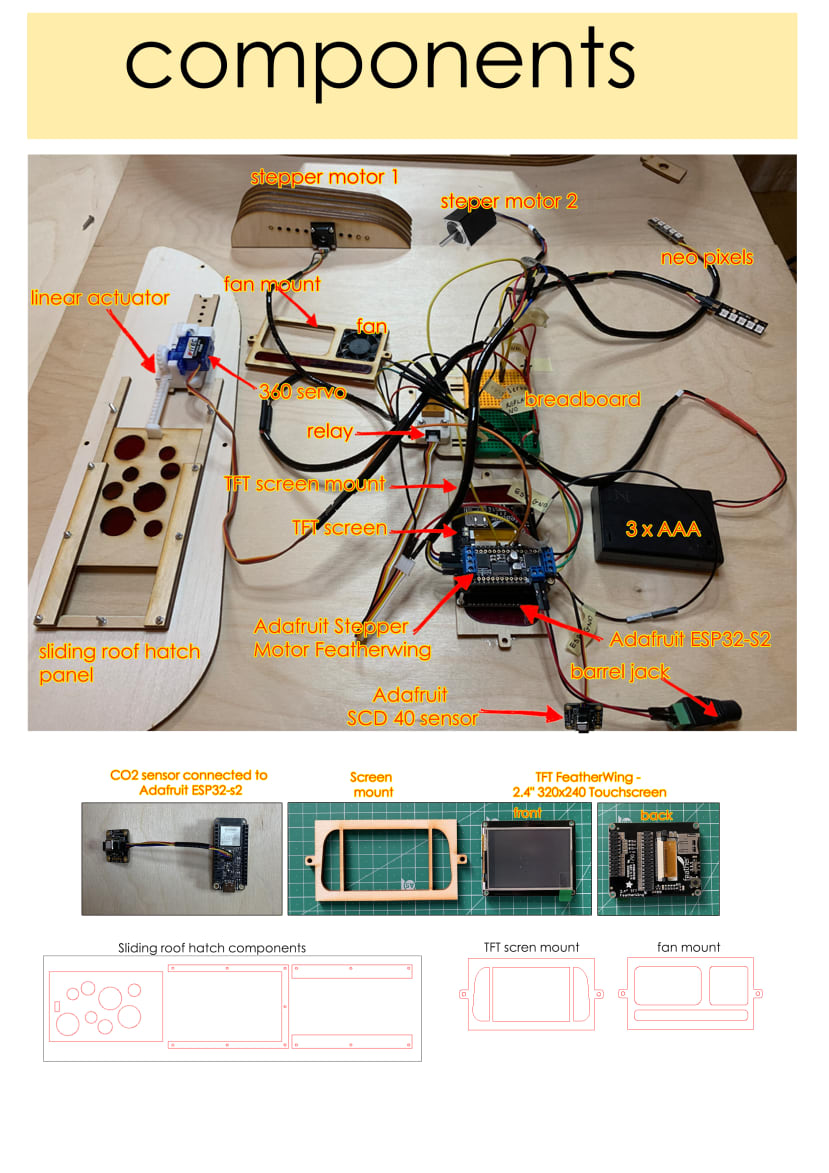
In this article, I attempt to explain how I built my particle pavilion. I will use a combination of words, photos & videos to demonstrate how sensors can monitor internal air quality and activate motorised shutter walls, servo-assisted sliding skylights, embedded warning lights & automatic fans to improve the user experience of shared spaces. Hopefully, you’ll get an insight into how I used the following components to realise my particle pavilion idea:
- Adafruit ESP32-S2 Feather with BME280 Sensor
- Adafruit Stepper Motor Featherwing
- Adafruit TFT FeatherWing - 2.4" 320x240 Touchscreen For All Feathers
- Adafruit SCD 40 - True CO2, Temperature and Humidity Sensor
- Mini Stepper Motor - 200 Steps - 20x30mm NEMA-8 Size (2 off)
- Micro 360 Degree Continuous Rotation Servo FS90R
- Linear actuator
- 5V DC, Axial Fan, 40 x 40 x 10mm, 7CFM
- Relay - 5V
- Kitronik ZIP Stick - 5 ZIP LED
- 4mm Economy Birch Laser Plywood - 600mm x 400mm
- sheet Clear Perspex Sheet (Cast) 4mm x 600mm x 400mm Lipo Battery - 3.7 v; 500mAh
- AA Battery pack; 3x 1.5V
- Jumper wires
- USB C to B Cable
- M3 button head screws
- M3 hex nuts
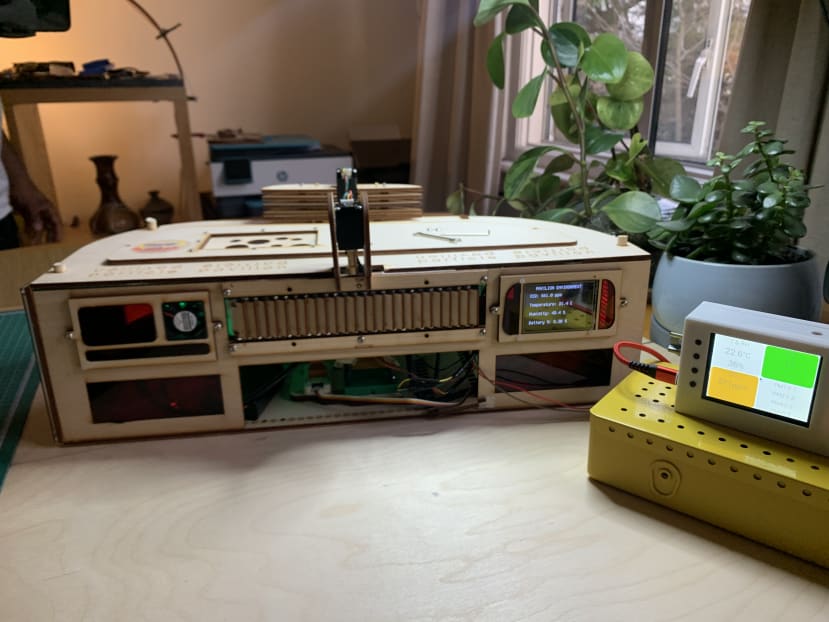
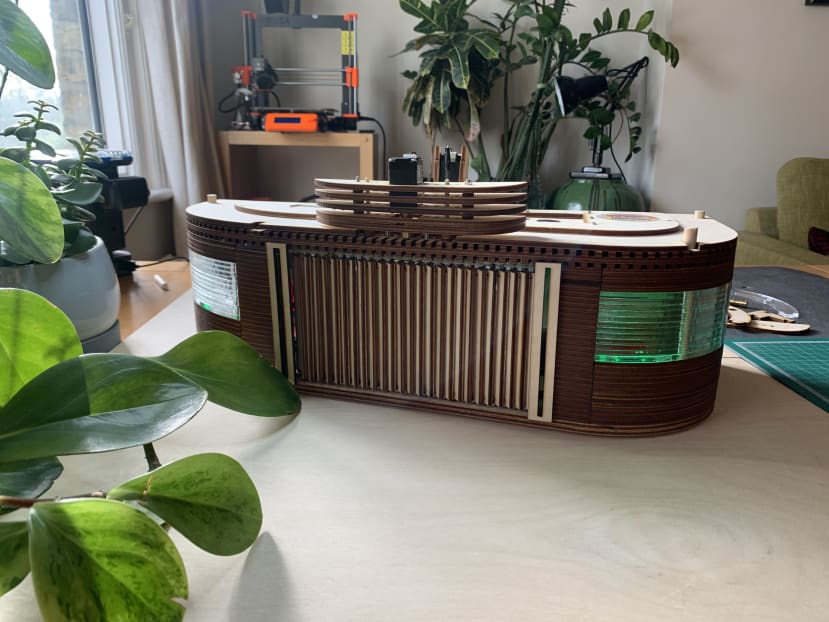
Guided Tour Around My Completed Pop-Up Particle Pavilion!
In one of the videos, you’ll able be to see the DesignSpark air quality monitor keeping tabs on the external air quality while the pavilion’s internal sensor monitors & then triggers various reactions to co2 levels from inside.
Next - Part 3
In part 3, I will be sharing the following:
- The files for all the laser cuts components
- The Code
- The Data Visualisation on Adafruit Io (IoT)
- More detailed wiring diagrams/guidance
- My reflections
Comments