NVIDIA Jetson Setup Using SDK Manager
Follow article
 Dave from DesignSpark
How do you feel about this article? Help us to provide better content for you.
Dave from DesignSpark
Thank you! Your feedback has been received.
Dave from DesignSpark
There was a problem submitting your feedback, please try again later.
Dave from DesignSpark
What do you think of this article?
All-in-one tool provides quick, easy and simple setup of software environments for NVIDIA development hardware.
While turnkey operating system (OS) images provide a quick way to get up and running with single board computers (SBCs), it can quickly become unmanageable if you need to have versions for different boards and software configurations, resulting in many different images which all need updating as new releases of an OS or software development kit (SDK) etc. become available.
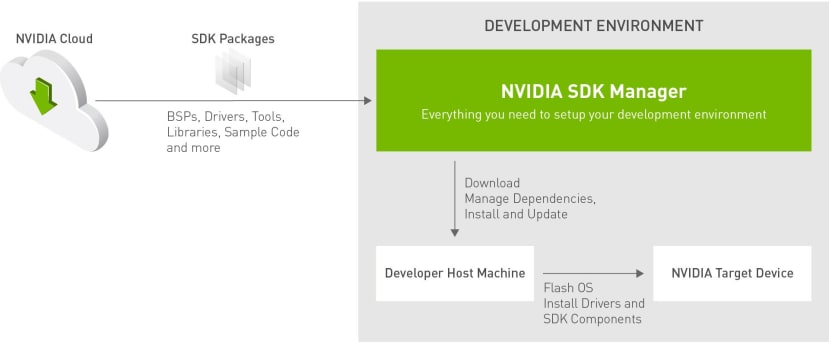
NVIDIA’s solution to this complexity is SDK Manager, which is described as “an all-in-one tool that bundles developer software and provides an end-to-end development environment setup solution for NVIDIA SDKs.” More than just setting up SDKs, the tool also installs the operating system for the target device, while providing support across the NVIDIA DRIVE, Jetson, Holoscan, Rivermax, DOCA and Ethernet Switch families.
SDK Manager is also used where the OS and SDKs are to be installed to eMMC flash or NVMe storage. In this article, we’ll take a look at installing Jetson Linux, along with runtime and SDK components, to a brand new NVMe SSD installed in a Jetson Orin Nano Development Kit (264-7384) .
The SDK Manager is available both as a GUI driven application and a command line interface (CLI) and we’ll be focusing mostly on the former.
Installation

SDK Manager is installed on a host computer, such as a laptop or desktop, which is used to drive configuration of the target device software environment. A Linux host system is required, with Ubuntu, CentOS, Red Hat, Rocky Linux and Debian all supported. However, not all SDKs are supported on all of these and, furthermore, not every release of a supported Linux distribution.
Therefore it’s necessary to first check which distributions have support for the required SDK. In our case, we are interested in the JetPack SDK for Jetson boards and with a host running Ubuntu. Which at the time of writing means that we need a computer running either Ubuntu 18.04 or 20.04.
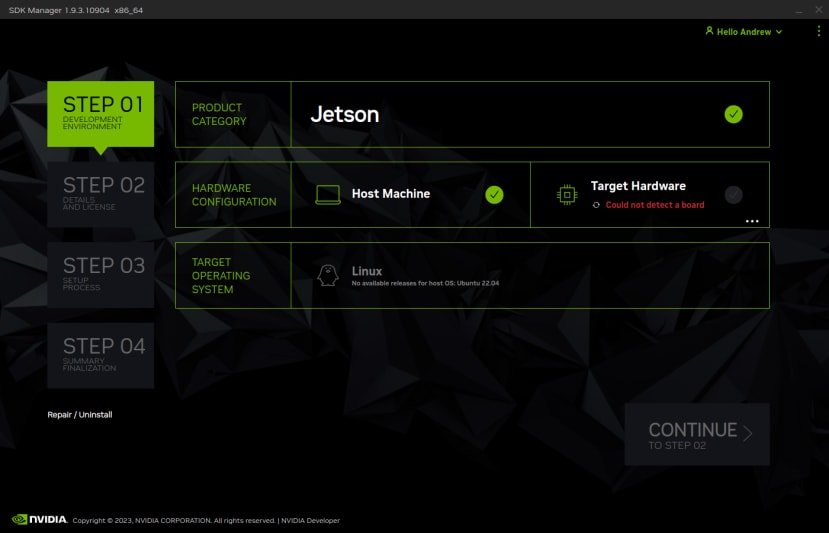
If we attempt to run SDK Manager on a host OS which is not supported for the target SDK/Product Category, we will discover that there is no target OS release available and we cannot proceed. So just to reiterate: check the Compatibility Matrix first!
SDK Manager can be installed via either an operating system package (deb/rpm) or as a Docker container.
OS package
We downloaded the deb package and installed this on Ubuntu 20.04 with:
$ sudo dpkg -i sdkmanager_1.9.3-10904_amd64.deb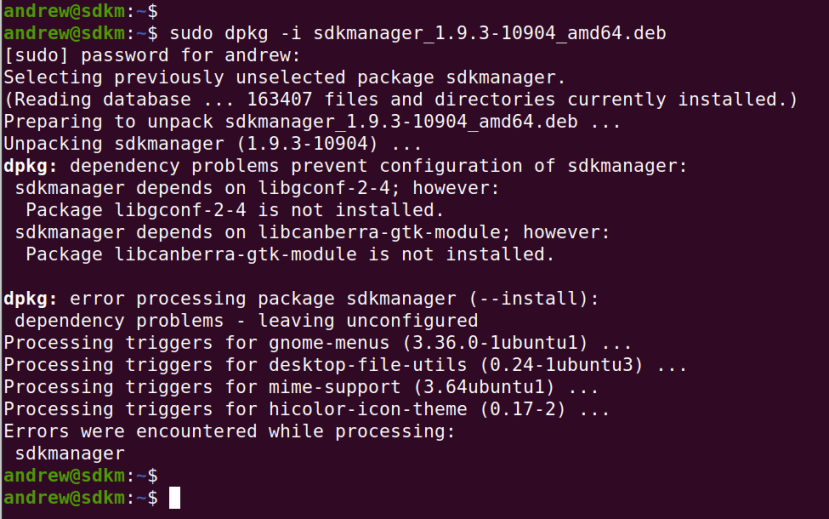
This resulted in an error due to missing dependencies, which was easily remedied with:
$ sudo apt -f installIf we then start SDK Manager we will be presented with a login screen.
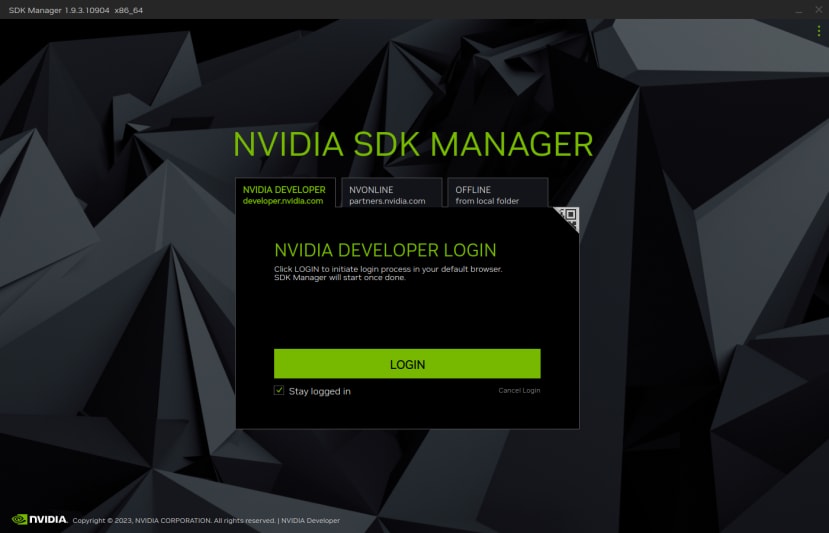
For which we just need to sign up for an NVIDIA developer account, if we don’t already have one.
That’s it.
Docker

Assuming that we already have Docker installed, we need to download the SDK Manager container image and load this, following which tag it as “latest” and then it’s ready to use. This is not a container we leave running or have to execute commands inside, rather instead that we treat as a kind of native CLI, where we just invoke the container each time to run a command.
$ docker load -i ./IMAGE.tar.gz

$ docker tag sdkmanager:VERSION sdkmanager:latest
Replacing IMAGE and VERSION as appropriate.
We will also need to log in to use the Docker container version of SDK Manager and we can use the query command to trigger the login process.
$ docker run -it –rm sdkmanager --query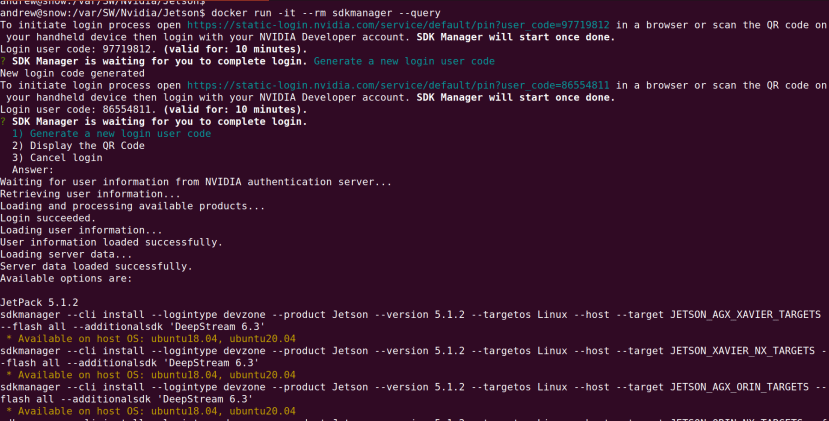
Here we can see we are prompted to open a URL in our browser, from where we can then log in and following which the command successfully completes. This only needs to be done once.
Basic use
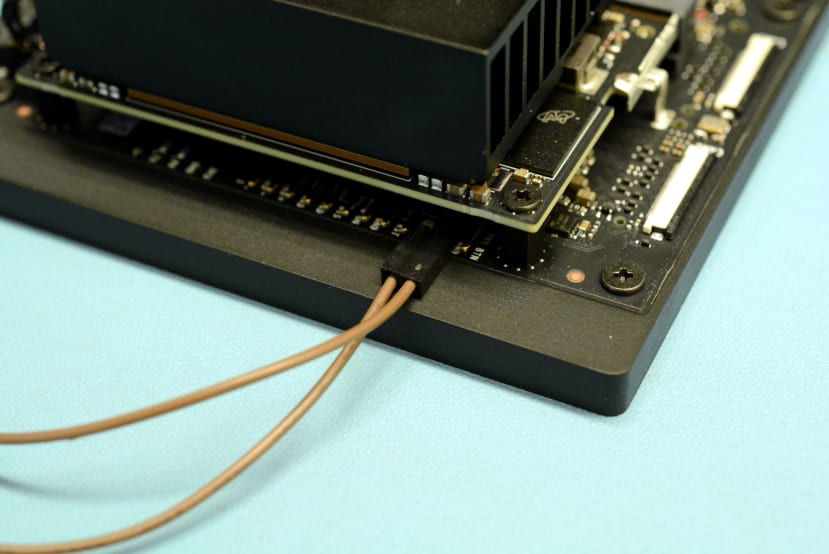
We need the Jetson module to be in Forced Recovery Mode and this is enabled by shorting pins, as seen above with a Jetson Orin Nano Developer Kit. Consult the hardware documentation for more details. Note that this step can be completed before starting SDK Manager and this will enable auto-detection of the target device. Alternatively, we can manually select the target device and we will be instructed to complete this step at the necessary point in the installation process.
Note that we will be installing to NVMe storage, but the process is much the same if installing to a Micro SD card or USB drive.
GUI
SDK Manager can be launched from the desktop, or from the terminal with:
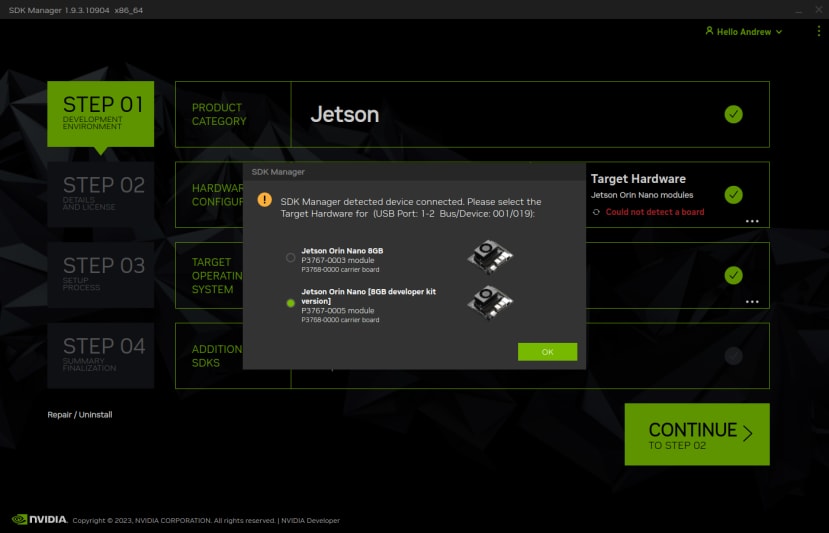
$ sdkmanagerAs part of Step 1, we need to select:
- Hardware Configuration: Host and/or Target Device
- Target Operating System
- Additional SDKs
Typically we would deselect Host and select the correct Target Device. If the module is connected and in Forced Recovery Mode it will be detected and we may then be presented with a smaller number of options, e.g. specific variant, rather than the full Jetson family to select from. There is typically one option for target OS and we can decide whether we want to install additional SDKs.
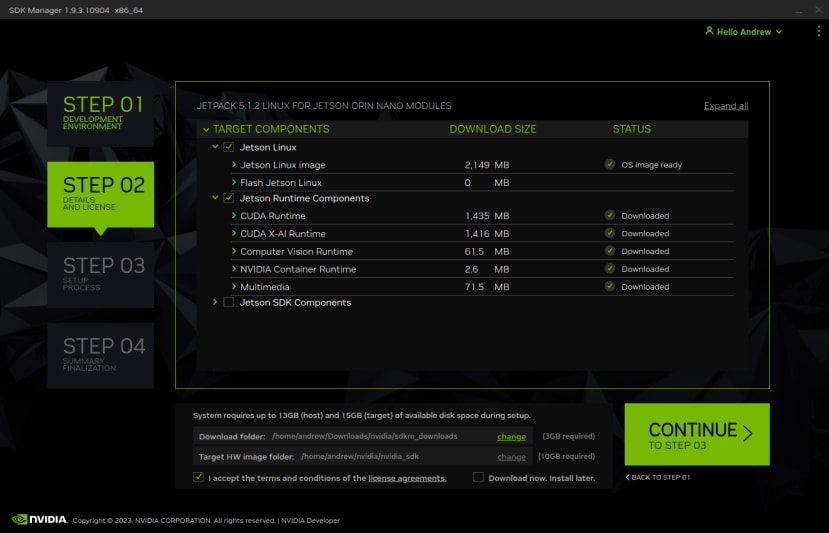
With Step 2 we have more control over exactly what will be installed. We could choose to install only Jetson Linux, with the option to install runtime SDK components at a later date if we wish. We can also drill down and select precisely which components within each category to install.
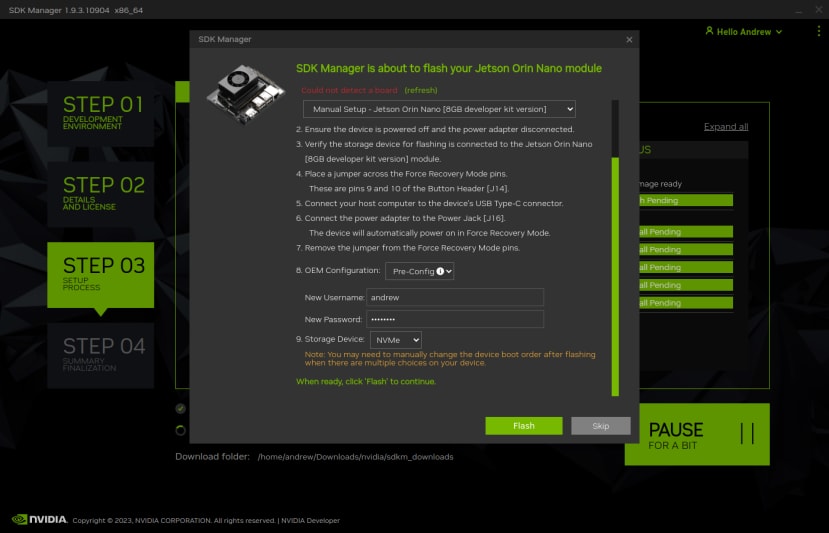
Step 3 involves configuring the setup process. For a system which doesn’t have a Linux install yet we need to select Manual Setup from the first option. For OEM Configuration we need to enter a username and password for the first account to be created on the freshly installed system.
We need to choose the target storage device and here we need to be careful: it is possible to select media which is not present and if we do this, the download and image build processes will work just fine and it won’t be until when it comes to flashing storage that installation will fail.
Note how in the above screenshot we are warned if the target system cannot be detected and instructed on how to put the module into Forced Recovery Mode.
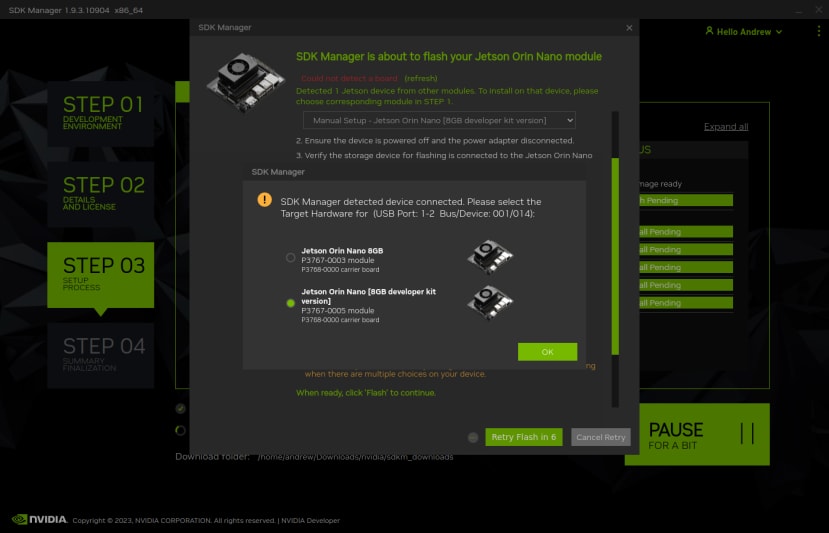
Here we can see again that the Jetson Orin Nano has been detected.
Once in Forced Recovery Mode we can remove the jumper and it’s important to do this, otherwise, the system will not reboot into Linux after this has been installed, which would subsequently cause the installation of runtime and SDK components to fail.
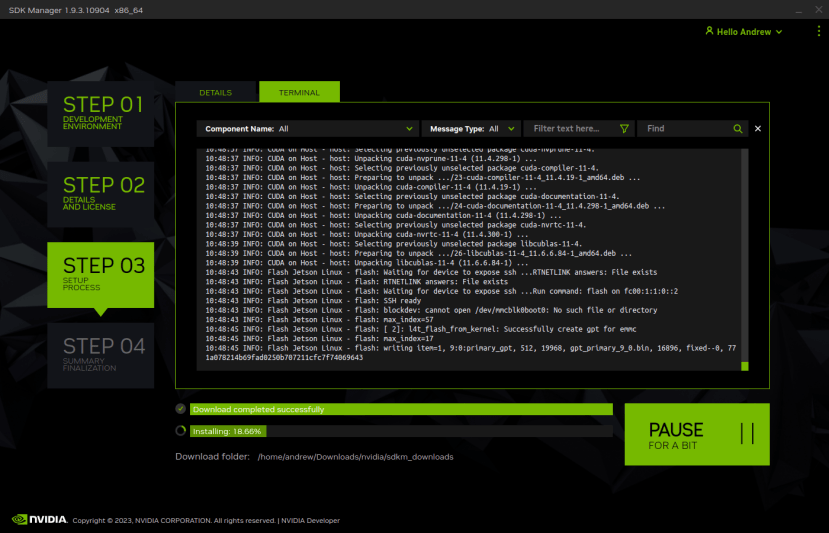
Above we can see how we can switch between progress indicators and debug output. The latter can be useful, but it’s not uncommon to see non-fatal errors.
Note that after rebooting into Linux you may be prompted to enter the IP address of the Jetson module, and USB networking is selected by default. This is due to the fact that, once the target device is up and running, runtime and SDK installation is carried out via SSH.
If issues are encountered connecting via the USB network interface, select instead the wired Ethernet connection and enter the LAN IP address for the Jetson module, which can be ascertained by logging into the system and entering:
$ ip addAlternatively, it should be possible to ascertain the IP address from the LAN DHCP server or router.
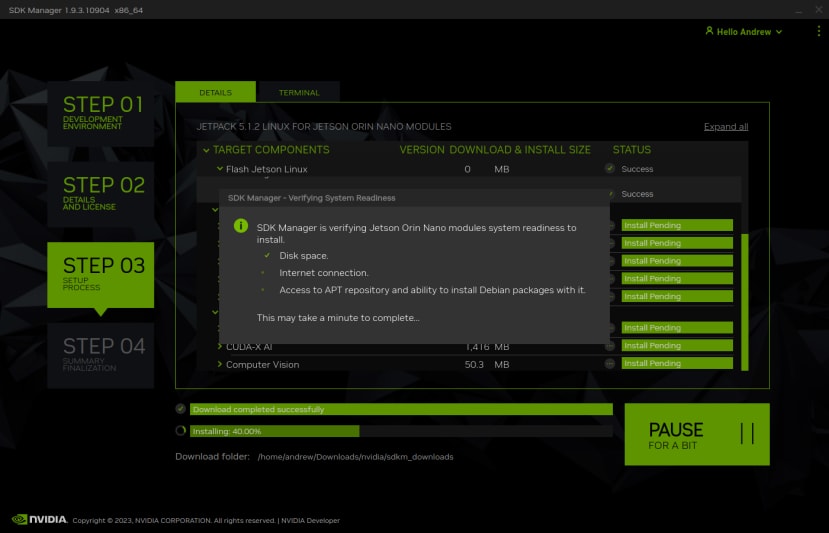
The installation will proceed following a number of checks.
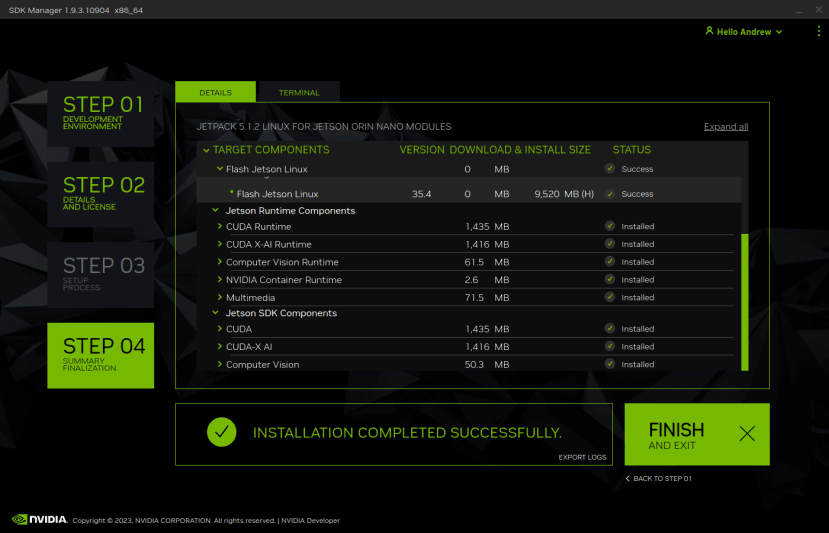
Finally, the installation will complete after some time has elapsed — possibly 45 minutes to an hour or more in total, depending upon the Internet connection speed.
CLI
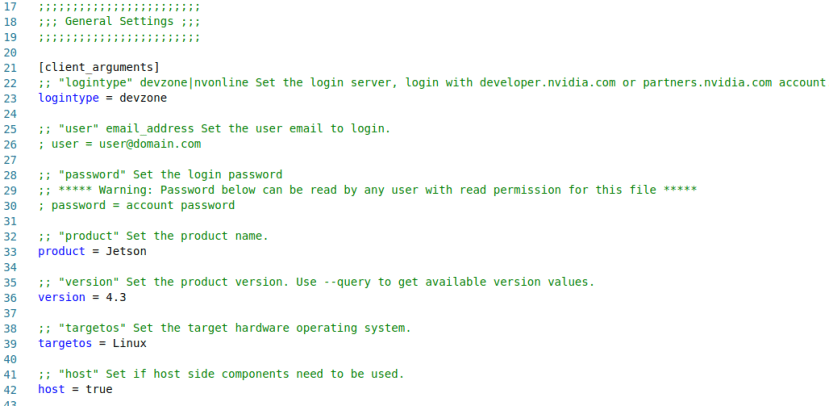
Fragment of an SDK Manager CLI response file.
The command line interface is obviously not quite as user-friendly, but is more powerful, in that it allows greater control and automation, both via integration into larger scripts and third-party systems and via the use of the provided Response File capability.
For further details, see the Install with the Command Line documentation.
Final words
In this article, we have seen how we can use SDK Manager to install Jetson Linux, together with runtime and SDK components, to a brand new NVMe SSD. And we have seen how this provides a neat solution to managing the complexity of software environment configuration, across many device families and storage types, and where there are numerous optional components.
Comments