How to start a new Project?
Follow tutorial
 Dave from DesignSpark
How do you feel about this tutorial? Help us to provide better content for you.
Dave from DesignSpark
Thank you! Your feedback has been received.
Dave from DesignSpark
There was a problem submitting your feedback, please try again later.
Dave from DesignSpark
What do you think of this tutorial?
This tutorial requires:
DesignSpark PCB V11.0.01. Dropdown menu
To start a new project, select the File menu, and click New (shortcut key <Ctrl-N>)

2. Design option
Select the Project option and give your project a name and save location by clicking OK.
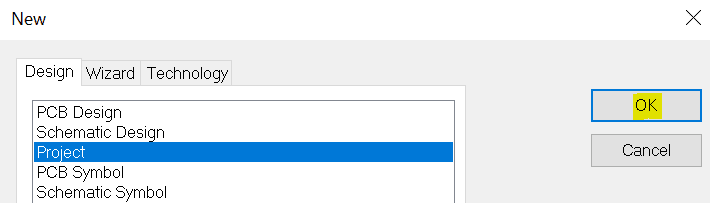
Note: You should normally put each project in its own folder along with any associated design files.
Now, you can start adding schematics and PCB design files into your project.
Projects are useful for controlling a set of Schematic sheets and a PCB design together to form a complete job. The advantage of using a project is that the Schematic design can be split into separate sheets. Each schematic design in the project will represent one of the sheets but will have access to the projects global net names. The use of a Project will enable net names and component names to be tracked through each sheet so that duplicates are not produced.
Initially, you can only create an empty project to hold your designs. As the design files are created you can add them to the open project, or you can later return to the project and include them using the browser.