How to create and manage component categories?
Follow tutorial
 Dave from DesignSpark
How do you feel about this tutorial? Help us to provide better content for you.
Dave from DesignSpark
Thank you! Your feedback has been received.
Dave from DesignSpark
There was a problem submitting your feedback, please try again later.
Dave from DesignSpark
What do you think of this tutorial?
This tutorial requires:
DesignSpark Circuit SimulatorDesignSpark Circuit Simulator provides hundreds of ready-made component models that allow you to use directly in design and simulation.
The components are organized into functional categories as seen in the menu on the left-hand side of the Design Analyzer application, in the Generic Components category.
You can browse for components within these categories, or search for components by name.
Component Categories
The categories for components perform two primary services:
- To allow logical grouping, i.e., between technology types.
- To show which components have compatible pins.
Multiple technologies are supported. Each technology has a distinct "pin type" that corresponds to the technology. Pin types for a given technology are not compatible with pin types from other technologies.
Creating and Editing Component Categories
In the My Components category, you can create subcategories to help organize the components.
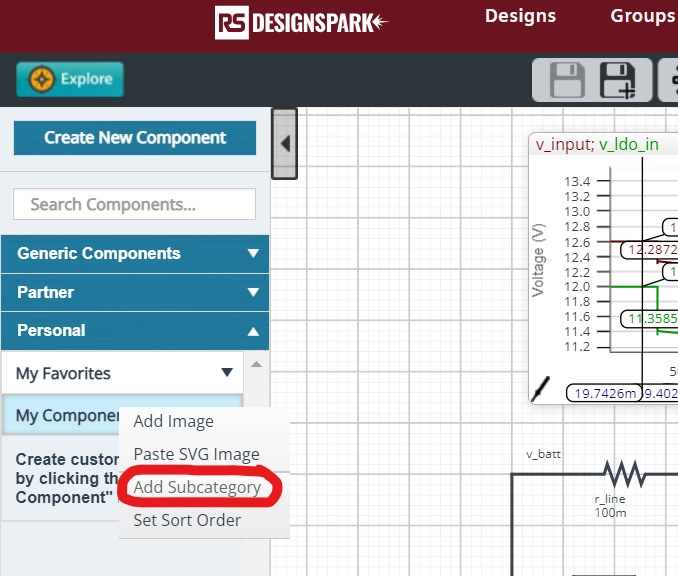
To create a subcategory, right-click on the category header to open its context menu, select "Add Subcategory".
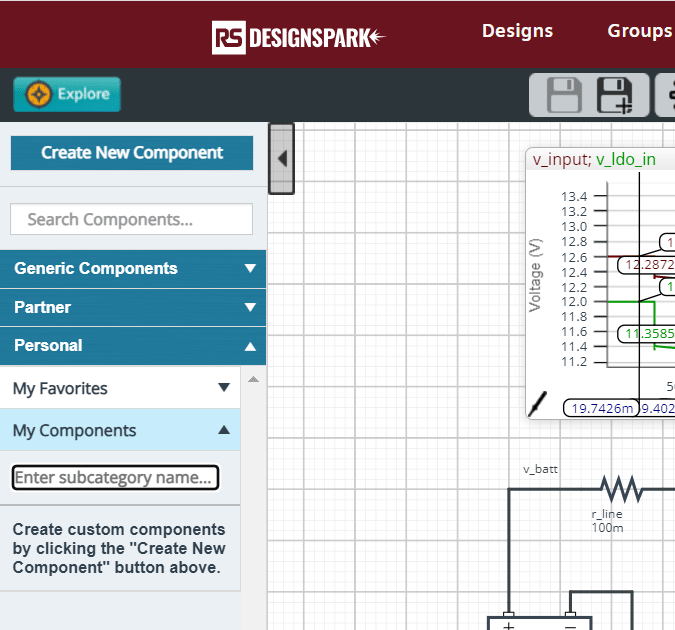
Follow the instructions to create a subcategory in My Components.
Enter the subcategory name.
Subcategories appear alphabetized among the components.
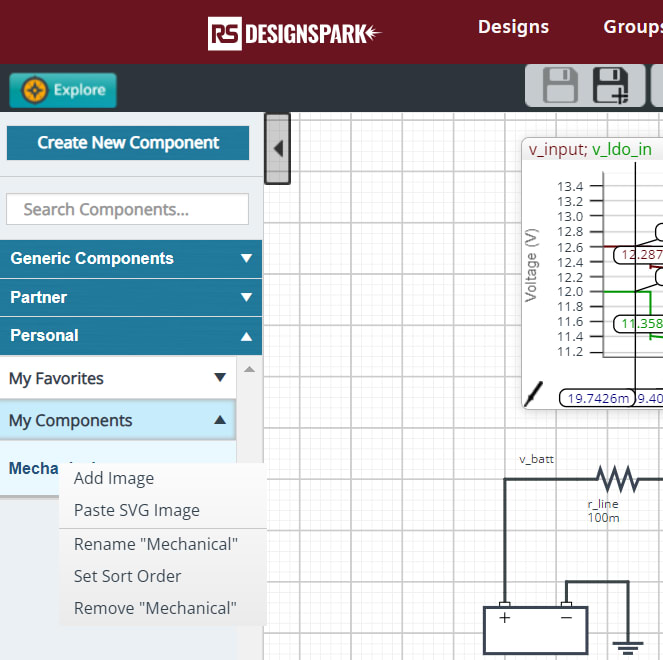
Click on a subcategory to open it. This shows the category path along the top and the contents below. Each subcategory also has its own context menu, allowing you to rename it, remove it, or add a custom image.
Right-click the current subcategory name to open its context menu.
Managing Components Within Categories
Moving a Component
Within your My Components category, you can move a component to a different location.
- Right-click the component and select "Display Component...">" in a different location".
- If you want to move more components to the same location, repeat step 1 for each.
- Navigate to the destination location, right-click it, and select "Display Selected Components in <location>".
If you are in the middle of this process and want to start over, select "Display Selected Components in <location>", then click the "Clear All" button.
Displaying a Component in Multiple Locations
Within your My Components category, you can display a component in multiple locations.
- Right-click the component and select "Display component...">" in an additional location".
- If you want to mirror new components to the same location, repeat step 1 for each.
- Navigate to the destination location, right-click it, and select "Display Selected Components in <location>".
Removing vs. Deleting Components
Generally, if you want to delete a component, there will be one option in the context menu to do so: "Delete Component". The exception to this is when the component is displayed in multiple locations. In this case, two context menu items appear: "Remove from <current location>" and "Delete Component".
The former removes it from its current location but leaves it in its other locations. The latter deletes it from all locations.