How do I run a simulation in my design?
Follow tutorial
 Dave from DesignSpark
How do you feel about this tutorial? Help us to provide better content for you.
Dave from DesignSpark
Thank you! Your feedback has been received.
Dave from DesignSpark
There was a problem submitting your feedback, please try again later.
Dave from DesignSpark
What do you think of this tutorial?
This tutorial requires:
DesignSpark Circuit SimulatorOnce your design has been created you can run simulations on it to see if it's working as expected. This is extremely useful for both design/concept exploration as well as for working out design bugs prior to prototyping a design with actual hardware.
The number of simulations you can do is unlimited in all DesignSpark plans, but there is a limit on server computation time taken for each simulation. If a single simulation takes more than 1 minute on the free Explorer plan, it will time out. You can upgrade to our paid subscriptions for up to 60 minutes (1 hour) of computation time allowed per simulation.

Simulation preparation guidelines
Following are some guidelines to follow when preparing a design for simulation:
- Add at least one ground (reference) component to the design.
- Make sure that all component parameters have values. If provided, default values can be used.
- Try to make component parameter values reasonable so that they make sense in the context of the design.
- If you are running frequency domain analysis, be sure to turn the AC source on.
Steps for simulating a design
The following are applied to the gear icon in the DesignSpark Circuit Simulator schematic toolbar:
- Select the Simulation Type. At this time, you can choose between Time-Domain and Frequency-Domain.
- Specify a simulation End Time (for time-domain) or simulation Start/End Frequency (for frequency-domain). You can add SI suffixes (e.g. m, u, k, etc.), but do not add units - they are shown on to the right of the time/frequency input field.
- Click on the Run simulation button (the button with the right-facing arrow). The simulation progress will be shown below the Run simulation button.

View Simulation Results
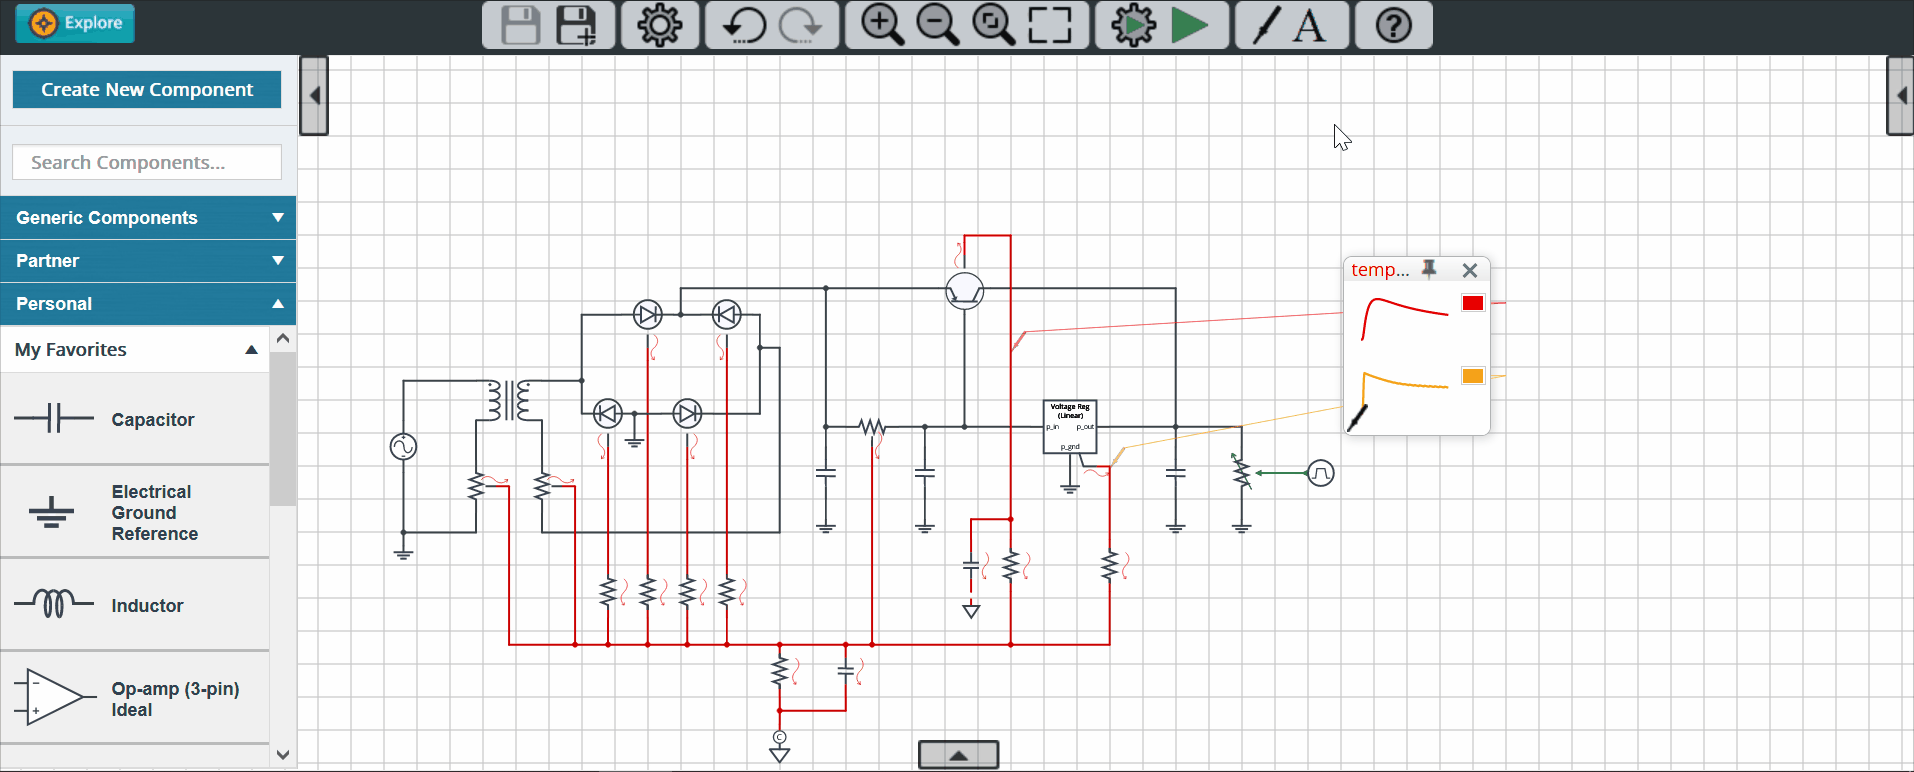
"Waveboxes" are intended for very convenient yet powerful waveform viewing. You can add a wavebox as follows:
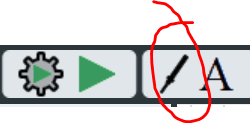
Click on the Waveform Probe icon:
- This will bring up a wavebox and attach a probe to your mouse cursor.
- Drag the cursor to a schematic net and click to view that net's waveform, or
- Drag the cursor over a component and click. Then click on an internal item to view its waveform.
Example
By simulating its operation, learn how to monitor the power dissipation of the different parts in a circuit and use the waveform viewer to account for all the power.
Watch this tutorial: