How can I add DSL files to my library?
Follow tutorialHow do you feel about this tutorial? Help us to provide better content for you.
Thank you! Your feedback has been received.
There was a problem submitting your feedback, please try again later.
What do you think of this tutorial?
This tutorial requires:
DesignSpark PCB V11.0.0DesignSpark partners with leading companies to bring you a huge online catalogue of part models for free. Find your schematic/PCB symbols and footprints at our PCB Part Libraries page: https://www.rs-online.com/designspark/pcb-part-libraries
Some catalogue providers offer their own integration allowing you to drag-and-drop models directly into your DSPCB workspace. If such an integration is not available, you can download the part model (usually a DSL file) to your folder of choice and manually add to the DSPCB local library. Here are the steps:
- Register with any catalogue provider and then search for the required component.
- Download the selected component which will be in a ZIP file.
- Using Windows, unzip the file to a folder.
Now using the unzipped DSL file, you need to perform three quick and easy steps from within the DSPCB Library manager. The next steps are:
- Extract the schematic symbol into your Schematic Symbols Library.
- Extract the PCB footprint symbol into your PCB Symbols Library.
- Extract the component (which uses the above symbols) into your Components Library.
These steps are illustrated below:
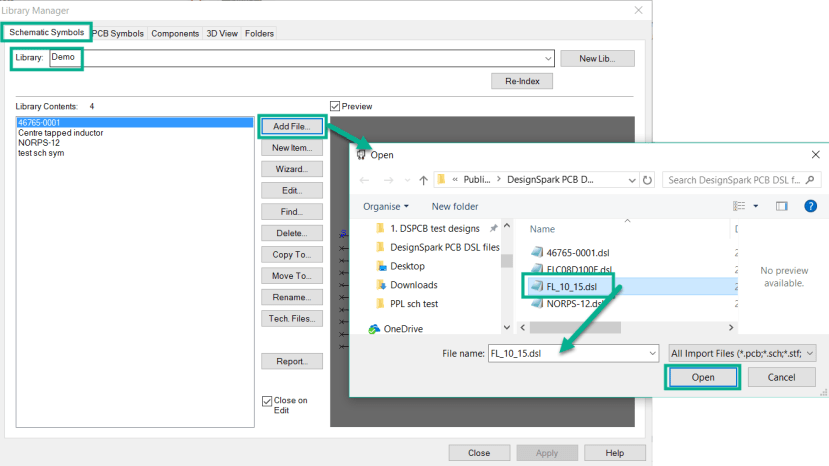
Adding the Schematic symbol:
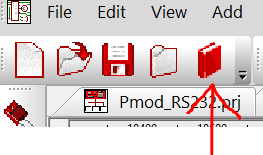
Launch the Library Manager.
Select the "Schematic Symbol" tab, select your destination "Library" and click "Add File".
In the "Open" dialog window, navigate to the folder containing the DSL file, select it and click "Open".
(If asked by a popup window, select the default technology file).
The symbol is now saved in the library and will appear in the list. Select it, ensure "Preview" is checked and it will appear in the preview pane.
Adding the PCB symbol
Repeat the above simple steps for the "PCB Symbol".
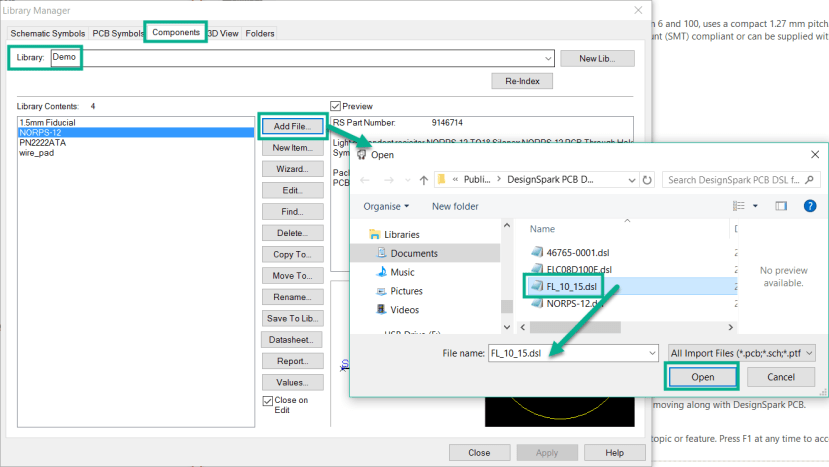
Adding the Component
Repeat the same steps for the "Component" too.
The DSL component is now in the library ready to use from "Add Component" in your design.
The above illustrates adding the component to a "Demo" library, but you can select the destination and it will typically be your "User" Library.


