FemEng - Sound Controlled Printer
Follow article Dave from DesignSpark
How do you feel about this article? Help us to provide better content for you.
Dave from DesignSpark
Thank you! Your feedback has been received.
Dave from DesignSpark
There was a problem submitting your feedback, please try again later.
Dave from DesignSpark
What do you think of this article?
I’m a civil engineering with architecture student at the University of Glasgow and this year I have been part of the Technical workshop run by FemEng and Grass Roots. I have never used electronics before or constructed a circuit and wanted a friendly introduction into using Arduino and to learn how to design and bring a unique project idea to life.
I was given an Arduino Uno and sidekick basics kit, and completed a number of tutorials run by Jana, our technical convenor. I’ve started learning C++ in a different engineering project and was excited to put it to use. Jana taught us how to set up LEDS, buttons, LEDS, Photoresistors, the servo, and thermistors in our group tutorials.
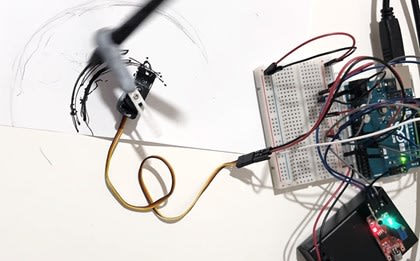
When it came to our individual project, I decided to make something which responded to music and would interpret the sound in another form like light or movement. I decided to build a circuit which would listen to input sounds and respond with a 2D-printing mechanism on one axis, like the waveform itself.

I started by thinking about the components I’d use: a microphone, a servo to control the pen and a motor to control a continuously turning spool of paper. Here are a few sketches I made initially. I am still working on the paper-turning process and am planning on using 3D-printed parts to hold up the pen and paper, changing the pen from rotating around a point to rotating along a fixed-line.

Next, I took the project into Tinker Cad, a website I was using for the first time. I tried a few tutorials on using servos, motors and microphones individually, and set up a circuit using a servo controlled by a potentiometer. I also ordered the extra parts I’d need in my circuit from RS GrassRoots.

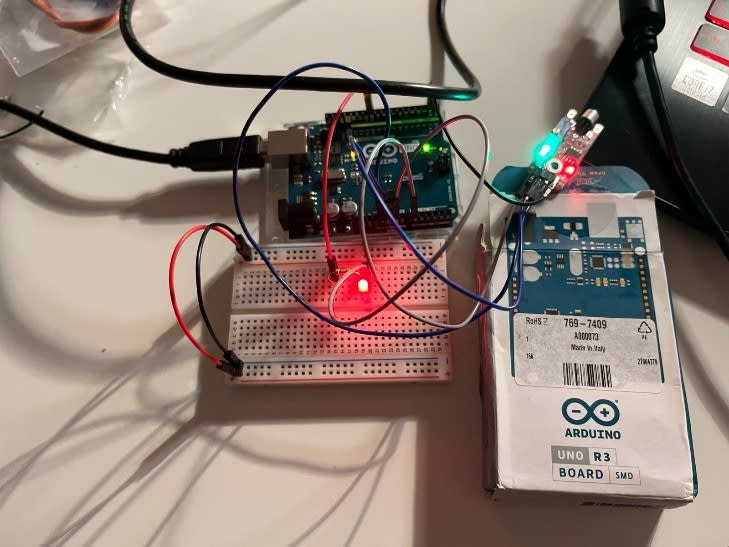
Now that this was working, I could test out the circuit in real life. I set up the microphone first, writing a code where I connecting it to an LED which flashed at high volume outputs. Then I connected the microphone to a servo and pen, and adjusted my code to work for a new output, mapping the volume of the microphone to degree rotations on the servo. It worked! [nb. I am not sure how to upload a video so you’ll have to believe me and look at the photo].
This is my current progress with the project, however I haven’t finished yet! I am planning to 3D print the pen holder and gears so as to make the pen move in a straight line and incorporate the motor circuit which I have written on TinkerCAD to keep paper constantly running under the pen.
I hope you have enjoyed learning about my journey with Arduino and it has inspired you to experiment with a kit yourself. Thank you to RS GrassRoots for lending me the kit so I have had this opportunity.
Comments