Exploring Ethereum with Raspberry Pi - Part 1: Getting Started
Follow articleHow do you feel about this article? Help us to provide better content for you.
Thank you! Your feedback has been received.
There was a problem submitting your feedback, please try again later.
What do you think of this article?
Installing and running an Ethereum blockchain client on a Pi 3 Model B.
Blockchain is an incredibly hot topic right now and has been for some time, due in no small part to the wealth that cryptocurrencies — mostly notably Bitcoin — have seemingly generated overnight for their early adopters, together also with the new economic possibilities that they open up.
However, blockchain can be used for much more than cryptocurrencies and as Greig noted in his recent post, its distributed nature and ability to verify transactions for tamper-proof records, lends it to use in IoT applications. What is exciting about the Ethereum platform is that it goes beyond simply cryptocurrency and securing transactions, to providing a distributed computing platform.
In this post we’ll take a quick look at the Ethereum architecture and attempt to cover some of the main concepts and components, before proceeding to install client software on a Raspberry Pi. Just to be clear: we won’t be mining any cryptocurrency, since you really need a powerful GPU for this, but a Pi can be used to create a simple sandbox for experimentation — and this also demonstrates that it is indeed possible to deploy blockchain technology with embedded platforms.
Ethereum 101
contract mortal {
    /* Define variable owner of the type address */
    address owner;

    /* This function is executed at initialization and sets the owner of the contract */
    function mortal() { owner = msg.sender; }

    /* Function to recover the funds on the contract */
    function kill() { if (msg.sender == owner) selfdestruct(owner); }
}

contract greeter is mortal {
    /* Define variable greeting of the type string */
    string greeting;

    /* This runs when the contract is executed */
    function greeter(string _greeting) public {
        greeting = _greeting;
    }

    /* Main function */
    function greet() constant returns (string) {
        return greeting;
    }
}An example Ethereum smart contract. Source: ethereum.org.
A blockchain is a distributed ledger that is typically managed via a peer-to-peer network and constantly growing in size as more records, or blocks, are successively added to it. Blocks usually contain a timestamp along with transaction data, and are cryptographically secured via hashing algorithms, such that once data is committed it cannot be modified — it is immutable.
The Ethereum platform has its own cryptocurrency, called ether, but it also builds further on blockchain technology to create a decentralised platform for smart contracts — objects which contain code functions and that live on the blockchain, and are able to interact with other contracts, make decisions, store data, and send ether to others.
Smart contracts are implemented in a language called Solidity, which is based on JavaScript. The Solidity compiler is used to compile smart contracts to bytecode — just as is done with JavaScript or e.g. Python, Java and Android etc. code prior to execution — which is then executed via the Ethereum Virtual Machine (EVM). There is a cost associated with executing the transactions in a smart contract and this is something that we’ll take a look at in a future post.
There are a number of different client applications available for Ethereum, with the original reference implementation, geth, written in Go. Some of these can mine ether and there is standalone mining software also. Plus GUI clients and an IDE for distributed applications.
In addition to the primary, public Ethereum blockchain network, mainnet, there are also test networks for experimentation, and you can create your own private networks, too.
Installing geth
Assuming we have already installed Raspbian, if we start by updating the installed packaged software to the latest versions.
$ sudo apt-get update

$ sudo apt-get dist-upgrade
I ran out of memory the first time I tried to compile the Ethereum client and a good way of freeing up RAM for memory intensive tasks, is to reduce the amount allocated to the GPU. Also, if you don’t actually need a graphical desktop, configure your system to simply boot to the command line.
$ sudo raspi-config- 3 → Boot
- B1 → Desktop / CLI
- B1 → Console
- 7 → Advanced
- A3 → Memory Split
- 16 (MB)
- Reboot
Next if we install the packaged dependencies.
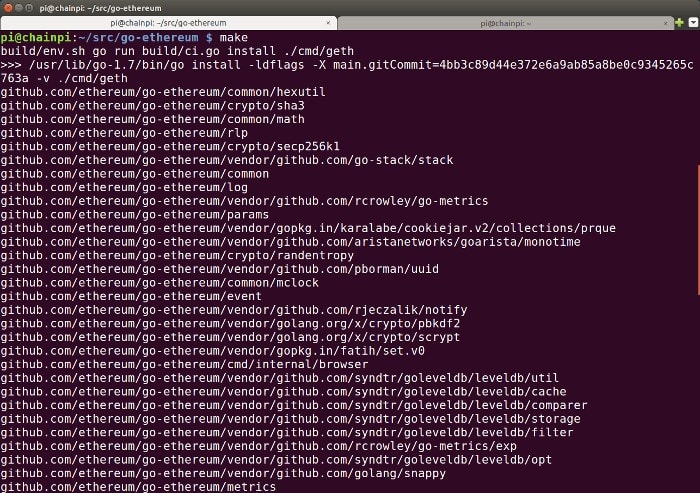
$ sudo apt-get install git golang libgmp3-devFollowing which if we grab the sources for geth, the official Go language implementation of an Ethereum node, compile these and copy the executable to /usr/local/bin/.
$ mkdir src

$ cd src

$ git clone -b release/1.7 https://github.com/ethereum/go-ethereum.git

$ cd go-ethereum

$ make

$ sudo cp build/bin/geth /usr/local/bin/
Create an account and test
First if we use geth to create a new account.
$ geth account newThis will generate a new set of cryptographic keys and protect the private key with a password. Note that if you were using this account to mine cryptocurrency and meaningfully transact, you would want to make sure to backup your keys and to prevent your private key from being accessed.
Now on to starting the node.
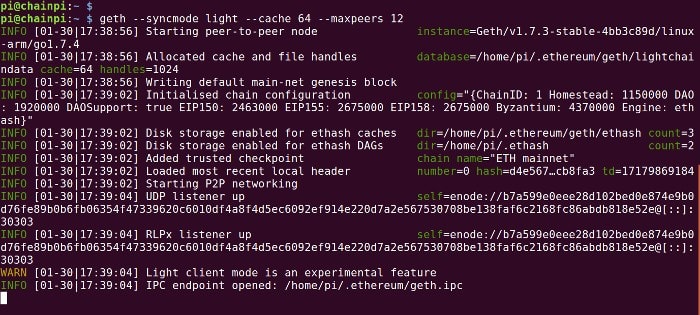
$ geth --syncmode light --cache 64 --maxpeers 12If we ran geth without any arguments, it would start up a node and attempt to sync the entire public mainnet blockchain. Which, at >50GB in size and constantly growing, might not be a great idea on an embedded computer. So instead we start the node in light synchronisation mode. This only fetches block headers as they appear and other parts of the blockchain on-demand.
To force the node to exit simply press CTRL-C. To run it as a service at boot time:
$ sudo vi /etc/systemd/system/geth@.service(replace "vi" with your favourite text editor)
And then enter:
[Unit]
Description=Ethereum daemon
Requires=network.target

[Service]
Type=simple
User=%I
ExecStart=/usr/local/bin/geth --syncmode light --cache 64 --maxpeers 12
Restart=on-failure

[Install]
WantedBy=multi-user.target
Save the file. Following which to have the Ethereum node run as the “pi” user:
$ sudo systemctl enable geth@pi.service
$ sudo systemctl start geth@pi.service
With our Ethereum node running as a service we can now attach to it using:
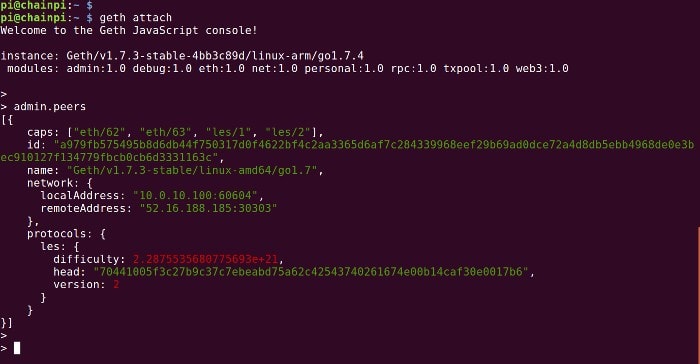
$ geth attachThis gives us an interactive JavaScript console. From here we can call functions, such as:
> eth.accountsWhich will list the current accounts.
Or to get information about the connected peers:
> admin.peersNote that the light client protocol is still in development, somewhat experimental and does rely on full peers/nodes enabling support for it. As such, it may not be entirely practical at the time of writing to transact on the Ethereum mainnet blockchain using this. That said, things are moving fast and this situation could easily change in the not too distant future.
Coming up
So far we’ve just installed the client software, created an account, started up a node and observed a peer connection. In the next post, we’ll take a look at actually executing transactions.


