Mirror, Mirror On The Coffee Table. Who In This Lab Is Smartest Of All?
Follow article Dave from DesignSpark
How do you feel about this article? Help us to provide better content for you.
Dave from DesignSpark
Thank you! Your feedback has been received.
Dave from DesignSpark
There was a problem submitting your feedback, please try again later.
Dave from DesignSpark
What do you think of this article?
This project has been developed as a requirement to pass a subject at the Public University of Navarre (UPNA), being the main target to correctly organize and plan an electronic project with a deadline.
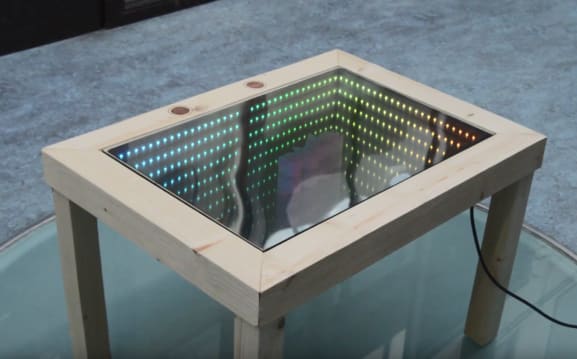
Design and electronic knowledge are combined to create the finished product. Looking for a cool concept, something that you would want to show to your friends and relatives. At the same time, a useful piece of furniture that can be integrated into your home, looking common at first glance.
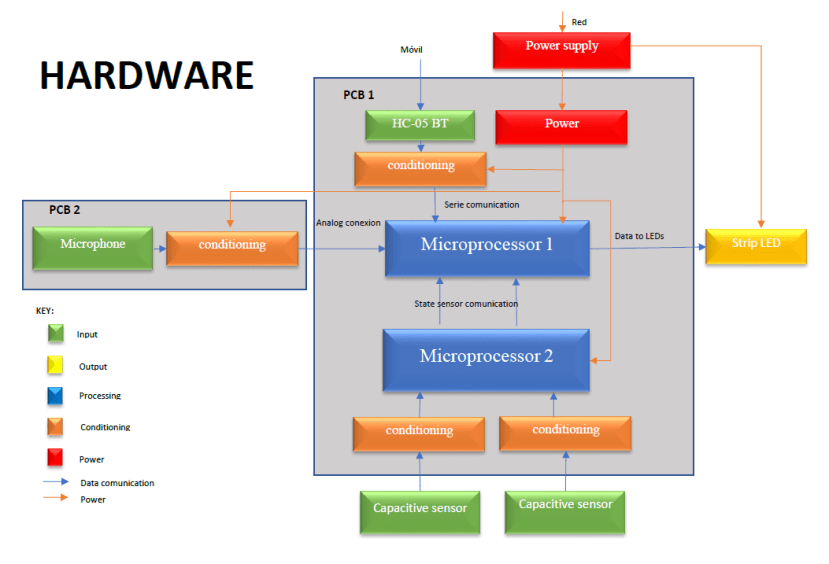
Under the surface, we can find a combination of two microcontrollers that, working together, control all the components (LED strip, microphone, Bluetooth module and two capacitive sensors).
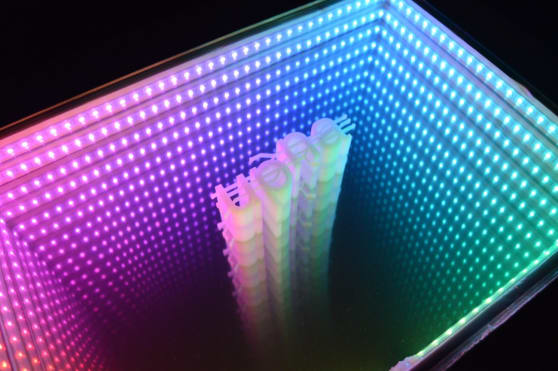
The infinity effect is achieved through the use of two mirrors. While the one situated at the bottom is a regular one, the other is a one-way mirror, reflecting half of the light and allowing the rest to go through it. The LED lights are situated between them and every time the light impacts the upper mirror part of it goes back to create the next reflection of the LEDs. Every layer is half as bright than the previous one, creating an illusion of depth.
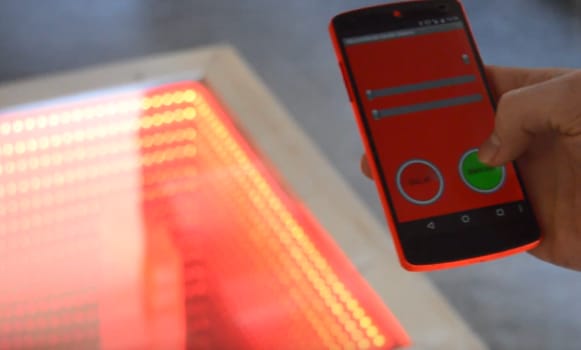
Using this illusion, we have created different functions as an interactive wave with customizable colors triggered by the capacitive sensors, a ping-pong game for two players, a static color chosen by the user, a rotating rainbow effect, a torch function with the white LEDs on and a dynamic lightning controlled by a microphone, etc. All these features are controlled using an Android App, created with the MIT App Inventor web, which is connected via Bluetooth with a HC-06 module in the table.
In the first stage of the project, we used two Arduino UNO boards instead of a custom PCB to check if it was possible to implement our ideas. Once it was checked, we used the free electronics PCB design software, DesignSpark PCB to design our own PCB, replacing the Arduino boards with two standalone ATMEGA328P that were programmed using the Arduino IDE.
The LED strip is an indexable one. This means that sending the data of one color to the first LED makes the LED send its current color to the next one and so on. We use the library NeoPixel by Adafruit to communicate the microcontroller with the LED strip. The performance of the library was good enough to implement fast animations.
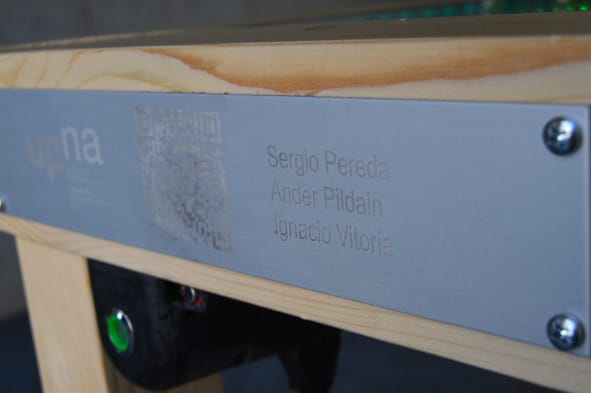
Finally, we use the tecnic of laser engraving to insert a QR code in our table. This is a useful tool for the users because they can download Tthe app and the documentation.
This video shows the table and all the functions that were described before: