Building Braccio - The TinkerKit Robot Arm
Follow article
 Dave from DesignSpark
How do you feel about this article? Help us to provide better content for you.
Dave from DesignSpark
Thank you! Your feedback has been received.
Dave from DesignSpark
There was a problem submitting your feedback, please try again later.
Dave from DesignSpark
What do you think of this article?
Assembly, test and drive of the Arduino controlled TinkerKit Robotic Arm Kit.
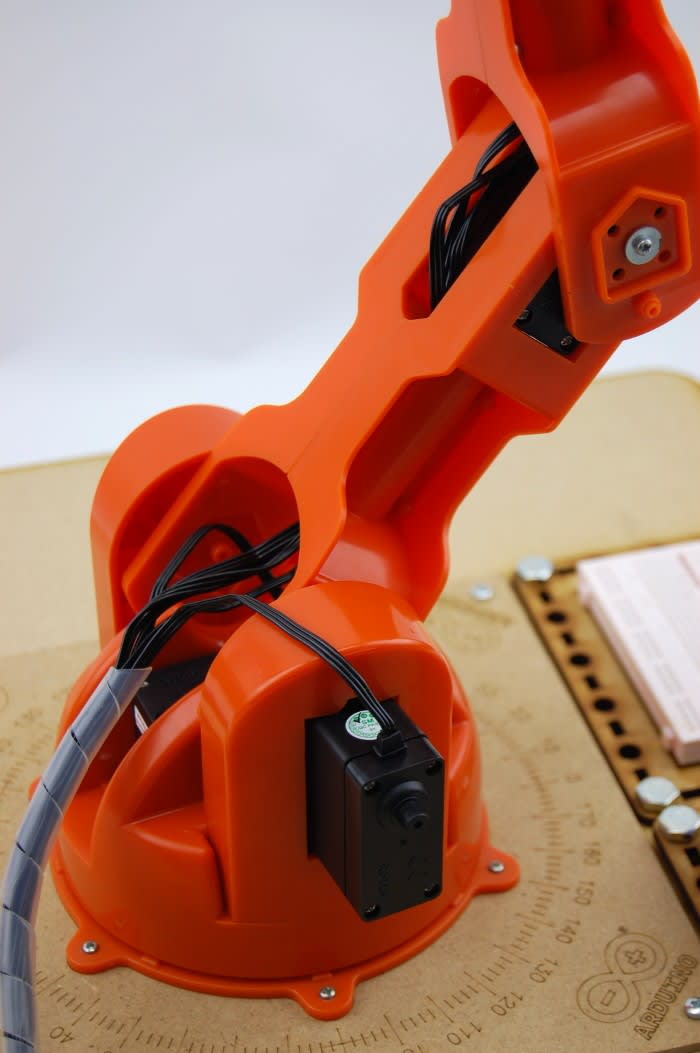
Italian for arm, the Braccio is a do-it-yourself robotic arm kit which you build from a box of parts and is controlled using the shield with an Arduino board. The arm consists of a total of 6 servo motors:
- M1 – Base
- M2 – Shoulder
- M3 – Elbow
- M4 – Vertical wrist
- M5 – Rotary wrist
- M6 – Grabber
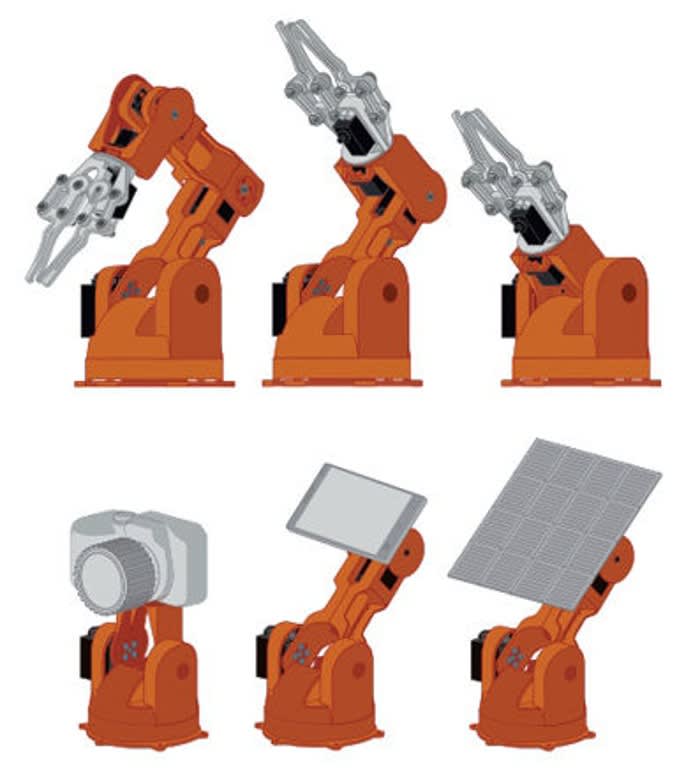
The Braccio can be assembled numerous ways, depending on the desired application and can also support various objects on the end of the arm. For example, you can use Braccio:
- With your camera to follow a subject
- By mounting your telephone or your tablet to follow you when you’re at a video conference
- With a solar panel to follow the sun
Assembling Braccio
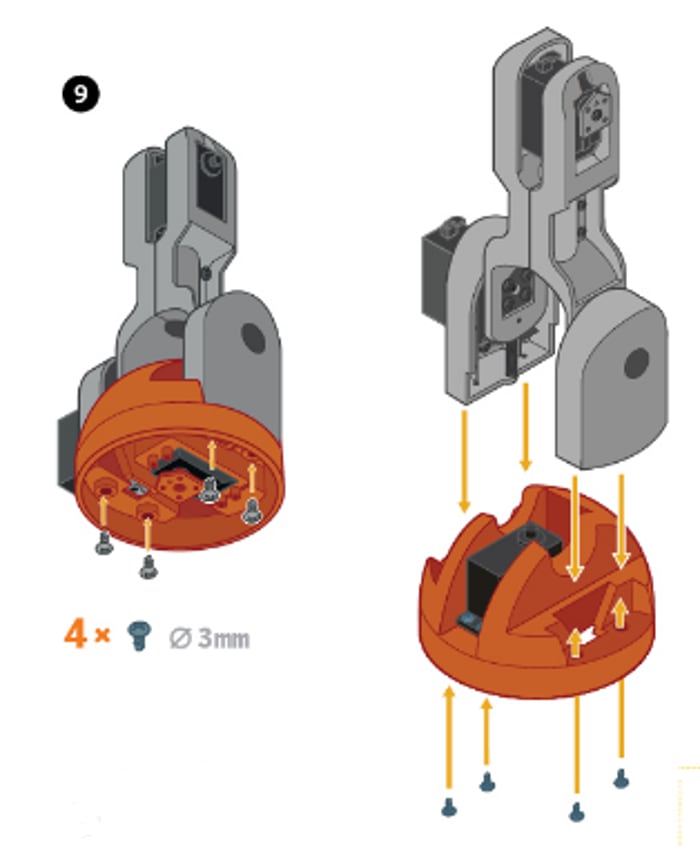
Overall the assembly of Braccio was fairly simple, although, a little tricky in places and at a couple of stages an extra arm would be useful!
At stage nine in the assembly instructions one image is slightly misleading, as the bottom of the arm is shown orientated differently to the other stages. Unfortunately, I did not notice this until I had almost completed stage 15. Hopefully this will be resolved quickly in future prints of the assembly guide, so that other people don’t have the same issue with their arm assembly.
One other thing to note is that it doesn’t mention in the assembly guide that the wires from the motors can be fed through the middle of the arm to keep them all together and tidy. I decided to wait until I had finished assembling the last pieces before feeding the wires through to prevent these getting in the way or getting tangled while I was assembling other pieces.
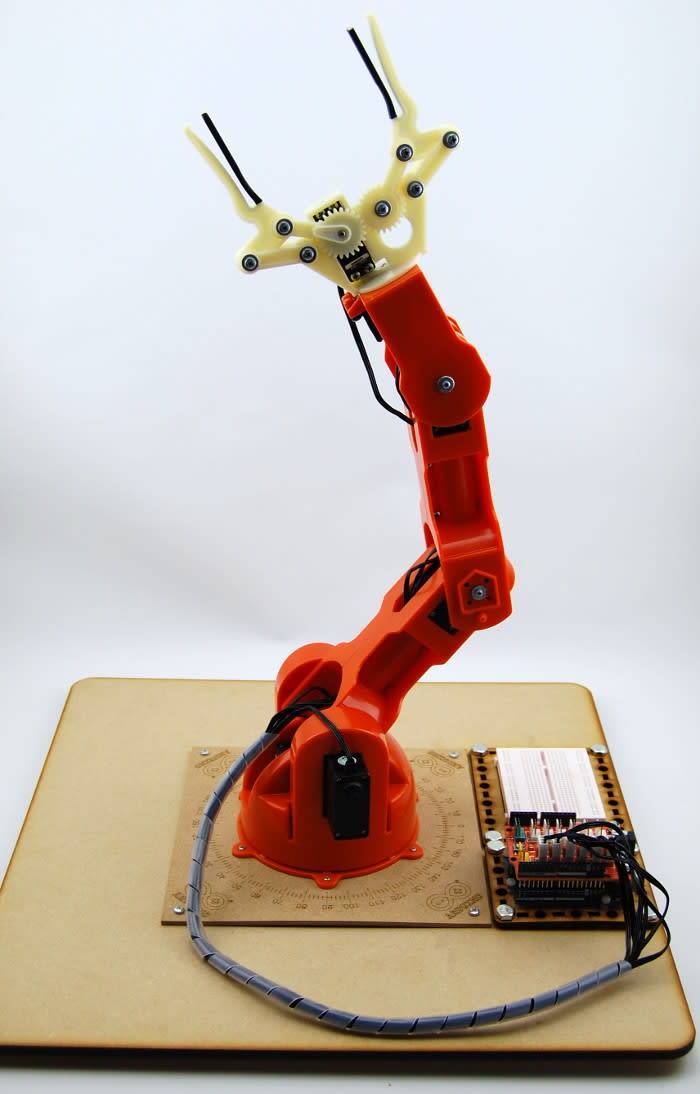
When I had finished assembling the arm I secured it to the laser cut MDF base supplied with the kit and began testing it. One thing which I noticed pretty much straight away was that when the arm isn’t powered it struggles to stay upright due to such a high centre of gravity, so to prevent the arm tipping when it moved I decided to cut a larger base out of thicker MDF to mount the arm on, which would help stabilise it.

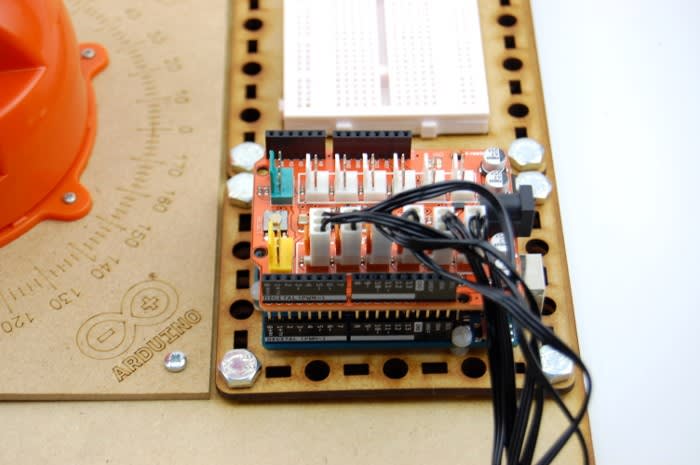
When cutting the base I also decided to include mounting holes for the Arduino board and a breadboard for use with future projects.
Once I had completed assembling the arm I stumbled across a video assembly guide which provides much more detail. This video can be found at arduino.org or below.
Looking into the Library
There are two main functions in the Braccio library, these are Braccio.servoMovement and Braccio.begin. Braccio.begin initializes and sets up the initial position for Braccio Arm. All the servo motors are positioned in the "safety" position with each angle as follows:
M1: Base – 90 degrees
M2: Shoulder – 45 degrees
M3: Elbow – 180 degrees
M4: Wrist vertical – 180 degrees
M5: Wrist rotation – 90 degrees
M6: Gripper – 10 degrees
Braccio.servoMovement allows you to control all the Braccio's servos with only one command, including a milliseconds delay between the movement of each servo at the beginning of each step and then the angle at which each motor should move. The parameters for the step delay and each motor can be found below:
Step Delay: Values from 10 to 30 milliseconds.
M1: Base degrees – Range between 0 to 180 degrees
M2: Shoulder degrees - Range between 15 to 165 degrees
M3: Elbow degrees - Range between 0 to 180 degrees
M4: Wrist vertical degrees - Range between 0 to 180 degrees
M5: Wrist rotation degrees - Range between 0 to 180 degrees
M6: Gripper degrees - Range between 10 to 73 degrees. (A value of 10 means the gripper is open and a value of 73 means the gripper is closed).
Time to Test
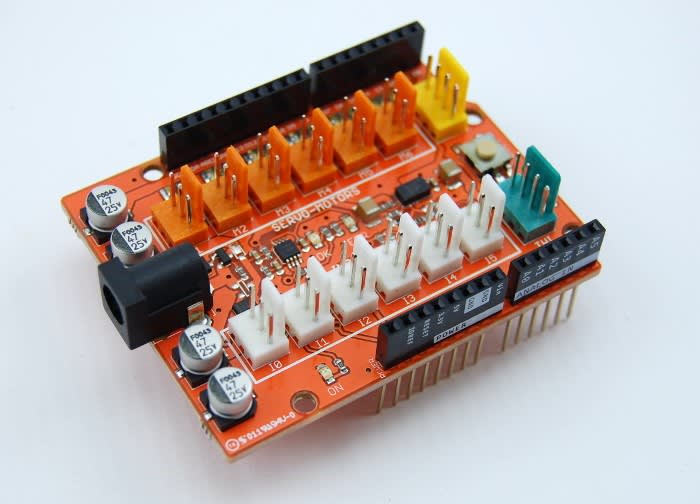
To control Braccio I decided to use the provided shield with an Arduino Uno board, simply because I had this to hand. The shield present in the kit is compatible with all the board-compatible pinout UNO R3.
As I was running an older version of the Arduino IDE I needed to download a more up to date version. The Arduino IDE only supports Braccio with versions 1.7.9 or later and at this time 1.7.10 is currently available. I decided I would run through with some of the examples in the IDE to begin with to check that everything was working OK.
To start with I ran the testBraccio90 sketch which aligns all 6 of the servo motors into the upright position. When I powered the arm I noticed that some of the servo motors weren’t quite aligned. To align the servos I had to dismantle the arm and manually move the plastic attachment on the motors. Unfortunately, I didn't have much luck with this as I couldn’t manage to get these to align much straighter than they were originally.
Ideally you should make sure the servo motors are aligned as much as possible before you assemble the arm. This can be done by connecting all 6 of the motors to the shield on an arduino and uploading the testBraccio990 sketch.
After this I decided to try simpleMovementssketch which worked fine. So I next ran the takethesponge sketch and initially this seemed OK, however, when it came to returning to the start position the grabber was catching the mounting board and knocking the sponge from its grasp. To try and fix this I changed the second to final movement angles in the sketch; I changed the motor movement for M2 from 90 degreed to 100 degrees hoping this would solve the problem. Once I had powered the arm again I found this made the problem worse – I realised I needed to decrease the angle of the motor instead of increasing it, so I then changed this to 75 degrees which gave enough clearance when the arm returned to the start position. I'm pretty certain that if the servos had been completely aligned then I wouldn’t have had his problem.

Potential Projects
One project which I thought would be cool to try and incorporate the Braccio robot arm into would be the official Arduino Robot, Johnny 6. From looking at previous projects with Johnny 6 I soon realised that Jonny 6 would no withstand the additional mass. I do think that trying to incorporate the two robots together would be great, but I may need to think up some more projects to build with Braccio instead!
Comments