Building a Rock 4 C+ Powered Audio Player
Follow article
 Dave from DesignSpark
How do you feel about this article? Help us to provide better content for you.
Dave from DesignSpark
Thank you! Your feedback has been received.
Dave from DesignSpark
There was a problem submitting your feedback, please try again later.
Dave from DesignSpark
What do you think of this article?

Using a Rock 4 C+ with the Mopidy and Iris software to create a network music player.
In this article we take a look at how you can use a Rock 4C+ together with open source software and optionally an external DAC, to create a powerful, extensible network audio player.
Hardware

At the heart of this project is the Rock 4C+ single-board computer (SBC), which integrates an RK3399 SoC featuring an ARM Cortex-A72 MPCore processor, Quad-core ARM Cortex-A53 MPCore processor and ARM Mali-T860MP4 GPU, together with 4GB RAM, Gigabit Ethernet, Bluetooth 5.0, WiFi 5 and plentiful video, peripheral and general purpose I/O.
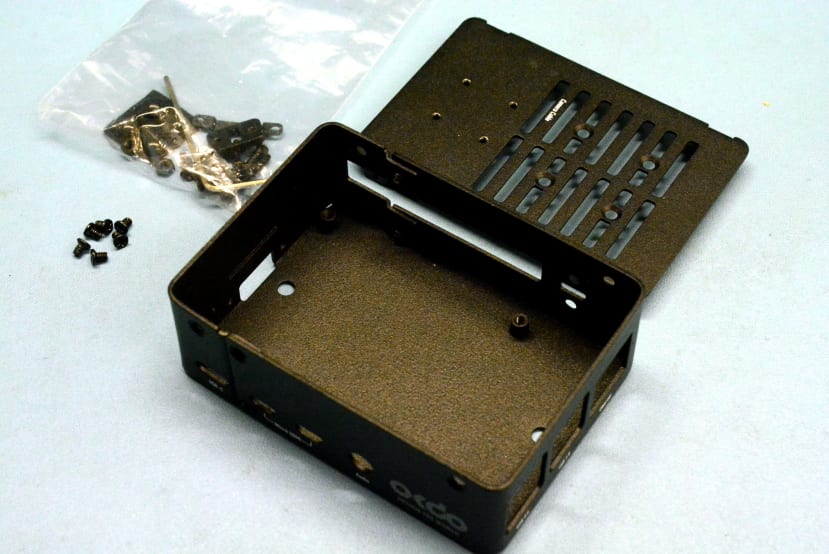
It was decided to house the SBC in an OKdo steel enclosure — which was originally designed for Raspberry Pi 4, but which will also accommodate the Rock 4C+ — as with its black finish this would pair nicely with an external DAC which will also be used. However, there is also a complete Rock 4C+ Starter Kit available which includes a power supply, heatsinks and fan etc. too.
Since a cabled network connection will be used it doesn’t matter that the enclosure is metal. Though it may be possible to use wireless by drilling the case to fit a panel mount SMA connector for an external antenna, with a short coax pigtail and a U.FL connector which plugs into the SBC in place of the included adhesive antenna.
O/S setup
Official operating system support is provided for Debian and Ubuntu Linux, plus Android, with third-party Manjaro, FreeBSD and Armbian images also available, amongst others.
It was decided to install Ubuntu Server and this was downloaded via:
https://wiki.radxa.com/Rock4/downloads
Selecting the Rock 4C+ tab and then Ubuntu 20 Server download.
Note that the current Ubuntu LTS release is 22.04 and according to the Radxa wiki support for this will be coming soon.
Debian could have been used also, but this is a full desktop O/S and it’s generally preferable to use a “server”, “headless” or “lite” variant for applications where there won’t be a local display attached. Of course, one option is to uninstall unnecessary software, such as desktop components and applications, but it’s easier to start with a more minimal image and build-up than to pare back.
However, a monitor and input device could be connected for local control and in which case, a desktop O/S would be needed. So this is really a matter of preference and how it will be used.
The image was uncompressed from the Linux command line with:
$ unxz rock-4c-plus-ubuntu-focal-server-arm64-20221109-1302-gpt.img.xzAnd then written out to a Micro SD card with:
$ sudo dd if=rock-4c-plus-ubuntu-focal-server-arm64-20221109-1302-gpt.img of=/dev/sdb bs=1M status=progress conv=fsyncNote that your of= argument may be different! Be sure to check this and not just copy the above command. Alternatively, a graphical tool such as balenaEtcher may be used, which is available for Linux, Windows and Mac.
With the Micro SD card inserted into the Rock 4C+ and this booted, it’s then possible to connect via SSH and log in with the username “rock” and password “rock”.
The first configuration step carried out was to edit /etc/hostname and /etc/hosts to change the hostname to “rockhifi”. This is not strictly necessary and pretty much any name could be used.
If we attempted to update the system at this point we would get an error message regarding an APT signing key. So first we need to get the current signing key and install this with:
$ wget -O - apt.radxa.com/focal-stable/public.key | sudo apt-key add -Following this we can now carry out the update:
$ sudo apt update && sudo apt dist-upgradeOne peculiarity with this image is that the home directory for the rock user is not owned by that user. In order to be able to create files we can rectify this with:
$ sudo chown -R rock:rock /home/rockAt this point it would then be possible to, for example, create a .ssh directory and an authorized_keys file within this, which contains our SSH public key, so that when we connect via SSH we don’t need to enter a password.
Audio device
The Rock 4C+ integrates a high-quality audio output on a 3.5mm stereo jack, which can be used with headphones or to connect an amplifier. If we run the following command:
$ aplay -l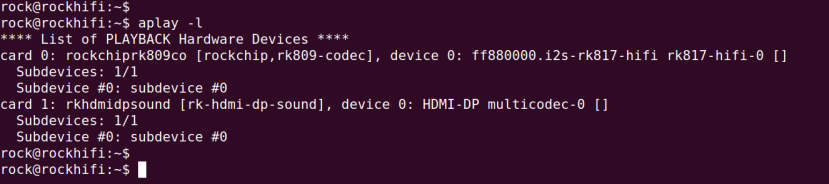
We will see an output similar to the above screenshot, where the 3.5mm jack output is the first device. Note how sound can also be output over an HDMI connection.
By default, playback will be set to OFF, but we can change this via alsamixer.
$ alsamixer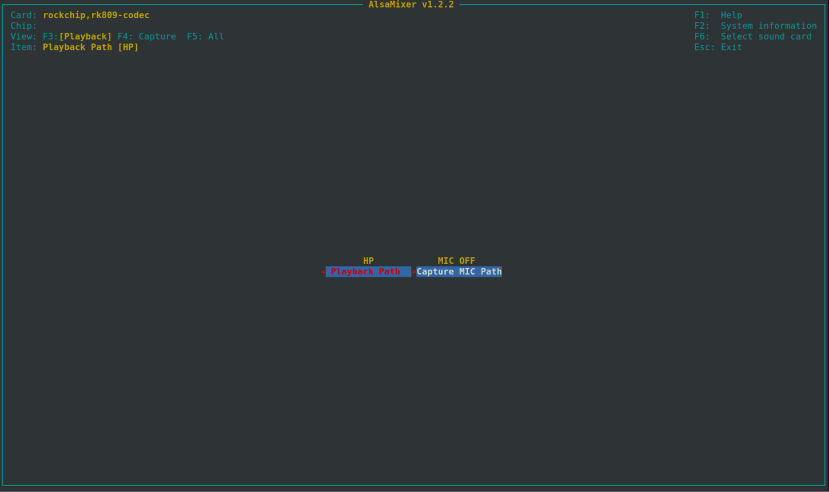
Above we can see that the output path has now been set to HP.
To test the audio output we can simply run:
$ speaker-test
Following this we should hear pink noise as this is played out of the default audio device.
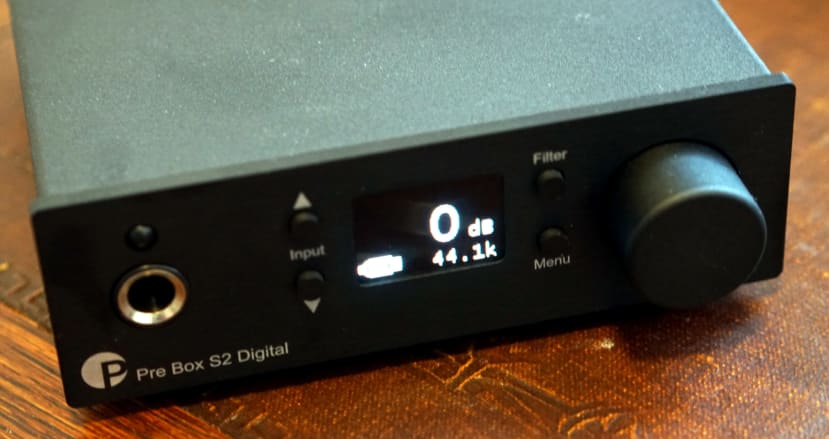
In our case, we wanted to use a Pro-ject Pre Box S2 Digital external USB DAC.
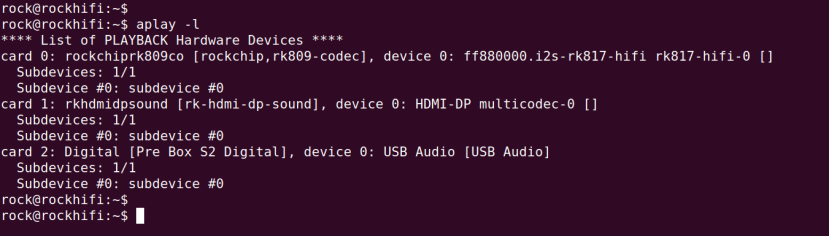
With the DAC plugged in, if we run aplay -l again we now see a third audio device, Card 2.
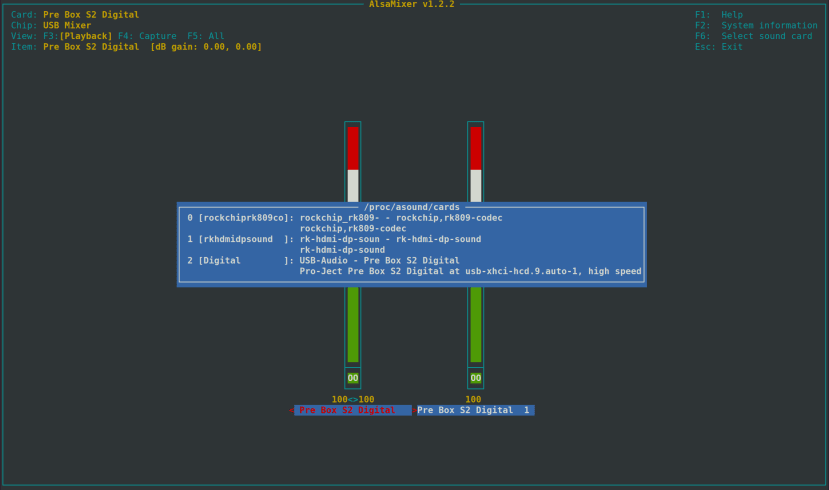
Running alsamixer once more we have to press F6 to select the device and following which we can set playback. In the image above F2 has also been pressed and so we can see the system information, which is pretty much the same information reported via aplay -l.
By running speaker-test once more we were able to confirm audio now playing out via the DAC.
Other external DACs may be configured and tested in a similar manner.
Now to set the system-wide default device we need to create the file /etc/asound.conf with:
defaults.pcm.card 2
defaults.ctl.card 2
Here 2 is the index for the audio device to use, which may be different in your case.
Software installation
Mopidy is an extensible music server written in Python, with a selection of useful extensions which add things such as web interfaces and support for streaming music services. We’ll be using Mopidy together with the local extension, which enables playing music from a local archive and provides a search function, and also the Iris extension, which provides a feature-rich web interface.
A list of available extensions is provided on the Mopidy website.
First, we need to set up the Mopidy APT repository:
$ sudo mkdir -p /usr/local/share/keyrings

$ sudo wget -q -O /usr/local/share/keyrings/mopidy-archive-keyring.gpg https://apt.mopidy.com/mopidy.gpg

$ sudo wget -q -O /etc/apt/sources.list.d/mopidy.list https://apt.mopidy.com/buster.list
Following this we can update the package lists and install Mopidy and the local extension:
$ sudo apt update && sudo apt install mopidy mopidy-localHowever, not all extensions are available via the Mopidy APT repo and therefore will need to be installed from PyPI using pip, which we’ll need to install first.
$ sudo apt install python3-pipFollowing which we can then install Iris with:
$ sudo python3 -m pip install Mopidy-IrisAnd in order to allow Iris to run commands via sudo, to enable things such as installing updates via the web interface, one more step is required:
$ sudo sh -c 'echo "mopidy ALL=NOPASSWD: /usr/local/lib/python3.8/dist-packages/mopidy_iris/system.sh" >> /etc/sudoers'Configuration
Configuration is held in /etc/mopidy/mopidy.conf and if we open this with our favourite editor and then add:
[audio]
output=alsasink

[http]
hostname = ::
default_app = iris

[local]
media_dir = /home/rock/music
In the audio section, we’re instructing Mopidy to use alsasink for the output device and previously we configured ALSA to use the desired output hardware. The hostname line in the http section instructs the web server to bind to all IPv4 and IPv6 interfaces, while the default_app line says that the Iris application should be loaded. If we omit the latter and have more than one type of web interface installed, we are presented with a list and can select which interface to use.
The media_dir line tells the mopidy-local plugin where our music files are. So next we’d better create the directory:
$ mkdir ~/musicFinally, we can enable and start mopidy:
$ systemctl enable --now mopidyUse
The web interface can be accessed via:
(or substitute the host part if you set some other hostname)
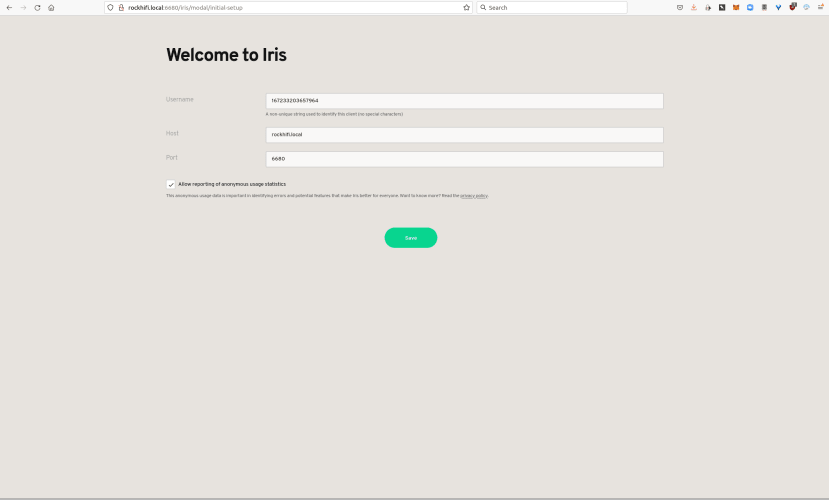
Upon first access, we are greeted by a welcome page, where we can set a username to identify the web client to Mopidy. Remember that it’s possible to have more than one web interface installed and there are other options for controlling Mopidy also.
At this point, if we haven’t already, we should copy some music into the music directory we created earlier, /home/rock/music.
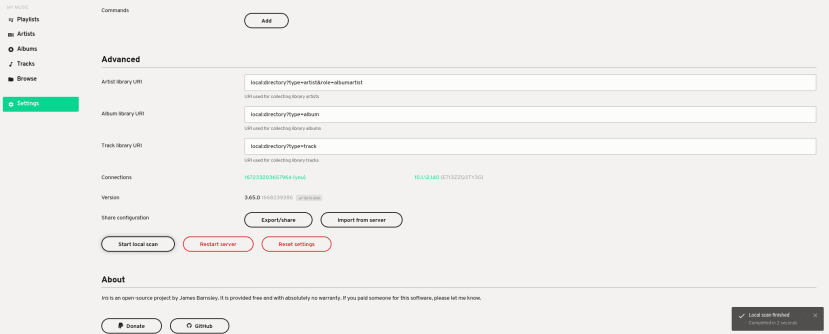
Whenever new music files are added we need to instruct the local plugin to scan the directory and update its database, which can be done from the web interface, via Settings → Advanced → Start local scan. Alternatively, we can also use the command line:
$ sudo mopidyctl local scan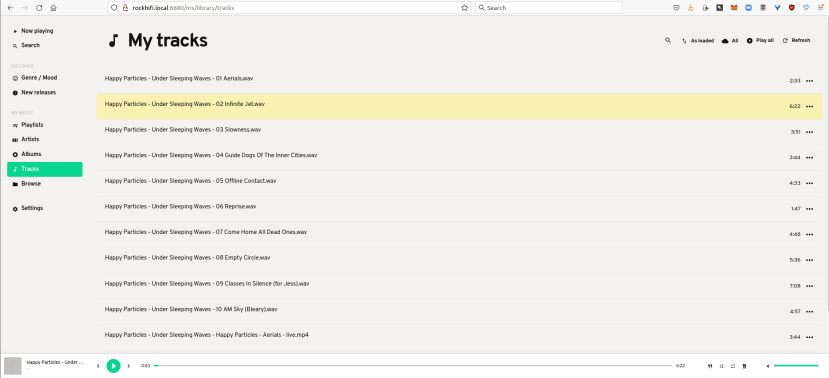
Finally, if we select Tracks within the web interface, we should see our music and be able to select to play this. If we don’t get any sound, but speaker-test worked fine earlier, it’s likely that either /etc/asound.conf or /etc/mopidy/mopidy.conf are misconfigured. The Mopidy documentation also has a Troubleshooting section with plenty of debugging info.
Wrapping up
In this article, we’ve seen how we can use a Rock 4C+ together with Mopidy and extensions to create a highly flexible network music player, which can be used together with the Rock 4C+ integrated high-quality audio output, or an external DAC. However, we’ve barely scratched the surface of what’s possible with Mopidy, which can also be configured with playlists and to stream audio from a number of popular online platforms, such as Spotify and YouTube Music. For further details of which, please see the Mopidy documentation.