Building a connected greenhouse - Part 1
Follow article
 Dave from DesignSpark
How do you feel about this article? Help us to provide better content for you.
Dave from DesignSpark
Thank you! Your feedback has been received.
Dave from DesignSpark
There was a problem submitting your feedback, please try again later.
Dave from DesignSpark
What do you think of this article?
An intelligent, controllable growing environment using the Intel Edison
A short time ago my colleague, Andrew, and I were challenged with creating a miniature connected greenhouse that integrates sensors and environmental controls, that is visually engaging and a practical and compelling example of an Internet of Things (IoT) application. This had to be portable, fit within a reasonably small space and have an element of interactivity.
The Intel Edison (833-0891) was selected to provide an embedded computing platform. Coupled with the Arduino-compatible Edison Breakout board (833-0895) , benefits include plenty of GPIO and integrated 2.4GHz wireless, plus a familiar Linux environment and support via the Arduino IDE.
This first post will cover the design of the greenhouse and mechanical build, ahead of a second post that will detail the software and completion of the electronics.
A controlled environment

IKEA Socker Greenhouse, image Copyright IKEA
There are many different variables that could be monitored in order to allow us to optimise conditions for plant growth. We chose to monitor temperature, humidity and light, while other variables include soil moisture and pH level, and the amount of carbon dioxide in the enclosure.
Since this is essentially a model and will be kept indoors, we did not feel it would be necessary to provide heating for temperature control. However we decided it would prove beneficial to be able to reduce humidity via ventilation, and increase the light level via LED lighting.
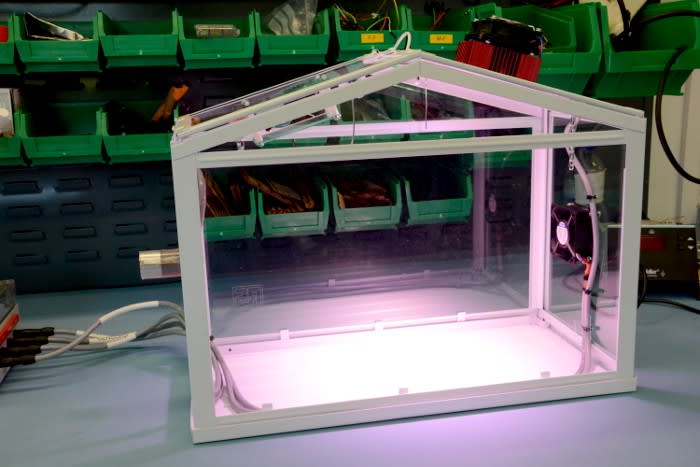
An off-the-shelf, compact greenhouse intended for windowsills provided a great base from which to start. Supplied as a flat-pack kit, it consists of a steel frame and plastic 'window' panels. It was immediately clear that these panels could be substituted for laser-cut acrylic replacements. We had a cost-effective hackable platform to work with!
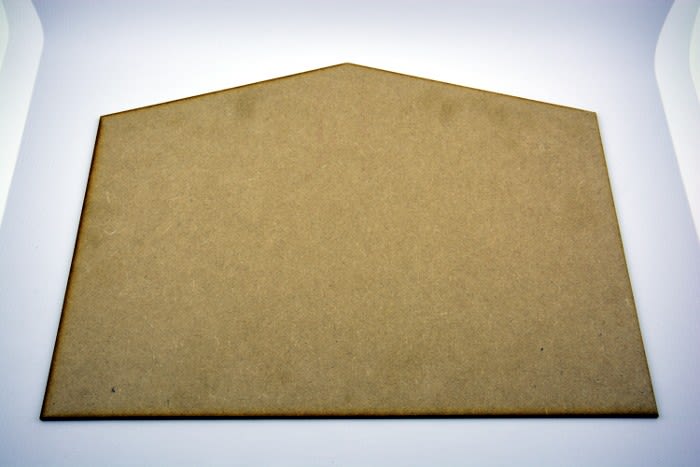
Test MDF panel to check fit in greenhouse frame
Whilst our sensors were to be mounted in the miniature greenhouse, we wanted to keep the power and control electronics separate, away from the moisture and soil that are part and parcel of horticulture. Suitably IP rated enclosures, components and connectors were therefore required.
Protected from the elements

Image from Wikimedia Commons
IP rating, International Protection Marking, or Ingress Protection Marking is the classification of a given product or component, rating the degree of protection offered against solids and liquids. Most commonly written as IPXY – where X is a number rating for solids and Y is a number rating for liquids (additional characters are sometimes added for extra ratings). More information can be found on Wikipedia and via many other resources.
Given that our enclosure will likely contain soil, plants and be subjected to intermittent watering, we settled upon a minimum IP rating of IP64 where possible.
Sensors and actuators
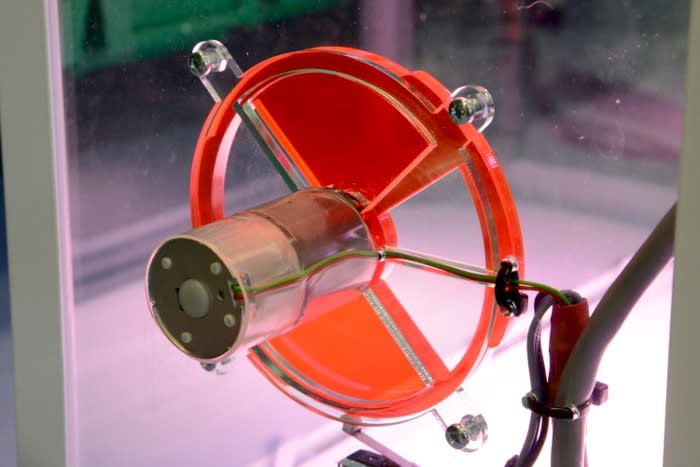
A DC fan (914-4253) will take care of air flow in to the greenhouse, reducing the moisture content of the air, provided that humidity is lower on the outside, which we would generally expect. To allow air to pass out of the greenhouse when the lid is closed, a rotary vent was designed. This is turned by a geared DC motor (298-5420) and has cams that actuate a microswitch (032-0528) in order to determine vent state.
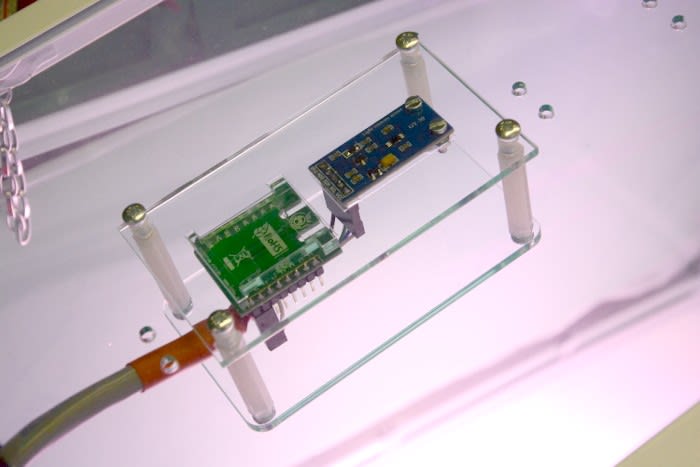
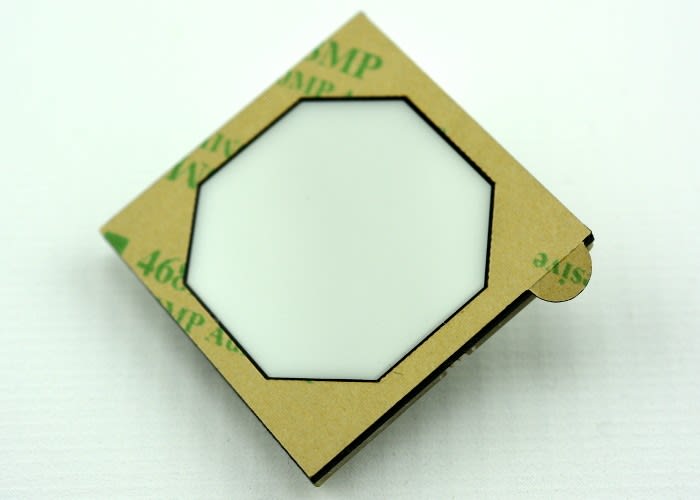
Two different boards are mounted in an upper panel. One is a low-cost light sensor module, with the sensor facing outwards. The second is a combined temperature and humidity module (862-4828) from the mikroBUS Click range.
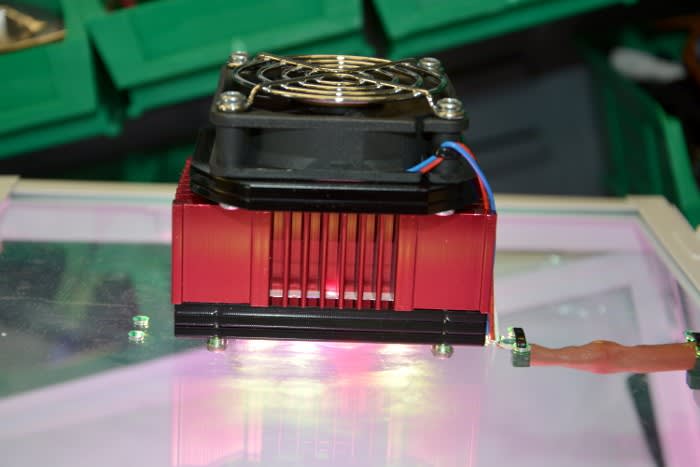
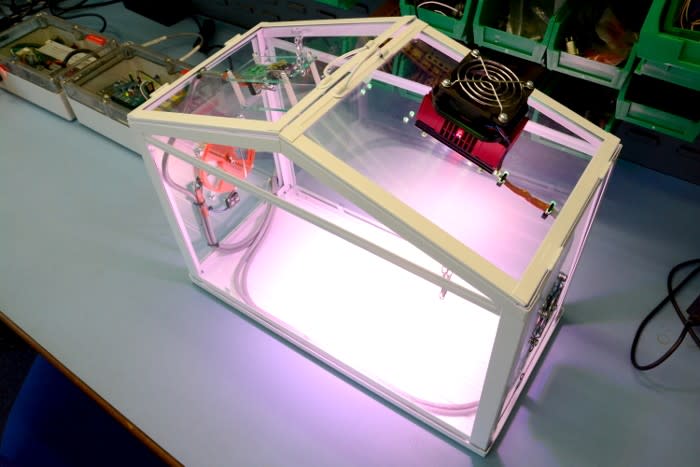
A Petunia LED grow light (875-0037) from ILS was added to the second top panel. The particular model selected is designed for general plant growth, though specific seedling or vegetative growth modules, with different LED configurations, are also available.
Since the LED module is located in a place that could be touched by operators of the demonstration unit, a bracket was designed for a fan to reduce the temperature of the heat sink. Though these LEDs give out far less heat than traditional growing lamps, thermal management is still required.
Multi-core cables were added to all of the above and routed out of the greenhouse, secured in place with cable ties.
Interconnection
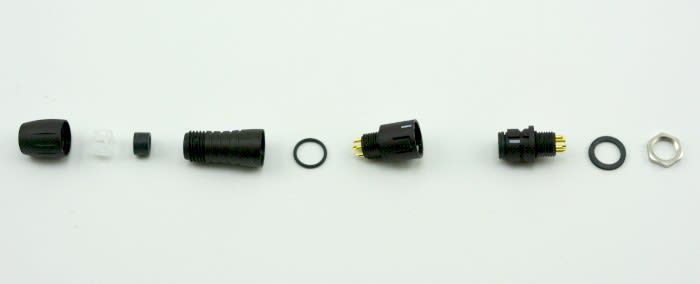
Given the restricted space available for our demonstrator, the challenge was on to find compact, yet suitably IP-rated connectors to go between enclosures. The Binder 620 Series proved to be just what we needed, with a range of different pin configurations available.
A list was made of each different connection required, whether male (046-8778) or female (046-8982) , cable or panel mounted, before placing our order.
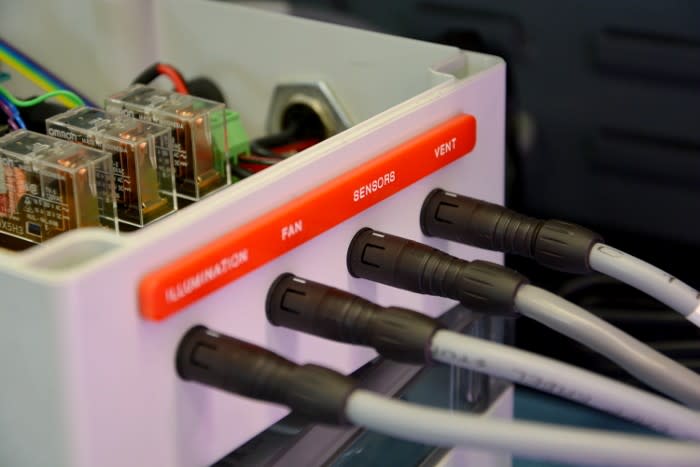
Adding the plugs and sockets was a quick and simple operation, resulting in safe, high quality interconnection. Each panel mounted socket was clearly labelled with a laser-cut and engraved plate, with the engraving wax-filled for high-contrast lettering. In addition to this, each cable was labelled with printable heat shrink tube (515-5565) .
External enclosures
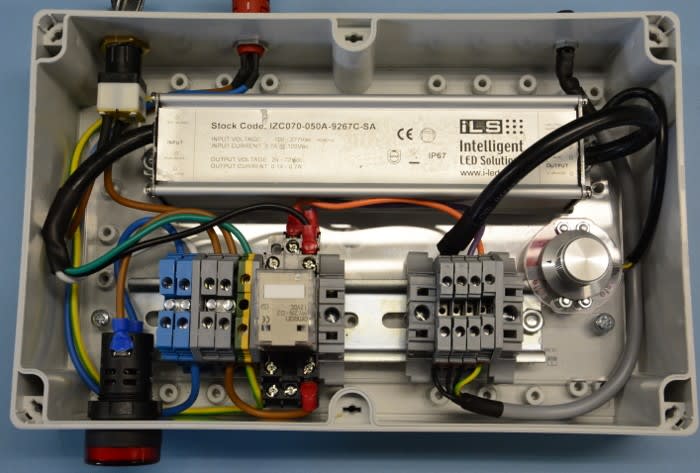
Alongside the greenhouse are three external enclosures. Firstly, a control electronics box, containing relays and an Intel Edison board. Secondly, one dedicated to 240V mains and the power supply for the Petunia LED module. Lastly, a console that displays readings from the sensors in the greenhouse, and features capacitive touch buttons for manual control of the fan, vent and lighting.
Whilst each of these will be covered in fuller detail in a forthcoming post, I felt it was worth highlighting elements of the console here.
The capacitive touch switches used are available in both latching (904-2690) and momentary (823-2258) versions, two sizes (20mm and 35mm) and feature bright RGB LEDs. They are self-adhesive, with adjustable sensitivity, set by DIP switches on the rear of the unit, depending on type and thickness of panel they are added to, up to a maximum thickness of 11mm glass and 8mm acrylic.
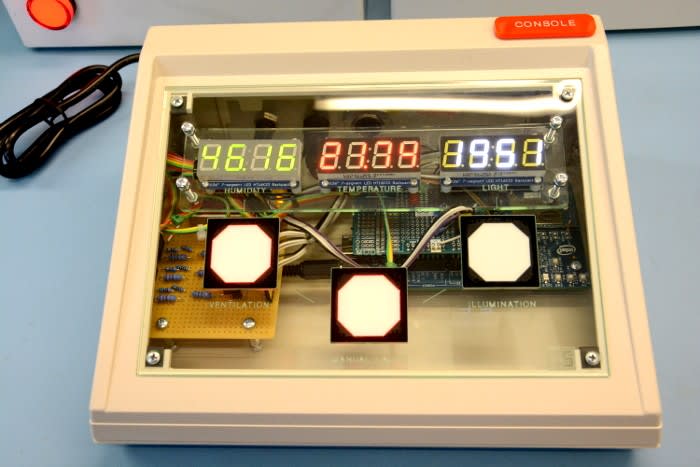
Another prominent feature of the console is three large 7 segment displays. These are driven over I2C, like the sensor boards in the greenhouse, making them easy to interface with the Intel Edison in the console enclosure.
Cloud cover
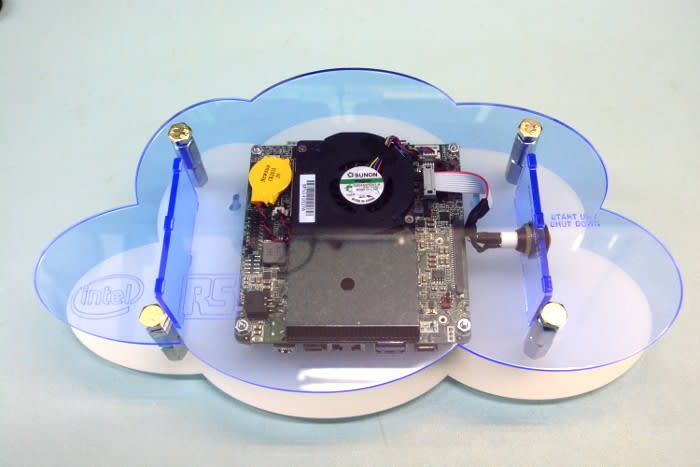
Since this is a connected greenhouse, we will be implementing control via the cloud. However, one constraint is that we could not be certain that there would always be internet connectivity, therefore we had to create a 'private cloud'. This is essentially an Intel NUC (882-9691) , but housed in a wall-mountable, cloud-shaped enclosure to indicate the purpose.
The two Intel Edisons will communicate with this cloud over a wireless LAN.
Summary
Starting with an off-the-shelf window box and series of components and enclosures, we now have the mechanical build complete. Tasks that remain include connecting up the sensors and outputs, interfacing and writing the software to be deployed on each Intel Edison, together with the control system which will run in the cloud. This will all be covered in the next post.
Comments