Arduino Stepper Motor Control | Arduino Stepper with Buttons | DesignSpark
Follow articleHow do you feel about this article? Help us to provide better content for you.
Thank you! Your feedback has been received.
There was a problem submitting your feedback, please try again later.
What do you think of this article?
Learning to control a stepper motor with the Arduino motor shield
To date I haven’t really done much with motors, especially stepper motors. I have a project in mind which needs fairly precise motor control so I thought I would use a stepper motor, but realised I had quite a bit to learn about these first. This post takes a look at what I have learned so far.
What is a Stepper Motor?
A stepper motor is a type of electromagnetic device which moves in discrete steps. This has several coils which are organised into ‘phases’ and when each phase is energised in sequence this steps the motor. One of the huge benefits of this is that with stepper motors you can achieve very precise positioning and/or speed control, hence why they are used for high precision applications such as printers.
Unipolar and Bipolar
Stepper motors come in two different types, unipolar and bipolar. The main difference between these is their winding arrangements which then affects how each is controlled.
Unipolar
This type of stepper motor consists of a single winding with a centre tap. Each section of the windings are turned on depending upon the direction of the desired magnetic field, because of this the magnetic pole can be reversed without switching the direction of the current. The centre tap is common, although there are typically 6 leads on a two phase unipolar stepper (3 per phase) the two commons can be internally connected together, meaning there are only five leads.
Bipolar
Unlike a unipolar stepper motor a bipolar stepper only has a single winding per phase with no taps. In order to reverse the magnetic pole the current in the windings needs to be reversed, which means that a bipolar stepper is usually more complicated to drive and typically requires a H-bridge arrangement. As there is no common there are two leads per phase and a typical two phase motor will have four leads. Although bipolar motors are usually more complicated to drive they do have their benefits, because of the better utilised windings a bipolar motor is more powerful than a unipolar motor of the same weight. This is because a unipolar stepper has twice the amount of wire in the same space and only half of it can be used at any one time, which means a unipolar motor is only about 50% efficient.
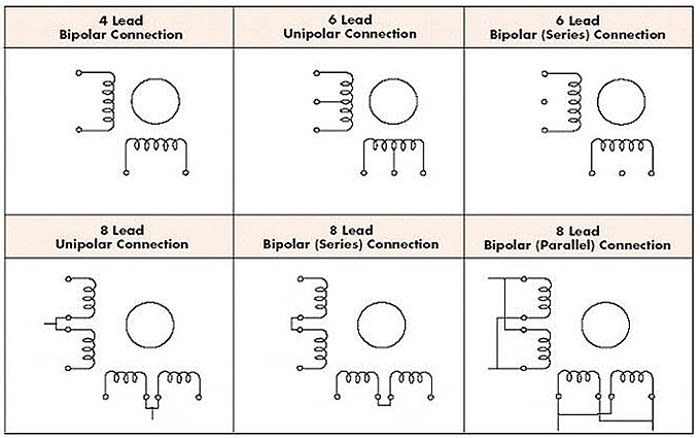
There are several different winding arrangements for unipolar and bipolar as shown below.
Image source: Osmtec.com
Arduino Motor Shield
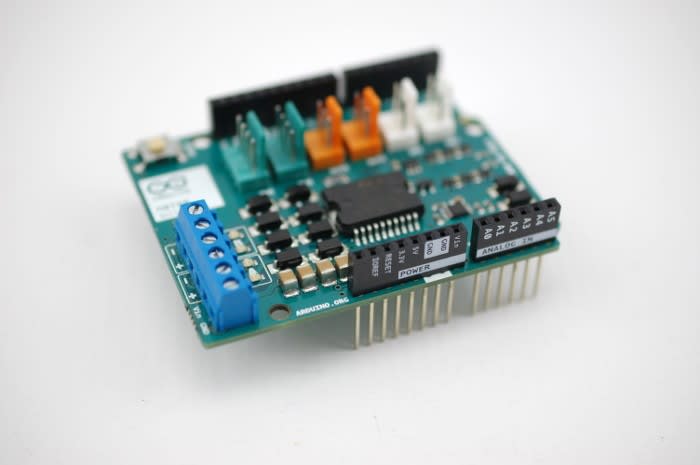
The Arduino motor shield is based on the L298 dual full bridge driver which allows you to drive one stepper motor or two DC motors. With this shield you can control speed and direction independently of one and other. Using the shield means motor(s) can be connected directly to the Arduino board without the need for a breadboard or any extra circuitry which would be normally required when using an Arduino.
My motor
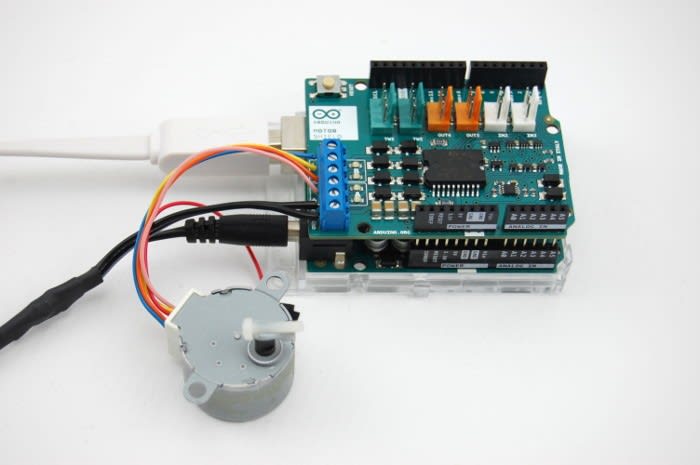
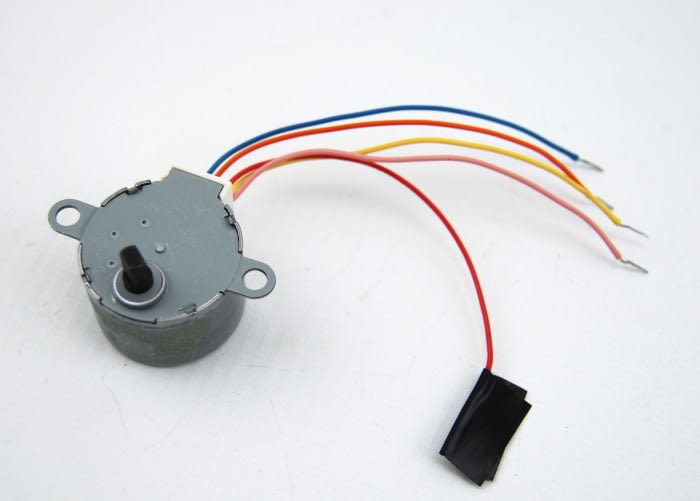
The motor I decided to use with this project is a Cliff Electronics Unipolar Bipolar, Unipolar Stepper Motor, which is a five lead unipolar stepper motor, but if you ignore the common lead this can be treat as a bipolar stepper.
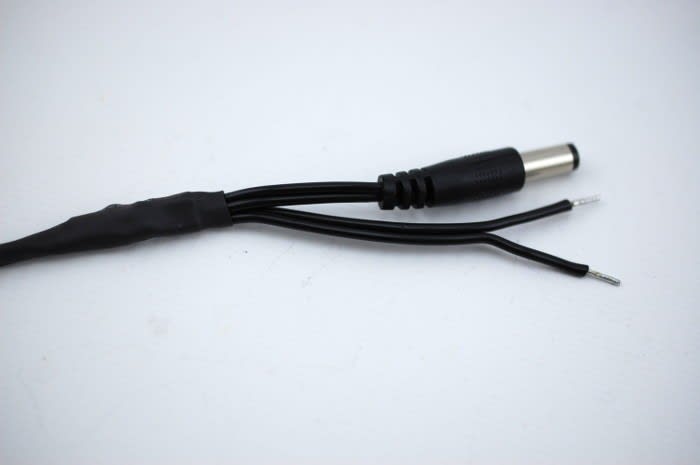
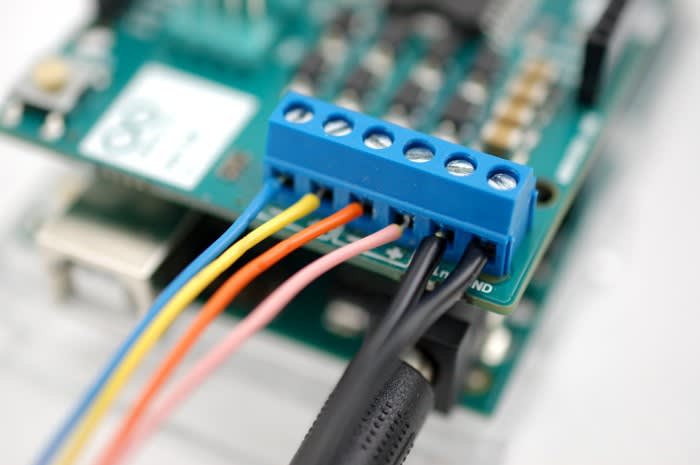
As this motor requires a 12V supply what I had to do was separate the power lines of the shield and my Arduino Uno to avoid any possible damage, as advised on the Arduino Motor Shield webpage. Because the power lines had to be separated I could no longer use the 12V mains power supply to plug straight into the Arduino, so this also had to be modified. It had to be split so that it could power both the Arduino and the 6-way screw terminals on the Arduino Motor Shield. To do this I cut about four inch from the barrel jack and then again in the same length of wire, these were tinned and soldered together to the remainder of the cable which connected to the plug.
Determining the coils in the motor
The manufacturer data sheet for the motor I had chosen actually told me which wire was which, from this I knew that blue and yellow formed one coil and pink and orange formed the other while red is the common of the two. I connected one coil to channel A and the other to channel B on the motor shield, while leaving the common unconnected. I can ignore the red wire as this is the tapped point of the two coils and I would only connect this if I was treating the motor as a unipolar stepper.
If the data sheet doesn’t say which wire belongs to which coil it is fairly easy to determine, using a multimeter set to ohms. Part of a coil will show a resistance, the tapped wire of the coil will be half the resistance what the ends would be, so be sure to check the other wires so a centre tap isn’t confused for an end. If there is zero resistance this is two separate coils.
Moving the motor
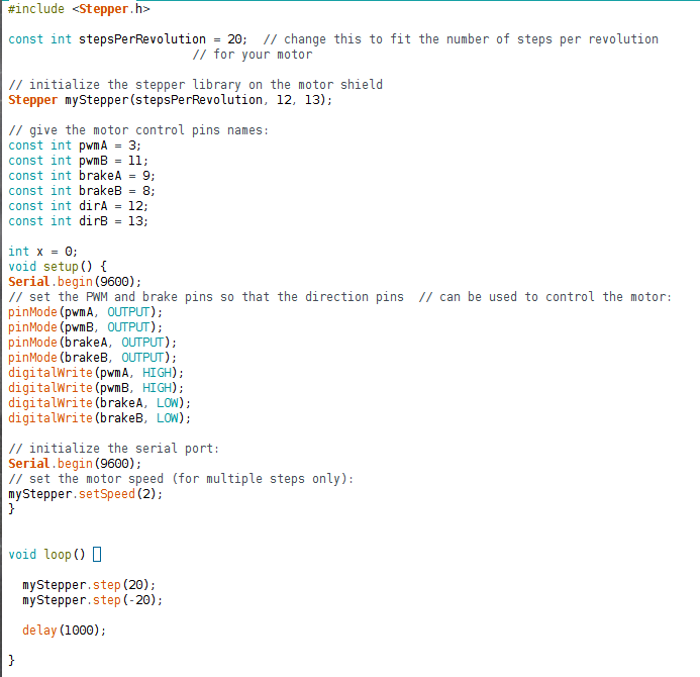
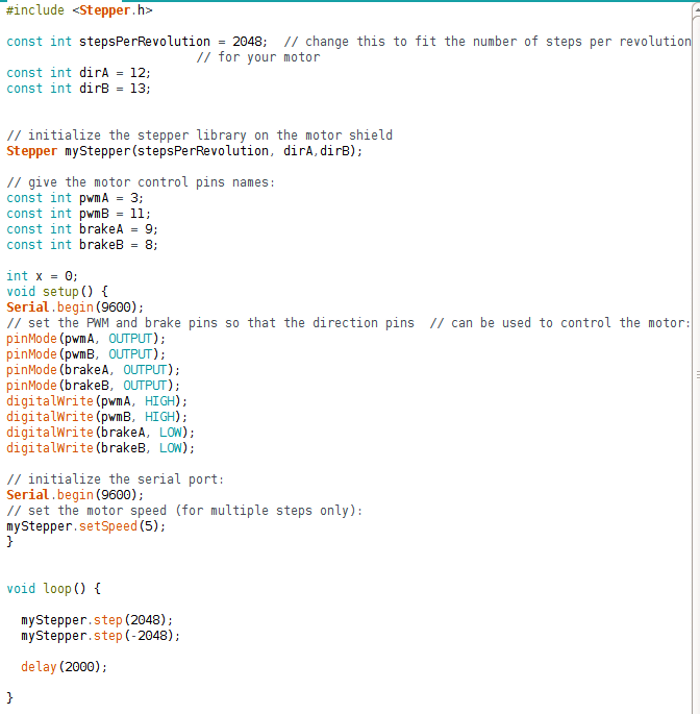
Since I had my motor connected what I needed to do next was find code which would work with the motor shield so I had a rough idea where to begin. I found some code on the Instructables Arduino Motor Shield tutorial which allowed me to spin my motor. This worked great but what I really wanted to do was include the Stepper.h library in the sketch used and this example didn’t use this. Using official libraries is best to do where possible, so I looked for another example and I then found one in an Arduino forum. In this sketch the motor should spin 360 degrees in one direction and then 360 degrees in the opposite.
In this sketch I needed to specify the steps per revolution for the motor I was using – but first I had to determine this. The manufacturer data sheet stipulated both 5.625 and 11.25 degree increments for the motor, so I used this to determine the steps per revolution – to do this we need to divide 360 by the angle. As this motor is also geared and has a gear ratio of 1:64 we need to then multiply the number of revolutions by the gear ratio. Like so:
360/11.25 x 64 = 2048
360/5.625 x 64 = 4096
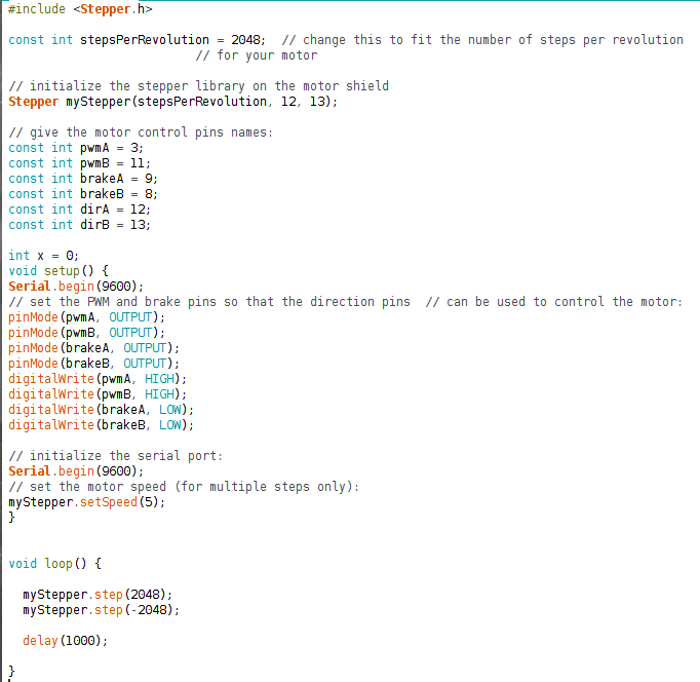
To start I used 4098 steps per revolution in the sketch, assuming that motor had an angle of 5.625 degrees, however when I did this it completed two full revolutions anticlockwise and then two revolutions clockwise. It was obvious here that I had assumed the wrong angle; as it was doing two rotations, because 5.625 is half of 11 when this is used in the division it would provide an answer two times greater, hence doing two full revolutions. I changed the steps per revolution to 2048 and this time the motor did one revolution clockwise, then one anticlockwise. I also changed the speed of the motor from two to five as when set to two the motor seemed to be moving far too slowly.
It wasn’t until I had done this that I properly looked at the code I was using and some of it didn’t seem to make complete sense to me. I didn’t understand why dirA and dirB pins were declared when they weren’t used in the setup or the loop. I commented these two lines out and uploaded the sketch again and this worked. Since it worked I assumed these lines weren’t necessary so I initially removed them to de-clutter the sketch. Following this I added these lines once again but above where the stepper library is initialised and used these as definitions.
I then had a look at the source code for the Stepper library and saw that there were not any lines of code here included to control the brake pins. The reason the example includes lines to control the brake pins, defining these as outputs and setting these to logic low, is a precautionary measure to prevent them from floating.
I feel like I have learned a lot about stepper motors, it’s really interesting to find out how they work and how various winding arrangements affect their operation. I’m really excited to be able to use them in future projects.


Comments