How do I fix low quality or faint lines when printing a design?
关注教程
 戴夫来自 DesignSpark
How do you feel about this tutorial? Help us to provide better content for you.
戴夫来自 DesignSpark
Thank you! Your feedback has been received.
戴夫来自 DesignSpark
There was a problem submitting your feedback, please try again later.
戴夫来自 DesignSpark
What do you think of this tutorial?
本教程需要:
DesignSpark Mechanical V6.0Firstly, click on Display tab -> Show -> Enable ‘Lineweight’ (it should be ticked).

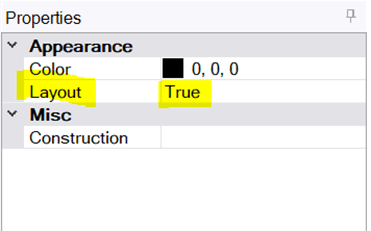
In your workspace, select the set of curves which appear faint on printing or during preview. Toggle the layout setting in selection properties to True.
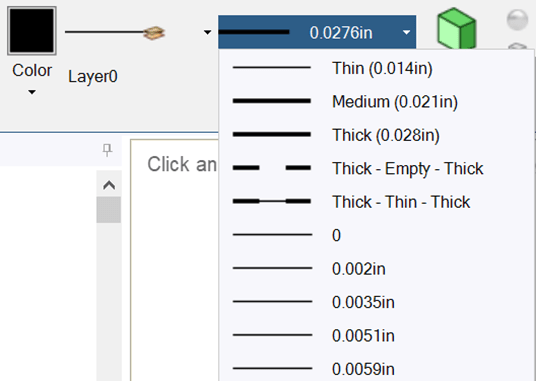
With the curves still selected, navigate to the Display tab-> Style group. The correct layer should be automatically chosen. Now, drop-down the lineweight list and choose a higher line thickness you want to print in.
Now, go to File-> Print Preview and you should see the chosen layout curves now have a thicker lineweight.
The line weight itself is a vector graphic property and the default print settings only print the existing design view as a raster image.
1. Head over to File -> Print Preview
2. Under settings, duplicate the highlighted options. The important one here is the overlay vector edges, which if left disabled does not load the correct lineweight and defaults to the 0.35mm (thin) setting.
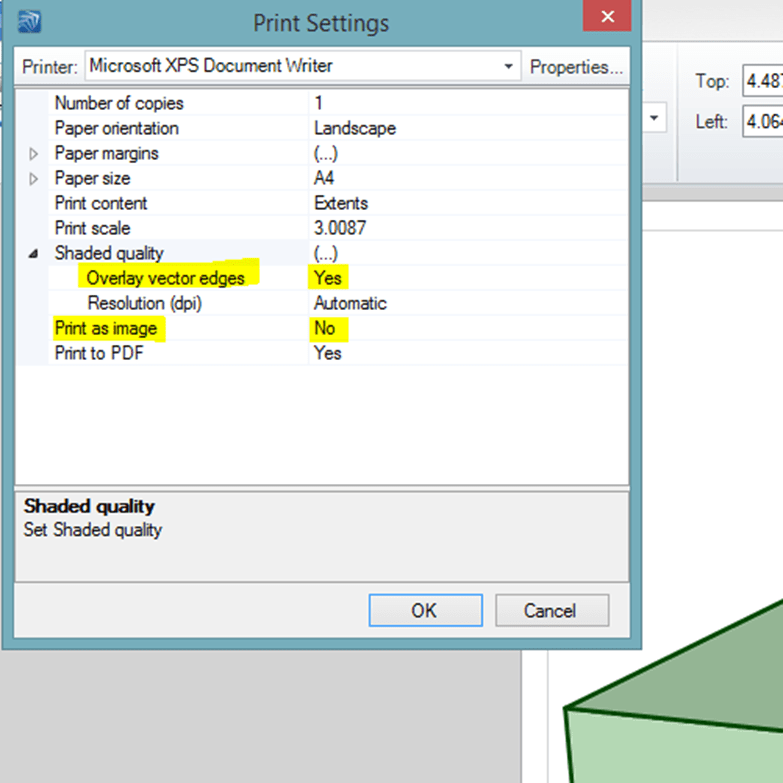
You can see in the bottom right corner of the image, that the edges are thick as per the initial design setting of 2.11mm.
If you'd like to print as an image but find the output is blurry, try increasing the resolution setting to 200dpi. To change the current entry, double-click on the field 'automatic' and type in 200 or a higher number (in dpi - dots per inch).