Measure, generate and control Signals through Digilent Test & Measurement Devices and NI LabVIEW
Follow article Dave from DesignSpark
How do you feel about this article? Help us to provide better content for you.
Dave from DesignSpark
Thank you! Your feedback has been received.
Dave from DesignSpark
There was a problem submitting your feedback, please try again later.
Dave from DesignSpark
What do you think of this article?
Engineers all over the world use Digilent Test and Measurement devices to decrease their design cycle time and increase their impact by always having an oscilloscope, logic analyzer, waveform generator and more within reach.
NI LabVIEW offers a graphical programming approach to help you visualize every aspect of your application, including hardware configuration, measurement data, and debugging. Benefits of using LabVIEW:
- Program the way you think with intuitive graphical programming
- Connect to almost any hardware with unparalleled hardware support
- Quickly gather and visualize data
- Interoperate with other software tools
This article demonstrates specific cases on how to use NI LabVIEW Community Edition and various instruments in Digilent test and measurement devices to test analog and digital circuits. You can use any of the following test and measurement devices in these examples.
- Analog Discovery 2 (134-6480)
- Analog Discovery Studio (194-6460)
- Digital Discovery (136-8070)
Software set-up
First of all, you need to download and install the NI LabVIEW Community Edition at NI LabVIEW Community. It is free for non-commercial use. A getting started guide can be found at LabVIEW Community Getting Started. By installing LabVIEW Community, the VI Package Manager and VIPM Browser will be installed, which are later used in this guide.
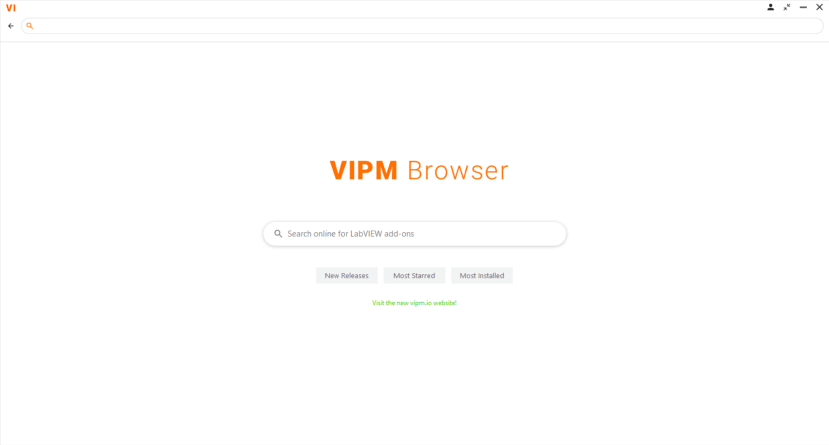
After you open the LabVIEW, go to the VI Package Manager (VIPM) Browser
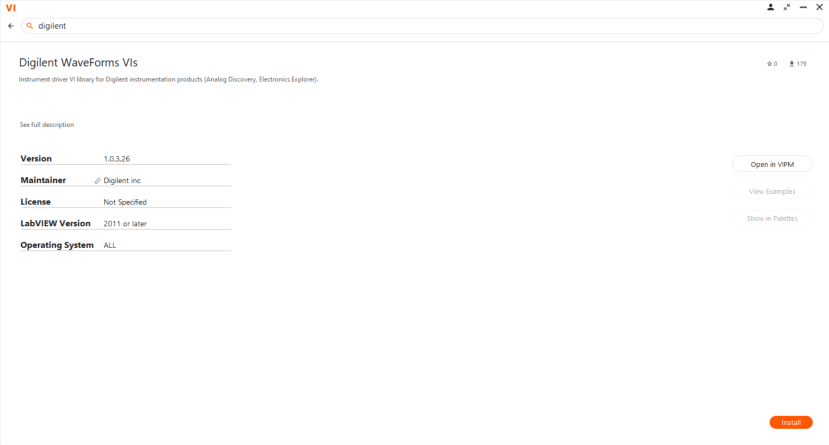
Search for “Digilent”, open “Digilent WaveForms VIs” and click “Install”
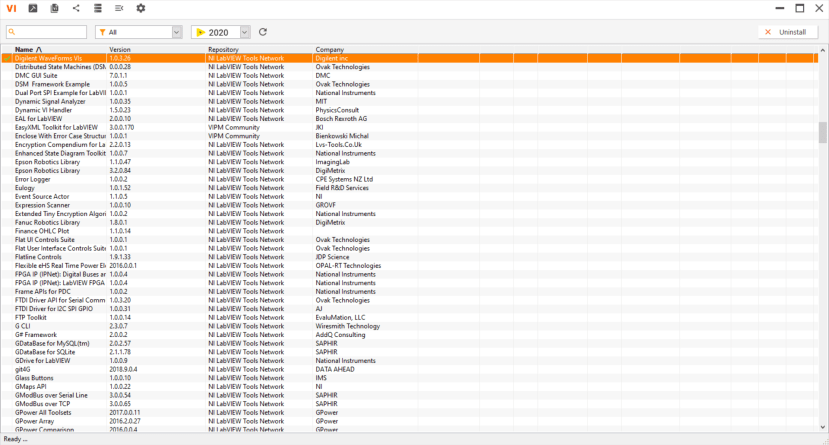
When finished close the current window and open the VI Package Manager. When it opens search for Digilent WaveForms VIs and double click on it.
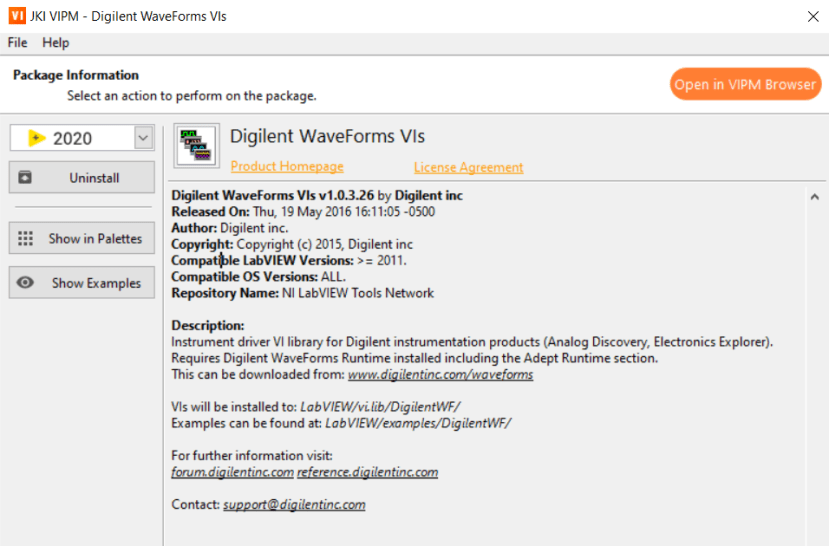
Click the “Show Examples” button.
After you have successfully installed the Digilent Waveforms VI, you can step through the Getting Started with LabVIEW and Digilent Test and Measurement Devices run the following examples. You will learn how to create the Front Panel and Block Diagram under NI LabVIEW VI. The Front Panel contains all controls and indicators for data in- and output and serves as a user interface when the program is running. The Block Diagram contains the blocks which are present on the Front Panel, but also other blocks which are necessary for information processing and the connections between these blocks.
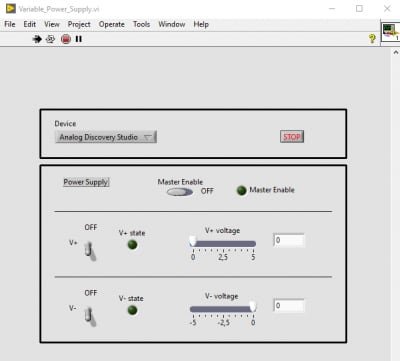
Power Supply Example
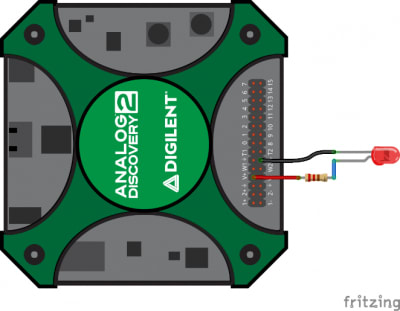
The power supply channels can be enabled with the help of the switches and adjusted with the help of the sliders. To visualize the output voltage, an LED should be connected in series with a 220Ω resistor between the V+ and the GND (down arrow) pins of Digilent Test and Measurement Device, e.g. Analog Discovery 2.
Digital I/O Example 1 - Virtual I/O
The state of digital I/O lines 0 to 15 can be set by the slider. The state of the pins is also read back and displayed with the help of the virtual LEDs.

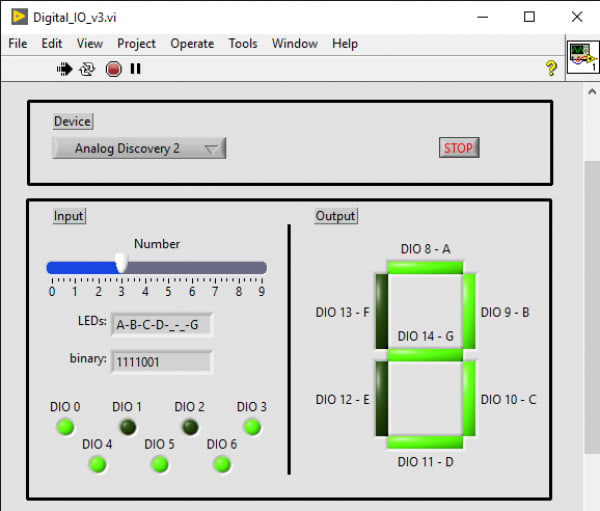
Digital I/O Example 2 - Simple Loopback
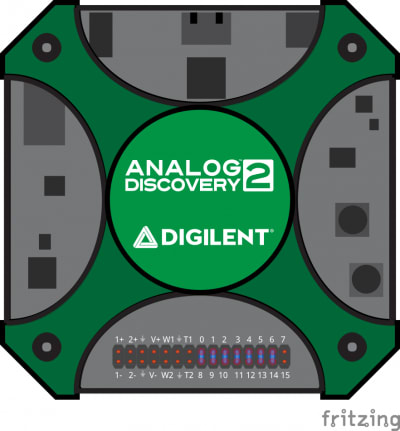
Connect DIO pins 0-6 to DIO pins 8-14 of Analog Discovery 2. DIO lines 0-6 are used as output and are controlled by the slider. As the segments of the seven-segment display are connected to digital I/O lines 8-14, connecting the respective pins will display the number set on the slider.
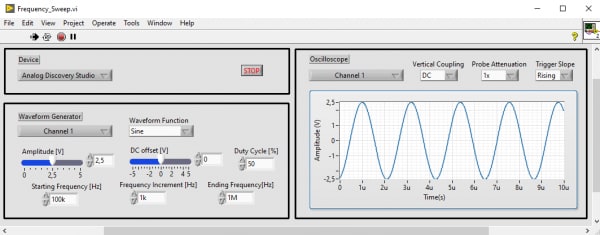
Analog I/O Example
Connect the oscilloscope Channel 1 of Analog Discovery 2 / Analog Discovery Studio to t Wavegen Channel 1 output of Analog Discovery 2 / Analog Discovery Studio. For devices that use differential input channels, such as the Analog Discovery Studio with MTE cables, make sure to connect the oscilloscope Channel 1 negative pin (orange wire with white stripes) to the ground pin associated with Wavegen Channel 1 (black wire).
To run the VI, first, on the Front Panel select the Test and Measurement device used, set the attributes of the desired waveform and the parameters of the frequency sweep, then press the Run button. The measurement can be stopped at any time with the Stop button or is finished when the ending frequency is reached.
All LabVIEW project files are available at Getting Started with LabVIEW and Digilent Test and Measurement Devices.