Using a Microscope to Help with SMD Soldering
Follow article
 Dave from DesignSpark
How do you feel about this article? Help us to provide better content for you.
Dave from DesignSpark
Thank you! Your feedback has been received.
Dave from DesignSpark
There was a problem submitting your feedback, please try again later.
Dave from DesignSpark
What do you think of this article?
Using an RS Pro Wireless and USB microscope to improve surface mount soldering.
In a previous blog post I detailed my first go at SMD soldering, building a module for my synthesiser. It was a good way to get started and now I have some extra time on my hands as a result of the Covid 19 pandemic, I am eager to try something more ambitious; there are some interesting synthesiser modules I would love to have a go at building, such as Mutable Instruments Marbles random sampler and the Ornament and Crime multi-function module.
One really useful tool when undertaking larger and particularly fiddly SMD projects is a microscope, both for inspecting completed work and for use whilst soldering tricky bits.
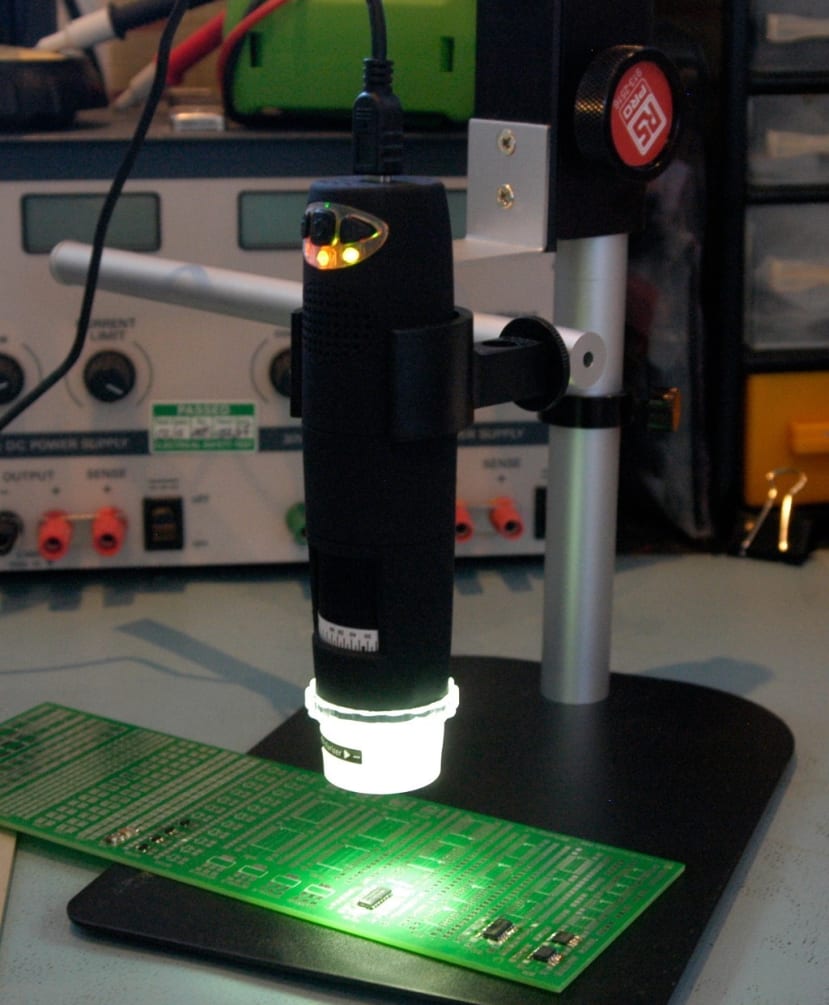
RS Pro WiFi Microscope
Microscopes suitable for assisting with SMD soldering come in all sorts of shapes, sizes and cost. A search on the RS site produces over 100 results ranging from less than £50 up to over £7,000.
I wanted something that I could connect to my PC and see what I was doing on the screen, and that had a focal distance sufficient that I could solder underneath it if necessary. Given that I am working at home and somewhat short of space, I also wanted something that would pack away easily when not in use.
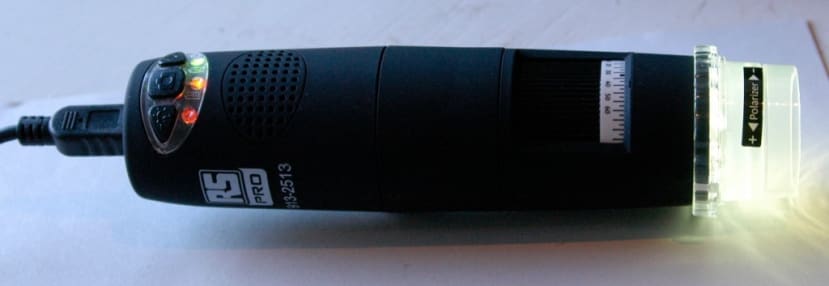
I decided on a mid-range digital USB and WiFi microscope (913-2513) with 5x to 200x magnification, plus a stand (913-2516) to mount it on. The microscope has an adjustable white LED light and a polarizer that reduces reflection and glare on shiny objects, and as I discovered, also makes type on small components a lot easier to make out.
The microscope can be connected to a PC by USB or using its inbuilt WiFi, which also provides connection to a mobile phone or tablet. There are iOS and Android apps freely available in the respective stores, just search for Mic-Fi.
Software
It is perfectly possible to use the microscope on a PC without installing any software, by connecting to its WiFi SSID and viewing through a web browser. To do this you first need to hold down the left-hand button on the top of the microscope for about 10 seconds, until the blue LED lights up. You should then see the SSID listed in your wireless management app (this screenshot is from Windows 10), click connect and enter the password 12345678 when prompted.

Once you are connected open a web browser and go to 10.10.1.1 and enter admin for the username and password and the microscope’s home page will load. Here you will see links for camera settings, which actually shows you what the microscope is seeing. On this page clicking the “Capture” button will produce a pop-up web page with the image that you can save in the normal way for your browser.
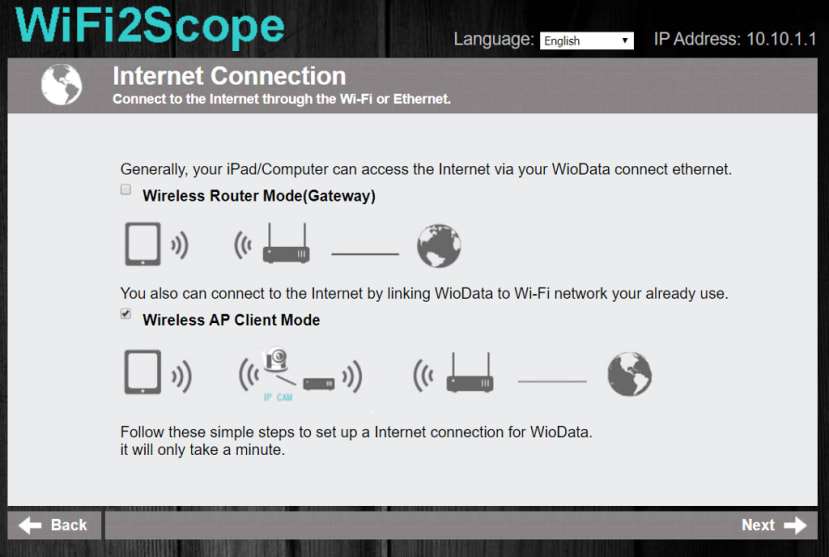
There is also a really useful feature that lets you set up Wireless AP Client mode. If like me you are working from home and cannot connect the Ethernet port on your computer, you will, of course, lose connection to the Internet when you are connected to the microscope’s WiFi. This setting lets you get around that by connecting the microscope to your wireless network. To do this click the “Internet Connection” button on the microscope’s home page and select the Wireless AP Client Mode option before clicking Next. Enter the password for your network and wait.
I found that during this setup the microscope WiFi restarts and, as it disconnects, my home WiFi took the opportunity to re-connect. This prevented the process from completing. The way around this is to monitor your WiFi connections during the setup and reconnect to the microscope as soon as it re-appears.
I also installed the Mic-Fi Plus 2 app on my Android ‘phone from the Google play store. This requires the ‘phone to connect to the microscope’s WiFi and offers similar functionality as the browser described above.
If you want to connect to the microscope via USB you will need to download and install the Windows software from the Mic-Fi web site. Although the software is free you do need to add it to a shopping cart and check out to obtain it. Once you have registered for the shop and agreed to the Terms of Service, clicking “Proceed to Checkout” results in an email being sent to you with a download link. It does take a little while to process and load the web site’s order page, so, if like me you get a little impatient, you can end up with multiple email messages!
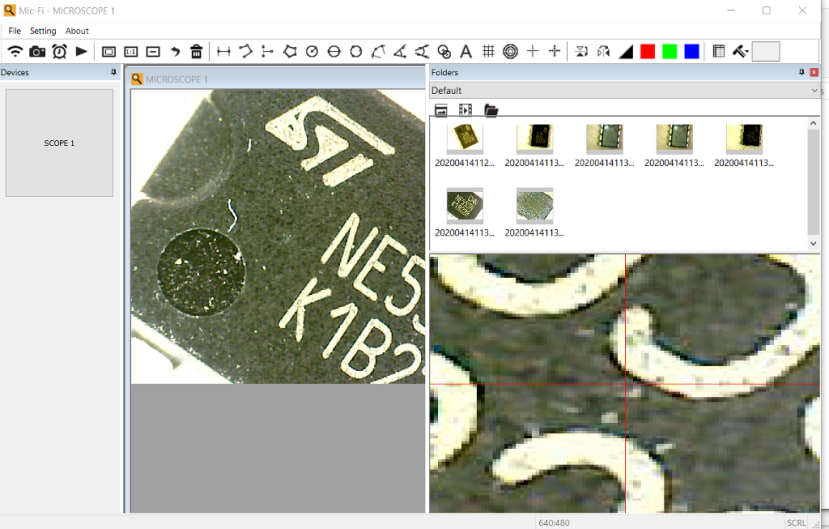
To use the software you need to make sure your microscope is turned off, then plug it into a USB port on your PC and start up the software. You should see a big button labelled Scope 1 in the column on the left-hand side of the app window, click this and it will connect to the microscope.
Although I probably won’t measure objects under the microscope, I thought it best to run through the calibration anyway.

Using the calibration ruler supplied to provide an accurate known measure I set the focus at 50 and then adjusted the height of the microscope using the wheel on the stand until the ruler was in focus. Clicking on the Calibration button in the Mic-Fi software I filled in the fields and then used the drawing tool to mark 5mm and finally clicked on OK.
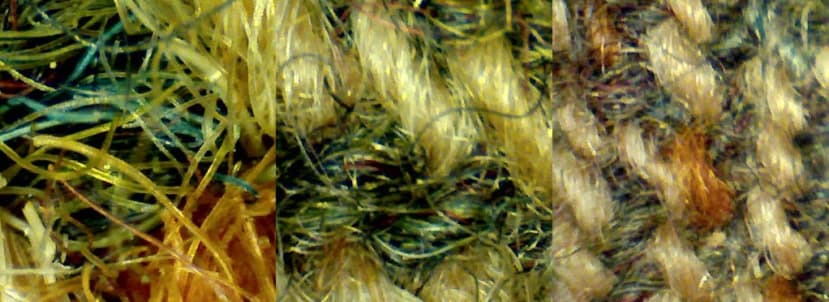
Although I am mainly going to be using the microscope for soldering I could not resist having a look at some other stuff, starting with some Harris Tweed fabric, varying the height of the microscope on the stand and then adjusting the focus wheel to alter the magnification. The image above shows 3 different levels of magnification.
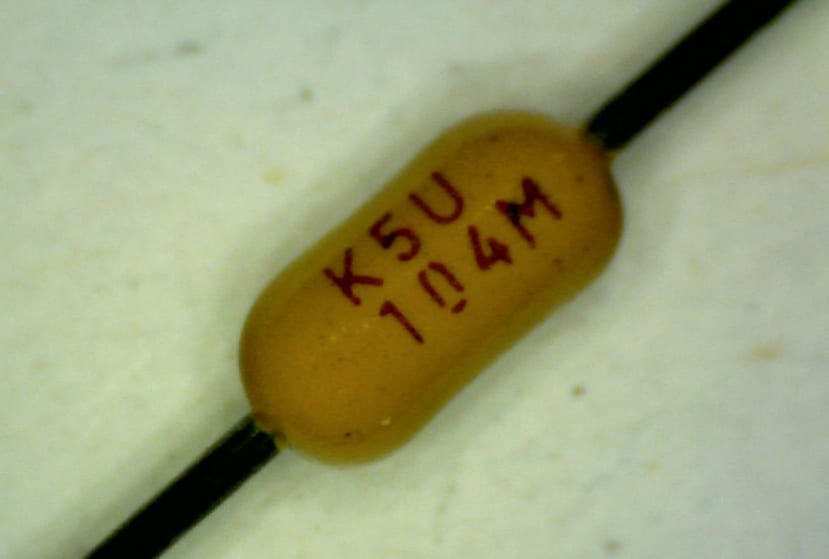
Next up I tried looking at some components that I had been given, including some mystery capacitors that I could now see the printing on.
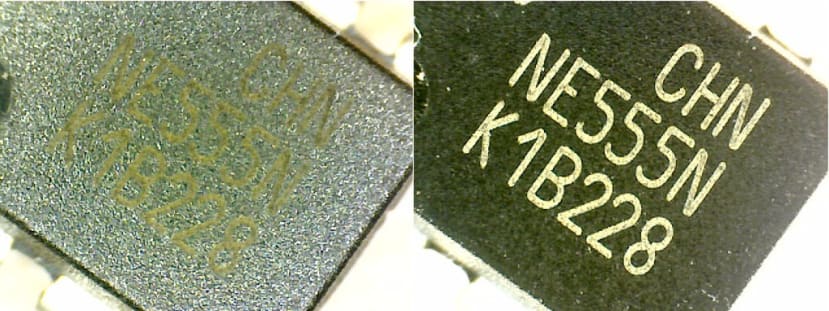
The polarising feature made the type on an IC a lot easier to read.
There is also a record function that will make a video and I tried some SMD soldering.
Other Possibilities
Although I intend to use the microscope to assist with my soldering, the fact it has a decent battery life combined with the ‘phone apps makes it great for exploring bug and plant life while out on your daily lockdown exercise and it would also make a fantastic educational tool if you are home schooling.