

If you’re into tinkering, teaching, or just getting started with robotics, the Arduino Alvik (284-2240) is a seriously clever little bot worth knowing about. Designed with educators, students, and curious minds in mind, it packs a surprising amount of tech into a compact, LEGO®-compatible frame — making it ideal for exploring programming, robotics, IoT, and even AI.
What is Arduino Alvik?
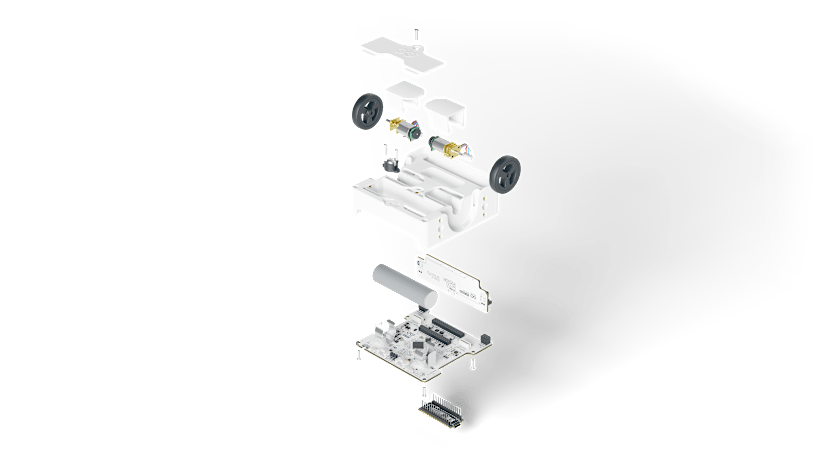
At first glance, Alvik looks like a simple wheeled robot — but under the hood, it’s a powerhouse of sensors, motors, and modular connectivity. It's built on two brains: the Arduino Nano ESP32 takes care of the heavy lifting (connectivity, programming, cloud integration), while a second STM32 microcontroller manages real-time responses from the sensors and motors.
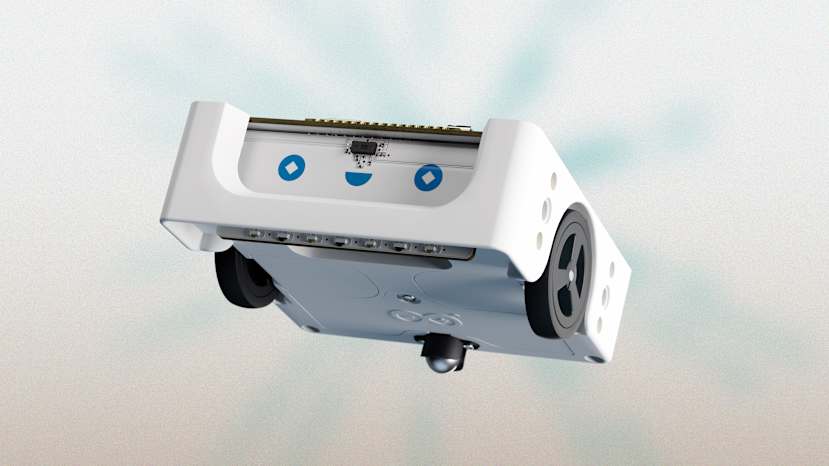
This dual-processor setup means Alvik can respond to its environment fast — whether it’s avoiding obstacles, following lines on the floor, or reacting to a touch.
What’s Onboard?
Alvik comes ready to roll — literally. You get:
- Two high-precision DC motors with encoders for smooth, controlled movement (up to 13 cm/s).
- A full-color sensor that can detect RGB values — perfect for sorting objects or navigating color-coded paths.
- A Time-of-Flight distance sensor (up to 3.5 meters) for obstacle detection.
- An IMU (Inertial Measurement Unit) to detect motion and orientation.
- Three line sensors underneath for classic line-following challenges.
- Seven capacitive touch buttons on top — easy for interactive projects.
- Two RGB LEDs — because robots should look cool while they work.
And for those who love to expand, there are plenty of options:
- I2C ports (both Grove and Qwiic) for adding sensors or displays.
- Two servo connectors for extra movement or interaction.
- LEGO® Technic™ mounting points — so you can build creative add-ons or house it in your own custom shell.
Flexible Programming for All Levels
Whether you’re teaching 10-year-olds or working on a university-level project, Alvik meets you where you are. You can program it using:
- Arduino C via the Arduino IDE
- MicroPython for quick, readable scripting
- Block-based programming (perfect for younger users or beginners)
- Arduino Cloud, for those looking to connect their robot to the wider world of IoT
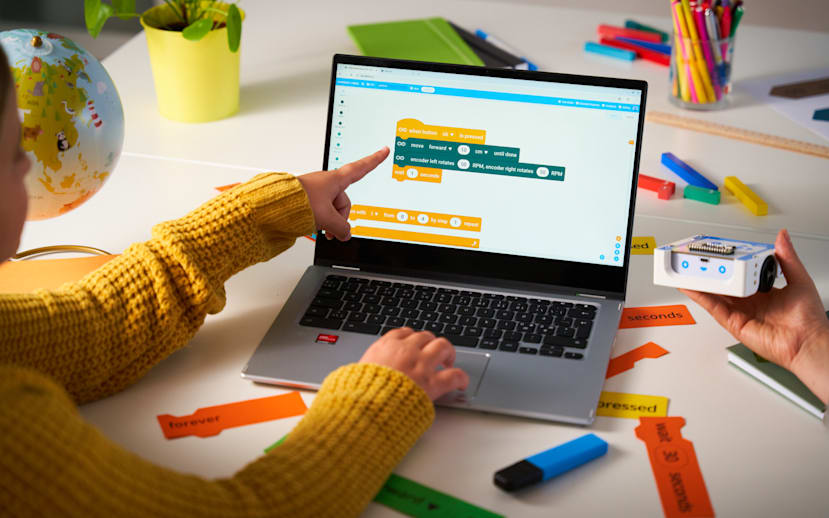
Arduino also provides a solid range of example sketches and tutorials to get you started.
Battery Life and Build
Power comes from a built-in rechargeable battery. You can toggle the whole system on and off with a single switch, and everything’s enclosed in a sturdy, compact design. It’s robust enough for the classroom, yet flexible enough for prototyping.
Tech Specs
| Component | Details |
|---|---|
| Alvik main controller | Arduino Nano ESP32: - 8 MB of RAM - u-blox® NORA-W106 (ESP32-S3) - Processor up to 240 MHz - ROM 384 kB + SRAM 512 kB - 16 MB External FLASH |
| Alvik on-board Core | STM32 Arm® Cortex®-M4 32 Bit |
| Power supply | Nano ESP-32 USB-C® rechargeable and replaceable 18650 Li-Ion battery (included) |
| Programming language | MicroPython, Arduino & block-based programming |
| Connectivity | Wi-Fi®, Bluetooth® LE |
| Inputs | - Time of Flight Distance Sensor (up to 350 cm) - RGB Color Sensor - 6-axis Gyroscope-Accelerometer - Line follower Array (x3) - Touchable Buttons (x7) |
| Outputs | - 2x RGB LEDs - 6V Motors – No-load speed 96 rpm, No-load current 70 mA |
| Extensions | - LEGO® Technic™ connectors (x4) - M3 screw connectors (x8) - Servo motor - I2C Grove - I2C Qwiic |
Why It Stands Out
There are lots of educational robots out there — but Alvik hits a sweet spot. It’s approachable, hackable, and packed with high-end sensors and options that don’t require soldering or advanced wiring. It’s a platform that grows with the user, which is exactly what a great learning tool should do.
If you're interested in what else you can do with Arduino, check out our Arduino Hub or reach out to our team with any queries.
Comments