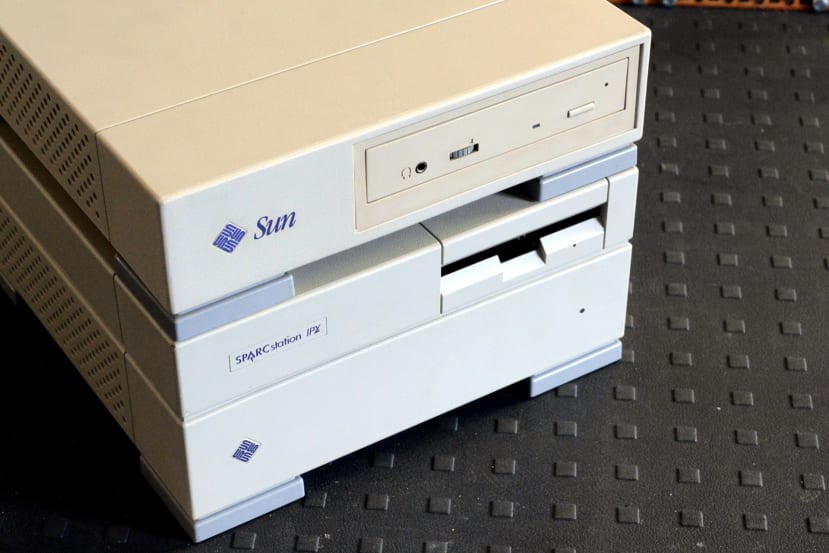
Restoring a Sun SPARCstation IPX Part 2: Cleaning up, and Additional PSU and NVRAM Work
Follow article
 Dave from DesignSpark
How do you feel about this article? Help us to provide better content for you.
Dave from DesignSpark
Thank you! Your feedback has been received.
Dave from DesignSpark
There was a problem submitting your feedback, please try again later.
Dave from DesignSpark
What do you think of this article?

Cleaning plastic parts, replacing more PSU caps, a new fan and an NVRAM fix.
The first post in this series introduced the Sun SPARCstation IPX and focused on replacing the electrolytic capacitors in its dead PSU, followed by replacing the NVRAM used to store the Ethernet address and Sun hostid, plus configuration similar to that set with a PC via its BIOS.
Now that we have a system which will boot, we’ll move on to cleaning up the plastic enclosures, some additional PSU work, and addressing a persistent NVRAM issue.
Notes on restoration
As is often the case when restoring such vintage electronics, decisions will need to be made as to how true to the original design to remain. These will be discussed at the appropriate points, but as a general comment, I prefer to avoid any irreversible modifications and where possible to take a long term view. However, this can be a complex topic and one of much debate amongst museums and professional conservators, let alone hobbyist collectors and enthusiasts.
It could be said that a Sun SPARCstation is neither that old nor rare, but they are becoming increasingly harder to find and particularly in good physical condition, without scratches to the casing and chipped corners etc. Give it another few decades and more will inevitably be lost, with others suffering further damage, perhaps most notably as they exchange hands and are sent via courier with insufficient packaging (something experienced first hand, sadly).
Hence the objective here will be to balance the desire to have something which is both aesthetically pleasing and practical, with taking due care and while considering that impulsive and convenience measures may offer some immediate benefit now, but later come to prove regrettable.
Cleaning
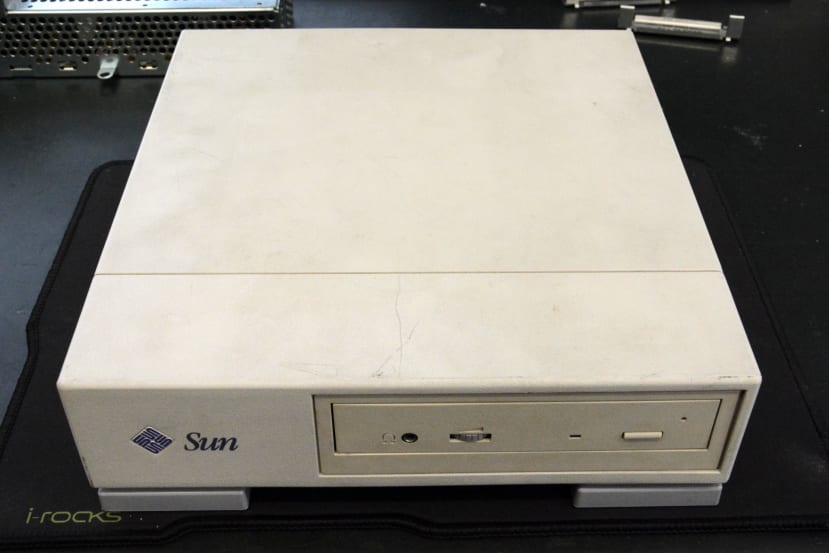
Thankfully, the plastic parts of Sun equipment, at least from this period, do not seem to suffer badly from yellowing, as a lot of other vintage computer equipment is prone to. However, there is a slight texture to the plastic and this means that it is prone to gathering hard to remove dirt. Above we can see that the external Sun CDROM drive, in particular, is fairly grubby.
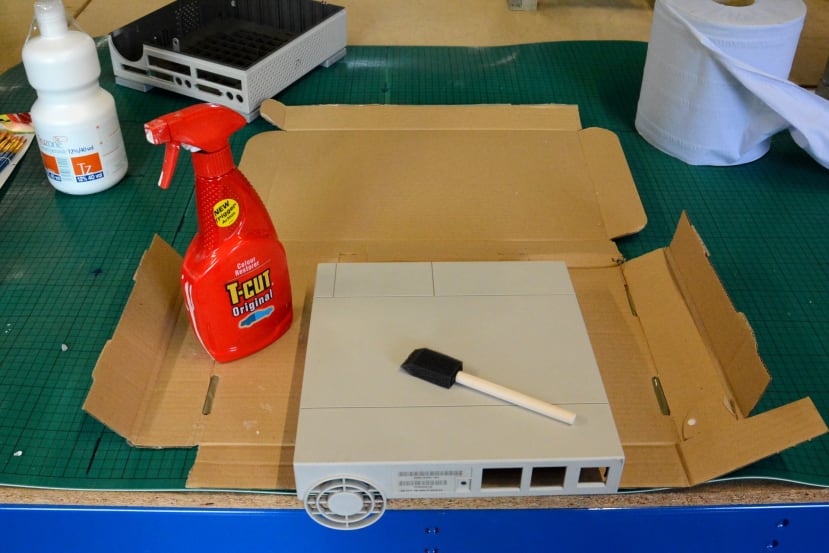
The SPARCstation, CDROM drive and mouse were all dismantled and their electronics removed. The plastic was then first cleaned with detergent and warm water, following which stubborn marks were polished out using T-cut, which contains a very mild abrasive. A vee shaped sponge applicator proved very effective in cleaning out grooves in the case.
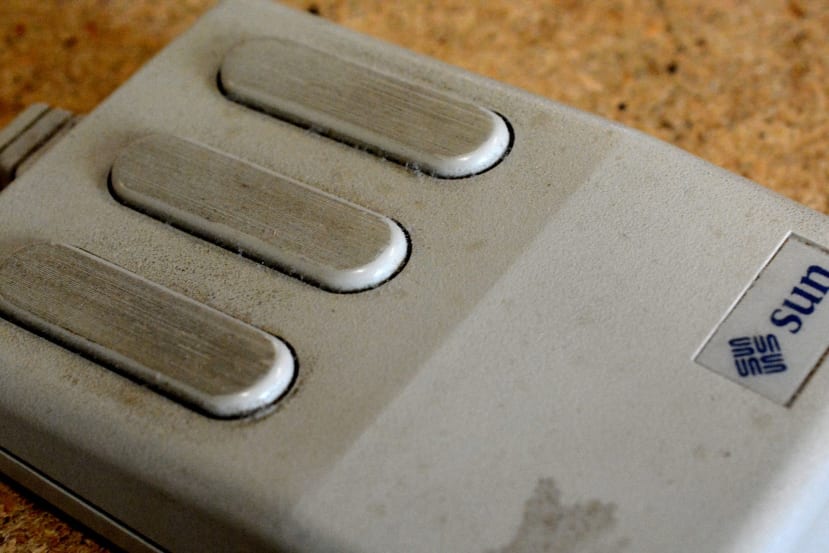
Mouse before cleaning.
As an aside, the mouse is a pretty interesting optical design and has what appears to be two LEDs plus two photodiodes, with a pair of plastic spheres to direct light down on to and back from, a special mouse mat which has a grid printed onto it. Get this mat the wrong way round and when you move the mouse, the cursor moves in the wrong direction!
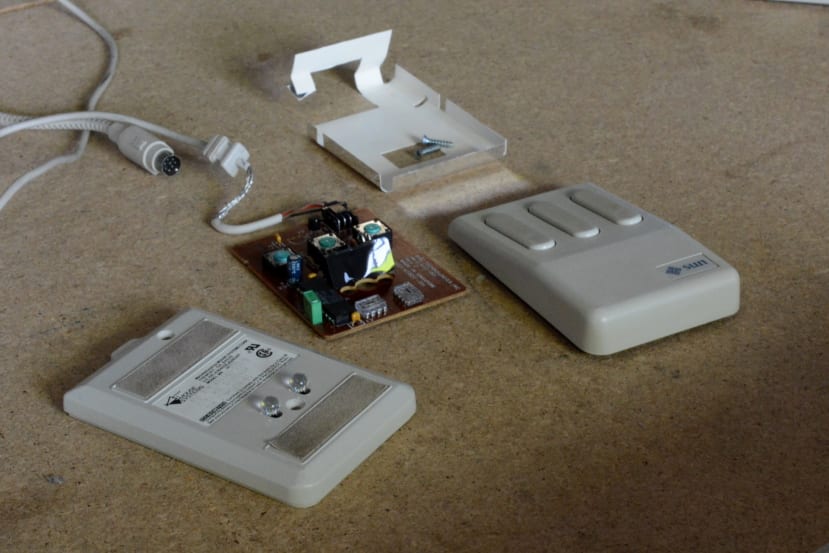
Above we can see the bottom half of the mouse case, with the clear plastic spheres sat on top. When assembled these would be located on the opposite side of this part and then with the PCB assembly sat on top, so that the spheres are sandwiched between the PCB and the enclosure bottom half.
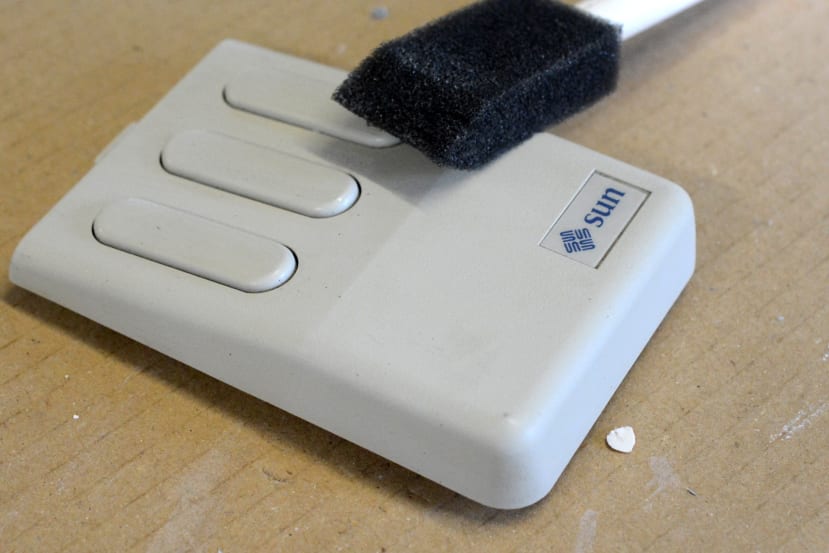
The mouse looked much better after having been cleaned up.
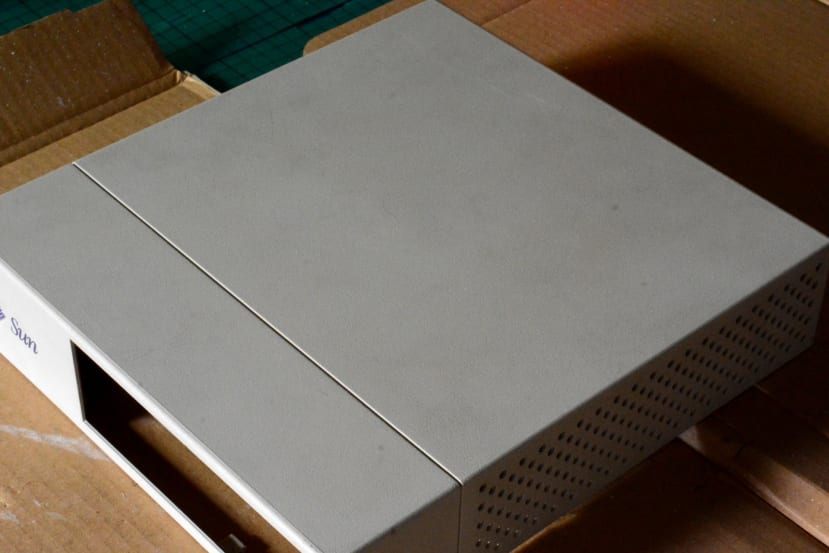
Unfortunately, some marks still remained on the CDROM drive enclosure top half, whereas the SPARCstation itself cleaned up quite nicely. However, it does appear as though the SPARCstation plastic enclosure is painted, while the CDROM drive looks to be bare plastic, which may have something to do with it.
A popular remedy for yellowing plastic is to apply hydrogen peroxide cream and to then place the part in sunlight for a few hours so that it gets exposed to UV light.
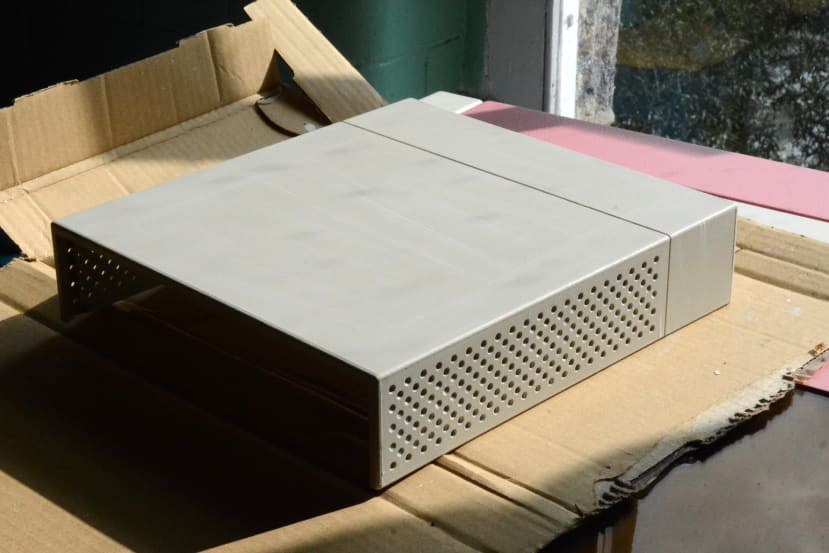
I decided to give this a go for this difficult marks, but to only leave the cream on for around 1 hour.
Now at this point, it should be noted that, firstly, appropriate care must be taken when using products containing hydrogen peroxide, wearing gloves and eye protection etc. Secondly, there is also the possibility that it will bleach things you did not want to bleach, such as a printed logo, or perhaps your clothes if you’re not sufficiently careful. Hence do not interpret this as advice and be sure to do your own research. It is also said that the process can make the plastic more brittle, but hopefully not in this instance, as only a small amount was applied and it wasn’t left on very long.
This last step definitely helped with the particularly stubborn marks on the CDROM enclosure and overall, I was quite pleased with the results. However, given the plastic wasn’t yellowed, I suspect that just more scrubbing with detergent and warm water may have shifted those marks and without risk of accidental bleaching. Note that the “X” of the SPARCstation IPX badge was already marked and this looks to be cream paint scratched through to expose blue underneath.
Would bleaching the enclosure of an artefact be acceptable practice in professional conservation? Probably not, for the potential risks previously mentioned. It would be interesting to find out what effective cleaning methods are typically used and generally accepted to be appropriate.
PSU fan and Y-class caps
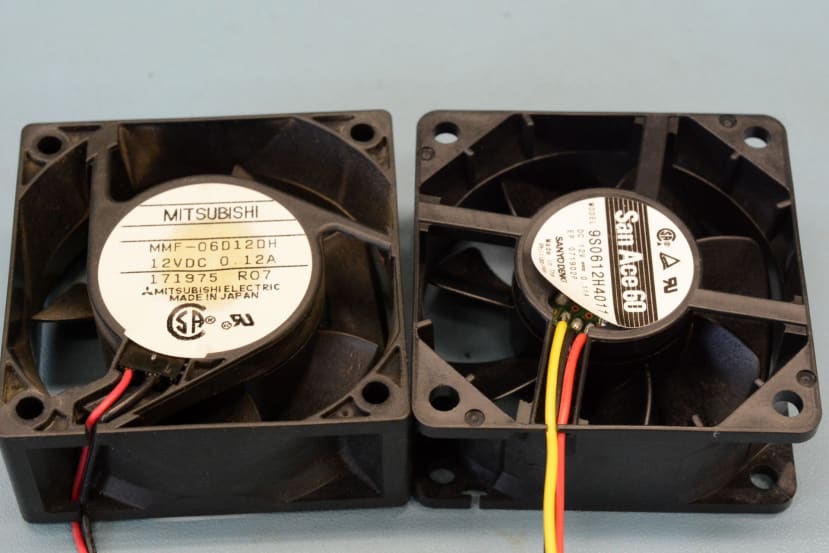
The original fan does still work, however, the bearings have probably seen better days and it has become a little noisy. As such it was decided to fit a new fan and in doing so to select a replacement that was as quiet as possible, while still of appropriate specification.
Mitsubishi state the original MMF-06D12DH 60x60x25mm fan as being 12V @ 0.12A, providing an airflow of 30m3/h and with a noise level of 29dB. A Sanyo Denki model 9S0612H4011 (751-1500) replacement was selected, which required slightly less power of 12V @ 0.11A, while providing a slightly increased airflow of 34.8 m3/h and a reduced noise level of 24dB.
The original and replacement fans can be seen above. The new fan has a third wire as it is equipped with a tachometer, which won’t be required.
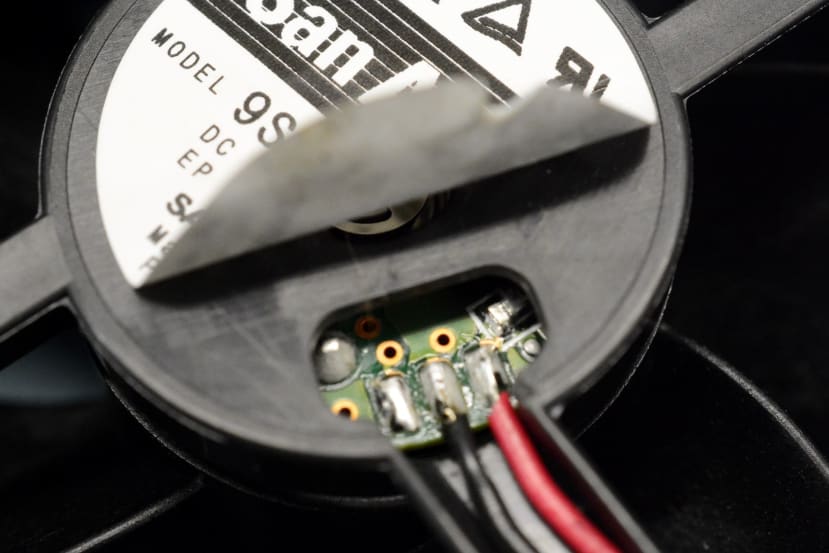
The label was lifted on both fans and the wires plus connector were removed from the original fan and fitted to the replacement
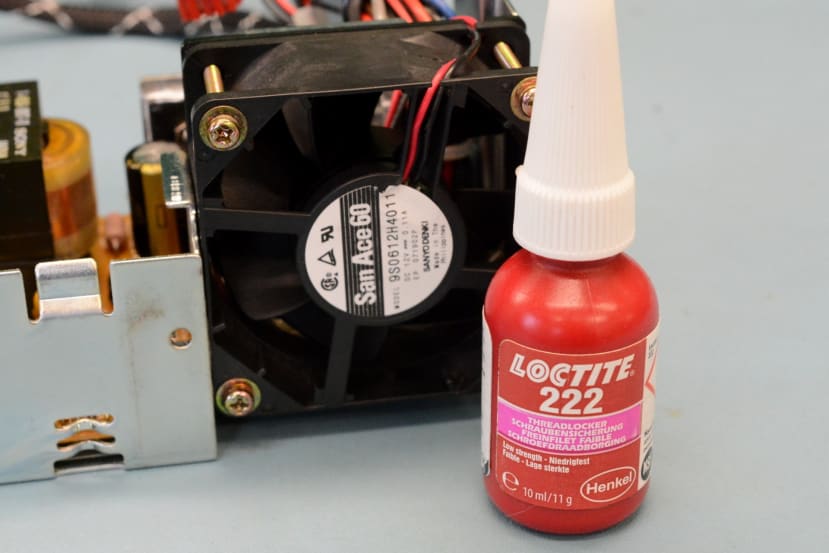
The new fan was then fitted to the power supply and the mounting screws were secured, as they were originally, with threadlock (051-4509) .
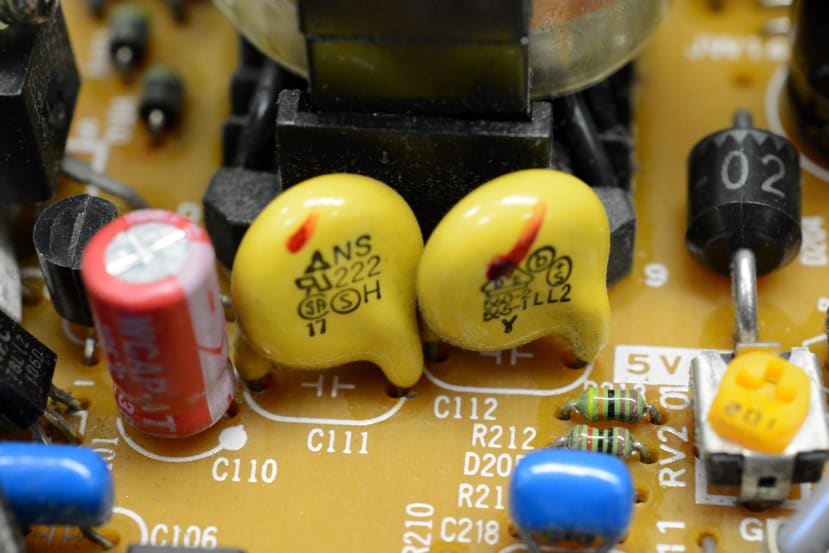
Previously the electrolytic capacitors were replaced and this brought the dead PSU back to life. However, in a comment on the first post, jabuzzard suggested that the Y-class capacitors designated C111 and C112, should also be replaced. Rather than in the usual configuration of being placed across supply line and earth, these instead appear to be across PSU primary and secondary sections.
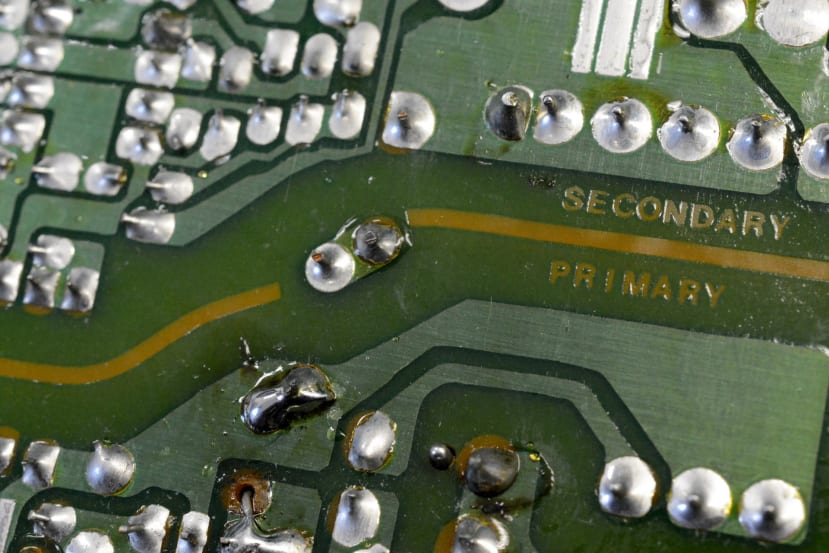
The two capacitors appear to be connected in series, via the pads located exactly between primary and secondary delineation.
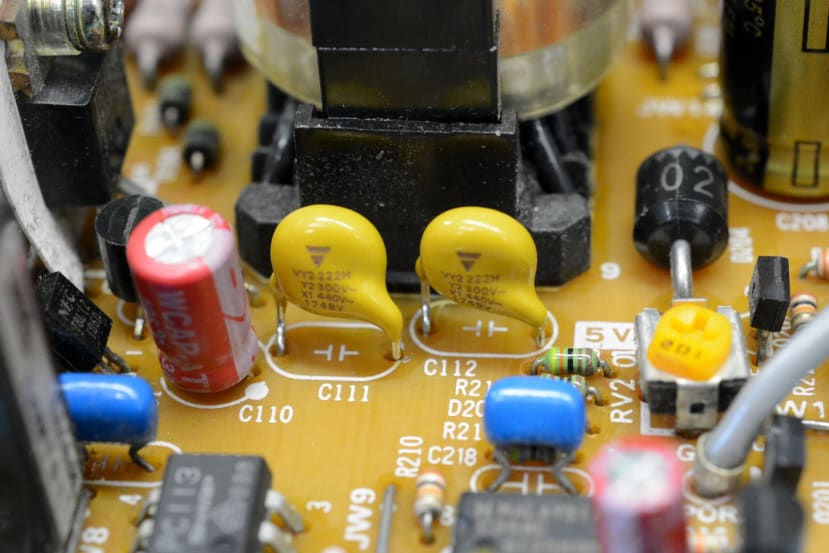
Although there was nothing to suggest these had failed or were failing, it was decided to replace (133-5629) them as a precaution, as advised.
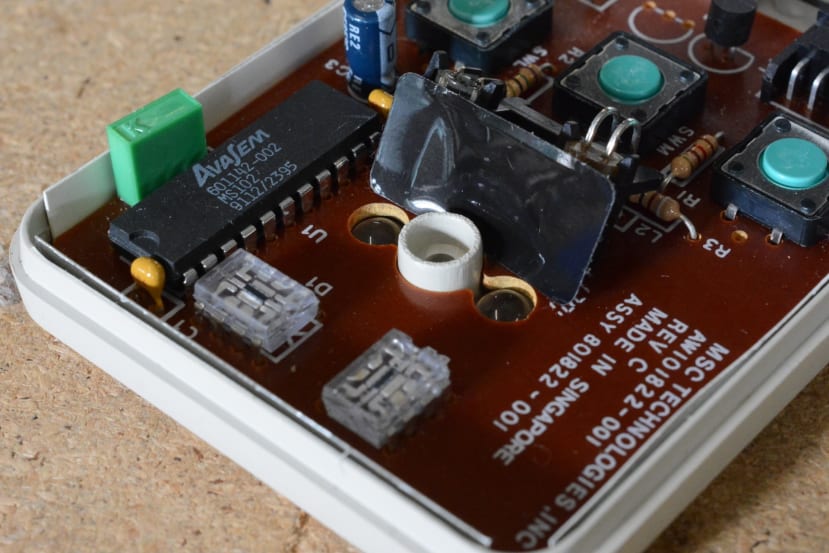
NVRAM
Previously we replaced the NVRAM device, which had a dead battery and this meant that time-of-day and configuration were lost when powered down. First, a 48T02 part was used, as originally specified. However, while settings were retained, the OBP monitor (firmware) still reported that the battery was dead. After researching the issue online, a 48T12 part was also tried, but to no avail.
Upon further research, it appears that at some point TIMEKEEPER parts were updated to store the century and it’s suggested that this is the cause of diag failures when fitting new replacements in vintage SPARCstations. Obviously this sort of issue that would be addressed via a firmware update, were the systems still actively maintained by a vendor (although given firmware is located in two EPROMs, it would also mean pulling them out and reprogramming).
Thankfully, the author of the glitchwrks.com website proposed a solution, as linked above. Which basically involves removing the dead battery from the original device and replacing this with a small PCB, featuring a coin cell battery holder plus a crystal (this was sealed in with the battery).
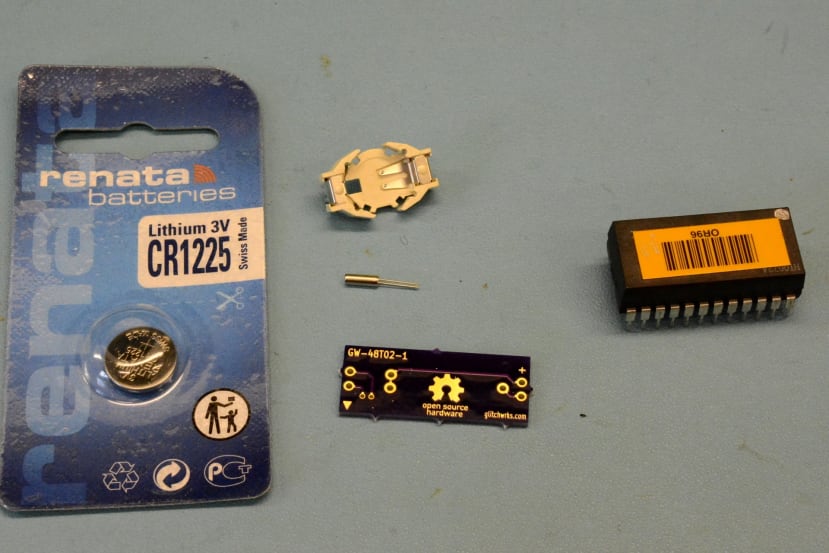
They were also kind enough to share the PCB design and so a few were ordered via OSH Park.

Shallow grooves were sawed into each end, as instructed, before then prising the “CAPHAT” off.
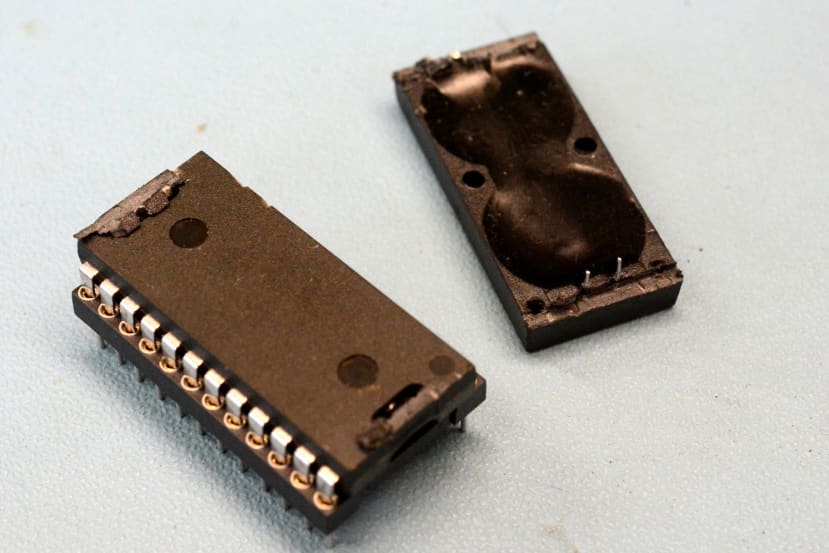
Unfortunately, this didn’t result in the four wires needed with sufficient length and coming up from the IC part (it was a bit like pulling a Christmas cracker and losing!) So next, there was a mixture of nibbling with wire cutters, scalpel scraping and use of a Dremel, to remove the remaining epoxy and expose the metal tabs at each end of the IC, so that four new wires could be attached.

Note that the IC was inserted into a DIP socket for ease of handling and to avoid bending pins.
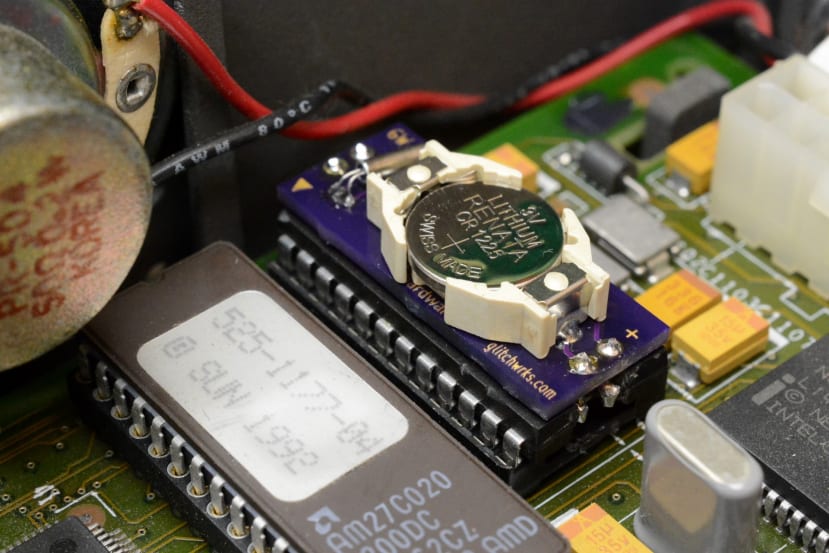
Finally, the board was assembled, epoxied into place and soldered to the wires, before then inserting into the socket on the SPARCstation PCB.
It was now time to power-up and repeat the process of entering OBP commands to program the hostid and Ethernet MAC address.
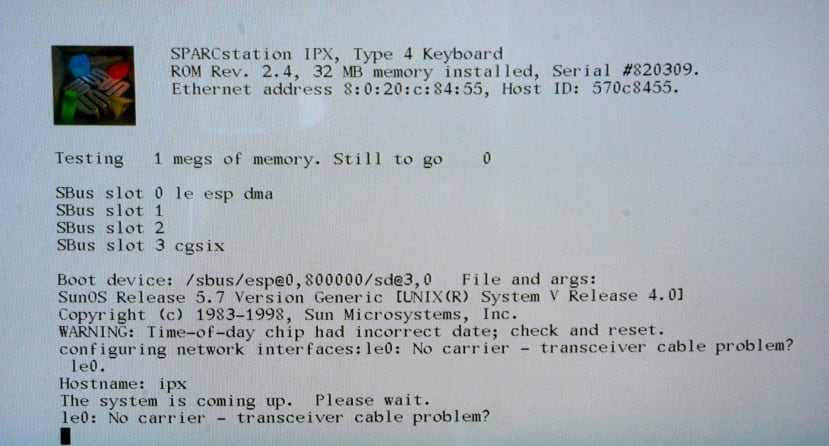
After entering reset the SPARCstation was restarted, we saw our hostid and MAC address were persisted, and finally, the NVRAM error was cleared and the system proceeded to automatically load UNIX. There were errors regarding the time and Ethernet, but time-of-day can now be set via the O/S and we simply need to attach an Ethernet transceiver and cable this to the wired network.
Ideally, there would have been a solution which did not involve having to saw an IC and fit a small custom board. One possible approach may be to patch the firmware and it does appear as though the sources were published for a later version of Sun’s OpenBoot, but this does not look to have support for IPX hardware. Which is not to suggest that it wouldn’t be possible to patch the EPROMs without this and others have carried out some pretty impressive fixes to old binary firmwares.
While I didn’t feel entirely comfortable about having to physically attack the original TIMEKEEPER device, the solution is actually quite neat, it’s a socketed part that is easily replaced and I do have other examples of this device in other SPARC hardware.
Next steps
The SPARCstation is now functioning as it should do, retaining configuration and proceeding to boot at power-up when configured to do so. The IPX is also a little quieter, while it, the mouse and the external CDROM drive are now physically much cleaner. In the next post, we’ll get on to installing a fresh copy of the O/S, putting it through its paces and looking at expansion options.