Raspberry Pi 4 Personal Datacentre Part 1: Ansible, Docker and Nextcloud
Follow articleHow do you feel about this article? Help us to provide better content for you.
Thank you! Your feedback has been received.
There was a problem submitting your feedback, please try again later.
What do you think of this article?
Pi 4 packs plenty of punch and is perfect for a private home or office cloud server.
In this series of posts, we show how a Raspberry Pi 4 can be used to create a personal cloud solution that is managed using Ansible and Docker — powerful tools that are used by many large scale cloud platforms, which automate configuration tasks and provide containerisation for applications.
This first post takes a look at initial Raspbian configuration, followed by setting up Ansible and Docker, and then finally the installation of Nextcloud using these tools.
Nextcloud provides a whole host of services, including file sharing, calendaring, videoconferencing and much more. However, as we will come to see, this is just the beginning and with our tooling set up, the capable Pi 4 can quickly be put to many other uses as a personal cloud server.
Hardware
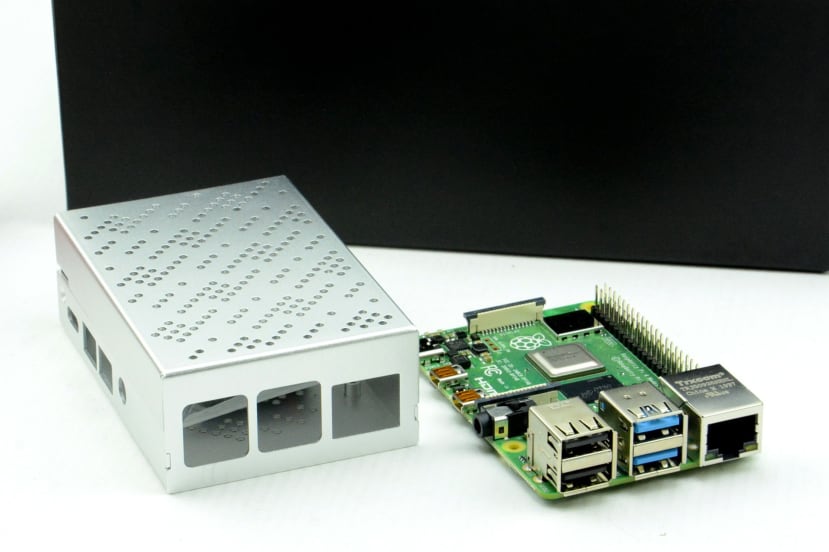
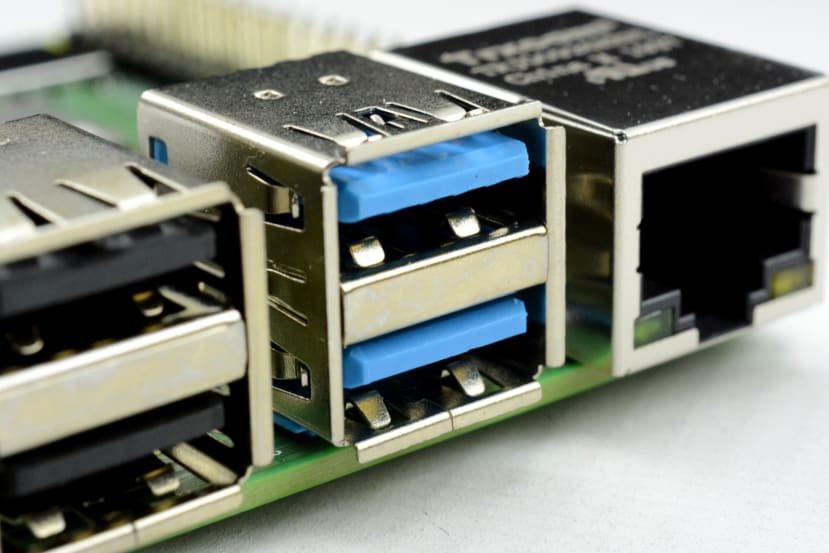
With its quad-core processor the Raspberry Pi 3 Model B was no slouch and the new Pi 4 features a system-on-chip upgrade which delivers a significant further performance boost. Not only this but with models that have up to 4GB RAM, it’s capable of running much more advanced and multiple larger workloads. In addition to which the upgrade from 100M to 1G Ethernet and USB 2.0 to USB 3.0, means that it’s perfect for a personal server and fast external storage can be attached.
The OKdo Raspberry Pi 4 8GB Model B Starter Kit (209-7566) provides everything that we need to get up and running: a 8GB Pi 4, heatsinks, enclosure with a fan, mains power supply, cables, a 32GB Micro SD card, and an SD card reader.
Basic setup
So if we start by downloading the latest version of Raspbian and, since this is going to be a “headless” server, the Lite variant should be selected. Once unzipped the image needs to be written out to an SD card and on Linux, this was done with:
$ sudo dd if=2019-09-26-raspbian-buster-lite.img of=/dev/mmcblk0 bs=1MNote that the input filename (if) will vary depending upon the Raspbian version and the output filename (of) will vary depending upon your system. Great care must be taken using the dd command and if unsure or using Windows or a Mac, see the installation guide.
If you’re going to configure your Raspberry Pi over a network connection see the SSH documentation. VNC could be used instead, but this would mean installing the full desktop version of Raspbian and this feels like overkill for a server and would use up more disk space.
Once booted the latest Raspbian updates can be applied with:
$ sudo apt update$ sudo apt dist-upgradeTo set the hostname to something more meaningful, two files need to be edited. E.g. using nano:
$ sudo nano /etc/hostname$ sudo nano /etc/hostsWhere “raspberrypi” is seen in each file replace this with your hostname of choice. For example, if you were to use “cloud” this would mean that, after rebooting the Pi, you could connect via SSH from another Linux system by using the command:
$ ssh pi@cloud.localAnsible
Ansible is a powerful open-source software for provisioning, configuration management, and application deployment. In short, it allows you to automate complex tasks that can quickly become boring and error-prone. Also by writing an Ansible script to do something, it means that you can cheat a little and get away with taking fewer notes since you don’t have to remember all the individual steps involved. Furthermore, via the magic of Ansible “roles”, we can take advantage of common tasks that have been automated by others via pre-packaged units of work.
So to start with if we use the Raspbian package management system to install Ansible, along with a Python module that will enable it to manage Docker:
$ sudo apt install ansible python3-dockerThen to install an Ansible role which automates setting up Docker, we simply enter:
$ ansible-galaxy install geerlingguy.docker_armNote that this hasn’t installed Docker and rather instead has just installed a role called geerlingguy.docker_arm.
There are lots of freely available roles for automating all manner of tasks and for details see the Ansible Galaxy website.
Docker installation
Now we could just install Docker using the Raspian package management system (with the apt or apt-get command), but instead, we’re going to use the Ansible role that we just installed, via an Ansible playbook — which is basically a list of tasks.
Playbooks are written in YAML and so we need to be careful to ensure that any indentation is with spaces and not tabs! If we create a file called docker.yml with the contents:
---
- name: "Docker playbook"
  hosts: localhost
  connection: local
  become: yes
  vars:
    docker_install_compose: false
    docker_users:
      - pi
 roles:
 - geerlingguy.docker_arm
What this says is that the playbook is called “Docker playbook” and it should be run on the local computer — in this case, our Raspberry Pi. The line “become: yes” means that we need to become the user root before executing tasks. The user “pi” is in the docker_users variable, which means that it will be added to the docker group so that it is allowed to manage containers. Finally, we then specify the role which actually sets up Docker.
More typically an Ansible playbook would be used to configure a number of remote servers and in such cases, these would be specified in the line starting “hosts:” instead of localhost (the local computer). In fact here the playbook could have been run from a different computer which then uses Ansible to remotely configure our Raspberry Pi over SSH, but for the sake of simplicity, we’ll just run the playbook directly on the Pi itself.
So now on to running our first playbook!
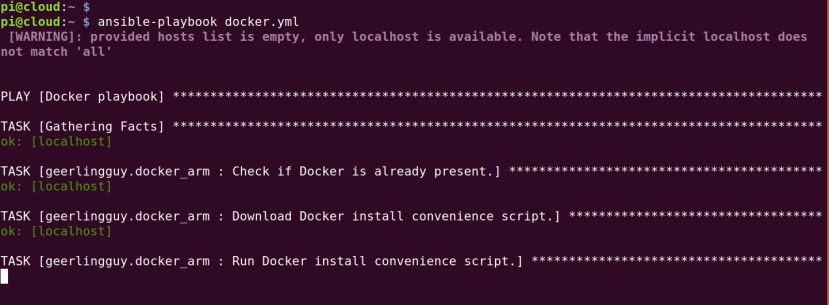
$ ansible-playbook docker.ymlNote how we didn’t need to prefix the command with sudo. This is because the playbook contains the line “become: yes” and so we become root before running tasks.
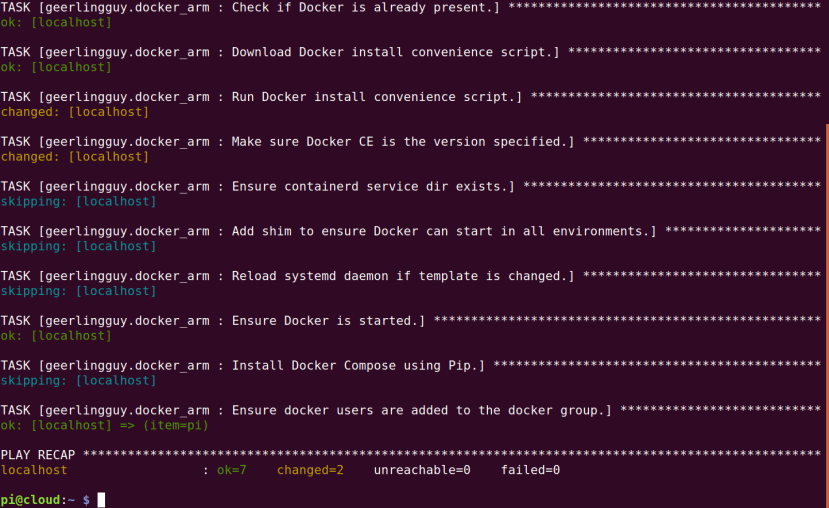
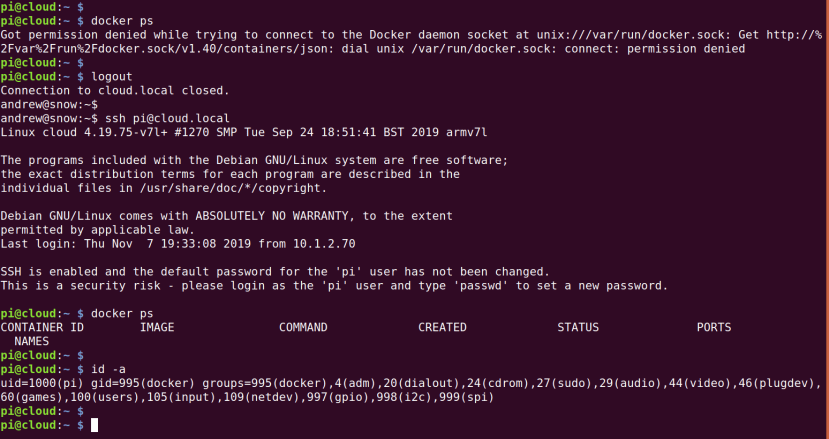
If all goes well we should see output similar to that above.
And eventually, the playbook should complete with zero failed “plays”.
Docker should now be installed and started. It has a ps command that lets you see the running containers. See above how the first time we ran this it failed because we weren’t in the docker group. However, all we had to do was to log out and back in again, following which we then picked up the docker group and could use commands to manage Docker.
Docker basics
Docker provides a containerisation system whereby applications are packaged along with all their dependencies and so in principle, you can deploy a Docker container on any flavour or version of Linux provided it has Docker available. This hugely reduces the overhead of having to maintain software for different distributions and versions. Furthermore, it allows you to neatly bundle lots of different pieces of software together and make it trivial to distribute complex application stacks.
Distribution of software is via images that are typically published to an online registry, such as Docker Hub. When you create a new container, the required image is first pulled from the online registry and once a local copy is on your machine, this is then used to create the container.
Other very cool Docker features include private networking that can be set up between containers and the ability to map ports on external IP addresses to ports inside containers. This means that you can easily have multiple different containers, based on the same or different images, running on different ports. E.g. instances of an app for home and work, or for production and testing.
Because data is kept separate from Docker containers, it means that you can delete a container and retain the application data, then subsequently deploy a new container that might use an updated image and which is configured to use data stored in an existing volume.
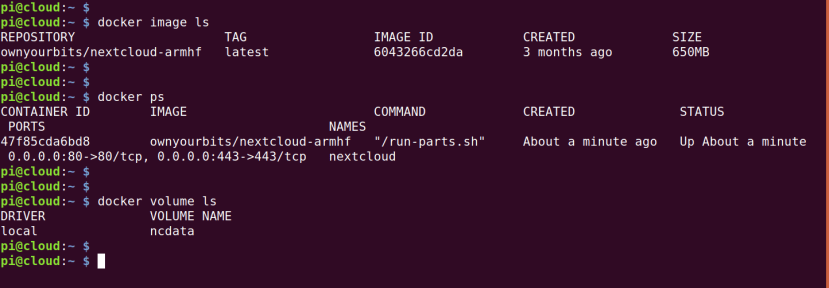
Some useful commands are as follows:
- docker image ls (list images on this machine)
- docker ps (show running containers)
- docker volume ls (list volumes)
- docker start|stop|restart (start, stop or restart the container)
- docker logs (show the logs for the container)
- docker inspect (show container config)
- docker volume inspect (show volume config)
- docker rm (delete container)
- docker volume rm (delete volume)
One of the key things to note with Docker is that we only have one copy of the operating system running, in contrast to virtualisation where we have many. This means that Docker makes far more efficient use of resources, as we don’t have to allocate CPUs and memory to VMs which then each run their own copy of an operating system. Instead, we have applications running side-by-side, albeit in their own containers, which provide increased manageability and security.
Nextcloud installation
---
- name: "Nextcloud playbook"
 hosts: localhost
 connection: local
 become: yes
 tasks:
 - docker_container:
  restart: yes
  restart_policy: always
  name: nextcloud
  image: ownyourbits/nextcloudpi
  pull: yes
  volumes:
   - 'ncdata:/data'
  ports:
   - '80:80'
   - '443:443'
   - '4443:4443'
Above we can see the contents of the playbook, nextcloud.yml, which we will use to install Nextcloud via a Docker container. This time instead of using a ready-made “role” we have specified tasks, with the first and only one being to set up a docker container with the configuration:
- To always restart the container (app) if it fails
- Use the name of “nextcloud” for the container
- Deploy using the container image, ownyourbits/nextcloud-armhf
- Always pull the latest image version
- Use a volume called “ncdata” to store user data
- Map external to internal ports: 80>80 and 443>443
This mapping ability gives us a lot of flexibility, both with data — here the volume ncdata is mounted (appears) inside the container as /data — port numbers used for networking.
To run the playbook simply enter:
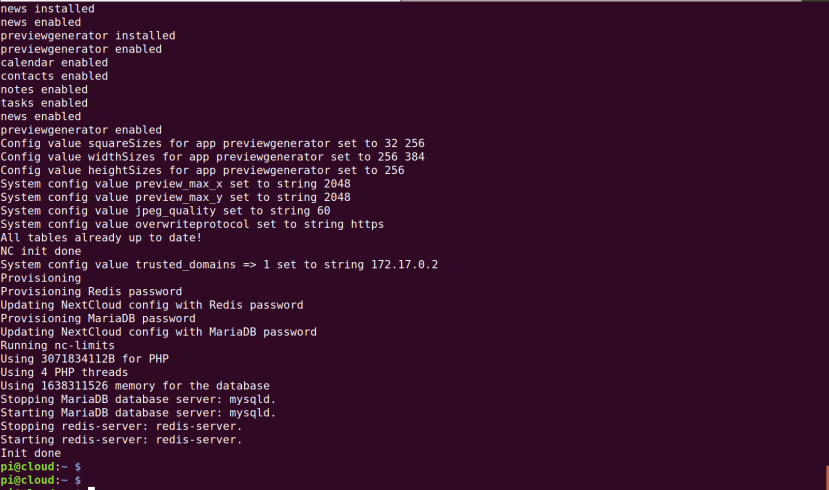
$ ansible-playbook nextcloud.ymlOnce again this should complete without any failures. We can also check the container logs with:
$ docker logs nextcloudAnd we should see something similar to the output shown above.
Nextcloud configuration
The Nextcloud container we have selected is generally used by itself as part of a turnkey SD card image which has a hostname of “nextcloudpi” configured. However, we eventually want to be able to run other things alongside it and so we picked a more generic hostname for our Raspberry Pi. Hence there is going to be just a little bit more configuration required.
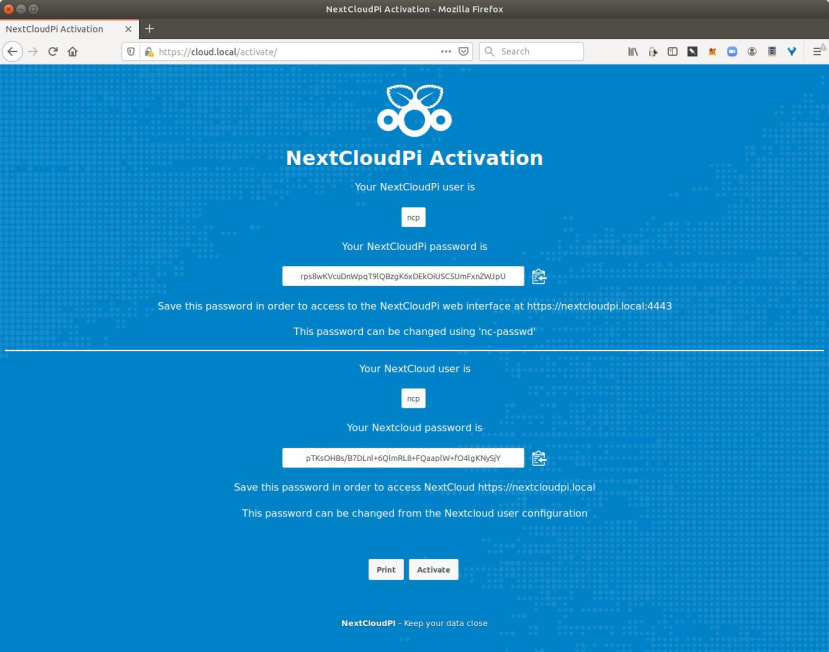
If we browse to http://cloud.local (or whatever hostname you configured) this will redirect to a secure page and initially, there may be a certificate error that we need to acknowledge. We will then be presented with a page similar to that shown above, with login details for the NextcloudPi and Nextcloud web interfaces. These should be noted down. Also, unless we did earlier use a hostname of nextcloudpi, the two URLs will need to be modified to use the hostname that we selected.
We can then select Activate. The NextcloudPi web interface is where we can easily make key Nextcloud system changes and we should load this (the one with a :4443 suffix) next. So just to be clear, this will be https://<hostname>.local:4443.
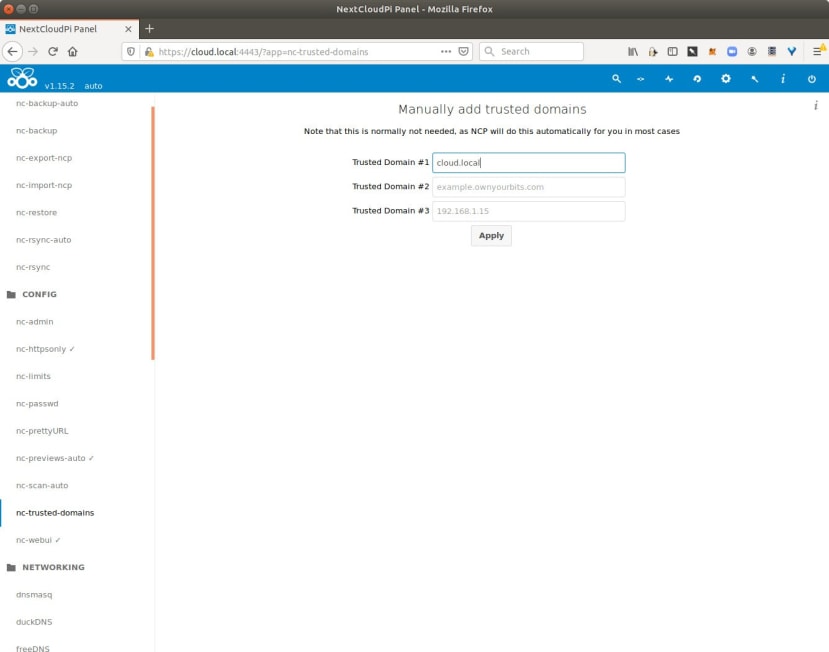
Here we need to select nc-trusted-domains from the left-hand menu and enter the appropriate domain. E.g. for a hostname of “cloud” this would be “cloud.local”. Then select Apply.
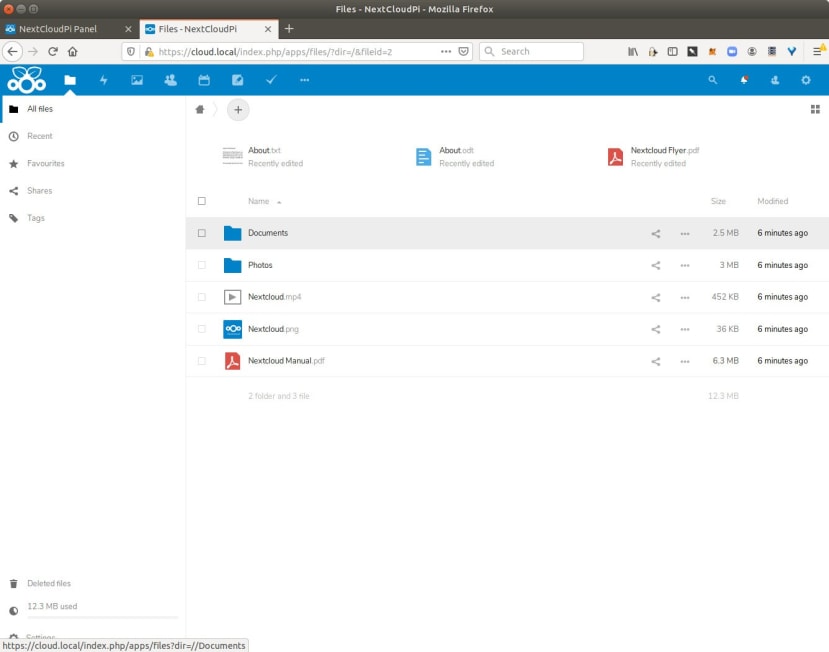
Finally, we can now visit the other URL, which will be https://<hostname>.local (no :4443 suffix). Then log in using the other set of credentials from the activation page. At this point, we can now create new users, upload files, collaborate, make use of apps and install new ones.
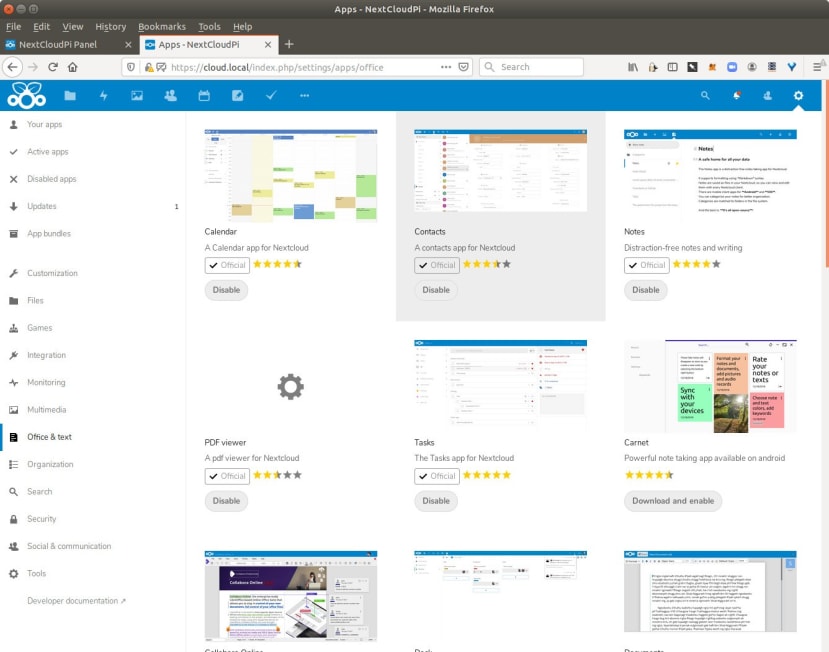
Nextcloud has a vibrant developer ecosystem and lots of great apps that can be installed with just a click from within the web interface. There are also companion apps for Android and iOS.
Wrapping up
We’ve by no means taken the simplest route to get Nextcloud up and running on our Raspberry Pi, but have done this in a way which makes it trivial to re-deploy whenever we need — onto the same or additional Pi boards! Furthermore, as we’ll come to see in the next post, the approach taken will allow us to easily run additional applications side-by-side and manage these with great ease. Part 2


