LoRa Social Distance Detection
Follow article Dave from DesignSpark
How do you feel about this article? Help us to provide better content for you.
Dave from DesignSpark
Thank you! Your feedback has been received.
Dave from DesignSpark
There was a problem submitting your feedback, please try again later.
Dave from DesignSpark
What do you think of this article?
Please keep enough social distance from others!
Today, I will share a LoRa project, the LoRa Social Distance Detection.
During the COVID-19, have you kept enough social distance from others?
The device is designed to maintain a social distance of 1.5 meters from others. People who are wearing the device get closer to 1.5 meters, a red LED lights up.

The project aims to measure the Received Signal Strength Indication (RSSI) value and estimate the distance between the LoRa transceivers. The LoRa transceiver continuously sends and receives data to check the RSSI value from other transceivers. If the estimated distance exceeds 1.5m, the LED will light up.
Hardware Part
This project uses an Arduino Nano 33 IOT RS Stock No: (192-7589) and an Adafruit RFM96W LoRa module RS Stock No: (124-5502) .
To make it wearable, I also used a 3.7V, 1200mAh Lithium polymer battery as the power source, Microchip MCP73832 IC RS Stock No: (738-6364) for charging the Lithium polymer battery, and Texas Instruments LMR62421XMFE/NOPB RS Stock No: (811-5863) to step up the voltage to 5V to the Arduino Nano 33 IOT.

If you don’t want to do too much, you can also use the power bank to power the MCU by the USB port.


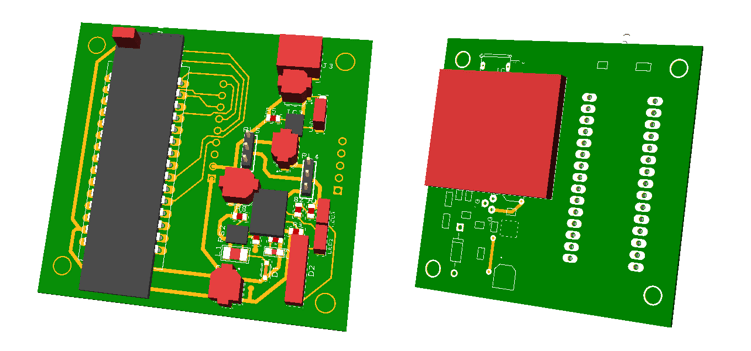
The above schematic diagrams are drawn in DesignSpark PCB 10.0.

Also, I used DesignSpark Mechanical 5.0 to draw a 3D printing shell for the transceiver.

With DesignSpark Mechanical 5.0, I can directly import my PCB into the software, which makes it easier to fit the PCB into the shell.
Software Part
In this project, I’m using the Arduino IDE to program it.
First, I need to get the RSSI value of the transceiver within 1.5 meters.
And for my transceiver, I tested which is around -100dBm. So, if the RSSI value is larger than -100dBm, which means the transceivers are closer than 1.5 meters.
#include <SPI.h>
#include <RH_RF95.h>

#define RFM95_CS 10
#define RFM95_RST 9
#define RFM95_INT 2

// Change to 434.0 or other frequency, must match RX's freq!
#define RF95_FREQ 434.0

// Singleton instance of the radio driver
RH_RF95 rf95(RFM95_CS, RFM95_INT);

int x=4; //MUC Port

void setup()
{
  pinMode(RFM95_RST, OUTPUT);
  digitalWrite(RFM95_RST, HIGH);
  pinMode(3, OUTPUT);


  Serial.begin(9600);
  delay(100);
  Serial.println("Arduino LoRa TX Test!");

  // manual reset
  digitalWrite(RFM95_RST, LOW);
  delay(10);
  digitalWrite(RFM95_RST, HIGH);
  delay(10);

  while (!rf95.init()) {
    Serial.println("LoRa radio init failed");
    while (1);
  }
  Serial.println("LoRa radio init OK!");

  // Defaults after init are 434.0MHz, modulation GFSK_Rb250Fd250, +13dbM
  if (!rf95.setFrequency(RF95_FREQ)) {
    Serial.println("setFrequency failed");
    while (1);
  }
  //Serial.print("Set Freq to: "); Serial.println(RF95_FREQ);

  // Defaults after init are 434.0MHz, 13dBm, Bw = 125 kHz, Cr = 4/5, Sf = 128chips/symbol, CRC on

  // The default transmitter power is 13dBm, using PA_BOOST.
  // If you are using RFM95/96/97/98 modules which uses the PA_BOOST transmitter pin, then
  // you can set transmitter powers from 5 to 23 dBm:
  rf95.setTxPower(23, false);
}

int16_t packetnum = 0; // packet counter, we increment per xmission

void loop()
{
  //transmitter code
  char radiopacket[20] = "Hello World # ";
  itoa(packetnum++, radiopacket+13, 10);

  radiopacket[19] = 0;
  rf95.send((uint8_t *)radiopacket, 20);

  delay(10);
  rf95.waitPacketSent();
  uint8_t buf[RH_RF95_MAX_MESSAGE_LEN];
  uint8_t len = sizeof(buf);

  //Receiver code
  if (rf95.recv(buf, &len))
    {
      Serial.print("COM");
      Serial.print(x);   //Port x receiver
      Serial.print(" Receiver: ");
      Serial.println(rf95.lastRssi(), DEC);

      led1();

      // Send a reply
      uint8_t data[] = "And hello back to you";
      rf95.send(data, sizeof(data));
      rf95.waitPacketSent();
    }
    else
    {
      //Serial.println("Receive failed");
    }
      delay(500);

}
In this project, the transceiver can succeed in detecting whether the transceivers are closer to 1.5 meters or not, which is a great start for us to use the radio frequency for social distance detection device.
Hope the covid 19 will end soon!
Future Development
In the next step, we can minimize the size of the transceiver. It can be used in kindergartens or even primary schools to maintain social distance with students to avoid the COVID-19 outbreak.